Degreasing the surface of a car is one of the most important stages in preparing it for painting. If it is not done correctly, the paintwork may peel off during the first wash. For those who plan to carry out the procedure themselves, information on how and with what to degrease the car before painting is important, so that the work does not have to be redone.
How to clean your car at home
Modern means with which you can degrease the body are produced:
- based on organic solvents (chemical);
- water or alcohol based.
To enhance the effect, you can use both types of degreasing. Solutions of acids and salts remove oxide film well, but do not cope well with fat.
At home use:
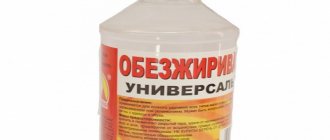
- anti-silicone products, which are designed specifically for removing wax, bitumen, mastic and oil (the most popular manufacturers are Novel and Body);
- hydroalcoholic – remove salt deposits;
- special preparations for processing plastic parts.
against stubborn stains; they use the best properties of aqueous alkaline compounds and organic solvents. Concentrates (Chistomet, Docker Dekamet, etc.) containing inhibitors, surfactants, and additives are effective. They not only degrease the surface, but also provide protection against corrosion. The concentrate dissolves in water in different proportions depending on the degree of contamination of the surface to be painted.
To clean a car at home, a variety of products are used: anti-silicone, water-alcohol, emulsions, etc.
The use of white spirit remains widespread; craftsmen are attracted by the following properties:
- chemical neutrality to metal;
- non-dissolution of paint coating even with scratches;
- Most of the solvent evaporates after surface treatment, and the residue in the form of a film does not impair the quality of painting;
You can prepare the car for painting without the use of solvents using sandblasting. When bombarded with sand particles under strong pressure, the surface is cleared of various contaminants, incl. from fatty ones.
Pay attention to: Restoring and painting a car dashboard: step-by-step instructions for do-it-yourself work
To decide how to degrease the body, you need to evaluate the following aspects of each product:
- efficiency;
- convenience and simplicity;
- safety;
- consumption per unit area and cost.
Electrochemical cleaning
It is an effective means of destroying persistent thin films of fats and oils. The process is also carried out in specialized baths, where, under the influence of current on the electrode, hydrogen ions are reduced in the form of bubbles, which facilitate the separation of oil droplets from the surface. To maintain the strength of thin-walled steel products and springs, a combination is used: 5 to 8 minutes at the cathode, then 1 to 2 minutes at the anode.
Electrochemical degreasing only at the cathode is performed for zinc, copper and aluminum parts. Due to the fact that electrolytes have low dissipative ability, the process is not used for products with complex configurations.
Heating accelerates degreasing because the electrical conductivity of the solution increases and the current density increases. To comply with safety measures, foam (the source of detonating gas) is regularly removed from the surface of the bath and the amount of foaming agents is controlled.
Degreasing car surfaces before painting
When repairing a body, painting and applying varnish take much less time and effort than the preparatory stages. Among them, degreasing is performed repeatedly.
You can check how well it was carried out in the following ways:
- Wipe the surface with a non-crumpled sheet of paper or white cotton cloth. There should be no traces left on the material.
- Moisten the surface with distilled water. Drops should not curl into balls.
Several hours before starting work, you should not use hand cream, and during work, do not touch the cleaned surface with your fingers or clothing so as not to leave stains or lint particles.
Mechanical cleaning of the base
This labor-intensive method makes it possible to obtain a rough surface with good adhesive properties. The layer of dirt is removed with a hand or electric tool; a drill with a special attachment, a steel brush or sandpaper is useful for this, followed by additional dust removal of the cleaned base. This degreasing option takes a long time, leaves behind traces of abrasives, and therefore often serves as a preliminary procedure before using chemical compounds.
The procedure for carrying out repair work
Repair stages:
- washing;
- removal of corrosion, matting and degreasing of all areas to be puttied;
- putty and sanding;
- degreasing;
- priming repair areas (areas not to be primed are sealed with masking tape and paper), drying;
- grinding;
- removing paper, tape, blowing all openings and cracks with air from the compressor and re-gluing the parts;
- degreasing;
- painting.
In this chain of actions, degreasing is carried out 3 times, but if necessary, it can be performed 4 times, for example, after re-priming.
Why degrease the body before painting?
Paint and varnish cannot penetrate oily contaminants and reach the metal substrate. Therefore, the following defects appear on a poorly degreased body surface after painting:
- drips, especially a lot when applying acrylic paint or varnish;
- craters - funnel-shaped holes in a layer of paint;
- bloating;
- wrinkling.
It is necessary to degrease the body so that no defects appear on it after painting.
It is a mistake to think that dirt can be removed by sanding - it will get clogged with abrasive deep into the sanding scratches and lead to the appearance of craters on the new paintwork.
Pay attention to: Car paint: search nuances, technologies
Cleanliness is the key to everything
Surface cleaning is the foundation of restoration work. This operation should precede any preparation and painting work. It should also go with you side by side throughout the entire repair, right up to the application of paintwork.
If this link falls out, the whole system collapses. A good half of all paintwork defects are associated precisely with insufficient surface cleaning. Here are a few of them:
- poor adhesion (coating peeling);
- silicone craters;
- loss of shine.
How to properly degrease the surface?
The surface can be treated in 2 ways:
- Pump sprayer. The degreaser is allowed to soak into the dirt, then the surface is wiped with a clean cloth.
- Using 2 napkins. 1, the parts are impregnated and processed, and after 5-10 seconds, the second (dry) removes the dirt along with the remnants of the product.
You need to use special wipes that do not leave lint marks. Synthetic fabric will not absorb moisture and dirt, but will only spread them over the surface.
High-quality degreasers do not evaporate too quickly, but even when using them, you should not apply the product to areas larger than 0.5-1 m². Applying the substance to the surface, as well as removing dirt, must be done in one direction (for example, from left to right), excluding circular movements, and each time you need to fold the napkin so that it comes into contact with the clean side of the base being treated.
When treating with anti-silicone, it is enough to wipe each area once, because the product slightly softens the soil. If it softens too much, it will begin to crack and the defective areas will need to be cleaned, puttyed and primed again.
What to choose instead of degreaser
It is better not to use acetone; it is an unpredictable and aggressive solvent. Like other universal solutions with different numbers, they are suitable only for rough cleaning of metals; after them, additional processing will still be required.
The same can be said about white spirit, kerosene, diesel fuel and gasoline. They leave stains that are difficult to wash off. This way you can only wash parts that are heavily contaminated with petroleum products.
Alcohol (ethyl or isopropyl) may be a good choice. The first does not leave stains, washes cleanly, is harmless to paintwork, at least you can verify this in advance. But they are inconvenient to work with and quickly evaporate without having time to dissolve strong and persistent contaminants.
Acidic, alkaline and other water-based cleaning compounds can only be used at the initial stage; this is washing, not removing grease.
Even if the surface looks perfectly clean, the point of degreasing is to completely remove even invisible traces of it, which only specialized substances can handle.
Washing the Grease Remover Machine
Before starting repairs, the car must be thoroughly washed to remove dust, dirt, grease, and in winter - salt and sand deposits.
For this you need:
- warm water;
- car shampoo;
- a soft brush or a special sponge, or better yet, a high-pressure washer.
It is necessary to thoroughly wash the bottom of the car and the wheel arches; a large amount of dirt accumulates in these places. In some cases, you may need to water the dirt first and wait until it gets wet. After the first wash, remove the moldings, seals, plastic and other parts and wash the car again. Then it is allowed to dry well (naturally or by blowing the case with compressed air).
We degrease efficiently and safely
It is more convenient and faster to process the body in parts by removing the doors, trunk lid, fender, as well as rubber gaskets and galvanized parts. If the work is planned to be carried out without dismantling, it is necessary to seal the doorways and protect the upholstery from dust and dirt with paper and film.
Please note: Choose an electric spray gun for painting a car
Degreasing begins after the body has dried thoroughly after washing. A ventilated room with good lighting and no open sources of fire is required. You must not smoke while working.
When carrying out work, you must wear protective clothing, gloves, a respirator and safety glasses.
For safety, you must wear personal protective equipment:
- gloves;
- protective glasses;
- respirator;
- overalls or an apron made of thick tarpaulin.
The properties of anti-silicone may differ slightly depending on the component composition, but all of them can be used without fear that they will cause harm to health. Caution must be observed when degreasing aluminum parts; you must first find out how the product interacts with this metal.
How to touch up chips depending on the location: bumper, roof, doors
Such a chip will require the use of P600 or P800 sanding paper.
Chips and small breaks or scratches on the paint surface of a car differ in depth, length and width, as well as location, so there are some nuances when touching up such body coating defects:
- damage may affect exclusively the top varnish layer or reach the metal, which affects the choice of repair tactics and means;
- if chips or scratches are located in the area of car doors or headlights, then before tinting the body, you should dismantle all elements or protect them with tape;
- exposure of the working surface to sunlight and warm air significantly accelerates the hardening of repair and restoration compounds, especially in the hood and roof areas, so work must be completed as quickly as possible;
- the damaged bumper is removed from the car, after which the paint is washed down to plastic or primer, and standard preparation of the part for painting is performed.
It should be noted that large and deep chips on the machine, regardless of location, will require the use of P600 and P800 sanding paper, which will smooth the edges of the damage and thoroughly clean the cavity.
