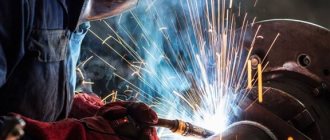
In a private house, country house or garage, quite often there is a need to connect various metal parts and create structures from them. It makes no sense to turn to professionals for help every time in such a situation, because you can purchase an automatic welding machine yourself.
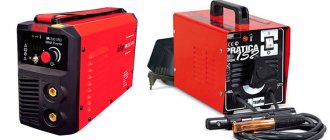
A wide selection of different devices are available in stores in different price categories, so welding with an inverter for beginners is the best that the market has to offer.
Basics of electric welding
Inverter devices are characterized by fairly high efficiency and ease of operation. The main load for the operation of such equipment falls on the electrical network.
It has storage capacitors that allow you to accumulate electricity and ensure an uninterrupted welding process and soft ignition of the arc.
Unlike old devices, which provide a maximum boost of electricity for work, which can result in traffic jams, an inverter allows you to safely operate from a household power supply.
Defects in welds.
To understand how to cook using inverter welding, you need to understand the basics of its operation.
In such manual welding machines, the arc is formed as a result of contact of the electrode with the product. Under the influence of temperature, the metal and electrode melt. The molten part of the rod and the product form a bath.
The coating of the rod also partially melts, turning into a gaseous state and closing the weld pool from oxygen. This allows you to protect the product from oxidation.
Each electrode, depending on its diameter, is designed for a certain current strength. If you reduce it below the required value, then the seam will not work. Increasing this parameter will allow you to form a seam, but the rod will burn out too quickly.
At the end of the welding work, the coating cools down, turning into slag. It covers the connection of metal parts from the outside. By tapping the seam with a hammer, it is quite easy to get rid of the slag.
There are also simple welding rules. To ensure that the arc does not go out during work, the welder should maintain a constant distance between the rod and the workpiece.
This is not easy to do because the electrode melts, so it must be fed into the welding zone at a constant speed. In addition, you must try to guide the electrode evenly along the joint in order to obtain a seam of maximum quality.
You can learn more about how to assemble a subwoofer with your own hands and about electronic radio circuits on the website - www.radiochipi.ru.
How to learn?
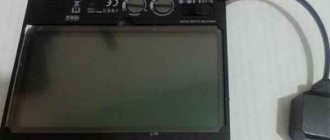
How to learn to cook with electric welding yourself? For training, you will need to properly prepare your workplace. It should be spacious, well lit and equipped with exhaust ventilation. Personal protective equipment for the welder will also be required:
- clothing and footwear made of non-flammable materials;
- split leather gaiters;
- a welder's mask with an adaptive light filter that protects the eyes from arc welding flashes;
- respirator for respiratory protection;
- Safety glasses or a clear face shield for stripping workpieces and seams.
Tools you will need are a wire brush, a hammer, and an angle grinder.
How to connect the electrode?
It is better to start mastering welding technology with electrodes with a diameter of 3 mm. The rod is inserted into the holder with the end cleared of coating and securely fixed with a screw or spring. The cable from the holder is connected to the inverter terminal. The second cable, which has a clamp at the end, is connected to the second terminal. Ferrous metals are welded using the so-called straight polarity - the positive wire is connected to the workpiece with a clamp, and the negative wire is connected to the electrode.
Two types of connection polarity.
Reverse polarity is used for welding stainless steel and other materials.
Beginning: lighting the arc
The arc is ignited using one of two main methods:
- striking with an electrode along the future seam;
- tapping the workpiece.
For beginners, the first method is recommended. If the electrode has already been welded, tapping helps knock off a thin layer of slag from the tip of the rod.
Electrode tilt
The angle of inclination of the rod to the vertical depends on the type of seam
The “backward angle” position is most often used. The working zone follows the tip of the rod, in this case the greatest heating of the metal is obtained. If you tilt the rod in the opposite direction, the heating decreases. This position is used at the end of the seam and when manually welding thin-sheet structures to avoid the appearance of burns and craters.
Movements
The welder must maintain the gap between the electrode tip and the workpiece within 2-3 mm. If it is necessary to ensure a seam width greater than the thickness of the electrode, complex trajectories for its guidance are used.
A novice master needs to master soft and even straight-line driving at a constant speed. After you begin to get even rollers, you can move on to more complex trajectories.
The main task at the training stage is to learn to “feel” and control the state of the weld pool, without overheating or cooling it excessively.
Trajectories of electrode guidance. It is better to learn on workpieces with a thickness of 4-5 mm. After mastering the welding of beads on the plate, you can begin welding two parts.
Welding methods
Nowadays there are many methods used for welding. They are divided according to various criteria. This information will be useful for a beginner, so you should definitely read it.
Depending on the heating, the edges of the product may completely melt or be in a plastic state. The first method also requires applying certain forces to the parts being joined - pressure welding.
In the second, the connection is formed as a result of the formation of a weld pool in which there is molten metal and an electrode.
There are other welding methods in which the product does not heat up at all - cold welding, or is not brought to a plastic state - connection using ultrasound.
Methods and types of welding.
Other types of welding are listed below:
- Forge. In this method, the ends of the joined products are heated in a forge and then forged. This method is one of the most ancient and is currently practically not used.
- Gas press. The edges of the products are heated with oxygen acetylene over the entire plane and brought to a plastic state, after which they are subjected to compression. This method is highly efficient and productive. Used in the construction of gas pipelines, railways, and mechanical engineering.
- Contact. The parts are included in the electrical circuit of the welding equipment and current is passed through them. A short circuit occurs at the point of contact of the parts, as a result of which a large amount of heat is released at the junction. It is enough to melt and join metal.
- Butt, point and suture are varieties of the contact method of fastening the product.
- Roller. Used in joining sheet structures that require high-quality and reliable seams.
- Termite. The metal is held together by burning thermite, a mixture of iron oxide powder and pure aluminum.
- Nuclear-water. The edges of the product are melted by the action of an arc burning between two tungsten electrodes. The electrodes are connected to special holders through which hydrogen is supplied. As a result, the arc and liquid metal of the weld pool are protected by hydrogen from the harmful effects of atmospheric gases such as oxygen and nitrogen.
- Gas. The essence of the method is to use a flame to heat and melt parts. A flame is produced by burning a flammable gas in an oxygen atmosphere. The gas-oxygen mixture is produced using special burners.
Under the action of an atomic-hydrogen welding arc, hydrogen molecules are split into atoms and then recombined upon contact with cold metal. As a result of this process, a large amount of heat is released. The method is used for welding metals of small thickness, copper and alloys based on it.
The gas welding method refers to fusion welding. The gaps between the products are filled using filler wire. This method is widely used in various areas of human life. Most often found when joining thin-walled products, non-ferrous metals, cast iron.
When working with an inverter device, the polarity of the electrodes is of no small importance. Depending on the scheme, the heating intensity of the part changes, which allows you to create different welding conditions.
Step-by-step instructions for welding with an inverter
First of all, for welding you need to have protective elements:
- gloves made of rough fabric;
- welding mask with a special filter protecting the eyes;
- a rough jacket and trousers made of material that will not catch fire from sparks that appear during welding;
- closed shoes with thick soles.
Electrode position during welding.
Before you start welding with a welding inverter, you must take the necessary measures aimed at creating safe working conditions.
Proper preparation of the workplace consists of:
- ensuring the necessary free space on the table, you should remove all unnecessary objects that could get splashed;
- creating high-quality lighting;
- Welding work must be performed while standing on a wooden floor that protects against electric shock.
Then the current is adjusted depending on the thickness of the parts and the electrodes are selected. The latter need to be prepared. If they were just purchased in a retail chain and their quality is beyond doubt, then this step can be skipped.
If the rods have been in an unheated, damp room for a long time, then they need to be dried for two to three hours at a temperature of 2000 degrees. For these purposes, you can use an old oven or special equipment, if available.
After preparing the electrodes, the ground terminal is connected to the product.
To obtain a high-quality and reliable connection, the metal must be prepared:
- rust is completely removed from the edges of the product;
- using solvents, various contaminants are cleaned;
- At the last stage, the edges are checked for cleanliness; the presence of grease, paint and other contaminants is unacceptable.
Next you need to connect the welding inverter. It is better to carry out training on a thick metal sheet, forming a seam in the form of a roller. Make the first connection on metal lying horizontally on the table. Draw a straight line on it with chalk along which the seam will go.
Electrical circuit of the inverter.
In the process of training on such an object, you can significantly improve your welding technique.
The welding process begins with ignition of the arc.
There are two ways to perform this action:
- scratching on metal;
- tapping on metal.
The choice of method depends on the person’s preferences; the main thing when igniting is not to leave traces of welding outside the joint area.
After igniting the arc from contact with the metal, the arc is ignited, the welder removes the electrode from the surface of the part a short distance corresponding to the length of the arc and begins welding.
As a result, a weld is formed at the junction of two metal parts. It will be covered with scale - scale on the surface. It needs to be removed. This is very easy to do by tapping the seam with a small hammer.
Forward and reverse polarity
Melting of the metal for welding occurs under the influence of an arc. It, as noted above, is formed between the surface of the product and the electrode, since they are connected to opposite terminals of the device.
There are two main options for welding, differing from each other in the order of connection and called direct and reverse polarity.
In the first case, the rod is connected to the minus, and the part to the plus. In this case, an increased flow of heat occurs into the metal. As a result, a deep and narrow melting zone is formed.
Direct and reverse polarity.
With reverse polarity, the electrode is connected to the positive, and the product to the negative. In this case, the melting zone is wide and shallow.
The choice of polarity is entirely determined by the product you are working with. Welding can be performed with two types of polarity. When choosing, you should take into account the fact that the element connected to the positive is subject to greater heating.
For example, it is difficult to weld thin metal products due to possible overheating and burning. In this case, the part is connected to the minus. Currents are also selected according to the diameter of the electrode and the thickness of the metal. This data is taken from a special table.
Oscillatory movements across the seam (3)
Oscillatory movements across the weld axis (electrode manipulation) are performed to obtain a weld of the required width, normal penetration of the weld root and edges, and slow down the cooling of the weld pool. Manipulation of the electrode allows you to obtain a seam with a length of 2 to 4 electrode diameters.
All types of electrode manipulations differ in shape, size and position in space:
- for uniform heating of the weld pool;
- for enhanced heating of the weld root;
- for enhanced edge heating.
Rice. 2. Oscillatory movements of the electrode
Common oscillatory movements during manual arc welding (Fig. 2):
- straight along a broken line with a step of 2-4 mm - convenient to use when there is no risk of burning through the metal, for welding sheets of metal in the lower position without bevelling the edges);
- with a crescent pointing its ends towards the weld pool - for welding butt welds with beveled edges in the lower position and for fillet welds with a leg of no more than 6 mm;
- a crescent with the ends directed in the direction of welding - for welding butt and corner welds with a leg up to 6 mm in any position;
- triangle - for welding butt welds and corner welds with a leg of more than 6 mm;
- triangle with heating of the weld root - for welding thick-walled structures;
- loop-shaped - to avoid burns at the root of the weld and increased heating of the edges (especially for welding high-alloy steels).
Effect of electrode feed speed
The feed rate of the welding electrodes must provide the required amount of molten material supplied. Not having enough of it can lead to undercutting. This factor is very important in both direct and reverse polarity when welding.
During electric arc welding, due to the rapid movement of the rod along the joint, the arc power may not be enough to heat the metal. The result is a shallow seam that lies on top of the metal. The edges remain unmelted.
Slow advance of the electrode leads to overheating. In this case, it is possible to burn the surface and deform the thin metal.
Modern welding machines have a wide range of different functions and capabilities. Nevertheless, at the moment, most of the quality work done is still determined by human skill.
From my personal experience
Why did I say that welding has changed a lot recently? This is because equipment and technologies have seriously developed and do not stand still. Today, instead of a huge transformer that will burn out all the wiring in the house, you can buy an inexpensive inverter that consumes no more electricity than a regular electric kettle.
So, with this same inverter you can do all the work around the house: weld a barbecue and a fence, weld a wheelbarrow or shovel. With the advent of an inverter in my house, I almost gave up the use of bolts, studs and a bunch of nuts, which were previously wasted in large quantities.
Perhaps many, like me, will benefit from my modest advice and developments that I have learned over many years. Please don't judge harshly.
Effect of current
Welding current selection table.
When mastering the basics of welding with an inverter, it is important to understand what current strength needs to be set in each individual situation. A properly configured inverter welding machine is the key to success.
Data on the current value are taken from the table, which also shows the size of the electrodes. However, these current values are not exact; they are plus or minus several tens of amperes.
What is the difference between DC and AC electrodes?
The differences between DC and AC electrodes can be briefly explained by two statements:
- Welding materials designed for alternating current are also successfully used for welding with direct current. Therefore, experts often call such electrodes universal. More about them below.
- While DC electrodes are generally not suitable for AC welding.
However, it should be remembered that materials of the second group guarantee a better connection . When performing important work, this fact comes to the fore.
Features of welding thin metal
In everyday tasks, we are most often faced with the need to join thin metal. In this case, it is necessary to remember the basics of inverter welding for beginners, namely the importance of connecting the product to the correct pole. Thin parts are connected to the “minus” of the welding machine.
To learn how to weld correctly and get beautiful seams, you need to practice.
Here are some useful tips that can help improve your skills:
- start cooking using the minimum current;
- form the seam at an angle forward;
- use reverse polarity;
- secure the part to reduce distortion during welding.
Common mistakes made by newbies
Arc welding diagram.
Beginner welders tend to make mistakes due to ignorance of the basics regarding the use of welding equipment. For example, beginners may not know how to choose the correct polarity for welding with an inverter, which will lead to poor-quality joint formation or even burning of the part.
The following main errors can be identified:
- neglect of safety precautions;
- incorrect choice of welding machine;
- use of low-quality or unprepared electrodes;
- work without trial seams.
For beginners, it is worth separately noting one feature if you cook Resanta by welding. This equipment is very popular, but it has short connection cables, which can create inconvenience in operation.
Let's sum it up
Having learned to work with welding equipment, it will be possible to solve many everyday problems that often arise when working in the country or in the garage. Beginners should pay special attention to the polarity of welding parts of different thicknesses with an inverter.
By understanding how to properly configure the equipment and choose an electrode, you will be able to obtain high-quality seams on any product. Be sure to pay attention to the forward and reverse polarity of connecting the welding inverter.
When welding thick parts, direct polarity is used when welding with an inverter, and for thin parts, reverse polarity is used.
Electrode selection
This tool, intended for welding, is a metal rod with a special coating called coating. When welding, the core begins to melt. The coating, when burned, releases gas, which will serve as protection for the seam from the adverse effects of oxygen in the air, which contributes to the creation of oxides.
When choosing an electrode, you should pay attention to the core material, which should be similar to the components of the products being welded. There are electrodes designed for welding the following materials:
- carbon steel;
- alloy steel;
- high alloy steel;
- stainless steel;
- heat-resistant steel;
- aluminum;
- cast iron.
This does not exhaust the complete list of materials. In everyday life, the most common use is not thick structural steel.
The following types of electrode coating exist:
- Basic.
- Rutile.
- Sour.
- Cellulose.
Each of them solves its own problem. Basic and cellulose coatings are used for DC welding. Can be used when working on critical structures. The advantages of rutile coating are ease of ignition and slight splashing of hot metal.
When using electrodes with an acid coating, easy separation of slag occurs. But it is not recommended to use this type in a confined space, as it can harm the health of the welder. The most widely used electrodes are those with basic and rutile coatings. They are suitable for beginner welders.
When choosing a diameter, take into account the thickness of the parts being welded. It is preferable to weld thin metals using semiautomatic machines or inverters. There are also tips for adjusting the current. They comply with the recommendations on how to properly weld using electrode welding. There is a dependence on the diameter of the selected electrode.
The welding current is selected according to the calculation: 20-30 A for each millimeter of electrode diameter. Within this spread, the spatial position of the seam, the thickness of the metals being welded, and the number of layers are also taken into account.
Sufficient information about various electrodes when choosing among them suitable for a specific type of welding can be obtained from the markings of these tools. It won't be difficult to figure it out.
