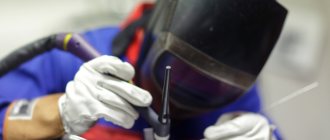
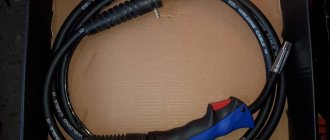
Do-it-yourself argon welding from an inverter is a solvable problem even in a personal garage, not to mention a workshop or metalworking shop.
Welding non-ferrous metals and alloys is not an easy operation even for the most experienced craftsman. Anyone who has ever encountered the need to weld aluminum or titanium understands the prices for these services. Often they are so high that you have to give up welding and take a new part or change the entire assembly. But most often, 80-90% of the price is not the cost of the equipment, but payment (the issuance of money for some obligation)
welder services.
I don’t want to say that argon welding, and specifically it is used in this case, is very complex and very different from MMA welding. Yes, it is somewhat more difficult from a technical point of view and requires certain abilities, but if you have mastered coated electrode welding, then, after a little practice, you can weld with argon TIG welding.
A natural question is: where can I get the device? You can solve this in 2 ways - purchase an inverter with TIG mode or recycle your own device. Do-it-yourself argon welding from an inverter is a completely solvable problem even in a personal garage, not to mention a workshop or metalworking shop.
Individualities of argon welding
Welding in an argon atmosphere differs from ordinary MMA in the following ways:
- done with constant argon blowing;
- current can be used either alternating or constant (reverse polarity);
- you need to use a tungsten electrode;
- Only very thin sheets can be welded without filler wire;
- an oscillator is needed to ignite the arc;
- The electrode wiring technique has certain specifics.
Let's look at all the points separately. It may seem that they do not directly relate to the topic of how to create professional argon welding from an ordinary inverter, but knowing these subtleties, it will become easier to take into account all the individual features of the device and technology.
Argon welding scheme:
What is argon used for?
Practical characteristics during welding are described by its weight - it is more than twice as heavy as nitrogen and oxygen, appearing in the weld zone, it simply displaces these gases and envelops the bath, preventing the occurrence of chemical oxidation reactions. This fact must be taken into account when welding outdoors - a strong or moderate wind can worsen the welding properties.
Welding current
Electronic current with a voltage of 30-80 V and a force of 20-200 A - spectra used when welding non-ferrous metals in an inert atmosphere. The choice of current characteristics is made according to special tables and depends on the diameter of the electrode and the thickness of the alloy being welded. By choosing the right current properties, you can perform the most difficult seams even on a homemade machine.
Electrode
- it does not melt (melting temperature is above 3000 0 C, even at reddish heat it does not soften) at welding temperatures of non-ferrous metals;
- allows you to get a very narrow arc, makes it possible to form a small-sized seam;
- evaporation of the electrode is no more than 0.01 grams per 1 m of seam.
With all this, the industry produces such electrodes in more than 25 types; choosing the right one will not be particularly difficult.
Filler wire
The wire material is selected in accordance with the alloy being welded: for aluminum - duralumin, for stainless steel - from alloy steel of a certain grade.
Oscillator
When welding with a constant current with a tungsten electrode, it is quite difficult to ignite an electronic arc. If you do this operation by touch, as when welding MMA, then there may be burning of the electrode, penetration of the alloy, welding of part of the material to the tip of the electrode, and other problems.
An oscillator is a special device that produces a frequency current to supply an ignition pulse. In the future, it occasionally generates supporting impulses that stabilize the arc and allows the welder to confidently work with both constant and alternating current.
Before you create a full-fledged argon TIG welding yourself, you need to purchase an oscillator, for example UVK 7, or assemble it independently according to one of the schemes:
But practice indicates that the industrial production oscillator works much more reliably. And its cost is not so high as to waste a week of time searching for parts, assembling and configuring a homemade device.
Moreover, the factory oscillator is connected very simply to virtually any device of an inverter or transformer type - just use special connectors to hang it on the welding electric cables. It works alongside the machine and does not affect the welding current, maintaining only the stability of the arc.
But when buying an oscillator, you should take into account that some models operate at an open circuit voltage of 40 V. If you are planning to weld at U = 28-30 V, then the pulse generator may not work.
How to make a burner with your own hands
You can assemble a torch for argon arc welding with your own hands. An example of such a device is shown in the photo (photo 1). Next to the burner there is a clamp for fastening when operating in semi-automatic mode. The photograph shows the main components of the device (photo 2).
For the manufacture of the collet clamp, brass grade LS59-1 was used. The clamp at one end has four slots to secure the electrode and allow argon to pass through. In the burner body, made of brass of the same grade, six slots are cut and a mounting location for the nozzle is machined. The optimal material for making a burner is copper due to its lower resistivity and higher thermal conductivity. To seal between the body and the nozzle, you need to install a gasket made of heat-resistant rubber. A special steel nut is tightened by hand, fixes the electrode and at the same time presses the nozzle.
Photo 1. An argon arc burner can be air or liquid cooled.
The nut is sealed when it rests on a fluoroplastic washer. On the back side of the housing, the electrode is sealed with a second steel nut with a fluoroplastic sealing washer. A copper tube for supplying argon is soldered into a hole drilled in the housing. The seam is made with refractory silver solder. At the same time, the tube acts as a conductor for connecting the electrode to the welding machine. The seam area is covered with a thermally insulating sleeve made of fluoroplastic, which is loosely placed on the tube. At the second end of the tube, a structure is soldered for connecting the welding cable and fixing the handle.
The welding cable is connected to the current collector with an M6 bolt and washer. On the current collection side directed towards the head, there is an external M12 thread. Before soldering, screw the nut onto the tube and put on the washer. This nut clamps an ebonite handle assembled from two halves. The handle can be used from a regular gas burner or you can make it yourself. In the receiving fitting at the end of the copper tube, you need to install a choke with an internal hole diameter of 0.5 mm on the thread. The throttle will limit gas flow during operation and prevent an initial shock when the gas supply valve opens.
It is advisable to sharpen the electrodes on a diamond wheel at an angle of about 40°. The optimal length is about 250 mm, but the size is not critical. You can use what is available. Gas pressure to the burner is 1 kgf/m2, gas quality is 99.993%. The distance from the end of the electrode to the nozzle is about 4 mm, the arc length is 2.7-2.8 mm when operating in semi-automatic mode.
For welding, a straight polarity connection is used, the positive wire to the part, the negative wire to the electrode.
For automatic feeding of a large number of identical workpieces, a milling machine table with a moving speed of 80 mm/min is used. At the edges of the parts to be welded, it is advisable to place two pieces of similar material to ignite the arc, or you can use the carbon plate shown in Figure 3. An open-circuit voltage on the electrodes with a nominal value of 80 V ensures easy ignition of the arc. The initial welding current of 16 A when working on a workpiece increases to 22-24 A. The voltage on the electrodes during operation is about 12-12.5 V and depends on the length of the arc.
Homemade TIG machine on an inverter
The main parts of such an installation are:
- inverter with MMA welding capability;
- TIG torch;
- argon cylinder;
- pressure gauge;
- oscillator;
- connecting hoses and cables.
They must be assembled in accordance with the following diagram:
After selecting the current characteristics, turn on the inverter, prepare the alloy and start welding.
You won’t have to work at the highest settings anyway, and there’s no point in paying twice as much for an industrial-grade burner. Almost all websites on the Internet advise you to create a burner without the help of others. In principle, it could be. But if you purchase all the parts and assemble them without the help of others, then the price will be equal to the factory one, and in terms of build quality and the ability to make adjustments and options, it will be an order of magnitude worse. In this case, all that remains is to reassure yourself that the burner was made by yourself.
We can come to the conclusion that converting an MMA inverter into a TIG installation does not require intervention in the operation of the device itself - you just need to purchase additional peripherals and assemble everything correctly. Compared to purchasing an inverter with TIG mode, it will cost almost half as much.
The editors share their experience of transforming an inverter into a TIG device on the pages of the website. We and our readers are interested in the advice and personal developments of practitioners. Write to us, the most noteworthy developments will be posted under the name of the creator.
Visitor reviews:
Vladimr, small volumes of welding with flux-cored wire can be performed using standard V-shaped rollers.
The only thing that is inconvenient (for me) is that I don’t use a cart. I just carry the device around the box with a long hose. the hose does not spin on the brush in the machine. As a result, the hose becomes bent.
Is it possible to use BRS? If so, which ones should I take? You need both a “father” and a “mother” for the hose and the apparatus. Thank you in advance.
Evgeniy, that's right. If possible, it is better to keep the device warm. Today, the company's engineers are considering the option of equipping OVERMANs with an additional capacitor, which will lower the operating temperature threshold.
Ruslan, hello. We responded to your email.
Sergey, the manufacturer reserves the right to make changes to the configuration of inverters that do not affect its technical specifications. characteristics. All devices that passed through our service center or were filmed in the video had TOSHIBA and FUJI components.
Vyacheslav, a household socket and a 16A circuit breaker will be enough to operate the OVERMAN 180. The cross-section of the copper core is from 2.5mm2, AL - from 4mm2.
Pavel, thanks for the comment. There was an error in the description, which we have corrected.
Argon burner: aspects of choice
Argon welding is a unique and only method of joining parts made of non-ferrous metals, characterized by ideal quality and speed. For this type of welding, a special argon torch (AG) is used, made with a clay nozzle and a tungsten electrode holder. The device is quite high quality and reliable to work in environments with high temperatures. The burner head must rotate 180 degrees so that it can be aimed at the seam, while protecting the handle from overheating.
Why should you buy a collet for a TIG torch?
buy several types of TIG torch collets This is also necessary in order to urgently replace the part if it wears out.
Today, many purchases are made online at competitive prices. The purchase is delivered to the specified address. Here it is important to choose the right seller, and the products must be certified and have a warranty period.
Buy a collet for a TIG welding torch:
8
Design and mechanism of operation
Argon welding is similar to conventional arc welding, only the weld pool is filled with argon, which is 38.0% heavier than atmospheric air; it descends into the weld pool, displacing air and isolating it from atmospheric O2. Due to this treatment, the welding seam comes out without an oxide film, and the welding property is improved. Argon is not an expensive gas; it is present in the air and is a by-product gas during the production of O2 and N2.
The main element of the device is the burner. A working current is supplied to the electrode, and the welding site is protected by argon from contact with O2 from the atmosphere, thereby preventing oxidation of the surface. The device kit includes a cable, a gas supply hose and a power cable. Sometimes the kit does not include a cable, so you will need to pay attention to this when making a purchase. AG welding can be done manually, semi-automatically and 100% automatically. The performance of the unit will depend on this; the greater the percentage of automation, the more complex the system and the higher the cost.
The AG design has a tank for water circulation with 2 fittings for inlet and outlet. In the center of the vessel, on dielectric stops, there is an electrode with a wire and a point for connecting the cable. Gas from the cylinder is supplied to the nozzle into a free space next to the electrode.
What does an argon burner look like?
The procedure for connecting an argon burner:
- The welder starts the circulating cooling system and the welding machine.
- Open the argon supply to the AG.
- After creating the protective layer, the arc is lit.
- Heating begins, at melting temperature a pool of alloy appears at the joint boundary, into which filler material in the form of a wire is fed.
- After a good connection has been formed, the welder moves the torch further along the seam.
Interesting read: DIY microwave welder
Types of argon burners
Argon burners are divided according to the type of cooling: air or water. Almost all TIG models are air-based, because the water method requires complex equipment. According to the method of supplying the inert medium, there are ATs with a valve or a key. Almost all modern devices are equipped with both. According to the type of connector with a welding machine, AT is not systematized due to the abundance of options. Usually the manufacturer completes them for certain types of inverters, the only condition is that the connector must match the socket of the device. Difficulties arise with this, especially when purchasing on the Internet, because almost all manufacturers forget to indicate the type of connector. Also, the kit must indicate the cable length of 4 or 8 meters.
The characteristics of the torch can be found from the name marking, for example, TIG 26, which means a huge water-cooled torch. AGs are divided into two groups: small and large. The first include markings 9 (air cooling) and 20 (water cooling). Consumables and spare parts for them are interchangeable.
By type of design
AGs are divided into valve and push-button. The first system is the most common; to start the process, simply open the valve on the cylinder. Often such burners are connected only to an inverter. The process of igniting the arc involves tapping the wire on the surface to be welded. This AG system is not used for connecting aluminum parts.
The push-button model is the most improved type. The key is comfortable, functional and has several mode positions: gas supply, welding current setting, ignition, arc formation and others. Such burners are easy to use and provide decent seam properties.
By type of cooling
Cooling options in the AG include air, operating on the natural principle of circulation, and water, with forced supply of cooling water. The first method is structurally simple, the parts are cooled with air under the influence of O2. This system is used when welding small seams and with a current of up to 200 A, otherwise the argon torch device will overheat.
Water cooling - the process is carried out using special structural parts to supply cool water to the body.
About water cooling units for welding torches
Water cooling units allow the welding torch to operate smoothly with high power and without overheating. By means of connected channels (hoses), the water cooling unit makes the welding torch heavier and increases its dimensions; however, the possibility of continuous operation at currents above 200A from this device outweighs all the disadvantages. Therefore, in the presented material we will try to consider in more detail all the nuances and issues related to water cooling units.
Content
- Description and purpose of welding torch cooling units
- Typical burner water cooling device and its operating principle
- How to choose a welding torch cooling unit
- Liquid cooling units - application tips
Description and purpose of welding torch cooling units
A water-cooled welding torch allows you to use its full potential with PV = 100% under any external conditions (you can find out more about what PV is by following the link). It would be more accurate to say that if there is water cooling of the torches, pauses in the functioning of the welding process will be associated only with technological reasons for changing electrodes, adjusting parts and the period of switching off the welding machine itself - but not with overheating of the torch from prolonged operation.
Aspects of choice
TIG welding is most useful where the type of weld being made is important or where the parts being welded are thin and the arc characteristics will need to be controlled. TIG machines are used to weld thin stainless steel and non-ferrous parts that require a precise arc mode, since the components will be deformed if overheated.
When selecting AG, the following aspects are used:
- Current mode from 5.0 to 230.0 A, welds 0.5 mm stainless steel and 6.3 mm duralumin assemblies.
- Stability of the welding mode is a fundamental parameter of a high-quality process, especially at the end of the process.
- The current mode is alternating or constant. If you plan to weld not only stainless steel, but also non-ferrous alloys, then the unit must be dual-mode.
- When connecting with alternating current, its direction changes. When duralumin parts are welded, in the “+” direction the surface is freed from oxides, and in the opposite direction, the melting process occurs. The balance between directions is also important, therefore it is permissible to change the duration of welding with electric current of a certain direction.
- Ease of use. This type of argon welding can be done by a highly qualified craftsman. Therefore, for novice users, you will need a regular device with clear control functions.
- There is a fan for air cooling. It can be switched on automatically based on a temperature sensor or operate in a constant mode.
- Profitability and productivity are the main reasons when choosing an AG; they are influenced by the system and consumables. When purchasing extreme ones, you need to pay attention not only to the cost, but also to the period of use.
Advantages and disadvantages
Argon welding, in general, is complex equipment for beginners; you need to prepare for the fact that in this case the work speed will be low. However, often these devices have no candidate. The main advantages of argon arc welding:
- Creation of a protective seam from the destructive effects of the atmosphere.
- No overheating of the alloy with certain work experience.
- There is no damage to the crystal mesh at the joints.
- Wide scope of application for all types of alloys.
- The rarest change of electrodes.
- Availability of devices for argon torch on the market.
- Protection from ambient air may simply be compromised if the welder works in a draft, since the shielding gas will simply be “blown away”;
- in a mode with a high current intensity, periodic cooling of the welding will be necessary;
- massive ultraviolet radiation when using helium;
- Quite complex equipment; to connect and use it, you need to complete its options;
- Welder qualifications and experience are required.
Connectivity aspects
An argon apparatus differs from an ordinary arc apparatus, therefore the welder must follow certain rules:
- The seam should be applied only in the direction of the edge being processed; any oscillatory movements will thicken the seam and reduce its strength properties.
- When performing work, you will need to monitor the operating speed of the arc and the depth of penetration of the alloy.
- It is better to do manual welding using inverter equipment equipped with a mechanical supply of filler material.
- In order to create a protective argon accumulation, the gas is supplied 20 seconds before the start of welding and ends after 5 seconds. The gas protects the acquired seam of microcracks, thereby ensuring its strength.
- Finish the seam using a rheostat, slowly reducing the arc voltage.
- The arc is ignited by introducing an oscillator with a power source. Then it is possible to create high-frequency pulses to ionize the arc gap, for example, at a network frequency of 55 Hz (the unit of frequency of periodic processes in the International System of Units of Units)
and a voltage of 220 V, the oscillator can supply a voltage of 5000 V with a frequency of up to 450 Hz
(the unit of frequency of periodic processes processes in the International System of Units SI)
, which allows you to simply ignite the electrode. - In contrast to an ordinary arc, AG is not allowed to begin with the electrode touching the parts being welded.
- First, gas is applied to them for 20 seconds, then the nozzle of the argon burner is gently brought to the alloy by 2 mm, the arc is slowly and evenly drawn along the seam, avoiding oscillatory movements, while the filler wire is placed in front of the nozzle and also applied smoothly.
A concise overview of the favorite manufacturers
AG models are more popular according to the 2022 rating:
- AURORA TIG 9V 110A - Russian torch works with welding units of the SVAROG brand, has good availability in the retail network both for consumables and spare parts
- The cost depends on the modification and ranges from 2.5 to 4.5 thousand rubles.
- SvarogTS 26V (M12-1) - a welding unit with air cooling with the highest operating current - 180 A for constant and 130 A for alternating, acceptable electrodes - from 0.5 to 4 mm, cost in Moscow - from 4 to 6 thousand rubles.
- Bars TIG-17V - for mode with a constant current of 140 A and air cooling, a cable, 4 m long, a large set of devices, cost 3.5 thousand rubles.
- TORCH burners for alternating and constant current, cost up to 3.0 thousand rubles. BlueWeld No. 9 from 9.0 thousand rubles. thousand, and No. 26 - from 15.0 thousand rubles.
Thus, we can summarize that the argon-arc torch, the main element for a welding machine (WIG/TIG), allows you to work with materials of different thicknesses, including dissimilar alloys, which makes it irreplaceable for such types of work. In the hands of a most experienced craftsman, she makes a careful seam, while at the same time the alloy does not actually splash.
Homemade argon welding
Argon welding is an indispensable method with which you can create permanent connections of products made of non-ferrous metals, titanium, stainless steel and other alloys. In addition, this type of welding is characterized by good seam quality and the highest productivity. The versatile capabilities of argon welding also attract DIYers. But this equipment has a high cost, and is actually not purchased for home use. Therefore, more craftsmen are starting to think about making an argon welding unit with their own hands.
Development and application of argon welding
Argon welding bears little resemblance to conventional arc welding, but to protect the weld pool it uses a shielding gas - argon. This inert gas has a number of parameters unique to it.
- Since argon is 38% heavier than air, it penetrates well into the weld pool and protects it from gases in the atmosphere. Thanks to this, the weld comes out without the formation of an oxide film, which improves the properties of the connection.
- Argon is found in the air, because it is a by-product formed when oxygen and nitrogen are obtained from the atmosphere, and is the cheapest among shielding gases for welding.
Interesting read: How to choose a welding inverter - useful tips?
The welding process in an argon environment follows the following principle. Almost 1 second before the arc ignites, argon is supplied to the torch. The welder brings the electrode to the part prepared for connection and presses the power button. But since ignition of an arc in a shielding gas requires its highest ionization, an oscillator comes into play.
An oscillator is a device that produces high-frequency and high-voltage pulses that can ionize gas and ignite an arc between the electrode and the workpiece.
After ignition of the arc, filler wire is fed into the joint space of the parts manually or automatically. Parts are welded by melting the additive, the alloy of which falls on the molten edges of the workpieces being joined.
Typically, argon welding involves joining metals using a non-consumable tungsten electrode that creates an arc and an additive in the form of an iron rod or wire. This type of welding has the international designation “TIG”.
Argon welding is used in subsequent areas.
- Frame construction. Welded seams are able to withstand constant overloads.
- Joining of pipes of both iron and non-ferrous metals, including pipes of different alloys.
- Connection of dissimilar metals.
- Fusion of virtually all metals: titanium, copper, aluminum, stainless steel, bronze, brass, cast iron, etc. This is especially important for the automotive industry.
- Manufacturing of decorative and jewelry items.
Promotion!
The AuroraPRO OVERMAN 180 welding inverter is designed for semi-automatic welding in a MIG-MAG shielding gas environment, as well as for working with self-shielded flux-cored wire in the NO GAS mode. Thanks to the continuous operation at maximum currents, the device is perfect for work at both the domestic and professional level. In the garage, in the car service center, in production - everywhere, OVERMAN 180 will prove to be an excellent and reliable assistant in business. Overman 180 showed good results when working with aluminum . We recommend this device for household and semi-professional welding of this metal. Visual control of all important welding parameters on the front panel will allow you to configure the semi-automatic machine to perform a wide range of welding jobs. A separate advantage of the device is the ability to weld in networks with large drops in supply voltage - OVERMAN 180 is capable of working with a voltage drop of up to 140 volts. Video review.
Peculiarities:
- welding current adjustment
- welding voltage adjustment
- inductance adjustment to adjust the desired arc stiffness, penetration depth and bead shape
- Confident aluminum welding
- 36V socket for connecting the gearbox heating
- wire drawing speed setting: fast / slow
- high arc stability, reduced spatter formation
- operation at reduced supply voltage - up to 140V volts
- Advanced MOSFET inverter technology based on FUJI transistors
Application:
- auto repair
- construction
- small production
- installation of metal structures
Equipment:
- Included with the device is a MIG 15 torch 3 meters - 1 pc.
- cable 16mm2, 3 meters - 1 pc.
- ground clamp 300A - 1 pc.
- gas hose (with a set of clamps) 3m (9mm) - 1 pc.
- roller with V-groove for working with steel wire 0.8-1.0mm
Dimensions and gross weight of the source: 560*360*530mm, 19.4kg
This unit can be installed on an AuroraPRO rack
The device can be retrofitted with feed rollers
Warranty - 2 years!
“You can’t say much about this device. Simple inverter semi-automatic. The welding quality is an order of magnitude better than that of a transformer source. In this case, it is only worth noting that the adjustments actually control welding and correctly set up the process, which is not always the case on budget models. It works with reduced voltage. You can work with aluminum, but only at the “everyday” level; nevertheless, for these purposes it is better to look at more sophisticated models.”
Review of semi-automatic welding machine AuroraPro Overman 180:
7 reasons for the popularity of OVERMAN, video:
Welding aluminum using the AuroraPRO OVERMAN 180:
Comparative test of semi-automatic machines:
Comparison of an inverter semiautomatic device with a transformer one:
Elements for assembling a homemade apparatus
To assemble equipment for argon welding, you will need the following elements:
- welding machine of constant current or inverter type;
- oscillator;
- inverter protection unit;
- burner;
- argon cylinder;
- gas reducer;
- gas hose;
- welding cables.
Current source
As a current source for TIG welding, you can take an ordinary welding transformer and adapt a diode bridge at its output to rectify the current. You can also use a welding rectifier. But for both types of devices it will be necessary to add an oscillator, which will facilitate non-contact ignition of the arc.
On the Internet you can read that the easiest way to create argon welding is from an inverter. But there are a number of aspects to this. There are inverters that already have built-in TIG welding capabilities. In this case, it is enough to connect a hose with a torch for argon welding to the device, connect the hose to an argon cylinder, and the unit is ready for work. But first you need to switch it to TIG mode and set the desired current.
It should be seen that such inverters already have a built-in oscillator and the necessary protection.
Inverters without an integrated TIG welding function cannot be used for this purpose. Even if you connect an external oscillator to it, the inverter will simply burn out. To prevent this from happening, a small modification of the inverter will be useful, which consists of adding a protection unit to its circuit. This block can be assembled together with the oscillator on one board and placed in a separate case. You will get a small attachment for the inverter.
Oscillator and protection unit
As mentioned above, the welding inverter will require a special attachment for TIG welding. You can assemble it with your own hands according to the diagram provided below.
This circuit includes a protection block (located on the left) and an oscillator. The last one can be purchased in China or assembled independently. You can find out how the above circuit is assembled by watching this video.
Burner
For argon welding, a special torch is used, consisting of a clay nozzle and a tungsten electrode holder.
Also on the burner there is a start button and a gas supply valve. The burner can be assembled from devices, which are quite abundant on Chinese websites, or you can purchase a ready-made (assembled) one there.
Argon cylinder
For safety purposes, it is customary to paint all gas cylinders in different colors and put inscriptions on them in different colors. Below is a sketch showing all types of gas cylinders with markings and colors corresponding to their contents.
As can be seen from the figure, dark-colored cylinders (with a snow-white stripe) or grayish color (with a greenish stripe and inscription) are used for argon. For TIG welding, purified argon is used. Therefore, it is useful to purchase a grayish cylinder with a greenish inscription “Pure Argon”.
Advice! For professional use, cylinders with a capacity of about 50 liters are used, which are heavier. But for household use, a 10 liter cylinder will be enough, which can be moved without the help of others.
Gearbox
Since the gas in the cylinder is under enormous pressure, you will need a reducer to supply it to the burner. This device indicates the pressure in the cylinder and allows you to regulate the gas flow rate through the hose leading to the burner.
The reducer must be selected strictly for a specific gas, in other words, in this case, for argon. Typically the device is the same color as the gas cylinder.
Hose and welding cables
If you assemble a hose for argon welding without the help of others, it will turn out to be thick and difficult to bend, since it is necessary to place an electronic cable and a gas hose in it. In addition, you will need to obtain separate connectors for connecting to the torch and to the inverter (if you use an inverter with TIG welding capabilities). A ready-made sleeve for argon welding can be purchased in the same place as the torch.
Assembling the device
Once you have all the components, you can begin assembly. First of all, connect the oscillator and the protective unit to the inverter apparatus. To understand how this is done, look for visual diagrams.
Connect the ground to the terminal of the oscillator device with the plus sign. Connect the cable that comes from the burner to the negative terminal. To weld aluminum, the cables must be connected in reverse.
Connect the burner to the gas hose and combine the cylinder with the reducer. Connect the hose with the burner to the gas hose and cables. Then connect the reducer and hose together.
Only after this can the device be connected to a regular power supply of 200 volts. The power of the oscillator should be about six volts. After all these steps, you need to configure the inverter equipment for argon arc welding technology.
Welding machine assembly method
Assembling equipment for argon welding from an inverter is quite ordinary.
- Connect the protective unit with the oscillator to the inverter according to the diagram above.
- The ground cable must be connected to the oscillator terminal with the “+” sign. The cable that goes to the burner is connected to the terminal with the “-” sign. For aluminum welding, the cables are connected opposite.
- Connect the burner to the sleeve with the cable and gas hose.
- Screw the reducer to the argon cylinder.
- The gas hose must be connected to a reducer mounted on an argon cylinder.
- Connect the inverter to a 220 V network, and the oscillator to a 6 V power supply.
After this, the TIG welding machine assembled by yourself will be ready for work. But it should be configured correctly beforehand.
general information
Argon welding differs from simple manual electric arc welding by the presence of a gas cylinder with argon and filler material. The remaining details of these methods are similar.
Argon arc welding (also known as TIG) necessarily involves the use of a tungsten refractory electrode, which ignites the arc. The seam is formed by an additive.
Tig welding itself is not complicated. Shielding gas is supplied from the torch to the weld formation area. Once the feed starts, the arc is ignited. To ignite the arc, the torch with the inserted rod is brought to the metal part.
At what point and why does arson occur?
This is done by the oscillatory mechanism. It charges the argon and directs its particles. This charge provokes the ignition of the arc.
The filler wire is fed into the welding cavity only after the electric arc has stabilized. It is moved either by the feeding mechanism or by the welder’s hand.
The metal is melted by an arc, and weld beads are formed from an additive. The latter melts simultaneously with the metal and merges with it into a homogeneous mass.
In the next block we will describe the assembly of the machine for argon arc welding and what is needed for it.
Setting up finished equipment
A homemade installation for argon welding requires the following options.
- Sharpen the tungsten electrode on a sharpener until it looks like a needle. This is done so that the arc is concentrated at the end of the needle and does not “walk” in different directions.
- Take a torch and install a tungsten electrode into it. The diameter of the electrode must correspond to the collet in which it is fixed.
- Open the valve on the burner and adjust the desired argon flow rate using the reducer (a flow rate of 12-15 l/min will be enough), then close the valve on the burner again.
- Turn on the oscillator and bring the torch with the electrode to the alloy to which the ground cable is connected.
- When you press the power button, an arc should appear between the alloy and the electrode at a distance of about 0.5 mm.
- Turn on the gas supply and press the button again. In this case, the arc must be ignited at a distance of 10 mm or more.
After carrying out the above easy options, we can say that the device with the TIG function is one hundred percent ready for work.
Individualities of argon welding
It is easier to outline the general principle of argon arc welding using the connection diagram of welding equipment shown in the figure.
The main working tool is an argon torch connected to the welding machine. A current of the required magnitude is supplied to the electrode, and the welding zone itself is protected by a cloud of inert argon gas from interaction with atmospheric oxygen, which prevents the possibility of oxidation of the alloy.
The operating mechanism is similar for burners from different manufacturers. The system is presented below.
Interesting read: Best welding machine for home rating
When sold, the kit includes a cable: a hose for supplying argon and a power cable.
In rare cases, the burner is sold without a cable - you must pay attention to this when ordering.
Types of argon torches for manual welding
Welding can be done manually, automatically or automatically. Accordingly, the design implementation will vary. The more automated the process, the more complex the device.
Let's look at devices only for manual welding (TIG): what they are, what to pay attention to when choosing one or another model.
The main functions of the torch are to hold the welding electrode, which creates the arc, and to supply gas to the welding zone. Even simple burners can handle this. For a high-quality result, not counting the experience of the welder, it is required that it is comfortable to work and there is no need to wait for a joke in the form of, for example, a falling electrode or other nasty “trifles.”
Argon burners can be classified according to the type of cooling: air or liquid. Most TIG torch models are air cooled. The water heat sink requires additional equipment.
According to the method of gas supply, burners are distinguished, equipped with a valve or a key. Some models are equipped with both.
It is difficult to systematize torches by the type of connector connected to the welding machine due to their abundance.
Typically, the manufacturer installs connectors for certain types of inverters. The connector must match the socket of the welding machine. Here, difficulties may arise when purchasing a burner via the Internet, since only a few manufacturers indicate the type of connector in the name. For example, in the FUBAG FB TIG 26 5P torch there is a 5pin control connector, in the TORCH 24 WATER 4m M12x1 there is an M12x1 connector. In the latter case, the connector is soldered.
But the length of the train is certainly indicated. Its most common size is 4 meters, less often - 8 meters, and even less often - intermediate values.
What clues can the markings give?
On most burners or in the product name on websites, traders still indicate a “defining” numerical value. For example, TIG 26 after the manufacturer's name.
When choosing a torch, a novice welder should have an idea of the differences between torches hidden under the numbers.
By and large, argon burners can be divided into two groups by size: small and huge. Small ones include 9 (air cooling) and 20 (water cooling). Consumables and components for them are interchangeable. For huge (suitable for household welding) torches with numbers 18 (water cooling), 17 and 26 (air) the same applies to replacement.
In the designation of cheap Russian burners, a designation like WP 17 is often found (the manufacturer’s name is indicated here and there, but you will have to look for it). In principle, a minimum of information has been obtained: a large argon burner with air cooling under electrodes made of pure tungsten.
Electrodes for argon welding
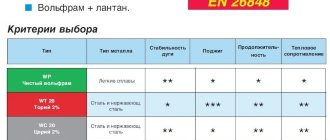
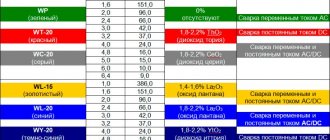
When argon welding, electrodes made of refractory tungsten are used, sometimes unstained, sometimes with additives. The presence of additives makes it easier to work with a number of metals and alloys.
Apart from letter markings, different types of tungsten electrodes are marked by the color of the shank.
For convenience, the information is presented in the table.
| Letter designation. | Color | Current (DC or AC) | Weldable alloys | Note |
| W.P. | greenish | A.C. | Magnesium, aluminum, alloys | |
| WZ | snow-white | A.C. | Bronze, aluminum, nickel, alloys | |
| W.T. | reddish | DC | Stainless steel, tantalum, molybdenum | Special safety measures: constant ventilation in the room. |
| W.Y. | blue | DC | Carbon, low alloy, stainless steels, titanium | |
| W.L. | golden | DC,AC | Any steels and alloys | |
| W.C. | grayish | DC,AC | Any steels and alloys |
The diameter of the electrode is selected depending on the operating current: up to 50 A - diameter 1 mm, up to 100 A - 1.6 mm, up to 200 A - from 2 mm to 2.4 mm, above 200 A - 3.2 mm, above 300 A – 4 mm. In addition to the current strength, the thickness of the alloy being welded is taken into account. It would be more accurate to say that the choice of electrode and current depends on the thickness and composition of the alloy.
Non-consumable tungsten electrodes require sharpening before insertion. The general principle for choosing the sharpness of an angle is that the wider the planned seam, the thinner the point.
The tip itself is cleaned.
What else does a welder need before work?
Concern for safety equipment when performing welding work falls on the shoulders of the welder himself. Mask (with a shield is the least comfortable), overalls or jacket with trousers, mittens made of specially treated fabric (The structure of tissues of living organisms is studied by the science of histology)
- indispensable equipment. Exposed skin is not allowed.
It is necessary to check the working space for the correct connection of the torch to the welding machine and cylinder, the integrity of the cable and hose, the presence of a fire extinguisher, and the absence of flammable and combustible objects nearby.
TIG argon arc torch: types, features, accessories
The argon arc welding process is absolutely not possible without the use of a Tig torch.
A device that is simple in its structure plays a key role, hardly inferior in importance to the quality of the current source used. That is why it is recommended to pay maximum attention to the selection of accessories and components. We tried to answer all questions regarding the Tig gas burner, its structure and existing varieties.
After carefully studying the information, you can easily select an accessory suitable for solving existing problems.
What is a tig welding torch and why is it needed?
Today, argon arc welding is quite popular.
It is used everywhere, because with the help of this technology you can easily join workpieces from almost any metal, including “problematic” aluminum.
It is noteworthy that the resulting seams practically do not require additional processing, there is no slag or scale on them, and this greatly simplifies the life of a specialist.
During the work, welders use not only filler rods, but also special tungsten electrodes, which are practically not straightened. It is for their fixation that an argon arc torch is needed. It is highly recommended that it be relatively light in weight, have a swivel head, and withstand the load level stated by the manufacturers.
Types of TIG burners
Conventionally, all existing torches for welding in shielding gases can be divided into several main types. So, for example, based on the type of cooling, there are two types:
- Air cooled TIG torches. Such devices do not have additional elements responsible for temperature removal. Heat distribution occurs naturally. This means that the user does not have to connect auxiliary equipment to ensure the supply of coolant, which is very convenient. But there is one caveat. Such air-cooled TIG torches are absolutely not suitable for operating at high currents. Experienced craftsmen recommend using them when welding up to 200 A, otherwise it is better to give preference to a device of a different type.
- Water-cooled argon-arc torches. This variety is ideal for working with high currents. A special system that supplies liquid, or rather water, to the body is responsible for removing the temperature. The coolant moves through special hoses. Water-cooled TIG torches can be used without problems to work with long seams at currents from 250 to 600 A.
The classification presented above is the most popular, but it is not the only one. Argon arc burners are often divided into types not only by type of cooling, but also based on structural features. Depending on the type of control, there are 3 more types of devices:
- Tig torch with valve. It is considered the simplest, most basic option. To ensure gas supply, a specialist just needs to unscrew the special valve a little. This adjustment is easy to implement, and therefore less likely to break down. The tig torch is not suitable for welding aluminum. So, if you are faced with such a task, then it is better to take a closer look at another model.
- Tig torch with button. This is a more advanced and practical option. Typically, a small push-button switch on the case can have several positions at once, responsible for various parameters. So, with one click, the user can provide gas supply, adjust the current strength, or even ignite the arc. Push-button devices are simpler and more convenient to use, help ensure excellent quality of work performed, and are well suited for beginners.
- Combined tig burners. They have both a valve and a button. If you have little experience, then it is better not to buy such a model, it will be difficult to cope with. But masters with extensive experience have long appreciated them and are actively using them.
Quite often, TIG torches for inverters are also divided into categories according to the type of housing. So, in stores you can see two types of devices at once: flexible and inflexible. Each specialist has his own preferences, burners with different jibs are popular, it’s just a matter of convenience and the variety of tasks performed.
Argon welding process
Main components of the workplace:
- welding machine;
- argon cylinder;
- burner;
- electrodes;
- filler rod.
The general procedure of work has some differences from ordinary arc welding, and it is worth paying attention to them.
When the required welding current has been selected and set on the machine, and ground is connected to the part being welded, the process can begin.
In one hand there is a torch, in the other there is a filler rod. Welding, unlike ordinary arc welding, cannot begin with the electrode touching the workpiece. First, gas is applied to the workpiece for 15-20 seconds, then the nozzle is gently brought to the alloy (the distance between the part and the electrode should be approximately 2 mm and remain so during operation). The resulting arc is smoothly led along the seam, preventing transverse movements. The filler wire is placed in front of the nozzle and fed smoothly. The most experienced welder can handle this simply; a beginner will have to “get a feel for the process.” As a rule, 3-5 attempts are enough.
The supply of argon should not be stopped immediately, but 5-7 seconds after the end of the seam.
Step-by-step semi-automatic welding process in argon
First of all, it is important to make sure that the equipment is ready, namely, set the operating mode of the semi-automatic machine, set the current strength, voltage, and wire feed speed. If aluminum wire is used for semi-automatic argon welding, it is better to choose a pull-type feed mechanism. While the pushing one is more suitable for steel wire. When the thickness of the product material is up to 3 mm, the current strength is set in the range of 120–145 A, and the wire speed is 900 m/h.
Another important nuance is polarity. Most often, direct current with reverse polarity is used for such work. That is, “-” is applied to the product, and “+” is applied to the burner with wire.
During the preparation process, it is necessary to clean the surfaces of the products. The edges of aluminum blanks are wiped with acetone and then treated with a wire brush. This is necessary to get rid of the surface film that complicates welding work.
Popular argon burner models
Regardless of the general mechanism of operation of argon burners, each manufacturer brings something of its own. Some use especially strong or especially flexible materials, others modify the basic system for comfortable work, others set the goal of durability or some other parameter.
When considering offers for paintings on sellers' websites, it is difficult to obtain comprehensive information, especially when prices range from 2.5 to 20 (sometimes higher) thousand rubles, and this is the cost without delivery.
A concise overview of manufacturers
The brand obviously makes adjustments to the price of the argon burner, but the name of the device means nothing for operation. Let's look at the products of manufacturers that are more needed today.
- AURORA TIG 9V 110A is a torch from a Russian manufacturer, adapted to work with welding machines of the SVAROG brand. Just find and purchase consumables. Devices from this manufacturer, depending on the modification, cost from 2.5 to 4.5 thousand rubles.
- Svarog TS 26V (M12×1) 4m - highest operating current - 180 A (fixed) and 130 A (variable). The electrodes used are from 0.5 to 4 mm, air cooling. Cost - from 4 to 6 thousand rubles.
- Bars TIG-17V - current (constant) - 140 A, air cooling, connector type not specified. The train, as in previous samples, is 4 meters long. The cost is about 3.5 thousand rubles.
- TORCH burners are distinguished by their low cost (up to 3 thousand rubles). The advantage is that it works on constant and alternating current. The connector is similar for the entire range of models - M12x1.
According to reviews from experienced welders, BlueWeld argon torches are distinguished by their exceptional quality of work, and AGNI are reliable in operation. Burners from SVAROG are not perfect, but they are completely suitable considering their cost. Useful video on this topic
Recommended selection considerations
- If the welding machine was purchased not so long ago, you should try to equip it with an argon torch from the same manufacturer.
- To avoid problems with aluminum welding, you should pay attention to whether the system is designed to work with alternating current.
- You need to carefully study the package. If you don’t have a set of spare parts, but you really like the price, it’s worth remembering that later you’ll have to spend about a thousand rubles on consumables.
- It’s better to choose not by the picture, but by hand: look at it, figure out whether it fits comfortably in your hand, make sure that the connector is the same type as on the inverter, and that the cable is quite flexible.
But a beginner can afford to purchase an inexpensive torch for training, mastering the welding process in an argon environment, and then, having gained experience, look for the most comfortable model based on his own experience.
