If you absolutely do not have enough space to store various home kitsch, or you just want to make functional furniture for your home yourself, then we have an excellent solution: a plywood box.
This multifunctional and stylish piece of furniture can help you organize the space in your own apartment much more functionally, while creating a unique atmosphere of comfort.
It is also very important to note that there are a lot of options for making such boxes, and none of them will require serious financial, time or physical expenditure from you. We'll talk about how to make a box out of plywood with your own hands in the material presented.
How to make a box from plywood with your own hands
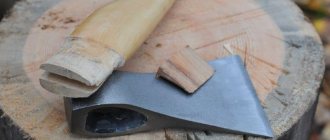
Features of making a tool box
Things often get lost. It's better if they have their own place. Then they won't get lost. And all the necessary things will always be at hand.
- The boxes can be made in different ways. They can have different shapes and colors.
- It's easy to do. Almost everyone can do it themselves if they wish.
- It doesn't require a lot of money to make.
- Plywood is easy to process.
- You can put heavy things. After all, it can withstand a heavy load.
- Thickness may vary.
- You can store both small and large things.
- Boxes can be of different sizes.
You can decorate them as you wish. They can be of different colors. Suitable for any interior.
Box making process
You need to understand what size the box will be. The drawer will have sides measuring 19.5 cm by 13 cm. The bottom of the drawer will measure 19.5 cm by 31.5 cm.
- Then they draw a drawing of the box.
- Draw patterns for the components of the box on sheets of plywood. The bottom of the box will be six millimeters thick. And to make the sides you will need plywood eight millimeters thick.
- The elements are cut out using an electric jigsaw or a hand router. There should be five parts in total. Four side walls and a bottom. If necessary, also cut out the lid. The walls can be in the shape of a cone if the box has a lid.
- Once the parts are prepared, the box is assembled. The walls are placed at the bottom of the box.
- The seams are glued with a special glue for wooden products. Excess glue is then removed with a regular rag. After gluing the box, place it under a press so that the parts stick together better.
- Then connect the parts with self-tapping screws.
- Then they make holes for the handle of the plywood box lid.
- You can make internal partitions in the box. But a box with partitions is suitable for experienced craftsmen. For novice craftsmen, it is better to make the box simple, without internal partitions.
If the box is large, then special wheels can be attached to the bottom. This will make the drawers easier to move around the room.
Classic wall flower stand
- shelf or board made of wood or chipboard,
- a decorative element for connecting the structure (in this case, a strong tree branch of a suitable configuration),
- drill,
- saw or jigsaw,
- screws,
- paint,
- varnish,
- pencil,
- brush,
- roulette
How to treat the surface → Room decoration → How to choose the right paint → Surface treatment technologies → Leveling and finishing the walls → Selecting and applying a primer → Removal from the surface → Stretch ceilings and technologies → Reviews and testimonials
Plywood box finishing
- After making the plywood box, we begin to decorate it.
- You can paint it with varnish. The entire box is varnished. This not only adds beauty, but also extends the life of the plywood box.
- The box can also be decorated with special overlays.
- It is also better to cover the outside of the box with color. This will give a beautiful appearance to the box.
- Before decorating the box, all holes must be filled with a special product for wooden products. The putty is applied very easily. Dries within three hours. After puttying, the box can be varnished.
- Afterwards, the plywood box is sanded using sandpaper. You can also putty a plywood box using a sanding machine.
Preparation and getting started
You can improve this assembly a little and get a real organizer. The sliding mechanism is what distinguishes it from elementary models. Making such a box is more difficult:
- Assemble the bottom deep box with an open top using plywood. The space inside it can be divided into two compartments by a partition.
- Make a pair of boxes. The width of each pair must match the width of the lower compartment. Make retractable lids for the drawers.
- Place the boxes on metal plates, which will form a retractable base. An example for a 3-story structure, when it is necessary to fasten on both sides separately:
- a couple of lower levels;
- all three (two longest plates);
- middle and upper floors.
The technology allows you to move individual levels of drawers. If you have any difficulties, refer to the diagram. Assembling any box is not difficult. Success is guaranteed by a pair of skillful hands and the necessary materials.
Plywood box with sliding lid
- You will need plywood 0.5 cm and 1.5 cm thick.
- Parts are cut out. The back wall should be 20 by 15 cm. The front wall should be 18 by 35 cm. The lid should be 34.3 by 33.3 cm. The bottom of the drawer should be 33.8 by 33.4 cm. The handle of the drawer will be 5 by 2 cm. These parts are cut from plywood with a smaller thickness. The side parts of the box are cut from other plywood. Their size will be 33.8 by 33.4 cm. There will be two such parts.
- Using a saw, the parts of the future box are cut out.
- Then the parts must be sanded using fine paper.
- Grooves measuring 0.6 cm are made on the sides of the box.
- It is necessary to make holes 0.4 cm in size on the walls of the box. This is necessary so that they can then be connected to the side walls of the future box using self-tapping screws.
- First, the parts are connected using a special glue. You can use both wood glue and PVA glue.
- Remains of glue are removed with a regular rag.
- View the edges whether they are suitable or not.
- Check whether the cover moves along the grooves. If necessary, process using sandpaper.
- The handle is glued to the lid using glue. You can also attach it to the lid using a special stapler.
- After everything is dry, it is better to sand the box again on all sides.
The top can be coated with special paint or varnish. The color of the box may vary.
How to do it?
After the preliminary preparation is completed, you should make sure that you have enough knowledge on how to create a box with your own hands.
Such information will help you more clearly understand the process of creating drawings and assembly diagrams, as well as the sequence of actions, which will help you avoid difficulties in your work.
A plywood box is created thanks to the correct algorithm of actions, which consists of the following points.
Think about what the future product will look like and transfer the diagram to a piece of paper. If all the calculations have been completed correctly, you can begin marking the parts on the plywood. To obtain straight sides and corners, it is best to use a square.
It is this sequence that allows you to create a neat and easy-to-use box that you can keep for yourself or give to someone. The final appearance of the product can be very diverse and depends on the preferences and purpose of the item.
Tips for making a plywood box
The thickness of plywood may vary. When making a plywood box where toys, clothes, and food will be stored, plywood with a thickness of 0.5 cm is suitable. And, if the box is to be stored outdoors, then the thickness of the plywood should be more than one centimeter.
- Before you start work, you need to understand whether the drawing is made correctly.
- You need to buy or rent the necessary tools to make the box.
- When purchasing plywood, you need to carefully examine the appearance of the material. There should be no chipped pieces or other defects on it.
- To ensure that the place where the plywood is cut is clear. You need to use tape to glue the place where the plywood will be cut.
- It is necessary to apply varnish to the plywood box. It gives not only a beautiful appearance, but also protects from various external influences.
- It is better to choose fine sandpaper for sanding a plywood box.
- If you need to make several identical boxes, you can make a template for the side walls.
- It is better to paint boxes in neutral colors.
- If the boxes will be located outdoors, it is prohibited to paint them with bright colors. After all, in the sun the color of the box will quickly fade.
- It is better to remove excess glue with a wet cloth.
Types of products
Today, a plywood box can be made in different shapes, types and for different purposes.
- Mailbox.
- Product for collecting children's toys.
- Design for sending fragile and valuable parcels.
- Toolbox.
- For storing and transporting vegetables, fruits and other products.
In addition to the main types, you can make gift packaging from raw materials, as well as niches as a cabinet and other things.