The exhaust system of a car performs very important functions in reducing engine noise, reducing the temperature of gases escaping from the cylinders, as well as partially eliminating the smoke and toxicity of exhaust gases.
The malfunction of the elements of such a system cannot go unnoticed. The breakdown of the muffler is especially obvious. When depressurized, this element immediately loses the function for which it received its name.
Considering this feature of the breakdown, it is necessary to restore the functionality of this part as quickly as possible, otherwise increased attention on the road cannot be avoided not only from motorists moving in traffic, but also from traffic police officers.
The easiest way to correct the situation is to install a new part, but due to various circumstances, replacing a faulty muffler may be impossible. Fortunately, it is possible to repair the muffler yourself without welding or replacement.
This article will discuss simple and effective ways to restore the functionality of this element of a car’s exhaust system, but first it should be recalled under what circumstances such a breakdown can occur.
How to make a gasket for a muffler?
How to make a gasket for a muffler?
A fairly common situation, especially for owners of foreign cars, when the old gasket of the muffler system breaks down, or rather simply falls apart, and it’s just not possible to get a new one. This situation is especially typical for connections between the manifold - exhaust pipe, or the resonator - muffler, as well as in other places in the exhaust system of the car. How to connect two muffler pipes using a homemade gasket? Here we will talk more about this, what solutions there are, because this is a way to save money and solve the problem. The muffler gasket is subjected to severe temperature and vibration loads, as well as high humidity and other negative factors, and therefore wears out over time and quite quickly. Often, muffler system gaskets are reinforced (with metal reinforcement), which is why a homemade gasket must be made of the appropriate material. And so, let's move on to the point of how to make a gasket for the muffler, and also what can it be made of?
DIY muffler gasket
We offer you a gasket option cut from pressed or reinforced asbestos. This option can serve you for quite a long time, from 30 to 50 km. mileage, and possibly more. It’s worth mentioning right away that the original branded gasket will be much better, but if you have a problem getting it and buying it, then this replacement option is quite suitable. And also, if you tighten the connection of the muffler pipes without a gasket, there will be a lot of creaking and noise, as well as wear of the metal at the joint, so a gasket is required. How to make a muffler gasket:
- measure the geometric dimensions of the connection point and the attachment point;
- we cut out a prototype gasket according to the shape and diameter from paper;
- we apply the paper version to a sheet of pressed or reinforced asbestos and cut it out in exact accordance;
- during cutting, care should be taken to ensure that the asbestos does not crack;
- then, we clean the place of the future connection;
- We install our gasket and press it tightly with a bolted connection.
The connection is ready, you can forget about the problem for a while. To make the gasket easier to install, you can pre-treat it with a heat-resistant sealant. The sealant will also help secure the gasket when joining the two muffler pipes. There are options for installing two pipes only on sealant, which should be applied in several layers, but this option can lead to squeaking. Such a creaking will be the result of two metal surfaces rubbing while the car is moving over bumps or potholes. Asbestos, pressed or reinforced with a special metal mesh, has excellent temperature performance, it will not fade quickly, and is also a fairly durable material. The laying option is labor-intensive, but definitely budget-friendly.
Source
Which gaskets are best to use?
REPLACING THE CYLINDER HEAD GASKET
Quite often, a muffler exhaust pipe flange gasket is used for replacement, which is responsible for sealing the connection between the exhaust pipe of a car exhaust system and the exhaust manifold. This gasket is usually used on cars that have a receiving pipe mounted at two points (Volga third series, GAZ-21).
However, you can make your own pant liner. It is recommended to use the following materials:
- Sheet copper;
- Asbestos;
- 2nd layer of copper.
Also, many motorists advise using automotive sealant that can withstand high temperatures. The technology for using it is quite simple: a thin layer (about one millimeter thick) is applied to the muffler in the seat, and then left to dry for twelve hours.
Most drivers prefer to use paronite to create a gasket. The creation process is as follows:
- First, a square-shaped piece of material is cut out, the old gasket is placed on it and placed on superglue.
- Then a marker is drawn along the entire contour. It is also necessary to circle all the holes located inside the product.
- The old gasket is removed, and then all the glue is removed.
- Next, the correct hole ratio is checked. If a discrepancy occurs, the product must be refined using a file.
There is an easier way:
- The surface on which the gasket will be present is cleaned and degreased;
- The gasket material is applied.
- Next, the product is hammered around the entire perimeter with a hammer.
- The gasket will gradually become visible, and the unnecessary part of the material will fall behind.
Repair in a garage
DoneDeal DD6785
– a high-temperature ceramic sealant reinforced with steel, which makes it possible to easily install a metal patch on the old muffler in the place of gas leakage, as well as to better assemble a new exhaust system when replacing it.
The process of installing a patch using the DD6785
requires some plumbing skills, but overall it is very simple - at least for those who did not skip labor classes at school.
As a rule, repairs with patches are practiced in case of burnouts in the muffler banks - directly in the muffler, resonator, flame arrester. A rectangle is cut out of a steel sheet 0.8–1 mm thick, the size of which is 30–50 percent larger than the size of the burnout. Holes are drilled around the perimeter of the patch for metal screws (every 2–3 centimeters), after which the patch is applied with a layer of DoneDeal DD6785
screwed with a screwdriver onto the surface of the muffler element, cleaned with a steel brush.
“No need to growl!”
Means for repairing the exhaust system without welding and replacement The sealant contains high-temperature additives that are stable up to 1400 degrees: sodium silicate, clay, steel powder, synthetic fiber. The time for complete polymerization of the sealant at normal ambient temperature is a day, but you can warm up the engine, speeding up the process, in 2–3 hours. The same goes for assembling a new exhaust system. The connections between pipe flanges and sealing gaskets do not always provide complete tightness due to rough processing, and even a new muffler can slightly smoke at the joints and “whistle” until the cracks become coked with soot. When lubricating connections DoneDeal DD6785
this will not happen, and the exhaust tract will be sealed immediately.
Re: Material for HIGH TEMPERATURE gasket
Is there an alternative or not? Yes - Option 1 Buy the original gasket and don’t fool yourself. The price is a little more than 60 gr. Option 2. Order a gasket with a metal edging from craftsmen. This is real in Kharkov. Price about 30 gr. Option 3. Buy a piece of paronite on the market and cut out holes for the exhaust and studs. Price is negotiable (with the seller of paronite). Option 4. (Sucks, but sometimes it helped) Spread the joints with high-temperature sealant and wait until it hardens. Afterwards the system is assembled.
Causes of muffler failure and preventive measures
It is easier to prevent a disease than to treat it later. This statement is also true for car breakdowns.
Of course, it is impossible to avoid all the nuances on the road. But knowing about the dangers that threaten the elements of a car’s exhaust system, you can try to use preventive measures to delay the occurrence of a particular malfunction.
If the car is used constantly, then sooner or later problems with the muffler will arise, regardless of the quality of the material from which this part is made. Located in the lower part of the car, this part is constantly exposed to the abrasive effects of sand and stones falling on its surface. And if, when the car is moving, a fairly large solid object ends up between the wheels, then the muffler can be completely destroyed from a strong impact.
Therefore, the main rule for extending the life of the unit is to drive the car carefully.
The muffler is connected to the exhaust system via threaded connections, so if the nuts are not tightened well enough, this part can be lost while the vehicle is moving. To prevent this from happening, the condition of the threaded connections of this element of the exhaust system should be checked from time to time.
The muffler often becomes unusable due to metal burning, but this process cannot be completely stopped. The failure of this part as a result of thermal and corrosive effects can be slightly slowed down only by treating the inner surface of this part using graphite impregnation.
Today I want to talk about how I make pads. On the Internet I found a description of what people make gaskets from. I used to make them from paronite. But I don't like the material itself. The oil makes paronitis soft like snot. The connections need to be constantly pulled, it gets wet and looks extremely sloppy.
Paper is the best choice. And because I work in the printing industry - I could have chosen the paper for the gaskets more consciously. I’ll say right away that I don’t like coated paper (from magazine covers as advised on the Internet), although I had a huge selection of it. I think its main disadvantage is that it practically consists of only chalk (and now there is just a wave of low-quality paper from China). Whatever one may say, chalk is an abrasive. Although very weak. Nobody wants to have abrasive in their engine. A more or less suitable paper is chrome ersatz (as on doctors’ magazines, medical records). But still, there is also chalk on this paper.
I had a criterion - no chalk. And it seems that such paper simply does not exist for printing! But it exists in a different form. So - I found her. Write down the name - calibrated cardboard (I had PAVAN) 0.5 mm, color - gray. Refers to under-deck materials (placed under offset rubber). You can find them in companies selling printing supplies. And also in printing houses with offset machines. This cardboard is replaced by printers and simply disposed of after some time. If you have friends, go and ask.
The main advantage of this cardboard is that it is really tough. There is no chalk in it. And it is very accurate (the difference in thickness is no more than 0.01mm).
My method is not fast, but it is as accurate as possible for home use.
We take the sealant and apply a thin layer to the surface. I just take the sealant on my finger and tap it lightly (I apply thermal paste to the processor in much the same way). Next, I place the sheet on a flat surface and press the lid against the paper with something heavy.
In my case, I pulled the lid through the hole in the center using a pin.
Then I wait about a day (that’s why this method is not fast). I roughly cut around the perimeter with a margin of a couple of centimeters with scissors.
The cardboard has already been properly adhered to the surface using sealant.
We take a stationery knife with this grip and cut off the outer contour.
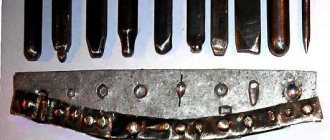
Next, to find the inner contour, press the contour with your fingers. It was not visible in the photo, but after this the internal contour begins to be clearly visible. We cut the inner contour in the same way
I carefully drilled the holes with a punch I made (it’s still good to have a lathe on hand!)
And the result is quite decent. Next, purging, rinsing with alcohol.
Applying sealant to the mating part (try to use the minimum amount of sealant).
And one more “trick” - pulling with a screwdriver with a torque limit. Gradually adding torque we tighten all the bolts. Leave it for a couple of hours and tighten it with a key (without fanaticism).
This is not the first renovation using this technology. I have used such gaskets several times already and there are no problems with them. They don't get wet or sweat. They hold up great. Knowing this technology, I am not afraid to open the engine even for inspection. Because I know that I can make this gasket myself for free.
I hope this information helps someone and good luck to everyone on the roads!
Muffler gasket: how and what to replace with
The muffler gasket or O-ring is used to isolate the gas junction formed between the rear muffler and the resonator (auxiliary muffler).
Installing a gasket between the exhaust manifold (“pants”) and the muffler is also necessary to ensure mutual movement of the muffler pipes.
Damage to the gasket can be detected as follows: under the very bottom, in the place where the sections are connected, there will be carbon deposits. In addition, if the gasket between the cylinder and the muffler is damaged, an unpleasant odor created by exhaust gases appears in the car interior. A damaged unit also makes itself known by a characteristic grinding noise that occurs during engine operation.
How to get rid of the problem
The muffler gasket is usually beyond repair. If the muffler gasket (ring) is damaged, it will have to be replaced with a new one. Replacing the gasket is fairly easy.
- First of all, you need to get rid of the old gasket. You need to unscrew the two bolts that hold the flanges together. The bolts are usually rusty, making them quite difficult to remove. For this purpose, you can use a special tool (“liquid keys” or an angle grinder, if the situation is critical).
- After the bolts are removed, you will have to carefully move the resonator tube to the left side.
- The old muffler gasket is located on the resonator pipe. You will have to use a screwdriver to pry the product and remove it.
- Next, you need to use a metal brush and sandpaper to remove carbon deposits from the flanges.
- After this, the muffler gasket is replaced. The ring is installed on the resonator flange. The main muffler pipes are connected, and the flanges are screwed together using a clamp that has spring-loaded bolts that come in one set with a gasket.
It is necessary to replace it in the event of a breakdown, because otherwise the car interior will be filled with fumes. Also, if a malfunction occurs, carbon deposits will begin to form under the very bottom, which will be very difficult to eliminate.
How often does a muffler need to be repaired?
As a rule, with careful operation of the vehicle and regular visits to the car service center, muffler repair work is performed extremely rarely, but for this it is necessary to contact the service center in a timely manner at the slightest suspicion of any malfunction in the operation of the exhaust system.
IMPORTANT! Do not forget that the operation of the muffler directly affects the operation of many other systems in the car, therefore any malfunction in the operation of this element can lead to additional, often more critical, malfunctions in other systems.
Paronite seals from Promresursservice
is the largest supplier of asbestos, rubber and polymer products in Russia and the EU. We offer paronite seals for various purposes and configurations. All products are manufactured using modern, high-tech equipment and undergo quality control at every stage of production. An individual approach, a flexible system of discounts, fast delivery, simple payment are just some of the advantages of cooperation with Promresursservice. To order or consult on products, you can call or use the feedback form. Our managers will call you back at any convenient time.
Prices
- Exhaust pipe laying from 100 rubles
- Replacement (work of a master) from 500 rubles
Thanks to it, a seal occurs at the junction of the exhaust pipes. It influences factors such as:
- Noise Removal
- Reduced exhaust system vibration
- Prevents exhaust gases from leaking through the exhaust system
If you do not change the gasket in the exhaust system in time, a separation may occur at the location of the faulty gasket or seal.
How to choose an exhaust system gasket?
Installation and replacement of exhaust pipe gaskets in Moscow
You can see even more photos of exhaust systems and their tuning in our gallery!
Our production:
- 2.52
- 3.24
- Paronite gasket DN-10 14*38mm 0.1-0.63MPa 2mm
Retail price 2.90 rubles RUB WHOLESALE (for purchases from 50,000 rubles) 2.77 rubles VIP price (for purchases from 100,000 rub.) 2.52 rub.Manufacturer:PRS / Russia
PC
2.90
Buy
- Paronite gasket DN-10 14*45mm 1.0-4.0MPa 2mm
Retail price 2.90 rubles RUB WHOLESALE (for purchases from 50,000 rubles) 2.77 rubles VIP price (for purchases from 100,000 rub.) 2.52 rub.
Manufacturer:PRS / Russia
PC
2.90
Buy
- Paronite gasket DN-10 14*45mm 1.0-4.0MPa 3mm
Retail price 3.38 rubles RUB WHOLESALE (for purchases from 50,000 rubles) 3.24 rubles VIP price (for purchases from 100,000 rubles) 2.94 rubles.
Manufacturer:PRS/Russia
PC
3.38
Buy
- Paronite gasket Du-15 13*20mm 1.5mm
Retail price 3.24 rubles RUB WHOLESALE (for purchases from 50,000 rubles) 3.11 rubles VIP price (for purchases from 100,000 rub.) 2.82 rub.
Manufacturer:PRS/Russia
PC
3.24
Buy
- Paronite gasket DN-15 20*43mm 0.1-0.63MPa 2mm
Retail price 3.73 rubles RUB WHOLESALE (for purchases from 50,000 rubles) 3.56 rubles VIP price (for purchases from 100,000 rub.) 3.24 rub.
Manufacturer:PRS / Russia
PC
3.73
Buy
- RUB
VIEW ALL
To increase the mechanical strength of paronite, metal mesh reinforcement can be used. The resulting material is called ferronite or, as defined by GOST, reinforced paronite (PA).
Paronite gasket (GOST 481-80) is divided into several types, suitable for different types of connections:
- seal for flanges;
- gas seal;
- for radiators;
- for water.
produces and sells paronite gaskets for the oil and gas industry, public utilities, metallurgical industry, food industry, for repair and construction tasks, trading houses, shops.
Removing the muffler
- Place the vehicle on a flat, hard surface.
- Move the gearbox to the “park” position and fully pull out the handbrake.
- To prevent the car from rolling away, install chocks under the rear wheels.
- Jack up the front of the car and install sawhorses on each side.
- Lower the jack just enough so that the car is on the trestles.
- Get under the car and find the muffler.
- Apply penetrating lubricant to the clamps and bolts that will be replaced. There are two clamps - one in front, the other behind the muffler. The lubricant does not take effect immediately, so wait a few minutes.
- Separate the muffler from the exhaust pipe. Use a cutting tool to cut off the exhaust pipe at the back and front of the muffler.
- Remove the muffler.
Re: Material for HIGH TEMPERATURE gasket
And don’t smile so maliciously - I understand everything
What thickness of paroni should I take?
lxndr
, aluminum melts easily - don't touch it...
zass
, well, as it is