A homemade pyrolysis oven from a gas cylinder is one of the most popular manufacturing options. It captivates with its cheapness and simplicity. All materials can be easily found at any dacha.
It will not heat a large house, but for a small dacha, garage, greenhouse it is just right.
Such a stove can easily cope with heating a room of 100 m2. Often used for heating greenhouses, garages, warehouses. It does not require a foundation, but the foundation still needs to be prepared. At a minimum, level and cover with a metal sheet of at least 4 mm thickness.
It is also important to follow all fire safety rules during installation. The distance to combustible objects should not be closer than 50 cm. Wooden surfaces are additionally protected with fireproof cloth.
Recommendations for increasing the efficiency of a homemade stove
How to increase the efficiency of bubafoni? What problem is preventing this heat generator from working to its full potential? One of the problems is that the stove body heats up unevenly. Because of this, we get poor heat exchange in the room. Is it possible to solve this problem? Of course you can. To solve this problem, let's take a sheet of corrugated metal profile. We wrap it around the stove, obtaining a protective “shirt” and spot-weld the profile sheet to the cylinder.
You can find another solution besides welding. It's up to you to decide. By implementing this solution into a finished design, we will obtain a long-burning furnace device that forms rising air currents. Cold air will rise from the bottom of the ribs. After passing along the body of the cylinder, the air will heat up and become hot at the outlet. In addition to this modification, you can do the following.
Cover the entire structure with bricks. This will allow heat to accumulate from the generator, releasing it evenly over the entire area of the building for quite a long time. In addition to the profile sheet, you can use pipe scraps. Profile or regular round pipes are suitable. They are welded around the cylinder body, resulting in an effective design for generating heat with uniform heating.
How to increase efficiency
To increase the efficiency of a solid fuel boiler made from a propane cylinder, work is carried out in two directions: increasing heat removal, that is, reducing the temperature of the flue gases and reducing heat loss.
There are a number of options to increase the efficiency of solid fuel boilers running on wood with a water jacket:
- Reconstruction of the chimney size. It must be done higher; the ideal distance from the boiler to the end of the pipe is 6 m.
- Install a deflector that not only protects the boiler from precipitation, but also increases draft.
- To conserve thermal energy, a damper is installed in the pipe structure to regulate the air supply to the firebox.
- The boilers are reinforced with heat exchangers in the form of water jackets. There are devices that fit directly onto the chimney.
Thus, the effectiveness of such home-made devices can be increased without the assistance of specialists and large financial investments.
The main thing is to experiment a little, because the specific results will depend on the type of fuel and the geometry of the boiler. It is also important not to overdo it in this matter, since a decrease in the flue gas temperature below 55 C will cause abundant formation of acidic condensate in the flue gases.
The acid will flow down the walls of the chimney and firebox and can damage not only the combustion chamber, but also the smoke exhaust system.
Gas cylinder for pyrolysis furnace
It is not difficult to make a pyrolysis oven from a gas cylinder. What needs to be done for this.
Pyrolysis stove from a cylinder
First of all, inside the cylinder you need to make partitions for the afterburning chamber. To do this, you can cut circles from sheet iron with a diameter equal to the inner diameter of the cylinder. On each circle you need to cut out a segment. The end result should be more than a semicircle. The resulting parts are installed inside the tank, where they are electric welded around the perimeter
It is very important to install the cut circles correctly. It is necessary to carry out the installation so that the space free from the cut-off element is opposite exactly the same, only different cut-off circle
That is, you should get a multi-stage chamber assembled from these circles of partitions, which, when assembled into one system, will form a coil. Along it, pyrolysis gases will rise from the firebox to the chimney. Here they will be enriched with oxygen and burned completely. Be sure to make several small holes with a diameter of 3-5 mm in the wall of the cylinder opposite the first floor of the afterburning chamber. Holes are made with a drill and drill. The end of the created afterburning chamber channel is connected to the outlet pipe, which will become the beginning of the chimney. Therefore, a hole is made on the side or top of the cylinder for the pipe, and it is welded on the outside. As in any furnace, a firebox must be formed in a pyrolysis oven. To do this, a rectangular hole is made in the cylinder for the door. Fuel will be loaded through it. A grate is installed just below the hole, which can be made from the same metal sheet in which the holes must be drilled. You can make it from reinforcement in the form of a mesh. Below the door, on the same side where it will be installed, you need to make several holes to supply primary air.
This design makes it possible to ignite from above the fuel. Air will penetrate through the mass of stacked fuel briquettes and enter the smoldering zone. There will not be very much of it, which will prevent the fuel from igniting at full strength. By the way, sawdust, finely chopped stems or leaves, preferably pressed, fine coal, can be used as fuel in pyrolysis furnaces. Today, manufacturers of pyrolysis boilers offer their own fuel for them, which is made from any plant materials. They are pressed into small granules called pellets.
Pyrolysis stove made from a gas cylinder with a press
A simpler design of a pyrolysis-type stove can be made from a gas cylinder.
- The upper semicircular cap of the cylinder is cut off.
- Part of the sidewall is cut off for the hole for the firebox.
- The grate is installed.
- A pancake with a diameter slightly smaller than the inner diameter of the cylinder is cut out of a metal sheet.
- A hole is made in the pancake for the chimney pipe, which is welded to it.
- This structure must be made heavier, for which four pieces of channel are welded on its lower side. In this case, the chimney opening should not be closed.
- A hole for the chimney is also made in the cut-out cylinder cap.
- The door is hung.
- Small holes are made below the firebox.
Scheme of operation of a pyrolysis furnace from a gas cylinder
The oven is ready, you can load it. More than half of the resulting space is loaded. Ignition can be done from below or from above. A press made of a metal pancake reinforced with channels is installed on top. Its main task is to press the fuel to the combustion (smoldering) zone, while a space formed by channels remains between the walls of the press and the surface of the laid fuel. When burning fuel, the press will lower, leaving the gap the same during the entire process of operation of the pyrolysis furnace.
There is also a gap between the edges of the pancake and the walls of the cylinder, through which carbon monoxide enters the afterburning zone formed by the furnace lid and the upper plane of the press. Typically, such a unit is called a long-burning stove. As practice shows, one bookmark is enough for 6-10 hours, depending on the volume of the combustion chamber.
Lachinyan pyrolysis furnace
Potbelly stoves - proven and simple designs
Potbelly stoves were a hit of the 20s of the last century. At that time, these stoves competed with brick stoves and were installed everywhere, even in apartments. Later, with the advent of centralized heating, they lost their relevance, but are used in garages, dachas, and for heating utility or outbuildings.
Sheet metal
Potbelly stoves from a cylinder, barrel or pipe
The most suitable material for making a potbelly stove for a garage is propane cylinders or a pipe with a thick wall. Barrels are also suitable, but you need to look for ones that are not very large in volume and have a thick wall. In any option, the minimum wall thickness is 2-3 mm, the optimal is 5 mm. Such a stove will serve for many years.
By design they are vertical and horizontal. It is more convenient to burn horizontally with firewood - longer logs will fit. It’s easier to make one extended upward, but the firebox is small in size, so you’ll have to cut the wood finely.
A potbelly stove for a garage can be made from a cylinder or pipe with a thick wall
Vertical
First, how to make a vertical stove for a garage from a cylinder or pipe. Divide the selected segment into two unequal parts. Below is a smaller one for collecting ash, above is the main one for storing firewood. The following is the order of work:
- Cut out the doors. Small at the bottom, solid at the top. We use the cut pieces as doors, so we don’t throw them away.
- We weld the grates in the chosen place. Usually this is steel reinforcement cut into pieces of the required length with a thickness of 12-16 mm. The reinforcement installation step is about 2 cm.
- Weld the bottom if there is none.
- We cut out a hole in the lid for the chimney, weld a strip of metal about 7-10 cm high. It is better to make the outer diameter of the resulting pipe fit standard chimneys. Then there will be no problems with the installation of the chimney.
- We weld the lid with the welded pipe into place.
- Using welding, we attach the locks and hinges to the cut-out door pieces and install it all in place. As a rule, potbelly stoves are not airtight, so there is no need to make seals. But if desired, you can weld a strip of metal 1.5-2 cm wide around the perimeter of the doors. Its protruding part will cover a small gap around the perimeter.
Overall, that's it. All that remains is to assemble the chimney and you can test a new stove for the garage.
Horizontal
If the housing is located horizontally, the ash box is usually welded from below. It can be welded to the required dimensions from sheet steel or a piece of channel of a suitable size can be used. Holes are made in the part of the body that will be directed downwards. It’s better to cut something like grate bars.
How to make a potbelly stove for a garage from a gas cylinder
Then in the upper part of the body we make a pipe for the chimney. To do this, you can weld a cut piece from a pipe of a suitable diameter. After the piece of pipe is installed and the seam is checked, the metal inside the ring is cut out.
Next you can make the legs. The best fit is pieces of a corner, to which small pieces of metal are attached from below so that they stand stable.
The next step is installing the doors. You can cut a piece of metal onto the ash pan, attach hinges and a lock. There are no special problems here. The gaps around the edges do not interfere - combustion air will flow through them.
There will be no difficulties if you are making a door from metal - welding the hinges is not a problem. Only here, in order to be able to at least slightly regulate the combustion, the door needs to be made a little larger - so that the perimeter of the opening is closed.
How to install stove casting on a metal stove
It is problematic to install furnace casting. Suddenly someone wants to have not a steel door, but a cast iron one. Then you need to weld a frame from a steel corner, attach the casting to it with bolts, and weld this entire structure to the body.
From two barrels
Anyone who has used a potbelly stove knows that very hard radiation comes from its body. Often the walls become heated to a red glow. Then it is impossible to be near her. The problem is solved with an interesting design: two barrels of different diameters, inserted one into the other. The gaps between the walls are filled with pebbles, clay mixed with sand (calcined over a fire, then filled in only after it has cooled). The inner barrel acts as a firebox, and the outer one is just the body.
This stove will take longer to heat up. It will not immediately begin to give off heat, but it will be more comfortable in the garage and after the fuel burns out, it will warm the room for another couple of hours - releasing the heat accumulated in the bookmark.
https://youtube.com/watch?v=PEWZxL2ebXE
DIY pyrolysis oven
Those who own a country house, a bathhouse, a country house, or simply want to heat their home in a natural, inexpensive way will undoubtedly like a pyrolysis stove.
You say: “What, for example, is worse than a fireplace or a stone stove?”
Of course, stone stoves are very romantic and beautiful. However, in order to install such a structure in a house, you will need quite a lot of space, with a foundation prepared for it. Another disadvantage of fireplaces and heaters is that to maintain their combustion, you need to continuously add an impressive amount of kindling material.
Therefore, the most convenient option for accessible heat in a bathhouse or home is a pyrolysis oven.
Of course, such a stove has its advantages and some disadvantages, the latter, however, are quite insignificant.
Advantages of a pyrolysis oven.
- Very economical fuel consumption. This is achieved due to the fact that such a stove operates not only on fuel, but also on gases released during its combustion. For this property, the pyrolysis furnace received a “second name” - a gas generator.
- Almost any material can be used as fuel for the gas generator: from wood waste and old magazines, to recycled engine oil and plastic.
- Minimum amount of soot produced. Due to the fact that the pyrolysis furnace processes the materials it has already processed several times, there is practically no residue left in the form of burnt fuel. This is a very environmentally friendly home heating solution.
- High utility rate, up to 80%. Even if your entire house is heated by one steam generator, you can wear one T-shirt in all rooms, even in the most severe frosts.
- Easy to control the oven system. Without a doubt, any household member can cope with the principle of controlling this equipment. Moreover, it does not require close attention; you just need to set the heating power and occasionally load fuel.
- You don’t have to spend money on fuel or think about where to throw away household waste without harming the environment. Your waste is the fuel for the pyrolysis furnace.
Although this alternative type of heating has many advantages, of course, it is not without several disadvantages.
- If you buy a ready-made boiler in specialized stores, it will cost you a pretty penny.
- Fuel that is too wet cannot be used in any way for such a stove.
- The gas generator must be permanently connected to the electrical network.
As you can see, in the lists we have given, pyrolysis furnaces still have more advantages than disadvantages.
Heat exchanger for wood boiler
Heat exchangers are quite often considered the “heart” of a solid fuel boiler. It takes heat from the flue gases through the walls of the heater and releases it to the coolant circulating inside the housing.
Heat exchangers can be made of cast iron or steel, the former is more expensive and has high thermal efficiency, operating time and endurance.
Such a device is large-sized and has a certain inertness both during heating and during cooling. Cast iron units are unpretentious and exhibit anti-corrosion resistance. With proper operation, the device can operate trouble-free for about 30 years.
Steel heat exchangers are made of pipes and sheet steel up to 6 mm thick. They are designed for open heating systems operating with natural coolant circulation, are susceptible to corrosion and can operate for no more than 15 years.
Balloon oven options
There are several main options for such designs:
The simplest of them is an ordinary potbelly stove. It is customary to use a 12-liter or 27-liter cylinder for it. For efficient heating, it is advisable to use a horizontal elbow for the chimney. The most difficult part is attaching the door for the opening through which the fuel is loaded. Convenient for storage in a city apartment. It is short-lived due to the gradual burning out of the walls of the cylinder.
Special long stoves. They work as long-burning stoves. The basic principle of operation is that the fuel burns continuously with only a small amount of fuel. Pyrolysis products are then formed, which burn in a separate combustion chamber. To ensure combustion efficiency, it makes sense to preheat the air that enters the furnace. The oil garage stove requires vertical installation. Used engine oil is used as fuel. Adjusting the combustion temperature The design looks something like this.
"Rocket". Its name comes from the fact that it sometimes makes a noise similar to the roar of rocket engines. However, this can happen if the oven is not adjusted. A properly functioning structure makes only a quiet rustling sound. Its design is not particularly complicated and a 50 liter gas cylinder is very convenient for its manufacture. This type has many important advantages. They heat the room well, are economical to use, and relatively simple to manufacture. They can be adapted to heat a bed. But, on the other hand, they must be done accurately and carefully. If the furnace is poorly adjusted, it will be ineffective. The fuel is firewood (usually thinly chopped chips or branches). It comes through a pipe from above. Air enters through the hole at the bottom left. Combustion occurs in the lower pipe. The blowing here is very strong. The combustion products rise upward and exit through the pipe on the right, heating the room. Let us tell you what a stove called “bubafonya” is. It uses a special principle of working with pyrolysis products. The combustion chamber is located vertically. Pyrolysis products are contained by a special metal “pancake”, which limits the combustion space from above. The efficiency of this design can reach eighty-five percent. This stove is not designed to use wet fuel. Humidity should not exceed 12 percent. The stove is very economical in fuel consumption. Convenient to use for heating garages or other utility rooms.
A rocket stove can be made not only using gas cylinders, but also using barrels, cans and other means.
Vertical oven assembly process
A vertical oven is more difficult to manufacture, but requires less space for its installation and has better user qualities. The volume of the cylinder is used more rationally. The principle of operation of the furnace does not change, but is implemented with greater efficiency. In the vertical version, two doors are made - for loading fuel and for the ash tray. Grate bars made of reinforcement are welded between these doors.
In principle, the entire upper part of the furnace can be dedicated to loading fuel, which will ensure long-term operation on one load. However, the volume of the combustion chamber is often reduced to accommodate additional heat exchangers in the upper part. One of the interesting options is through metal pipes welded into the upper part of the gas cylinder, through which air is driven by a fan (necessarily heat-resistant).
The process of assembling a vertical stove from a cylinder
Such a device will significantly increase heat transfer and reduce the heating time of the room several times. If forced water circulation is established through the passage pipes, a water heating system can be installed.
How to make a low-power pyrolysis oven?
The drawing of the pyrolysis furnace is quite approximate
Despite the relative complexity of the design of pyrolysis furnaces, you can make such a heating device yourself. Options for making the unit from brick or from a gas cylinder are quite common, but the most aesthetically pleasing and efficient in operation is a design made from sheet metal.
Pyrolysis furnaces with low power (up to 25 kW) are excellent for country houses, garages, greenhouses and any premises not exceeding 100 m2 in area. This design differs from a conventional pyrolysis furnace in the following features:
- Does not connect to the heating system.
- There is no need to install a smoke exhauster, since in this case the combustion chamber is simply located above the gasification chamber. This creates natural traction.
- Due to the fact that the design is not automated, it is necessary to periodically adjust the combustion mode and monitor the operation of the equipment.
Construction of a low-power pyrolysis boiler
The instructions for making such a stove include several steps:
- According to the diagram, the structure body is welded from heat-resistant steel, in which holes are provided for the ash pan door and the combustion chamber. In this case, the combustion chamber should be located above the ash pan, separated from it by a cast-iron grate.
- The gas combustion chamber is located exactly above the firebox. Between them there is a cut-off plate, which is made of heat-resistant steel. The firebox must have a special channel through which air will be supplied with the possibility of shutting it off using a special damper.
- The same sheet metal is used to make the doors, which is additionally reinforced with a corner. Doors must be locked.
- The inside of the furnace chamber should be lined with fireclay bricks, which will not only protect the structure from burning out, but will also contribute to better heat distribution.
- The chimney should be made of a heat-insulated pipe. To regulate the draft in the design, a gate is provided.
Testing a homemade pyrolysis boiler
conclusions
Having considered how to make different types of pyrolysis furnaces, we can summarize that it is realistic to make only a structure from a gas cylinder. You won’t be able to build a brick oven yourself; it’s too difficult. A camping option made from cans also has a right to exist, but it can only be made at home; this cannot be done in the field. And finally, the exhaust furnace is simple but dangerous and requires very careful and careful operation. The risk is quite high, so we do not recommend it for heating a garage.
Drawings, dimensions and calculations
You can make a small stove with your own hands to heat a garage or other space using scrap materials.
It’s easy to create a sketch plan and drawing of a small metal stove-stove yourself
An obligatory step is the creation of a drawing or diagram of the future structure. To do this, you need to determine the shape and dimensions of the case, the location of the cameras. After this, the power sufficient to heat the room is calculated. The parameters are determined as follows:
- Let's assume that 10 kW of heat is required to heat the room at the lowest outside temperature. We determine the required power of the furnace in normal combustion mode. It is known that in the gas generation mode the furnace power is 10-30% of that which develops in the flame combustion mode. Consequently, to obtain 10 kW with gas generation, the unit, when burning with a flame, must develop a power of W = 10 / 0.3 = 33.3 kW (we assume a 30 percent power ratio);
- We choose the least energy-intensive fuel. For example, dry beech is optimal;
- We calculate the volume of fuel that can provide the required power. A portion of firewood burns in flame mode in approximately 4500 s. Therefore, during this time it should provide the following amount of heat: Q = 33.3*1000*4500 = 149.85 MJ. Let's calculate the required mass of fuel, taking into account that it burns only 80% completely, and the efficiency of a homemade stove is approximately 50%: M = 149.85 / (15.5*0.8*0.5) = 24.17 kg. Knowing that the density of dry beech is 620 kg/m3, let’s convert the resulting mass value into volume: V = 24.17 / 620 = 0.039 m3 = 39 l;
- We calculate the volume of the firebox. The average furnace load factor is 0.63. It should have a volume: Vt = 39/0.63 = 61.9 l.
You can make a drawing or technical drawing of the product yourself, taking into account the shape and features of the stove. A ready-made image of a suitable unit is taken as a basis.
Tools and materials
List of required consumables and working tools:
- sheet steel grade St20, thickness 3–4 mm;
- steel equal angle angle 4x50 mm;
- pipe with a diameter of 50–60 mm;
- steel reinforcement with a cross section of 8 mm;
- steel pipes with a diameter of 110 or 120 mm for the chimney;
- bricks in the amount of 15 pieces;
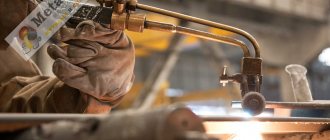
- electric welding machine and several packages of electrodes;
- drill and metal drills, grinder with 230 mm circles;
- building level, tape measure, pencil, hammer.
Choose consumables that are high-quality and reliable. Not only the operation of the pyrolysis furnace, but also the safety of the surrounding area during the heating process depends on this.
Preparation and selection of installation site
The assembly of the structure is carried out directly in the room where the stove will be installed. It is best to order sheet cutting into blanks from specialists in the store. This will ensure a good quality base for the product.
The space around any stove must be safe and heat-resistant, and the floors must be level.
The site for installing the unit must be prepared.
- a base of bricks or other non-combustible material is laid on the floor;
- the base area should be larger than the dimensions of the oven;
- install the unit at a distance of at least 80 cm from the nearest walls;
- the floor within a radius of 1.2 m in front of the heating device must have a fireproof coating (iron sheet 1.5 mm thick).
Potbelly stove in the garage: pros and cons
Car enthusiasts install a homemade potbelly stove in the garage for several reasons:
- the stove heats the room in winter;
- you can cook food or heat a kettle on a potbelly stove;
- With a design approach, a homemade heating device can become a decoration for the garage.
We advise you to read in more detail why a potbelly stove smokes and find answers to your questions.
A potbelly stove has a number of advantages compared to other heating devices:
- For kindling, you can use a variety of fuels - firewood, coals, construction waste, petroleum products, waste oil, etc.
- The main advantage of a potbelly stove is the speed of heating the room. Thanks to its high efficiency and power, the stove will heat a garage of 50-60 square meters. m. in 15-20 minutes.
- The stove distributes heat evenly regardless of where it is located.
- A potbelly stove is an economical heating device. For example, heating a garage with a potbelly stove will cost several times less than with an electric heater.
- An additional advantage of a potbelly stove in the garage is the ability to cook or warm up food. When creating a stove yourself, it is enough to attach a metal cooking surface to its upper part.
- A homemade stove will cost the car owner almost free if there is an unnecessary barrel, sheet of metal and pipe lying around in the garage.
We previously wrote an article about installing a potbelly stove for heating and recommended adding it to your bookmarks.
The potbelly stove will fit harmoniously into the interior of any garage. In addition to the heating function, the heating device has a “cooking mode”. A hob is installed at the top of the stove, where you can heat a kettle or cook food.
The disadvantages of a potbelly stove in the garage are:
- the need to install a chimney in the garage;
- periodic cleaning of the chimney;
- the need for constant fuel supply;
- inability to accumulate heat.
Self-assembly options
Pyrolysis furnace made from a metal barrel
Homemade structures can be made from various materials, such as a gas cylinder, tin cans, barrels, bricks and much more.
Depending on the material of production, all furnaces are divided into:
- stone;
- metal.
Stone or brick ovens are used extremely rarely. This is due to the fact that its construction will require a lot of investment and time.
Of course, recently such designs have undergone some modifications, which has significantly increased their efficiency. As for metal stoves, they are especially popular. The fact is that they can be made even from an old gas cylinder or barrel.
Pyrolysis furnace Lachinyanka
Depending on the principle of operation, the fuel and material used, all furnaces are divided into the following types:
- furnace operating on treated oil;
- Kuznetsov furnace;
- Lachinyanka;
- Buleryan stove;
- Bubafonya.
The principle of operation of all these structures is the same - afterburning the gas that is released from the fuel. But, when choosing a design, it is worth considering some features of each type.
Thus, it is undesirable to use stoves that run on waste oil in bathhouses and other residential premises. They are ideal for heating garages and other non-residential premises.
Of course, it is worth considering that small furnaces running on waste oil are highly productive. You only need a cup of oil to get the job done.
You might be interested in an article on how to make a pyrolysis boiler with your own hands.
Read a review of modern models of pyrolysis boilers for heating here.
Made of brick
To build a brick stove you will need:
Drawing of a pyrolysis furnace. (Click to enlarge)
ceramic and fireclay bricks; steel sheets; cast iron grates; 300 W fan; door to the furnace room and for the blower; welding machine; drill; Bulgarian and others.
Having such materials and tools at hand, you can build a stove with your own hands. Of course, we should not forget about some nuances on which the strength and efficiency of the heating structure will depend.
If you have chosen a brick kiln, the construction process will look like this:
- Clearing the site and installing the foundation. The best option would be a strip foundation. It must have high strength.
- After the foundation has hardened, you can begin laying bricks. For this purpose, high-quality refractory bricks are used, which are highly durable.
- The inside of the oven is lined with fireclay bricks, which can withstand high temperatures.
- Chimney installation. It is best to use metal inserts or ceramic structures here.
Keep in mind: the installation of a chimney must be approached with great responsibility and it is better to consult with a stove professional in advance.
All work is carried out according to a pre-drawn plan, which is best agreed upon with a specialist.
If necessary, you can decorate the structure. For this, facing bricks, stone and other materials that can withstand high temperatures are often used.
From a gas cylinder
The peculiarity of the Bubafonya stove is that it can be used with different fuels.
To make such a design with your own hands, you will need the following tools:
- hammer;
- Bulgarian;
- welding machine and electrodes;
- pliers.
The manufacturing process of the Bubafonya stove is carried out in the following sequence:
- Cut off the top convex part of the cylinder.
Be careful: cut off the top of the cylinder below or above the welding seam, since the connecting seam is reinforced from the inside with a metal plate, which can complicate cutting.
There is a hole in the center for the air duct. At the top of the cylinder body, a hole is made for the chimney. Make a gas divider with a pipe through which oxygen will be supplied to the second chamber. Weld the chimney.
As you can see, you can easily make a stove from a gas cylinder with your own hands
But you should pay special attention to cutting the cylinder. Before you start working with an angle grinder, you need to make sure that there are no gas residues in the cylinder; to do this, fill the cylinder completely with water
How to assemble a structure with a water jacket
The manufacture of the chimney is carried out in the following sequence of operations:
- Carefully cut the balloon at the top. The resulting cap is subsequently used to make a lid for the boiler.
- The bottom of the cylinder is equipped with homemade legs. Each of them must be exactly level before fixing.
The piston is constructed in three stages:
- A steel circle is cut out: in cross section it should be approximately 35-45 mm smaller than the internal diameter of the cylinder. Thanks to the side gaps, pyrolysis gases will leak into the secondary chamber without interference. A hole is made in the center of the circle for the air duct: this pipe should be inserted into it quite tightly.
- Next, the metal circle and pipe are welded to each other.
- A piece of channel is welded on top of the piston base.
To make a furnace lid, you can use the upper cut part of the cylinder. On its surface, markings are applied for the air duct pipe with a fixed supply piston. In this case, it is necessary to provide a certain margin for the free movement of the pipe. Cutting is done along the drawn lines. On the side, the homemade lid is decorated with handles, for which fittings bent in a vice are used. Now you can begin installing the chimney at the top of the improvised pyrolysis oven. Using a grinder, a cutout is made for the pipe blank: welding is also used to fasten the parts.
At this point, the main part of the work on the construction of Bubafoni is considered completed: it can be put into operation. It is advisable to install the stove on a pre-arranged foundation.
Homemade pyrolysis oven from a gas cylinder
Design and operating principle of a gas cylinder stove.
You can make a pyrolysis oven with your own hands according to the drawing from an ordinary gas cylinder; it is also called the Bubafonya oven. Pyrolysis is the separation of organics from inorganics in the absence or deficiency of oxygen. During pyrolysis combustion, temperatures up to 500 degrees are reached. This is a necessary condition for the released pyrolysis gases from wood to burn out.
A pyrolysis furnace from a gas cylinder can operate on any solid fuel, and the fuel moisture level can reach 70%. The cylinders are made of ferrous metal, 3–4 mm thick. The upper part is made in the form of a dome and welded to a cylindrical base. Let's consider what manipulations need to be carried out to make a pyrolysis oven from a gas cylinder:
- cut off the upper convex part;
- in its central part we make a hole for the air duct;
- in the upper part of the conical body we make a hole for the smoke exhaust;
- we manufacture a gas divider with a pipe for supplying oxygen;
- We weld the chimney.
In principle, a homemade pyrolysis oven from a cylinder has a fairly simple design. In your work you may encounter various nuances.
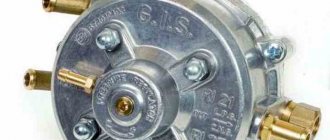
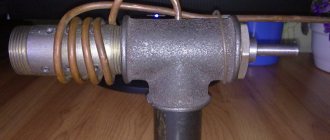
Gas diffuser at the end of the air supply pipe.
The hole in the lid should almost coincide with the diameter of the air supply pipe, and the latter should move easily. The diameter of the gas divider must also be matched to the size of the tank. At the bottom of the gas divider, ribs are welded to direct gas flows. It is better to make them curved so that the flow swirls. Remember, the fewer extra gaps, the higher the efficiency of the unit.
To protect yourself, before starting cutting, you need to fill the cylinder to the top with water, in case gas vapor remains inside. Even if there was liquid in the cylinder before, and there are definitely no gas vapors, a characteristic smell of propane may appear during cutting. Don't worry, it's the additives that are added to the gas that smell. They tend to settle on the inner walls. Additives are a necessary warning measure, since the gas itself has no odor.
The operating principle of a homemade pyrolysis oven from a cylinder:
- Fuel is placed in a cylindrical tank and ignited;
- a pipe with a gas divider at the end is installed on top (the latter should press the fuel);
- the lid is put on top;
- combustion occurs from top to bottom; as the fuel burns out, the pipe with the gas divider lowers.
A feature of this fuel combustion method is the minimum amount of smoke and soot. There is really very little ash. After the first burning, a sharp smell will appear - this is the burning paint that covers the cylinder. There is no point in removing it mechanically, as it is ineffective. It’s easier to burn out everything unnecessary by testing kindling.
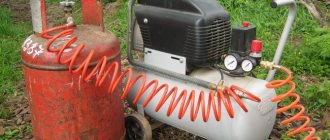
To make long-burning pyrolysis stoves with your own hands, you will need the following equipment:
- Bulgarian;
- hammer;
- pliers or pliers;
- welding machine.
To carefully cut a round hole with a grinder in a blank for a pyrolysis oven from a gas cylinder with your own hands, you need to take a small, already erased circle and make a 1 mm indentation along the cutting line. Then, using a large, new circle, cut a square in the center of the marked hole and make slits from it to the edges with an indentation of 1–2 cm, like the petals of a flower. Then the petals are bent inward with a hammer. The bend line will run exactly along the intended perimeter with a depth of 1 mm. The petals can then be broken off with pliers.
As a result, we get a neat hole. If you immediately use a large circle, then the cuts will inevitably go beyond the boundaries of the markings. After this they will need to be brewed. As you know, no welding seam can compare in strength to solid metal.
Fuel requirements
Wood fuel for solid fuel boilers is grouped by type: homogeneous and mixed. The admixture of other types of wood in the first category should not exceed 5% of the total cubic capacity of the batch. Firewood is further divided by humidity: dry up to 25%, semi-dry from 25 to 34% and wet over 35%.
Firewood that has been stored in a warehouse for more than 12 months after harvesting is considered dry. Semi-dry timber is spring-harvested timber with a shelf life of at least 6 months.
For solid fuel boilers to operate, it is necessary that the firewood be of a dry category, this is due to the fact that in pyrolysis and long-burning devices operating at low combustion temperatures, wet firewood intensively releases moisture, which accumulates in the lower part of the firebox, combining with sulfur and nitrogen oxides .
Thus, it turns into acid, which corrodes the walls of the combustion chamber and welding seams. Through cracks in the latter, carbon monoxide and aggressive acid can enter the room.
Types of long-burning stoves
Options for furnaces of this type are classified depending on the material, method of operation and method of heat transfer. The designs differ in the type of traction and the relative position of the internal chambers. Thus, stoves are made of metal or brick.
Table: classification of pyrolysis furnaces
| material | internal structure | application |
| metal | potbelly stove | heating of residential and non-residential premises |
| for baths and saunas | ||
| cooking | ||
| for barbecue (outdoor) | ||
| Buleryan stove | heating of residential and non-residential premises | |
| Bubafonya stove | heating of non-residential premises | |
| waste oil oven | heating of non-residential premises | |
| brick | Kuznetsov furnace | heating of living space |
| for a bath | ||
| cooking |
Photo gallery: variety of heating units
Based on the method of heat transfer, the units are divided into models:
- with a water heating circuit;
- variability in the placement of heat exchangers (combustion and smoldering chambers are located in different orders). If the firebox is located at the top and the afterburning chamber is at the bottom, then forced draft is required using smoke exhausters and fans. If, on the contrary, the firebox is located below, then natural draft is triggered.
How to choose a stove option
First decide:
- for what purposes is the stove needed;
- where will she stand;
- what fuel to run on?
When choosing the type of structure to DIY, consider the area and type of space. Depending on the parameters of the heated room, the size and power of the furnace are selected. It is worth considering that brick models are placed in a permanent place for future use, while metal ones are almost all mobile.
A homemade stove must meet the necessary characteristics and be safe to use
When making any furnace model, it is worth calculating the balance between the ratio of oxygen and gas. Therefore, the selection and assembly of any furnace option requires careful calculation of the parameters, power and dimensions of the product.
Structural elements
High-quality steel sheets are used to create rectangular metal structures. In this case, the stove is made with double walls. The space between them is filled with sand or water (water circuit). Metal barrels with thick walls can serve as the basis for making a small oven.
The metal structure can be covered with bricks from the outside (lining) or from the inside of the furnace (lining)
The pyrolysis furnace has two combustion chambers. In one compartment, solid fuel is processed, and in the other, pyrolysis products are mixed with air. When the firebox is located at the top for solid fuel, a grate is placed between the compartments. In metal furnaces, the partitions are hollow plates inside.
A visual representation of air flows during operation of a pyrolysis stove with a firebox in the lower compartment
Charge fans are necessary elements in structures where the gas chamber is located below. With the help of forced draft, gaseous substances move downwards, where the afterburning process begins. Such products also contain smoke exhausters on the exhaust channels.
Forced draft directs the gases to the second part of the furnace, where they are burned (releasing a large amount of heat)
All structural elements are interconnected, ensuring efficient operation of the pyrolysis furnace.
Making from a barrel
Among other options, you can use a barrel to make a homemade stove. For example, a sauna stove made from a 200-liter barrel would look good; let’s look at the stages of its manufacture:
- The first step is to determine the required height of the barrel using a grinder;
- Next, the inner walls of the barrel are lined with refractory bricks;
- You can limit the combustion chamber using metal sheets or mesh. Remember that the minimum height of the combustion chamber is 60 cm;
- Stones are laid out on a sheet of metal or mesh;
- Next, you should weld a lid to the barrel and install special doors for ease of use.
Features of operation and rules of safety regulations
It is very easy to operate such a sauna stove:
- collected thick and long firewood;
- they filled the entire volume of the firebox;
- They opened the damper and ash pan, made sure there was good draft and lit the wood.
Everything, as the wood burns, the stones heat up, the water heats up. You can call your friends, take brooms and a supply of herbal decoction or just kvass and, after throwing a few shakes on the stones, enjoy the fragrant and hot steam and conversation with loved ones.
When operating, it is important to follow the rules for safe use of the oven. There are few of them and they are very simple:
- Be sure to monitor the condition of the chimney. At the first sign of its malfunction or decrease in traction, all problems will need to be corrected immediately. It is recommended to clean the chimney at least once a month;
- after the wood starts burning, the ash pan door must be closed;
- The firebox door opens only to add firewood and control its combustion. The rest of the time, when the fuel is burning, the door must be securely locked;
- You should not try to heat the oven by touching the sides with your bare hands - this will lead to burns on your hands. The level of heating can be felt by the amount of steam from the stones when water is splashed on them from a ladle.
A little more about the chimney
It is worth noting here that thanks to the design of the stove, which consists of two sections, a chimney pipe that is too long will not “steal” heat - an increase in draft will only contribute to increased combustion and an increase in temperature. The main thing is to secure it so that the wind does not uproot it. But it’s worth thinking about the deflector (protective cap). If there is snow or a blizzard at night, the pipe may become completely clogged. In this case, lighting a potbelly stove will be quite problematic. In the photo below you can see that I raised the chimney quite high. However, when this photo was taken, the deflector had not yet been installed.
This is the chimney pipe I got
Horizontally arranged oven
To ensure the stability of the horizontal stove, after all work on the manufacture of the stove is completed, it is fixed on a securely standing stand, welded from corners, using spot welding.
In this case, all activities begin with markings, after which a square hole is cut for the door and a round hole for the chimney. Cutting a round hole can be labor-intensive if you don't have a cutter, since the grinder is not an assistant here. First, you need to cut holes in a circle, then you use a chisel and a hammer, and in the end everything is brought to the desired result with a file.
The role of the grate will be played by a hole cut in the bottom of the furnace, and the box welded under it will become a container for ash. This same box plays the role of a blower, and therefore a door is welded onto it in order to regulate the inflow and outflow of air in order to achieve the necessary draft.
You can make the door yourself using part of the cylinder, or you can purchase a ready-made one with a frame and a ready-made latch, and this option is, of course, much simpler.
After securing the door to the hinges of the oven, the device is secured to the stand, securely fixed, and you can weld legs of the required length to it.
Next, a pipe is fixed to which a chimney pipe is connected, which in turn will exit through holes in the wall or roof of the room.
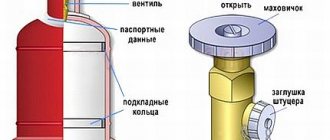
First of all, it is necessary to unscrew the cylinder valve to remove the gas under residual pressure in the cylinder. The valve is completely removed from the housing. After the gas has been removed, the cylinder is inverted to remove condensate.
By turning the container over, we remove moisture naturally. It is better to collect condensate in a disposable unnecessary container. Condensation often has a specific unpleasant odor. Therefore, it is better to immediately throw away the container with the collected condensate.
Next, the cylinder is turned over again and placed in a vertical position. To completely remove gas residues, you need to fill it with water. Water filled to the edges of the cylinder will completely displace the remaining gas from it. After this, the cylinder is emptied of water and it is considered suitable for cutting.
Chimney cross-section size
The minimum permissible cross-section of the chimney is determined by the amount of energy released per hour of operation of the stove, which is determined by the ratio S = 1.75E (kW/hour). Here E = mq, where m is the mass of fuel in the load, q is the specific energy of the fuel burning over an hour, table value. The necessary information is given in the table.
Table: data for calculating the cross-section of the chimney
Type of fuel Specific gravity (kg/dm.kv) Energy intensity (kW/hour)
Aspen logs 0.144 2.83
Coniferous shavings and sawdust 0.138 3.21
Alder briquettes 0.286 3.49
Coal 0.402 4.85
Peat 0.341 2.37
Having made the necessary calculations, we obtain the minimum required chimney diameter for the Bubafonya stove of 150 millimeters.
Air intake pipe size
Having determined the size of the chimney, it is easy to calculate the cross-section of the air intake from the ratio d = 4S/P (pi).
Tools for making a potbelly stove
To work with metal you will need special tools, some of them are available in almost every private home, while others will have to be purchased or rented.
- Angle grinder - “grinder” and consumables in the form of cutting discs and grinding wheels.
- A welding machine with a power of 200 A, and also consumables - electrodes Ø 3 and 4 mm. In addition, you will definitely need a special mask and protective suit.
- Metal brush.
- Slag hammer.
- Measuring tools - folding meter, long metal ruler, tape measure, chalk or marker.
- Pliers, hammer, chisel.
- Drill with metal drills of various diameters.
The choice of stove model most often depends on where it is planned to be located, since residential premises require a more aesthetic appearance of the heating device and increased safety. Therefore, for installation in a house, the best option is one made from metal sheets or a piece of medium-diameter pipe.
Any of the existing models is suitable for a garage, but it is better to choose one that will help not only bring warmth into the room, but also warm the water.
To finally make your choice, it is worth considering different options and familiarizing yourself with the process of their manufacture.
Protection of the wall and people in the building
It is clear that some kind of fencing needs to be done, but there are certain nuances here. In my case, a metal profile was used. That part of it, which is located near the wall, was made to the floor, to protect the concrete from high temperatures (I felt them when I first checked the stove) and to additionally reflect heat from the cylinders into the room. As for the outer protective wall, it must be installed at a distance of 20-30 cm from the floor. This will ensure good air circulation. The resulting convection will allow the room to be heated much faster and more evenly.
As for my particular case, after the first ignition of the stove, 20 minutes later, the temperature in the garage became such that it was possible to walk around in a shirt (with the gate closed, of course). This is despite the fact that outside at that time it did not rise above -30ºС.
Protective screens are installed, the potbelly stove is operating normally