To restore order and free up space occupied by accumulated things, a metal rack is assembled. You can buy a ready-made design or make it yourself. If the weight of the objects is small, an aluminum corner is used as the material. To store preparations for the winter in city apartments, racks made of steel corners are installed on the balcony. To accommodate a large number of heavy objects, make a rack from pipes in a garage, shed, or cellar.
Features of assembling metal shelving
Metal racks can be welded or assembled with bolts.
There are usually no problems with welding. If a corner is used, the joints can be overlapped - a difference of 3-5 mm when laying shelves is unnoticeable. If you wish, you can cut out the excess in one of the shelves and butt weld, but trimming takes a lot of time, and you still won’t see much of a difference. How to cut corners for a smooth connection
When assembling a frame for a bolted shelving, the order is as follows: first, assemble the squares of the sidewalls and shelves separately, then screw them together. It is advisable to have at least two bolts for each connection - for greater rigidity (less play).
If you assemble garage racks from a profile pipe with your own hands, the procedure is different. First, the sidewalls are assembled, and short crossbars are attached to them. You get two rectangles with crossbars. Then they are connected by crossbars.
Methods for bolting profile pipes
See the photo for how to make connections. In one case, welding is still needed - weld the heel pad, in another you can do without it - cut out the "ears", bend them and cling to them.
There is another way - special crab systems. These are metal plates with recesses molded to fit the profile. Pipes are placed into the grooves, then the two plates are bolted together.
Crab systems for profile pipes
Such a connection is unlikely to withstand very heavy loads, but there is an undeniable advantage - you don’t have to drill a bunch of holes in the metal. In a profiled pipe this is certainly easier than in a thick-walled corner, but it still takes a lot of time and effort.
By the way, the bolts used are M8 or M6, so large holes are required for them. It is easier to first drill with a thin drill, then expand to the desired size with a thick one. But even with this order, you will need a significant number of drills. To make them overheat less and break less often, place a jar of water nearby and periodically lower the drill into it.
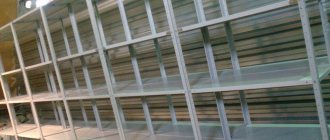
Welded
Used to create large metal shelving. It has impeccable reliability and the ability to withstand even the most severe loads. Most often, shelves of this type are used to store large items.
There is one significant drawback - during redevelopment, it is often not possible to fit such a rack into the new space due to the non-demountable design. So if you love change, there is reason to think about choosing a different type.
Bolted
The main advantage of such a shelf is mobility. All parts are bolted together and can be easily dismantled if necessary. However, even with perfect assembly, there may be some play at the connection points. It is either present immediately or appears over time under the influence of the mass stored on the shelves.
The disadvantages of this design can be overcome by fixing it to the walls.
Combined
Typically found in spacious garages and technical rooms for car repairs. Most often it is formed through the so-called build-up - when there are more and more tools and storage items, but there is no other place for a new shelf and is not expected.
Sources
- https://www.yaprofi.net/polki-svoimi-rukami/
- https://stroychik.ru/garazh/polki-i-stellazhi-dlya-garazha
- https://www.asusfone.ru/svoimi-rukami/samodelnyj-stellazh-dlja-hranenija-v-sadovom-sarae-iz-staroj-mebeli
- https://postroika.biz/24568-stellazh-iz-dereva-svoimi-rukami.html
- https://garazhmechty.ru/polki-v-garazhe-svoimi-rukami.html
- https://1dacha-sad.com/delaem-stellazh-dlya-garazha-svoimi-rukami
Which rack is better: welded or bolted
Garage shelving is made of wood and metal. Wooden ones are mostly non-removable - on nails and screws. They are usually installed permanently, attached to the wall. Metal racks can be welded. Then they are inseparable. There are racks with bolted connections. These structures are mobile and can be disassembled if necessary. Their disadvantage is insufficient rigidity, since there is always some play in such a connection. To make the structure more stable, it is attached to the walls. To do this, metal plates with a hole can be welded (bolted) to the outer posts. Drive a crutch into this hole (after drilling a hole of a slightly smaller diameter in the wall).
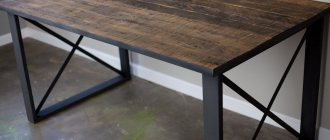
One of the options is a frame made of profile pipe and plywood shelves
Both welded and bolted garage shelving work well, but welded structures are more common. The collapsible option is chosen in two cases. The first is that it is possible to move to another garage and all the equipment will need to be transported, but the structure weighs hundreds of kilograms, so moving it entirely is problematic. The second is that there is no possibility or desire to use welding (if you make the garage racks yourself). The rest usually prefer welded ones - they are more stable and, if you have experience in welding, they can be assembled faster.
There are also metal racks made from perforated corners on sale. They are also mobile and can be disassembled, but they are connected using hooks (on the crossbars) and grooves (on the racks). Such storage systems are convenient - you can rearrange the shelves to the desired height. Their disadvantage is that they are expensive.
Possible options and standard sizes of garage shelving
Step-by-step instructions on how to design and build a greenhouse from a profile pipe: ready-made drawings and photos of the best
GSH ideas are formed by racks, crossbars and shelves. Sometimes, to enhance their stability, the back side is additionally equipped with transverse ties - two steel rods attached diagonally to the outer posts. This measure is aimed at compensating for lateral loads by increasing overall stability.
Drawings and dimensions of the standard design are presented in the figure. When determining its dimensions (height and depth of shelves), the parameters of the objects that are planned to be placed on them are taken into account. Calculate the span length, i.e. The distances between single-section racks should be as precise as possible. This parameter is influenced by the rigidity of the material used for the manufacture of the GSF. Sagging of the shelves is unacceptable, no matter how strong the load on them.
If heavy objects will be placed on the racks, the approximate span length should be 1.5 m, otherwise it can be increased by another 0.5 m. If a longer rack is required, it is recommended to resort to installing intermediate racks with a distance between them of no more than 2 m.
The photo shows the recommended dimensions for a structure assembled from a galvanized profile with a cross-section of 50x50 mm. This material is used for installing drywall. It is convenient to attach it to the wall using 6x60 mm dowel nails. In this case, part of the load on the shelves is transferred to the wall. In this case, it is necessary to take into account the small thickness of the profile metal and it is advisable to strengthen the front pillars. To do this, you can insert wooden blocks with a cross section of 50x50 mm into them to the middle of the height of the rack and fasten them to the galvanized sheet using self-tapping screws.
When planning the shelving, special attention should be paid to the height of the shelves. The distance from the lowest of them, where the heaviest things are often stored, to the floor level should be 50-70 cm
The height of the remaining shelves can vary depending on personal preference. Advice: the height of the GSH shelves should be such that you can freely place a one and a half liter bottle on it, i.e. about 35-37 cm.
What does the list of preparatory work consist of?
Stopping short, calculate the amount of consumables, including mounting parts and fasteners, consider the location and shape of the future rack, decide on the level of operational loads so that the future rack has at least one and a half safety factor.
A mobile rack is more complex and material-intensive. Stationary structures are attached to the walls, which has a positive effect on increasing their load capacity and reducing material consumption.
When choosing the latter option, you should take into account the complexity of possible dismantling and installation in another location.
Drawings and options
DIY tool box: drawings and diagrams, step-by-step instructions, with photos
Many shelving drawings are available on the Internet. But in order to choose the right one, you need to decide on the future use of the structure. For storing tools and spare parts in the garage, a rack measuring 500 x 2000 mm with four shelves of 450 mm each is suitable. But for a cellar with conservation, you can make more shelves - every 300 mm. Warehouse structures require an individual approach, taking into account the size of the stored boxes.
The most common shelving options are:
- design 500 x 1800 mm with four shelves;
- rack 600 x 2000 mm with three shelves;
- combined models measuring 500 x 1800 mm with a high shelf at the bottom of 700 mm and three shelves for small parts of 350 mm each.
If the items for which the rack is designed will constantly change in size, then there are universal designs where the distance between the shelves is adjusted. To do this, several holes are drilled in the main racks at the level of future shelves. Only the main frame (cube) is welded, and all internal elements are bolted. This way you can add or remove the number of shelves, as well as change the distance between them. This is especially convenient to do if the main racks are from a corner. Holes are drilled in them and the shelves, and for fixation two bolts are used on each side.
If you need a long rack, it is recommended not to make it on the entire wall, but to leave small gaps of 100 mm from the side walls to make it more convenient to install the metal structure in place. There are no strict size restrictions on the depth of the shelves, but it is worth considering the convenience of retrieving items. For example, if the depth is 1000 mm, then not everyone has enough arm length to reach the part under the wall. But if the structure stands in the middle of the workshop, and there is access from both sides, then you can make shelves 1500 mm deep.
The height of the racks is made individually. It all depends on the materials available and future use. But in any case, it is not necessary to make the height up to the ceiling, because the upper part can also serve as a shelf, on which only a small threshold (150 mm) is provided so that the objects located there have somewhere to rest, if they are located vertically.
There are combined models of shelving, where there is a high shelf for large items (engine, wheel) and small parts. The reinforcement under the shelves depends on the future weight of the load. If these are heavy car parts, then it is worth welding an additional jumper under the middle of the shelf. Based on this, the number of main racks is determined. Excessively large spans will lead to sagging and deformation. But if the design is made for small parts, then the outer racks are quite enough.
Types of shelves
According to the method of arrangement, shelves can be built-in or wall-mounted. Niches give the room an organic feel, merging with it. They can be located against the wall or perpendicular to it, dividing the room into zones. mobile, can be located anywhere and can be attached in different ways:
- made of plasterboard are attached to 2 adjacent sides and perfectly replace ready-made shelving.
- With one-sided fastening, they can be located anywhere and are attached as needed in the household.
Plasterboard shelves built into counters and tables are also gaining popularity: we see photos of these in fashion magazines and in modern fashionable interiors. Few people know that making the same ones at home will not be difficult.
Shelves made of plasterboard can be suspended from the ceiling when the structure is attached to hanging profiles and there is no installation to the wall.
Finished structures look very interesting when illuminated: a “floating” effect appears and the space visually expands.
How can you make a shelving unit in your garage with your own hands? Photos, drawings of homemade shelves
We build a shed from a profile pipe with our own hands: instructions, recommendations + video materials
A garage is more than just a place to park a car. Very often, it is in the garage that we store certain things that we do not need at the moment, but will definitely need a little later.
To avoid clutter inside the garage, it is very important to use the storage space correctly. Therefore, no good garage is complete without a reliable storage system.
A shelving unit is one of the most important attributes of a garage, and if for some reason your garage does not yet have one, then let’s find out how to make a shelving unit for your garage with your own hands from a corner, from a profile, from metal and wood.
First, let's figure out what types of racks there are and what materials they can be made from.
By type of design, racks are divided into:
- Not mobile (stationary) shelves. Such shelves are firmly attached to the garage wall and can stand for a long time. This is the most stable type of shelving that can support the heaviest items and tools.
- Modular shelving systems. Such shelving systems are sold in many construction and furniture stores. They can be quickly and easily assembled and disassembled. You can also add new segments to them if you wish.
- Mobile (movable) racks on wheels. They are small in size and have limited weight. They are convenient because they can be moved to another place at any time without dismantling the rack.
- Hanging shelves. Mounted on walls or under the ceiling. Not intended for storing heavy items.
- Small rotating racks. They are very convenient for storing small tools, parts, cables and other necessary items. But you can rarely find them on sale.
Garage storage systems can be made from different materials:
- metal. The strongest and most durable type of shelving. They are not afraid of temperature changes, do not burn and can withstand any weight;
- tree. Such racks are cheaper than metal ones and less durable due to frequent changes in temperature and humidity levels inside the garage;
- plastic. Structures with shelves made of this material are the cheapest and lightest in weight. Designed for storing light items;
- combination of several materials. For example, a wooden frame and plastic shelves.
The required type of structure is chosen based on the weight of things and the amount of free space for storing which shelves and racks are made in the garage.
What do-it-yourself garage shelving looks like - photo:
Advantages of metal profile structures
Racks made of metal profiles have a number of advantages that can be used both at home and in the office, shops, and warehouses.
- Simplicity and accessibility of installation/dismantling. To assemble a metal collapsible rack, the participation of specialists is not required. The work can be performed by any person who has minimal skills in handling carpentry tools.
- Metal profile structures can withstand significant weight. The shelf is assembled without an additional strip in the middle (stiffening ribs) with a maximum load of 60 kg. One stiffening rib will be needed at 90 kg, and a shelf with two additional parts at the base will support a weight of 120 kg.
- Low cost. Moreover, this applies both to the metal profile itself and to work with it.
- Long service life. Metal, especially after special treatment, is one of the most durable materials. The main danger is contact with water. But the use of galvanization or special polymer dyes can solve this problem.
- Aesthetic appearance. The shape and size of the structure are selected taking into account the needs and characteristics of a particular room.
Shelves can be made:
- free-standing;
- mobile;
- wall
The latter, in turn, can be rows of shelves on four vertical supports or racks, which, using hanging brackets, are attached only to two vertical supports attached to the wall.
Design advantages of household metal shelving
In everyday life, for storing relatively light things and household items, lightweight racks that provide easy access are used. They are made of metal profile. Most often, profiles intended for:
- arrangement of load-bearing frames of plasterboard coverings;
- electrical installation work.
Why is it recommended to use profiles for making shelving? There are several reasons:
- First of all, these are profile sections that are quite long in the delivered state, which have good structural rigidity and high mechanical strength. We are talking about workpieces with a wall material thickness: for a plasterboard metal profile - ≥ 0.45 mm. The lightweight profile (wall material thickness is about 0.35 mm) has significantly limited design and technological capabilities. Therefore, they are used for the manufacture of shelving in a limited number of cases and are not discussed in this article;
- for electrical installation profiles – 2…4 mm;
- the presence of a special anti-corrosion coating. There are two types of profile coating: zinc;
No welding is used during assembly.
Advantages of no welding:
- no special welding equipment or ability to use it is required;
- the anti-corrosion coating of the profiles is not destroyed;
- easily removable shelves and screw fastening allow the structure to be easily disassembled, moved to another place and reassembled;
There is always the possibility of modifying and decorating shelving structures: with panel wood, glass and even decorative tiles. You can create a rack that is original in design and at the same time beautiful, which will serve as a zoning partition in the room. This improvised wall can be equipped with lamps, through niches and other components that form the interior of the room;
- The stability and rigidity of the rack structure is ensured by simple-design spacers and gussets. This allows, in a number of cases, to install metal shelving without attaching it to the wall.
Diagram of a rack made of a metal profile
Let's consider possible options for designs and sizes of profiles using the example of electrical installation components.
Features of forging from a profile pipe
Forged products of the following shapes can be made from a profile pipe:
- Arcs with a small bending angle. Due to this, the original strength is preserved, critical mechanical stresses do not form inside the metal, so it can be used in loaded structures.
- Spirals. The profile bends at large angles, so the likelihood of metal rupture increases significantly and internal deformations are formed. Used to create decorative elements or lightly loaded structures.
- Volumetric spirals. They are similar to ordinary spirals, but their use is possible only for decorative purposes.
- Flattening, deformation of the profile for further installation or increasing the contact area with the part being connected, as well as for decorative purposes. A special feature is the complete or partial loss of bending strength in one plane.
Determining the length of the finished part from a profile pipe that needs to be bent is quite simple; for this you need its drawing and a curvimeter. You can also perform calculations using mathematical formulas for the length of a circular arc:
, where α is the opening angle of the arc, r is the radius of the circle.
To carry out such work, special machines or tools may be required: snail, twister, pipe bender, anvil, angle grinder.
Features of pipe bending:
- to simplify bending in a given place, it is necessary to make small profile slots;
- if you first pour sand into the pipe and close it with plugs, you can prevent rupture of one of the pipe walls;
- It is better to perform bending on a flat, durable surface (steel table, workbench).
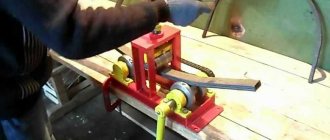
Cold forging
Review of ready-made
The modern market offers countless convenient and multifunctional shelving, both wooden and made of metal. Universal designs will fulfill their purpose completely and fit into any garage space. In Ikea stores you can find excellent options made of steel and high-quality wood, complemented by cabinets, drawers, fasteners and hooks for more convenient use.
The tire rack is convenient and practical to use in the garage space. Excellent examples can be found in stores, but some craftsmen assemble a similar design themselves, purchasing metal consumables separately: a corner or a profile. Shelves and panels for tools that you can buy or make yourself will be useful.
Areas of use
Any furnace design is a whole organism in which all parameters must be coordinated - from the size of the firebox and ash window to the height of the pipe. Cracks that appear in different sections disrupt the sealing of the walls of the chimney, combustion chamber and other areas involved in the removal of combustion products. As a result of such disturbances, cravings become worse, and smoke, which contains many substances hazardous to humans, can penetrate into the home.
Such processes often lead to tragic consequences, because carbon monoxide can cause fatal harm to the body. In addition, damaged stoves are a fire hazard. The most harmless thing that can happen if the seal is broken is that the efficiency of the unit will significantly decrease.
In this video you will learn the pros and cons of sealant:
The traditional method of repairing damage is to putty with clay mortar, but this procedure has a temporary effect and does not provide a lasting seal. In addition, the repaired part must be constantly monitored, because at any moment new cracks may appear at the patch sites. Therefore, a more reliable method of getting rid of cracks is to use special sealants for high temperatures.
Read also: how to work with refractory fireclay clay.
No less important is the sealing of chimney pipe connections made of ceramic or metal, as well as those made of multilayer sandwich panels. Not only the effective operation of structures, but also the safety of the entire room depends on the quality of the docking. In addition, sealants are needed to organize the passage of the chimney pipe through the roof and rafters. Here the compounds are used as an additional element, which fills the gaps between the apron of the frame.
Without such mixtures, it is impossible to completely close all the cracks in the passage of the chimney pipe, so previously bitumen mastic was used for these purposes, or they came up with their own methods of sealing joints.
Furnace restoration:
https://youtube.com/watch?v=RnEDvZYoifg
If depressurization occurs in a metal chimney from a gas-powered boiler, the flame in the gas burner will regularly go out. This problem is quite common when operating gas units. The main reason for such situations is a violation of the sealing at the joints of the chimney sections. In this case, the optimal repair agent is fire-resistant silicone.
Preparation for putty
Before you putty the drywall under the wallpaper, the surface needs to be prepared.
- At the initial phase, debris and dust should be removed from the sheets.
- Check that the screws are screwed in correctly. The protruding fasteners must be tightened using a screwdriver.
- To identify defects in the wall, you need to run a wide spatula over it. It should glide smoothly. Any deep dents or scratches found on the wall are repaired before the main layer of putty is applied.
- Before applying putty, the wall must be primed. The primer, preferably water-based, is applied with a roller in one layer and allowed to dry. Acrylic primer for drywall under wallpaper will not cause warping of the drywall sheet, and after drying it will provide reliable adhesion to the applied putty.
What to make a rack from
DIY wooden book rack
First, it is advisable to select a drawing of the future design on the global network, special publications, or develop your own original version. Classic shelving with and without a base looks like this.
Required tools and materials:
- boards 2–4 cm thick;
- slats 4x4 and more;
- holders, wooden blocks, metal corners on which the shelves will rest;
- plywood for walls;
- self-tapping screws;
- wood glue;
- varnish, brush;
- jigsaw, grinder, electric drill;
- screwdriver, hammer;
- pencil and tape measure for marking.
Metal
If you decide to make metal shelving for the garage, the choice of materials is wider - there are two options for rolled metal, plus standard solutions for warehouses (perforated corners). You can also use metal parts intended for other purposes - for example, steel cable racks or cable channels that are used in communications are suitable.
Cable channels and shelves - convenient and not very expensive
So, what is the frame of a metal garage shelving made from:
- From a metal corner with a metal thickness of 3-4 mm. The width of the corner shelf is 25-45 cm, depending on the planned loads. Durable, but metal-intensive material, weighs a lot, and is expensive.
- Profile pipe (rectangular in cross-section). With less metal consumption (less wall thickness), compared to a metal corner, it has better elasticity characteristics (more difficult to bend), and is more resistant to torsion. Approximate dimensions for racks are 50*50 mm or 40*40 mm, for crossbars 50*25 mm or 40*25 mm, respectively.
- The racks are made from corrugated pipe, and the crossbars are made from angle iron. The thickness of the metal is 2-3 mm, the width of the shelf is 25 mm or more. Unfold the corner so that the laid flooring looks like it is in a “nest”.
Take a closer look at how the corners are positioned
The flooring on the shelves is made from the same materials as for a wooden rack (board, plywood, OSB, chipboard), only sometimes non-standard options are added, which are used with a wooden frame because of their high weight - sheet metal.
The board remains optimal for most regions - a reliable, not very expensive material. You need to take wood, without knots (with a minimum of knots) with a thickness of 21 mm. Treat with antiseptics, then paint.
The advantage of metal shelves is high reliability with a small thickness, the disadvantages are price, weight and “loudness”. They also need to be painted, but first clean them of rust, then go over them with a rust converter and primer, then paint them, preferably in two layers. Also, by the way, the metal frame must be processed. Then the rack in the garage will not rust.
Watch this video on YouTube
What tools and auxiliary materials are needed
In order to make a rack, you must have:
- screwdriver and screws;
- electric planer or coarse sandpaper;
- paint, varnish and brushes;
- rubber gaskets under the legs of the rack.
Watch this video on YouTube
Covering the frame with plasterboard
After completely assembling the cabinet frame, you can begin covering it with plasterboard. Sheathing of the frame should be done from the outside and inside. However, if the cabinet is small, then it is quite possible to get by with cladding from the outside. It should be remembered that the larger the cabinet, the greater the load will be placed on its internal shelves and walls. Therefore, it can be covered with 2 layers of gypsum board.
Fastening plasterboard sheets to profiles is carried out similarly to the installation of gypsum boards when cladding walls and ceilings:
Scheme of fastening gypsum boards with screws.
- The gypsum boards should be secured to the profiles with 25 mm metal screws.
- The fastening step should be no more than 20 cm.
- First, the plasterboard element is fixed around the perimeter of the frame, and then to its remaining parts.
- The screws must be tightened correctly: the depth of their indentation should be no more than 1 mm, otherwise the cardboard may be damaged. To do this, you can install a special limiter on the screwdriver. If the screw is still screwed in deeply, then it must be unscrewed and screwed in again at a distance of 5 mm from this point. The old hole will be filled with putty later. In Fig. Figure 1 shows a diagram of fastening gypsum boards with screws.
- The sheets should be joined together with a certain distance - 2-3 mm. This will make it easier to process the seam when leveling it.
Manufacturing materials
As a rule, racks and shelves are made of wood, metal or plastic. For a wooden structure, not only wood is used, but also PVC and chipboard, which are reinforced with sheet metal for strength.
Do not forget that wood is a flammable material and it is very light, so it will not withstand heavy loads. Wood is also very sensitive to humidity, despite the fact that temperature does not affect its structure. With high humidity, it is subject to rotting, deformation, and mold. So if you decide to equip your garage with wooden shelving, immediately think about what you will put on them and take into account the humidity of the room. Do not place racks and shelves where it is damp. In addition, if you make a wooden rack with your own hands, do not forget to impregnate it with antiseptics, which will give the material strength and durability, protect against insects, and prevent the appearance of mold, fungi and other microorganisms.
Metal products are made from perforated corners, profile pipes, combining them with wooden materials to make the structure lighter. Most often there are racks made of profiles, which are distinguished by their lightness and strength.
Metal products are more resistant to the influence of chemicals, withstand heavy loads, and humidity and temperature do not affect its performance, do not rot, and do not ignite. If the structure was purchased in specialized stores, then assembling it will not be difficult.
Plastic is not resistant to severe frost and heat, but tolerates moisture well. Such structures are flexible and lightweight, but cannot withstand heavy loads. They are inexpensive and intended only for light items.
Peculiarities
Garage shelving is an open or closed storage system consisting of vertical posts, crossbars and shelves of varying heights. High-quality steel and wood are used for their manufacture. Wooden products are more fragile and bear less load than metal ones, which can withstand fairly large objects. Structures can be dismountable, if they are assembled with bolts, and non-dismountable, if they are welded and installed permanently on the wall using nails or self-tapping screws.
Garage shelving remains, in practice, the best option for storing tools, spare parts and other equipment. Among the main advantages are spaciousness, compactness and accessibility. Depending on the type and material of manufacture, large objects, small parts, unnecessary utensils, cans, and tires can be placed on them. They will fit neatly along the wall, and the shelves are under the ceiling and will conveniently accommodate everything that makes the garage space cluttered. Spare parts, tools, consumables and other small items put away on their shelves look more aesthetically pleasing and neat and will always be at hand.
You can make a rack yourself without incurring large expenses, or purchase it in specialized stores. The modern market allows you to choose exactly the product that is right for you. Self-made racks will be in no way inferior to purchased ones, if you follow the diagrams and instructions, use quality materials and put in a little effort, and will last the same number of years, keeping your garage tidy and clean.
Models and designs
When choosing shelving for your garage, take into account the area of the room and the space allocated for it. So, some designs may be too bulky for the parameters of your garage or, on the contrary, not spacious enough. Before choosing a model, immediately think about what will be stored on them, because different types of storage systems perform their individual functions and withstand different loads
Before choosing a model, immediately think about what will be stored on them, because different types of storage systems perform their individual functions and withstand different loads.
The following shelving models are available:
- stationary;
- collapsible;
- mobile;
- island;
- rotating;
- modular;
- mounted
Stationary shelving is stable due to the fact that the pressure of the weight of the loaded shelves falls on the floor. The structure is made of vertical beams and horizontal bars on which the shelves are attached, and has a rigid connection, which ensures safety. Involves installation on a wall in a permanent place without the ability to move. They are easy to use, stable and durable.
Metal racks are the strongest and can withstand a lot of weight, while wooden racks are suitable for light items and are easy to make yourself. Installation of such a storage system does not require special tools or skills.
More common are prefabricated metal garage racks, which can also be purchased at any market and assembled yourself without much effort. Unlike stationary ones, they are made of perforated metal profiles, and the shelves can be fixed at any height depending on needs. Such racks are more convenient and spacious and allow you to store both a set of spare wheels and large cargo. They can be equipped with drawers that can additionally store necessary things.
Mobile racks are made mainly of metal structures. They are equipped with small wheels that allow you to freely move tools around the garage. It will be possible to easily transfer tool boxes to the workbench and continue working.
Although the movable design is mobile and makes it easier to work with necessary items, its load capacity is much less than that of other racks. This rack is sold disassembled and can be assembled in the garage like a construction set without much effort or skill. Withstand load – no more than 100 kg.
The metal island rack is a stable system of several shelves that can be changed in height. This design is designed for lighter objects and is clearly balanced to prevent possible collapse of shelves and blockage due to gravity. There are central racks that can be approached from all sides, and corner racks that are installed in the corner of the room. The load withstand is no more than 50 kg.
The rotating rack is designed for storing and storing small piece items, bolts, nails, hooks, keys and other small things that are easily lost and difficult to find in drawers. Every little detail will be visible. Such designs are convenient, do not take up much space (it would be rational to install them on a workbench) and will free up space for more massive parts. Withstand load – no more than 50 kg.
Modular shelving is a multifunctional product consisting of individual block elements that can be connected to each other, like a construction set, into a convenient storage system. You can make exactly what you need, and if there is a need for additional space, you can attach more sections and shelves to the existing rack. Withstand load – up to 150 kg.
Hanging shelves can’t exactly be called racks, but such a convenient and versatile design can be used in garages. They will fit everything unnecessary, things that are not particularly useful in work, small parts, light objects. Wall-mounted systems are practical and affordable; making such shelves will not be difficult from any available materials, and ceiling-mounted ones, if attached using special fasteners under the ceiling at a level that does not touch the roof of the car or your head, will completely hide everything from prying eyes extra items. The load should not be large, because hanging shelves can hold much less weight than stationary racks. Withstand load – no more than 100 kg.
Useful tips
Shelving is a great way to keep your garage organized.
The specialist gives some tips that will help if you decide to organize the contents of your garage:
- Don't be afraid of costs and wasting time! All this will pay off many times over. Over time, you yourself will understand that organized things will never interfere with your work and will always be at hand.
- You can make or buy a separate rack designed for wheels and tires, a separate one for storing canned jars, a separate stand for gardening supplies, a dial panel on which you can collect keys and screwdrivers. Give free rein to your fantasy and imagination!
- Before you buy or make a rack yourself, draw a drawing, measure the width and height of the place where you want to install the storage system, in short, make sure that the product will fit in the garage and there will be room for a car.
- Remember that wood does not tolerate humidity well, so you should not install wooden racks and shelves where the humidity exceeds 12%.
- Immediately think about what will be on the shelves. Remember that many structures cannot support large items.
- Homemade wooden structures need to be impregnated with an antiseptic to avoid rotting.
- Metal structures are painted or primed to prevent corrosion.
Alternative versions
To save metal, you can make a rack in another way:
- two racks with a height of 2000 mm are taken;
- jumpers under the shelves are welded to each of them at one end (these elements can be 400 mm each and at a distance of 300 mm from each other);
- a plate with a hole is attached to the free end of each jumper;
- the racks are placed against the wall so that the ends of the lintels rest against the brick;
- the lintels are anchored;
- Wooden boards are placed on top of them to form shelves.
This model significantly saves metal profiles, because only two racks are used and there are no long vertical beams. But more small welding will be required on the plates at the ends of the shelves, and there will be costs for anchors. But if the space expands, such a rack can be quickly disassembled: remove the boards and only two racks on the sides will remain, screwed to the wall.
Shelving greatly facilitates the distribution of tools and other materials. Every good owner should have order in his garage or workshop. You can weld your own rack using the tips in this article.
Requirements for racks
To ensure that the metal rack is safe to use, the installation is guided by the requirements of GOST 16140-77:
- distance between racks 0.9 - 2.9 m;
- rack width 0.45 - 1.35 m;
- the curvature of the posts and crossbars should not be more than 3 mm per 1 m or 0.1% of the length;
- permissible deviation of the racks from the vertical is 1 mm per 1 m without load, and under the influence of weight 4 mm, but not more than 6 mm in length;
- sharp corners and edges must be smoothed;
- if the load does not exceed 60 kg, the shelf does not need an additional bar (stiffening rib), for 90 kg one crossbar is installed in the middle, for 120 kg - two;
- Cracks, lack of penetration, sagging, slag inclusions larger than 1 mm in size, and undercuts deeper than 0.5 mm are not allowed on welded seams.
Accessories
Let's look at the main parts for the shelving that may also be needed.
Band
Strips are made in lengths: 1.0; 2.0; 2.5 m.
The main dimensions of the strip are given in Table No. 1.
Note. Hereinafter, the term “Main sizes” refers to the most popular standard sizes. During installation, if necessary, you can use strips and profiles with other parameters specified in the technical specifications TU 36-1434-82.
Table No. 1
| Band/Dimensions | H | l | l1 | l2 | L | b | S | Weight, kg |
| K 107 P2.0 UT1.5 | 40 | 36 | 50 | 14 | 2000 | 9 | 2, 0 | 1, 35 |
| K 107 P2, 5 U3 | 40 | 36 | 50 | 14 | 2500 | 9 | 3, 0 | 2, 0 |
| K 106 U2 | 40 | 36 | 50 | — | — | 9 | 4 | 2, 14 |
| K 107 U2 | 40 | 36 | 50 | — | — | 9 | 3 | 1, 61 |
Z-profile
The main channel dimensions are given in Table No. 3.
Table No. 3
| Z-profile/Dimensions | A | H | b | l2 | b | S | Weight, kg |
| K 238 U2 | 30 | 40 | 30 | 8 | 9 | 2,5 | 2,87 |
| K 241 U2 | 40 | 32 | 32 | 8 | 9 | 2 | 2,65 |
| To 241 cUT1.5 | 40 | 32 | 32 | 8 | 9 | 2 | 2, 65 |
Corner
The main dimensions of the corner are given in table No. 4.
Table No. 4
| Angle/Dimensions | A | H | I | b | S | Weight, kg |
| To 237 cUT1.5 | 50 | 36 | 50 | 36 | 3, 10 | 2, 87 |
| To 242 cUT1.5 | 40 | 32 | 32 | 9 | 2 | 2, 65 |
| K 237 U2 | 60 | 40 | 60 | 45 | 4 | 3, 77 |