Unit types
When making a hitch, the following factors are taken into account:
- tractor power;
- land area;
- model of technology.
Compact models are equipped with a three-point hitch. Before making attachments for tractors, it is recommended to decide on the type of design:
- Plow (for plowing the soil) - rear attachments are used to work with such a unit.
- Harrows (make it easier to plant crops) with a coverage width of 1-2.7 m.
- Potato planter - such a hitch is made for a mini tractor made in Russia, Japan and China (power above 24 hp).
- To care for the crop, rakes are made - the working width of the implement ranges from 1.4-3.1 m. In this case, the engine power must exceed 12 hp. With.
- Cultivator - such a do-it-yourself attachment for a minitractor is made for the purpose of caring for agricultural crops as they grow.
- Sprayer - designed for watering and spraying fertilizer. The productivity of a homemade hitch for a mini tractor is 120 l/1 min.
- Potato digger - designed for harvesting root crops. To connect the unit to the tractor, you will need a rear linkage.
Motoblock. Start
The walk-behind tractor is the fruit of the late Soviet period, or rather, the era of the legendary six hundred square meters. In the mid-eighties, the Soviet government was forced to admit that the system of collective and state farms, despite being fully equipped with a fleet of modern equipment, including giant combine harvesters and agricultural aircraft, and the help of the country’s population (who doesn’t remember the “potato growing” trips?), fulfilled its main purpose function is not able to. The country was forced to purchase food from abroad.
It was decided to act on the principle “saving drowning people is the work of the drowning people themselves,” and supplying workers with agricultural products was partially entrusted to the workers themselves. Those who wished were given a plot of land with an area of six hundredths of a hectare (those same six hundred square meters).
To process even such a modest plot with the help of a shovel, a hoe, and the mother of an unknown Japanese at the end of the second millennium in the country of victorious socialism, which proclaimed the Scientific and Technical Revolution, was completely out of hand. And then it turned out that there was practically no equipment in the country capable of solving such problems. Personal plots of collective farmers, as a rule, were part of one field and were processed with one or two passes of “adult” equipment. This method was absolutely not suitable for patchwork “six-hundred” plots.
A fundamentally new type of agricultural machinery was developed, called a “motorized block” or walk-behind tractor. The “Unknown Little Animal” was a heavy motorcycle engine mounted on two coaxial off-road wheels. Working with such a unit was reminiscent of peasant labor at the beginning of the century - the plowman walked behind the horse, guiding the plow and putting pressure on it with his own weight.
Only the place of the horse was taken by a two-wheeled miracle of technology, controlled and directed using special handles. Instead of a plow, a set of attachments was used, thanks to which the walk-behind tractor could plow, harrow, sow, and mow grass. There was even a two-wheeled body with a seat, which turned the walk-behind tractor into a vehicle of unknown purpose: for movement and movement of goods around the village and the surrounding area, a motorcycle with a sidecar (another, almost forgotten relic of the past) or a car was clearly more convenient. And there was clearly no place on the highway for an incomprehensible hybrid moving at the speed of a lame mare.
Additional designs
Factory and homemade tractors can be used for building roads, loading and unloading materials and performing other work. Such equipment can be equipped with the following designs:
- Bulldozer blade - a lifting mechanism for a mini tractor levels construction sites, removes snow and construction debris. If necessary, a utility brush is installed on the dump.
- Mounted excavator - used when laying communications and constructing a pit.
- Front loader - used in warehouses. If the unit is intended for light-weight equipment, then the homemade hitch on the mini tractor is equipped with counterweights.
Manufacturing of KUN
To assemble a front-end loader for a walk-behind tractor or mini tractor, you will need to prepare drawings. In this case, the carrying capacity of the equipment is taken into account. The walls of the attachments on the minitractor are made of sheet metal (6 mm thick). To do this you will need metal scissors or a gas cutter.
Electric welding is used to secure the sheets together. The service life of attachments for a mini tractor depends on the quality of the seams. The next stage is the manufacture of racks and rods. For this, pipes (diameter 50 and 100 mm) are used. Then the hydraulic booster is installed.
To ensure greater mobility for the last element, the diameter of the bucket should not exceed 30 mm. To secure the racks, a pipe is welded to the front of the equipment. The design is reinforced with metal corners. In order for homemade tractor attachments to rotate, a cylinder is fixed to it.
To make your own bulldozer blade, use a water pipe (section radius more than 70 cm). The width of the device is selected individually in each case. The value of this indicator depends on the technical parameters. Experts advise making a hitch for mini tractors with your own hands from metal 8 mm thick.
To cut the pipe lengthwise, use a grinder. In this case, a distance from the edge is maintained (to ensure optimal bending of the bucket). A metal profile is welded below the center of the pipe. If necessary, do-it-yourself attachment to a minitractor is supplemented with transverse thrust elements.
To attach the blade to the equipment, an A-shaped structure is made. The product is complemented by longitudinal beams. A hydraulic cylinder is used to lower and raise the unit. A bracket is used for its installation. The hydraulic cylinder can be removed from the semi-trailer 2 PTS-4. To secure the blade, you will need a front linkage.
Lift
Lifting various weights (up to 800 kg to a height of 3.5 meters) can be achieved using a mechanical device. In this case, you can use the “hydraulics” of the suspension.
The design is not labor-intensive, but it is not always convenient to use. You can make another lifting mechanism.
To make a lift, you will need the following components:
- corner "8";
- sheet steel (6 mm);
- corner jumpers “4”;
- two gussets and eyelets.
- A groove is made in the rear jumper - it is needed for fixation (it is equipped with a “triangle”).
- All elements are fastened together, holes with a diameter of 24 mm are drilled for engagement. The arrow is fixed at the top point of the tip - thus creating a lever that provides the lifting height.
- The arrow is made from the angle “8”. A channel is welded along the entire length as a fastening. All joints are reinforced with welded plates. The upper part is equipped with a hook-shaped hook that bends at an angle of 45 degrees. A ball joint is attached to the other end.
- An additional guide (65 mm) is provided. Holes (4-6 pcs.) are drilled along the length so that the equipment can be secured in different operating modes.
Plow assembly
Before making the plow yourself, the bend of the plowshare is calculated. The advantages of such a do-it-yourself hitch for a mini tractor include:
- the geometric parameters of the blade and ploughshare coincide with the requirements for cultivating a certain type of soil for a specific agricultural crop;
- making a hitch for a mini tractor with your own hands with maximum efficiency;
- maximum bucket grip;
- long service life;
- the use of various attachments, which allows you to cultivate and plow the soil.
When making your own plow for a mini tractor, special attention is paid to the size and shape of the cutting elements. The efficiency of deepening the structure into the soil and the volume of soil turned over depend on these parameters. When plowing, the plow should not move to the side, bury itself in the ground, or go out. The main parameters of the plow are the angle of the edge plunging into the ground and the bending angle of the blade.
The value of the first indicator determines the nature of the structure’s penetration into the soil and the retention of a given level. Experts advise making a plow with an edge angle of 40°. If the angle is sharp, then the plow will slip out. Otherwise, the unit will not cope with the load.
The angle of the blade depends on the bend of the blade. With the help of large blades, you can cultivate a large volume of land (in 1 pass). When performing such work, a significant load is placed on the tractor. Therefore, experts advise choosing an inclination angle within 25-130 °.
The main load is on the ploughshare. Durable thick steel is used to make the working part of the plow. The shape of the share can be screw, cylindrical or semi-cylindrical. In this case, the value of the bending angle must coincide with the value of the angle of inclination of the blades.
Preparatory stage
Most often a cylindrical plow is made. This mini tractor hitch is used when cultivating various types of soil. The soil is crushed well, but does not penetrate deeply into the formation. Such units are recommended for use on unplowed land during primary cultivation.
Simple plows, unlike the plowshare type, are easy to manufacture. Using the half-screw design, you can turn over the soil without loosening it. The share plow is a durable and reliable attachment for a mini tractor that can be used constantly. The structure processes the ground with cutting elements. The soil is thrown to the sides by two blades. This plow manufacturing technology provides a high level of loosening and depth of soil cultivation.
Read also: DIY snow blower: homemade manual snow blower on wheels
The drawing of the plow is carried out taking into account the type of structure. The single-hull model is presented in the form of a metal pipe of rectangular cross-section. On the opposite side of the product, a cutting element is attached, and on the other side, a wheel and fasteners to the mini tractor.
To process a large area, a two-body hitch for a mini tractor is assembled. The product is made from several frames equipped with different tools. Each component part of the structure performs specific tasks (harrowing, plowing).
If the drawing is completed, then the device is detailed. Then the parts are cut out. To do this you will need a steel sheet and scissors. The shape of the blade depends on the tools used and equipment available. Plate bending machines allow you to achieve high precision.
Sprayer
The sprayer is usually made of two wheels. A container with fuel and a pump are placed on the block. Water is poured into the canister. You will also need nozzles and a hose. Sprayer differentiation:
- dispersed spraying - droplets in the form of fog cover the soil and agricultural crops with an evenly thin layer;
- jet spraying - usually used for the root system.
Step-by-step instruction
If the hitch for a mini tractor is made in a workshop, then you will need a vice and an anvil. A sheet of metal (3 mm thick) is cut out from the finished pattern. Then the parts are bent. When performing this work, maximum accuracy is observed.
To simplify the task, a pipe or cylinder is used. The lower part of the blade and the cutting element are reinforced with metal tape (5 mm thick). To fix it, use secret rivets or a welding machine. Then the surface is cleaned. A holder is welded on the opposite side (length up to 40 cm). To cultivate the soil at different depths, it is recommended to equip 3-4 holes in the holder.
A rectangular steel pipe is used to make the body. The length of the body should vary between 0.5-1 m (taking into account the amount of hanging structure). A flange is mounted on one side of the pipe (to secure the frame to the equipment). On the opposite side, the working part of the plow is mounted on bolts.
If a heavy plow is being manufactured, then the installation of two wheels is provided. They are positioned relative to the axis line so as to ensure balance of the plow during operation and reduce the load on the mini tractor.
When operating any attachment for a mini tractor, it is recommended to follow safety precautions.
Overview of attachments
Compact tractors are used in almost all sectors of agriculture. Many attachment devices are designed specifically for soil cultivation. There are various devices for cultivating soil, caring for plants and farm animals.
Attachments for a mini tractor
Note! To install front and other attachments on the tractor, use a mechanical three-point hitch on a mini tractor.
Planting devices
The plow is the most important tool for preparing the soil for spring field work. The compact tractor can work with equipment of different designs. If the farm has equipment with a power of up to 30 horsepower, then single- or double-body tools are used. The plowing depth of such units is from 20 to 25 cm (this indicator can be changed very easily).
If a mini-tractor like UAZ or Ural has a motor of more than 35 horsepower, then a four-wheeled plow is connected to the tractor. With its help it is possible to significantly increase the plowing depth. These systems are most often used by summer residents and small farms.
Disc plows and homemade plows are used for uncultivated and dense soil types. Large farming enterprises use manual and rotary models.
Attention! All plows are attached to the tractor through the rear linkage, not through the front linkage.
Before planting, the soil must be carefully prepared. This can be done by using a harrow. Depending on the design, they weigh from 200 to 650 kg. The width of soil gripping by shovels in such structures is from 1 to 2.7 m. Some models are capable of cultivating soil at a depth of up to 15 cm, sufficient for effective soil treatment.
Milling cutters are a type of plow. They are used in a small area. They are most suitable for those areas where the soil is regularly and efficiently cultivated. For areas that have not been plowed for a long time, a large plow is suitable.
Planting equipment
This type of equipment includes potato planters. There are several models of planters, with 1 and 2 rows. They also have different tank sizes for planting tubers. Different agricultural enterprises and individual owners can choose tanks of various sizes.
Homemade potato planters for mini tractors are a universal unit. They cut a furrow and throw out planting material, that is, potato tubers, at an equal distance. After this, the planting is automatically covered with soil. All these operations are performed while the mini-tractor is moving around the site. If it stands, then planting potatoes is impossible.
The power of the planters is from 24 horsepower and more. Weight – about 180 kg.
Important! The potato planter should only be used on farms with a large area. The use of attachments in summer cottages and garden plots is ineffective and impractical.
Hiller is equipment for covering the planting site of agricultural crops with soil. Plants are processed in rows. Works the same as a seeder.
Plant maintenance equipment
It is advisable to use it for selecting and collecting hay into windrows, raking hay and debris, and tedding. A rake is used for all these purposes. There are a large number of modifications of rakes for mini-tractors, depending on the power of the tractor and the amount of work required.
Cultivators are used to clear fields of weeds. They loosen the soil well and remove roots. It is advisable to use the equipment when the plants are small, immediately after the seeds germinate.
Using mounted sprayers you can control plant pests. For summer cottages, use universal models of sprayers. They consume less fuel and provide processing of a large area of land.
Read also: Do-it-yourself potato planter for a walk-behind tractor, drawings, dimensions, video
Homemade rotary mowers for mini tractors allow you to effectively mow plants. Homemade mini tractors with coon are used for more efficient operation of the hay loader.
Harvesting equipment
This includes potato diggers. The most popular types of diggers in homesteads and farming are vibrating and conveyor ones. If a farmer has a homemade mini tractor, then most often they make their own digger.
Note! The easiest digger to install is the fan type.
Drum and horse-drawn diggers and hay mowers are also on sale.
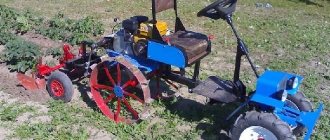
Mini tractor with your own hands from a walk-behind tractor. Do-it-yourself mini tractor from a walk-behind tractor
For cultivating small plots of land, there is no better solution than a mini tractor made from a walk-behind tractor, made by yourself. Not every site owner can purchase a factory-made model, so they have to look for other solutions. It’s easier, for example, to buy a regular walk-behind tractor and remake it yourself.
Required tools and materials
The first stage of work consists of drawing up the drawing and preparing the equipment. If you have the appropriate skills, you can develop a diagram of components and mechanisms yourself or use those presented below.
As for components, ready-made factory kits for conversion are suitable - in any case, they are cheaper than the mini tractor itself. But this option is only suitable for those who do not want to save on absolutely everything.
Creating a homemade tractor will become impossible without:
- Grinders and discs.
- Fasteners and hardware (bolts and nuts).
- Channels and pipes with a metal base.
- Drills that come with drill bit sets.
- Welding equipment.
- Set with tools.
You can’t do without two suitable wheels along with a hitch and a driver’s seat, a steering mechanism, pedals, and the walk-behind tractor itself. It must have a sufficient level of power.
A heavy class walk-behind tractor with diesel fuel is an ideal option for a homemade mini tractor.
Examples of mini tractor drawings
Overall dimensions of the mini tractor
Layout drawing of the Ant mini-tractor
Kinematic diagram of a mini tractor
Choosing a walk-behind tractor
Among the important parameters for these devices it is worth highlighting:
- Cost and manufacturer.
- Plow size (if the mini tractor will be used to plow the land).
- Type of engine used.
- Weight.
- Power level.
Power. One of the most important parameters, since the performance and strength of a mini tractor directly depends on engine power. The more aggressive and heavier the load on the vehicle, the more powerful the walk-behind tractor needs to be.
Weight. If a homemade mini tractor will be used to plow the land, then the weight of the walk-behind tractor will be a critical parameter. The determining point is the type of land being cultivated: for hard soil varieties, you should not choose too light walk-behind tractors, otherwise the mini tractor will not cope with its purpose.
Although gasoline walk-behind tractors are much quieter, diesel wins in terms of the efficiency of its use: it has stable speeds and increased traction. A diesel engine will cope better with heavy soils and large areas.
In any case, for any purpose, the heavier the walk-behind tractor, the better the performance data of the future mini tractor.
Price and manufacturer. If possible, it is better to choose products from companies that have been on the market for a long time. If financial possibilities are limited, you can get by with cheaper analogues. Russian products will also be the best option for the majority.
Chinese walk-behind tractors
These are mostly copies of Russian models. Their cost is lower due to reduced production resources and savings on materials. This has a somewhat negative impact on the final quality of the product.
At the same time, the functionality does not differ from Russian walk-behind tractors. Recently, products of acceptable quality have appeared, although they are still far from comparable to their analogues from Russia. Popular Chinese walk-behind tractors include the Bison, Farmer, Centaur, Forte, Aurora, Zirka and others.
Russian products
The optimal solution with an affordable price. Motoblocks with a belt drive or with a transmission with the ability to transmit torque to, or. In any case, the process cannot be completed without the participation of a special belt.
A special feature of our developments is the simple design of the clutch system. The only maintenance procedure left is belt replacement. Soviet engineers also designed a gearbox that is recognized as one of the most successful on the market. Professional engines from foreign manufacturers are used. The units are functional and reliable.
Types of attachments
A do-it-yourself hitch for a minitractor is made from a steel profile. The best manufacturing method is welding. There should be equipment for connecting any working equipment.
The most commonly used is a three-point nozzle. It provides easy movement of equipment in various geometric planes. Almost all farm equipment is designed to accept three-point attachments.
Three-point hitch for a mini tractor
The exception is the mini-tractor, which has a caterpillar track. For such a unit, a universal nozzle is usually used, which, if necessary, can easily be transformed into a two-point one.
Baler
This equipment is difficult to manufacture from a technical point of view. But you can solve the problem if you follow these approximate instructions:
- The running support is assembled on a pair of pneumatic wheels.
- The front part, the pick-up and the conveyor are mounted on these parts.
- The press chamber is mounted separately. The rollers and pressure brush should be at the bottom. The plate on the spring is placed at the top. This part is then used to press the compressed layers together. Thanks to this, the contact of the roll to the working surface will be maximum.
- Next, the drive is assembled, from which all other working units begin to move. A cardan is connected to the 2-speed gearbox. The gearbox is a source of chain energy going to the rollers and the pick-up transport.
- Gears are installed on the picking mechanism of the mini-tractor. The main thing is that their diameter should be larger than that of the rollers. Then the picking speed will be higher, as will the force of simultaneous pressing.
Photos and drawings:
Manufacturing of attachments
Buying canopies for a walk-behind tractor will be very inconvenient for a small summer resident. A summer resident or farmer can make all the equipment himself at home, using a little ingenuity. Most of the equipment is quite simple and can be made from almost whatever is on hand.
Before you make a plow for a mini tractor with your own hands, you need to carefully study the drawings and dimensions and choose the most optimal one. It will be easier to make equipment if you have a ready-made factory circuit.
Making a hiller
To do this, you need to take 2 metal disks with a thickness of 2 mm and position them so that they open outward. When the angle is selected, they are secured with bolts or simply welded. Then it is simply secured to the hitch.
Potato planter
The structure of this unit resembles a hiller. It has a bowl on top into which potato tubers are poured. From a special hole they fall into the ground.
To make a homemade potato planter, you need to assemble wheels, an axle, pins, a hopper, sprockets, and an adjustment mechanism. All this is attached to the frame.
The wheels are covered with a metal plate at the front, otherwise the potatoes will fall out of the hopper at times when this is not needed. The bottom of the hopper is covered with rubber so that the potatoes do not fall out.
How to make a bucket for a mini tractor? For this you need tin and internal racks. 2 side and internal racks form a bucket. The rods are screwed to them.
Mills, plow
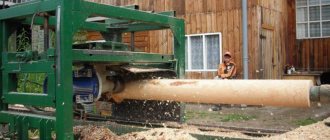
This is one of the most important equipment. Milling cutters are used for processing soft and constantly cultivated soil. A homemade plow for a mini tractor is more suitable for working with hard soils. To make a homemade plow, you need to take a plate with a thickness of 3 to 5 mm and a pipe with five-millimeter walls.
The plate is sharpened with a knife, like a scythe. Next, the blade is turned out using a grinder. The cutting part is the working element of the scythe, which is beaten on the anvil.
Milling cutters are used for processing soft and constantly cultivated soil
All parts are glued together with obligatory observance of corners. The ploughshare is placed on a steel sheet. These elements must be spot welded on both sides.
Important! The ploughshare and shaft must be joined very tightly. There should be no gaps between them.
Making a trailer adapter
The design of this device includes:
- metal frame;
- hitch;
- cross bar;
- braces;
- racks, axle, wheels;
- management tools;
- trailer or cart;
- space for the operator and connection of additional mechanisms.
The frame is made of pipe (length - from 1.5 to 1.7 m). A hitch is welded at one end and a rod at the other. Wheel racks and a brace are attached to the rod.
Levers are used to control devices. By switching them, you can set the optimal position of the attachment. An additional lever is installed to adjust the applied force.
The length of the drawbar depends on the power of the walk-behind tractor. Engine power affects wheel size. Additionally, hydraulics are installed.
The hitch for an internal combustion engine mini tractor and other units can be easily done independently. It fits almost all agricultural equipment, greatly facilitates and reduces the cost of all work in the country or on the farm. Proper use of the equipment extends the service life of the walk-behind tractor.
Do-it-yourself mini tractor from a Neva walk-behind tractor. Making a mini tractor from a Neva walk-behind tractor
By creating a mini tractor from a Neva walk-behind tractor with your own efforts, you will receive the following amenities:
- This technique does not require a large space for its placement. This means there is no need to build a garage for it.
- The price is significantly lower than the price of a ready-made working adapter for a walk-behind tractor.
- Operation requires the cheapest fuel and in small volumes. 2 liters will be enough.
- Maximum speed – 30 km/h.
- It is not difficult to get spare parts for it. They are available almost everywhere and their prices are quite low.
- If you equip such a vehicle with tires with deep tread, you can achieve high cross-country ability and excellent traction.
- Thanks to its compact size, you can also work in difficult areas where trees grow abundantly. It also allows for comfortable work in the local area. In this case, neither asphalt nor paving slabs are affected.
Of course, creating such a masterpiece yourself is possible if you have certain skills and knowledge. Before the main work, you will need to analyze many different drawings and diagrams, read technical literature and watch useful videos.
There is no universal scheme or similar sets of drawings. Since devices from different manufacturers have differences in design, power and other parameters. How to make a mini tractor from a Neva walk-behind tractor? Start by choosing a model and drawings.
Minitractor from a Neva walk-behind tractor. Dimensions
If you are unable to purchase or find the Neva walk-behind tractor, its analogues, for example, Zubr, Salyut and Argo, will do just fine. There are also a number of Chinese analogues. But Russian products are in great demand. Drawings and diagrams of a homemade tractor from a Neva walk-behind tractor:
DIY mini tractor diagram
You will also find it useful in your work:
- metal corners and pipes;
- stainless steel (1 sheet);
- drill;
- welding equipment;
- attachments;
- standard set of installation tools (screwdrivers, wrenches, nuts, bolts, etc.).
A mini tractor can be equipped with only the most necessary arsenal:
- two suitable wheels;
- comfortable chair;
- driving;
- levers.
General overview of factory-made equipment
Mini tractors work in all industries, but they are most in demand in agriculture. The manufacturer takes this into account, so most attachment mechanisms are designed for soil treatment, caring for animals and vegetation, as well as performing planting and harvesting work. To connect most equipment, a three-point hitch is installed on a mini-tractor, but there is also a two-point option.
Equipment for preparing soil for planting work
The plow is responsible for preparing the soil. A mini-tractor operates with attachments of various designs. Single- and double-furrow plows are used with equipment with a power of up to 30 hp. With. Their plowing depth is adjustable from 20 to 25 cm. If the unit is equipped with a motor of more than 35 liters. pp., then you can hook up a four-furrow plow, for example, model 1L-420. The plowing depth has already increased to 27 cm. Such models are called reversible or plowshare-moldboard and are most often used by private owners for their summer cottages.
There are also disc plows used for heavy soils and virgin lands. On farms, soil preparation can be carried out using rotary models.
Read also: Neva walk-behind tractors: purpose and characteristics of walk-behind cultivators, review and description of models
Before planting, the soil needs to be prepared. Disc harrows are responsible for this area of work. Depending on the design, their weight is in the range of 200–650 kg, and the soil working width is from 1 to 2.7 m. Different models differ in the number of discs, as well as the harrowing depth. For example, 1BQX 1.1 or BT-4 cultivate soil up to 15 cm deep.
Planting equipment
This type of trailed mechanism includes potato planters. There are single- and double-row models with different tank volumes for planting tubers. The potato planter itself cuts a furrow, throws the potatoes at an equal distance, and then rake them in with soil. All this is done while the mini-tractor is moving across the field. As an example, we can take the UB-2 and DtZ-2.1 models. The planters are suitable for domestic and Japanese equipment with a power of 24 hp or more. With. The equipment weighs around 180 kg.
Plant maintenance equipment
For tedding and raking hay into windrows, a rake is attached to the mini-tractor. Such equipment is more in demand by farmers and private owners who have large areas allocated for haymaking. Tedding rakes are produced in various modifications. For a mini-tractor with a power of 12 hp or more. model 9 GL or 3. 1G is suitable. The equipment is characterized by a swath width of 1.4–3.1 m and a weight of 22 to 60 kg.
Cultivators clear the field of weeds, loosen the soil, and remove the roots of unnecessary vegetation. The equipment is used after the plantings emerge and during the entire period of their growth. Common models include KU-3-70 and KU-3.0.
Mounted sprayers help control crop pests in fields and gardens. Models SW-300 and SW-800, produced by a Polish manufacturer, are universal. The equipment is suitable for all models of mini-tractors. With a liquid solution flow rate of 120 l/min, the jet covers up to 14 m of the treated area.
Harvest equipment
This type of equipment includes potato diggers. Conveyor and vibration models are mainly used. For a homemade mini-tractor, the diggers are often made independently. The easiest to manufacture is the fan design. There are also drum-type and horse-mounted diggers. Factory-made models include DtZ-1 and WB-235. Any potato digger is connected to the rear linkage of the tractor.
Other types of factory-made equipment
This category includes mechanisms that are rarely used in the agricultural industry. Most often they are in demand at construction sites, as well as by public utilities.
The blade is connected to the front linkage of the tractor. It is needed to level the soil and clear the area of debris and snow. When cleaning roads, the blade is usually used in conjunction with a rotary brush attached to the rear linkage of a mini tractor.
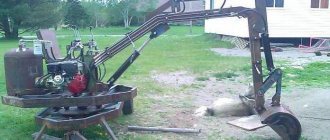
A bucket is a kind of mounted excavator on a mini-tractor, which is designed to perform earth-moving work. A small bucket is convenient for digging trenches for laying communications or small pits. The mounted excavator has its own hydraulic distributor. To connect to a mini-tractor you need a three-point hitch.
A front-end loader, or KUN in other words, is often used in warehouses and granaries. From the name it is already clear that the mechanism was created to perform loading operations. To prevent a light tractor from overturning under the weight of a loaded KUN, a counterweight is attached to the rear linkage.
The price of factory-made equipment is quite high. It all depends on the manufacturer, model and other factors. Let’s say the cost of a plow varies from 2.4 to 36 thousand rubles. A harrow will cost from 16 to 60 thousand rubles, and potato planters from 15 to 32 thousand rubles. Such high cost encourages enterprising private owners to make the necessary devices with their own hands. The easiest way is to make a homemade hitch, which we will talk about now.
Types of attachments and independent production of a three-point structure
A do-it-yourself attachment for a mini-tractor is made from a steel profile by welding. But before you do this, you need to understand the essence of the design. The hitch is needed to connect the working equipment of the tractor. There are models of seeders and mowers for which the linkage ensures transmission of motor power.
The three-point hitch is made movable in two planes: vertically and horizontally. The hydraulic drive is usually installed only on the front linkage. Now let's talk about the design. Almost all agricultural equipment is connected to a three-point hitch. An exception may be a mini-tractor with caterpillar tracks or with a broken frame. Such equipment can have a universal hitch, which, when working with a plow, transforms and becomes a two-point one.
The three-point homemade hitch is a triangle welded from a steel profile. The mobility of the connection with the tractor is ensured by a central screw. An example of a homemade hitch can be seen in the photo.
Breaking a mini tractor with your own hands from a walk-behind tractor. What you need
Before you begin, you should make sure that you have all the necessary parts, materials, and tools.
So, what is required for work:
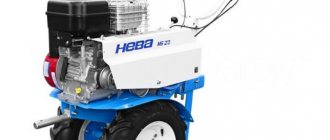
- Motoblock. It must be selected taking into account the above recommendations. It is this that will serve as the basis for a homemade mini tractor.
Motoblock Neva - the best option for remodeling
- Additional wheelset with axle. It is necessary to purchase bearings for the wheels, as well as a steering unit.
- Metal sheets, pipes and corners. The material is needed to create the body and frame of the structure.
- Elements for fixing parts and mechanical components. In this case, washers, bolts, nuts, and welding are used.
To carry out the assembly, in addition to the parts, you still need to prepare a number of tools:
- welder;
- drill-driver;
- a set of wrenches of different sizes;
- pliers;
- Bulgarian.
A homemade unit has a number of advantages. First of all, this is the cost. Even if a home craftsman needs to buy a cultivator, he will in any case spend less money. In addition, you can create special equipment of the required size, degree of adhesion to the ground, and performance.
As for the disadvantages, they are that equipment made by hand is much inferior to factory models in terms of reliability. Also, such equipment often requires repair work.