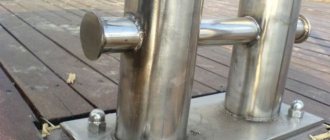
Many different parts and products are made from stainless steel. This metal is in demand due to its resistance to corrosion. During processing, it may be necessary to make a hole in it using improvised means. The fact is that the alloy differs from ordinary steel in its increased viscosity, and this is fraught with rapid failure of the cutting tool due to overheating. And here the question arises, how to drill stainless steel at home. Video tutorials on this topic will only help if you know the intricacies of such operations.
Not everyone can afford a specialized machine that allows easy processing of the alloy. In a home workshop, you can often count on a regular drill and the same drill bits. Therefore, craftsmen have a whole arsenal of tricks that help them effectively drill through stainless steel.
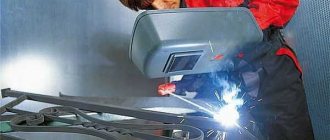
When working with turning or drilling equipment, you need to be extremely careful and not violate safety rules when operating electrical machines.
Choosing the right drill bit for stainless steel
Conventional metal drills are not suitable for stainless steel.
Therefore, for normal drilling, you need to figure out how to drill through stainless steel. If you need to drill a material in a product with a small thickness of 1 to 2 millimeters, then you can try using an ordinary spiral drill for metal. The cutting edges of such a drill must have a sharpening angle of 120 degrees.
It is important to drill at a low rotation speed (about 100 rpm).
If the thickness of the metal is greater or less than that indicated above, then it is better to prepare special drills for stainless steel before starting work.
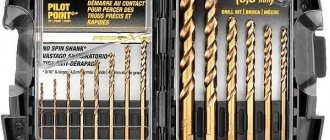
Cobalt alloyed steel drills are well suited for drilling stainless steel. The cobalt content must be at least 5%. Such steels usually have a pale yellowish tint on the surface.
Foreign steels usually have the “Co” sign in their markings or trade designations, sometimes indicating the cobalt content as a percentage. Another important alloying element is tungsten, which should contain up to 20%. Cobalt drills are manufactured according to the DIN 338 standard. The main dimensions of this type of drill are specified in GOST 10902-77.
One of the suitable grades of steel for a stainless steel drill is P6M5. It contains more than 5% vanadium, molybdenum and tungsten. The letter “P” at the beginning of the marking indicates that this steel is high-speed. Foreign analogues of this brand are usually marked with the symbols HSS - high-speed steel. Such analogues can be steel S600-S601 or 1.3343 or M2. A stainless steel drill made from steels R6M5K5 and R18 is also suitable. The cutting edges are sharpened at an angle from 125 to 135 degrees.
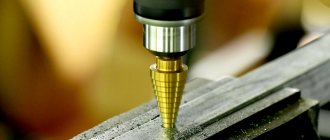
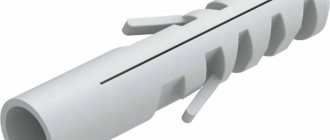
If you want to make a hole in thin sheet steel (up to 1 millimeter), then it is best to use a conical step drill for stainless steel. The hole produced by such a drill will have precise dimensions, as well as high quality of the processed surfaces. It should also be made of cobalt alloy steel and have a yellowish tint.
Stainless steel turning
Since all stainless steels have completely different machinability due to different chemical compositions, especially chromium (Cr) and nickel (Ni), the approaches to their processing are different.
When machining austenitic steels, high nickel (Ni) content increases strength and increases the likelihood of built-up edge. Also, superaustenitic steels, where the nickel content is more than 20%, have the lowest possible machinability, see the graph in the previous article.
IMPORTANT TO KNOW AND APPLY:
1. Select the largest possible radius at the top of the plate.
2. Be sure to use coolant with a precise direction to the cutting zone and preferably under pressure, and the higher the pressure, the better. Since the processing of stainless steel and especially austenitic steels leads to the release of a large amount of heat. This is a key factor that negatively affects processing; heat is not removed and transferred to the tool.
3. Use round inserts or a small leading angle (45 degrees) to avoid notches on the insert equal to the depth of cut.
4. Use sharp edges and/or positive rake geometry to reduce built-up edges, reduce work hardening, and reduce heat generation. Austenitic steel is particularly susceptible to work hardening and build-up. There are especially sharp series of stainless steel plates. Positive geometry is especially important when turning thin-walled parts, loose parts, long thin shafts, etc.
5. We use only special chipbreakers and only those designed for stainless steel to avoid drain chips that wrap around the cutter and damage the insert. We don’t even use general-purpose chipbreakers; they don’t give the same results as special chipbreakers for stainless steel.
6. Select a cutting depth that is, if possible, greater than the thickness of the hardened layer.
7. We use coated plates to improve heat resistance and wear resistance. At the same time, we take into account that CVD coatings are thicker and they significantly increase tool life, and also allow increasing cutting conditions and thus productivity. Although they are not so sharp and difficult to sharpen. PVD coatings are thinner and provide a sharp plate edge and smooth surface. True, there is a risk of rapid wear and failure of the plate. However, PVD coatings are often used to treat austenitic steels. When the build-up formed during processing of stainless steel is separated, it can tear out part of the coating and particles of the cutting edge, and thus damage the insert. The smoothness of the coating reduces the possibility of build-up. But the coating is also necessary to increase the resistance to abrasive particles of stainless steel.
8. We take plates with high temperature resistance . I may repeat myself, but heat dissipation is very poor in stainless steels, especially austenitic ones, and this is practically the key point. Because the chips do not remove heat, and it is transferred to the tool, you need to use coolant, but it is not always possible to direct the coolant exactly to the cutting zone, so inserts that respond well to temperature shock would be very useful.
9. We adopt PVD coated fine-grained carbide to finish stainless steel to obtain high precision and low surface roughness. This alloy will provide high strength and durability of a sharp cutting edge. These inserts will work even with intermittent cutting and thermal shock. But everything is in accordance with common sense and the recommendations of the catalogue.
10. You can also look at PVD-coated cermet for finishing stainless steel only in good conditions. Less sticking is observed.
12. We take a cutting blade with internal channels for supplying coolant to the cutting zone , since the bottleneck does not make it possible to direct the external supply of coolant exactly to the cutting zone, and this has a great effect on the durability of the cutting plate.
13. There is a recommendation to increase the depth of cut and cutting conditions to the maximum possible values . The idea is that a larger volume of chips will absorb more heat, even when accounting for the low thermal conductivity of stainless metal. This will reduce the number of passes, but will lead to work hardening, poor roughness and require rigid, powerful machines. You have to try - it may not always be possible.
14. We use coolant with an oil content in an oil-water emulsion of at least 8-9% (usually 3-4%). Many even try using oleic (fatty) acid and achieve excellent results.
15. Remember that the tool must withstand temperature, chemical, adhesive and abrasive wear. Therefore, we choose an insert that has geometry (sharp edge, chipbreaker, etc.), alloy and coating only for stainless steel and with the best combination of all these components.
16. Different depths of cut can be used to ensure uniform wear on the inserts.
17. Sometimes it is worth carrying out preliminary heat treatment of stainless steel blanks to align the structure, if this is permissible.
Using these measures, it is possible to increase the speed and feed of turning of stainless steels and thereby increase productivity . We try to apply all these recommendations comprehensively and thus increase not only productivity , but also the durability of tools .
When machining duplex stainless steels, it is necessary to use cutters with internal high-pressure coolant supply - this will reduce the temperature, crush the chips and quickly remove them. In ferrite and martensitic materials, the nickel content is lower and the chromium content is higher; an increase in chromium leads to increased strength and greater abrasiveness, which leads to rapid wear of the plates; we take this factor into account and use wear-resistant coatings.
Cutting conditions for turning stainless steel
When choosing cutting modes, you should rely on the catalog data for a specifically selected insert, but you must take into account the desired tool life. As a rule, the catalogs indicate the maximum values of cutting conditions corresponding to maximum productivity , but also minimum durability .
In addition, the modes are highly dependent on actual production conditions, system rigidity, etc., so the optimal modes must be selected individually for each case separately.
The modes also differ for different sharpenings and different geometries, so the primary source is the catalog of a specific tool. Although, as an example, the following cutting mode options can be given for reference.
Source
Stainless steel drilling technology
If you have correctly selected the appropriate drill and already have something to drill stainless steel with, you need to understand the correct technology for metal-cutting operations.
Since stainless steel is a hard material with high viscosity, it is important to drill using cutting fluids. This allows you to reduce heating of the working parts of the cutting tool, increase process productivity and reduce drill wear. To make quality holes, several basic rules should be followed:
- If it is necessary to obtain a hole in a material with a thickness of 5 millimeters or more, then it is advisable to carry out the process in two steps - first, a preparation hole with a diameter of 2-4 millimeters is drilled, and then the final drilling is carried out to a given diameter.
- The rotation speed of the spindle of a metalworking machine or the chuck of a hand tool should be reduced in relation to working with non-alloy steels (for a drill this is 100-400 rpm, for machine tools - depending on the technological process).
- The supply of cooling and lubricating fluid must be carried out throughout the entire drilling process; the supply must be made to the cutting edges of the drill.
- If you use a stainless steel drill with a ground surface of the working part, the chip removal process will be more efficient and the internal surfaces will be smoother.
- You should work in the minimum drill feed mode and maintain uniform pressure on the hand tool.
- Observe safety precautions when working, use personal protective equipment.
Preparatory work
Preparatory work consists of eliminating some of the negative factors associated with drilling stainless steel. Let's look at what properties make this process difficult:
- The chemical composition of stainless steel grades helps to increase the ductility of the metal. When drilling such steels, chips stick to the drill, causing the cutting edges to be excluded from the process, and hardening forms on the walls inside the unfinished hole. Such surface hardening makes further processing difficult and changes the physical properties in this place.
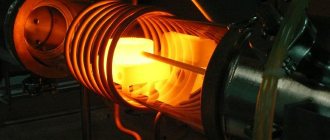
- Heat is removed from the drill heated by rotation and cutting along the surface of the metal. Without taking preventive measures, you can end up with a tarnished area around the drilling. In addition to the damaged decorative surface, this reduces corrosion resistance and requires additional technological operations to restore the specified parameters.
To avoid the disadvantages described above, before drilling it is necessary to decide how the surface will be cooled and what to do to prevent chips from sticking. Among the effective methods, water is suitable. If the volume of metal being drilled is more than one hole with a diameter of 10 mm in a sheet of 2 mm thickness, then you should consider cooling with oil or a special emulsion.
Attention. Cooling with water when drilling stainless steel occurs during the process itself. Cooling by lowering a hot drill into a jar standing nearby leads to hardening and tempering of the metal and loss of basic properties. Coolant is supplied to the contact point when drilling. To reduce consumption, you can place a rubber ring on the surface, surrounding the contact point.
How to drill stainless steel at home?
When performing plumbing work on drilling stainless metal, professional drilling machines are not always at hand. Not every home master can boast of having specialized equipment. Therefore, below we will provide brief information on how to drill stainless steel at home.
The main disadvantage of working in such conditions is the impossibility of uninterrupted supply of lubricating fluid to the working area. Therefore, if it is necessary to obtain a hole on a horizontal surface, the following method is used. The workpiece is aligned strictly horizontally and secured. The location of the future hole is marked and marked to facilitate alignment. A piece of polymer or steel tube is installed on the hole. The internal diameter of such a tube should be slightly larger than the diameter of the drill. Then lubricating fluid is poured into the tube. If you do not have a special coolant, you can pour machine oil or even olive oil into the tube. Drilling must be done in this bath. If liquid splashes or spills, refill the bath.
If the hole needs to be made on a vertical surface, then liquid lubricant will not work. In this case, you can use a small piece of pork fat or paraffin, which I fix at the drilling site. When the drill and workpiece are heated, the lubricant will gradually melt and enter the drilling working area.
Attachment to an angle grinder for sharpening drills with your own hands
Metal drills, for the manufacture of which high-speed steel alloys are used, are used to create both through and blind holes in metal parts. The most common are twist drills, the design of which includes the following elements:
Structural elements of a twist drill
If the shank, which can be either cylindrical or conical, is designed to securely fix the tool in the chuck of the equipment used, then the working part simultaneously performs several important functions at once. It is the geometry of the drill that determines its performance and cutting properties.
The most important elements of the working part of a metal drill are screw grooves. Their task is to remove chips from the processing zone.
The geometry of a spiral drill for metal provides that the front side of the spiral groove is made at a certain angle, the value of which changes in the direction from the axis of the tool to its peripheral part.
During the manufacturing process of a metal drill, narrow ribbons are formed on the side area of its spiral elements, slightly protruding above the main surface. The purpose of such ribbons is to reduce the amount of friction between the tool and the walls of the hole being formed.
Features of different types of drill sharpening
Sharpening drills, as mentioned above, is necessary in order to restore their geometric parameters. The choice of a specific type of drill sharpening depends on a number of factors (tool diameter, characteristics of the metal being processed, etc.).
The most universal is normal sharpening (N), during which one transverse and two cutting edges are formed on the working part of the drill. The sharpening angle of the drill in this case is 118–120°. When choosing this type of drill sharpening, you should keep in mind that it can be used for tools whose diameter does not exceed 12 mm.
Types of metal drill sharpening
All other types of sharpening, which are designated by the letter combinations NP, NPL, DP, DPL, can be used for tools with a diameter of up to 80 mm. Each of these types of sharpening involves bringing the geometry of the metal drill to the required parameters.
Such sharpening involves sharpening the transverse edge, which is done to reduce its length and, accordingly, to reduce the loads taken by the tool during the drilling process.
In this case, in addition to the transverse edge, the ribbon is also sharpened, which makes it possible to reduce its width in the area of the cutting part. Sharpening the tape, in addition to reducing the friction force created during drilling, allows you to form an additional back angle of the drill, which facilitates the processing process.
This is a double sharpening combined with a sharpening of the transverse edge. Performing sharpening of this type allows you to form one transverse and four cutting edges on the working part of the metal drill, which look like broken lines.
This is a similar type of sharpening to the previous one, in which the ribbon is additionally sharpened. Creating four cutting edges when performing double sharpening is necessary in order to reduce the angle between the peripheral sections of the cutting edges. This approach makes it possible to improve heat removal from the cutting part of the tool and, accordingly, significantly increase its durability.
How to choose the right sharpening angles
Drill sharpening angles, as mentioned above, are selected according to special tables, where their values are presented depending on the material in which the hole needs to be formed.
Table 1. Metal drill sharpening angles for various materials
If you choose the wrong angles at which the drill will be sharpened, this will lead to the fact that it will become very hot during operation. This may ultimately lead to its failure. In addition, it is the incorrectly selected angles used to sharpen a metal drill that often become the main reason for poorly executed drilling.
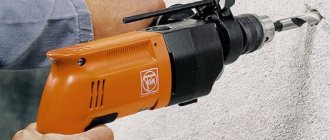
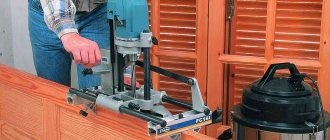
How to sharpen using a drill attachment
Every home craftsman can go to a household power tool store to buy a drill attachment, with which you can easily sharpen any drills if their diameter falls within the range of 4 to 10 mm.
In this case, you must proceed in the following order:
At home, the easiest way to restore the functionality of a dull metal drill is to use a drill with a special attachment. After all, this device, unlike the grinder and sharpener, will help novice craftsmen avoid mistakes that will result in them having to throw away a damaged tool.
Helpful tips for drilling
To properly drill through stainless steel, you need to use a few simple techniques:
- It is most convenient to drill a surface that is horizontal. To do this, the part is placed on a workbench or table and the location of the future hole is marked with a core. Next, take a piece of plastic or thick-walled rubber tube with a length of 20 mm and a diameter exceeding the diameter of the drill, and install it at the drilling site. A special coolant is poured into the tube, which has lubricating properties. You need to drill through the stainless steel through this tray.
- If the workpiece is located horizontally, then there is a way out of this situation. The place to be drilled is also marked with a core and a paraffin ball is attached to this point. Drilling is carried out through paraffin. As a result of heating the surfaces, the paraffin will melt and gradually lubricate the treatment area.
- It is best to use a drill whose shaft rotation speed can be adjusted. It will be very difficult to drill through stainless steel at high speeds. The optimal rotation speed of the tool should be in the range of 100–600 rpm.
In the case when a home drill does not have a rotation speed regulator, and the rated speed is high, you can drill stainless metal, including electrical equipment, pulsed for 1-2 seconds after the same period of time.
Drilling a sink
The question often arises about how to drill a hole in a stainless steel sink. It is important to understand here that the sink should first be dismantled so as not to damage the plumbing elements and the bedside table. Then the sink needs to be installed on a flat horizontal surface. Next, the location of the future hole is marked and it is cored. If the hole is intended for installing a faucet and has a large diameter, then it is better to use a conical step drill, since the metal of the sink body is thin-walled.
If you are in doubt about how to drill stainless steel with a drill, then there are no big features from the technology described above. The main thing is to use the correct drill and ensure that it is well centered. Use a drill with speed control, set the torque to a position close to the maximum. A hand drill can help produce holes with a diameter of up to 10 - 12 millimeters.
The right lubricants
If the drilling process is carried out in an industrial environment on specialized metal-cutting equipment, then special compounds are used as a cutting fluid (coolant).
In this case, the use of self-made mixtures is not justified and can lead to damage to equipment and tools.
If the work is carried out in a home workshop, then the purchase of expensive consumables is not justified. They can be replaced with homemade coolant options.
You can prepare a lubricant based on ordinary machine oil, to which a certain amount of colloidal sulfur is added. Moreover, the sulfur must be ground into a fine powder.
Another option for preparing coolant at home is a composition based on sulfur and fatty acid. To prepare it, take bar soap and grind it on a grater. These pieces are then dissolved in hot water to form a thick soapy solution. Next, a technical solution of sulfuric acid is slowly poured into the container. As a result, fatty acids will rise to the top layer of the container. At the end, pour cold water into the container and wait until the fatty acids harden. Thickened acids are separated from the rest of the composition and mixed with sulfur in a ratio of 6 to 1.
Tricks for drilling stainless steel
As can be seen from the article, the process of drilling stainless steel is quite labor-intensive and requires certain skills and training.
We have prepared some useful tips on how to drill through stainless steel:
- When drilling, metal shavings should be long and come out in uniform sections; small, dark-colored shavings indicate that the rotation speed is incorrectly selected, and that the cutting edges of the drill are excessively heated.
- If you don’t have a prepared lubricant on hand, you can use regular vegetable or olive oil; pork fat or lard are also excellent.
- To work with thin sheet stainless steel, you can use a special drill bit for porcelain tiles.
- It is advisable to carry out the drilling process at a low speed of rotation of the cutting tool, and if the drill does not have a speed control function, drill by briefly turning it on and off for 2-3 seconds.
- If a cobalt drill is not available, you can use a pobedit tool with sharpening the cutting edges at 135 degrees.
- Before starting the drilling process, the workpiece should be punched, which will facilitate centering the drill.
- When drilling a workpiece of increased thickness, you can preheat the treatment area using a gas burner; when cooling, the heating can be repeated periodically.
- When processing thin stainless steel parts (up to 1 millimeter), you can use a high-quality wood drill bit; experience shows that the holes are smooth and of precise dimensions.