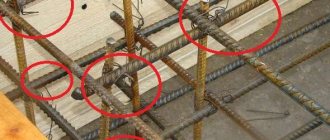
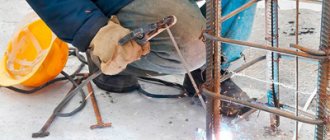
There are only two ways to attach reinforcement to a frame: electric welding and knitting. We will not open a debate about which one is preferable. Let’s just say that knitting does not reduce the strength of the working rods.
Any welding weakens the metal because it creates local stresses in it. This negatively affects the reliability of the entire structure.
Compared to welding, knitting work is more labor-intensive.
Despite this, in private construction with its small volumes it is better to choose them. Especially when it comes to such critical structures as foundations and floor slabs.
In this article we will tell novice builders how to knit reinforcement correctly. Let's look at the tools, materials and technologies used for this work. We hope that the information received will help you confidently handle metal, assembling strong and reliable frames.
Methods
It is necessary to first consider what methods of tying reinforcement for the foundation generally exist. They differ from each other by type:
- tool;
- material;
- knitting patterns;
- type of fittings.
By type of tool - this can be either knitting reinforcement for the foundation manually or using a special tool. For the latter, special crochet hooks, screwdrivers, and special pistols , produced specifically for this operation.
The material used to connect reinforcement bars to each other is:
- tying wire is the most common and reliable technology for tying reinforcement for the foundation, because it is performed with tying a knot.
- paper clips - are wire clamps, which, unlike ligation with knitting wire, are made without tying a knot.
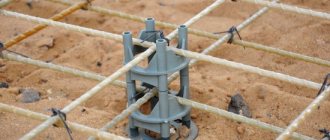
- small clamps made of plastic - this new material has become widespread due to its ease of installation and high knitting speed, and besides, it is not afraid of corrosion. However, such a bundle of reinforcement for the foundation causes a certain skepticism among professionals. Read more here.
- clips - made in the form of latches that fix adjacent rods to each other.
- welded connection - this old method has not become widespread, since the welded connection, due to its fragility, is susceptible to cracking during concrete pouring and does not have the necessary reliability. To perform a high-quality welded joint, you need a highly qualified welder.
Use of plastic clamps
The main advantages of this method include the speed of work completion, as well as the strength of fixation of structural elements. Using plastic clamps for knitting reinforcement also does not require special knowledge. However, plastic clamps have a certain cost and their purchase can be considered an economic cost. The disadvantages of clamps also include the fact that they can fail at low temperatures.
When analyzing these options, it can be said that the wire binding process will have a greater advantage than the same process using plastic clamps, since in the first case there will be less cost. However, clamps will help create a stronger and more reliable structure, even though it costs more money.
Required wire
When choosing wire, the following factors must be considered:
- Manufacturing accuracy class. The accuracy class is determined by the production method. There is a wire of a higher accuracy class, its deviation of the actual size, diameter, from that declared by the manufacturer along the entire length of the wire is less than that of a wire of a lower accuracy class. However, for knitting reinforcement, the accuracy class is not particularly important.
- Wire rolling method. There are two types of rolled products: cold-rolled and hot-rolled. Cold-rolled steel is rolled out from blanks by presses without heating. With the hot rolling method, rolled steel is rolled out in a heated state, which gives greater strength.
- Which group in terms of tensile strength does the wire belong to (there are the first and second groups);
- Degree of corrosion resistance. On this basis, there is only one difference - whether there is a galvanized coating on the wire or not.
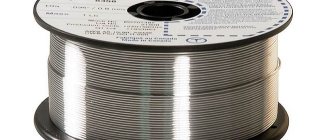
The criterion for choosing a wire is very simple, you need a wire that is called “knitting” . It has a full set of necessary characteristics: sufficient softness with the declared strength, abrasion resistance and reliability when fastened.
Galvanized wire is considered overkill. The optimal diameter of the knitting wire is 1.2-1.4 mm. A wire with a diameter of 1.6-2 mm takes a lot of force, as a result of which construction slows down, and the piece is too weak, it will simply burst.
Care must be taken to ensure that the reinforcement connection remains rigid after tying the knot: the frame must remain motionless during pouring.
This will ensure the reliability of the structure after hardening. You need to check the rigidity of the connection of the reinforcement by touching the rods - if they are rigidly fixed, they will not move, which means everything is in order. You should not test the strength of the knot itself, otherwise there is a risk of loosening the binding. The length of wire recommended for one knitting point is from 30 to 50 cm. The wire itself is extremely cheap - about 50 rubles. for 100 meters. To avoid running out of it at the wrong time due to loss or excessive consumption, it is recommended to buy it with a double supply. 100 rubles for 200 meters is quite inexpensive.
Choosing a knitting wire
The wire can be of different diameters, heat-treated and unfired, with or without zinc coating, with normal or increased manufacturing accuracy. Don’t be afraid of such a variety - in the store, when you ask for tying wire for fittings, they will definitely select what you need.
For reinforcement, it is recommended to use annealed wire. It is flexible, durable and resistant to external influences. It is easier to make knots from it, and the connection will be strong. The firing method does not affect the technical properties, but to keep your hands clean when working with black fired wire, you will have to use gloves. Light-fired wire does not get dirty, since the heat treatment process takes place without the participation of oxygen, but its cost increases.
If there are special requirements for the service life of a reinforced concrete structure, use galvanized wire; it has increased corrosion resistance. In addition, according to reviews on the forums, it is also easy to use.
It is important to choose the correct wire diameter and the reference point for this is the diameter of the reinforcement. For low-rise buildings, 8-12 mm reinforcement is used and tied with 1.2-1.4 mm wire. When choosing, do not forget that the larger the diameter of the wire, the harder it is to work with, but insufficient thickness will worsen the fastening properties.
Now let's look at the labeling
Heat-treated wire is designated by the letter “O”, while light firing is “C”, dark firing is “H”. Wire with zinc coating is designated “1C” or “2C”, where the number is the density class of the zinc coating.
Now you need to calculate how much wire is needed. The simplest way to calculate is to multiply the number of nodes by 0.5 and get the required wire footage. We recommend doubling this amount, since when knitting the pieces are torn and lost. After counting, we convert meters to kilograms. This is not difficult at all: look below at the table of the ratio of weight and length of wire of popular diameters.
Usually the wire is supplied in skeins or wound on spools. There is always one piece of wire in a skein, but on a spool there can be up to 3 pieces.
In the online store of Pervaya Metallobaza LLC you can choose a popular household knitting wire with a diameter of 1.2 mm (in coils from 50 to 300 kg).
How to bend reinforcement correctly, all the ways
You should choose how to bend the reinforcement for the foundation based on its diameter: with your own hands is quite easy, but for thicker reinforcement you will have to use special devices, homemade or specialized.
Among homemade devices, two methods are common. The first is when an ordinary pipe of suitable diameter is installed vertically and its base is poured with concrete so that it stands firmly.
The fittings are inserted inside all the way, and now the end protruding from the pipe can be bent by simply leaning on it. If this presents certain difficulties, then a second pipe is additionally put on the free end of the reinforcement, and now, due to the increased leverage, the thick reinforcement can be easily bent.
Welding is also often used. By softening a section of the rod with heat, it becomes easy to bend. The same is done with a blowtorch and a hammer. After heating the bend point with a lamp, bend the reinforcement with a hammer.
The most radical way is to make a cut with a small grinder and then bend it completely using available tools.
It should be noted that methods using welding and notching are not the best - at the bend, in these cases, the strength of the reinforcement is reduced by up to 10%.
Knitting reinforcement using wire.
The main advantage of this method is that this process does not require the use of additional equipment and specially trained craftsmen. When tying a reinforcement frame with wire, builders do not even need special knowledge. If any error occurs during the process, it can be eliminated immediately. The process of knitting structures using wire can be performed in formwork. However, the master still needs to carefully and carefully carry out the knitting process.
The disadvantages of this design include the fact that it is more shaky. If the frame was erected in a non-pit, then its installation requires special care and attention.
Crochet
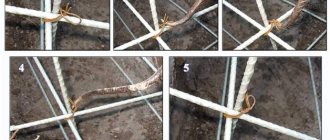
The design of the hook for these purposes may be different, but this is not so important. The meaning lies in the presence of a hook as such, because it is used to thread the wire. The rules for tying reinforcement for the foundation are shown schematically in the figure.
Pay attention to the sequence of actions:
- Bend the wire in half;
- Follow the arrow, as in the figure, bring it into position for threading;
- Insert the hook into the loop that will now be wound;
- Place the hook loop inward between the free ends of the wire;
- Without removing the hook, twist until tightened, but do not pinch;
- Ready!
There are motorized screw hooks in which the wire is tightened by rotating a screw. It turns out very quickly and conveniently.
What tools do we use for tying reinforcement?
In addition to the main device for knitting, the hook, the following tools are needed for reinforcement work:
- cutter, guillotine or grinder with a disk for cutting rods;
- pipe bender or similar device for bending reinforcement;
- You can use a screwdriver or a knitting gun.
In addition to the tool, you may need various templates, “stars” and other devices for marking the distances between frame elements and attachment points.
Correct crocheting of reinforcement
The frame laid out according to a given diagram is connected in the following order:
- The wire is located in the recess of the profile, overlapping joints are made at several joint points.
- The wire is bent in half and placed under the connection point.
- The loop is hooked.
- The free end of the wire is brought to the hook, then placed on the tool with a slight bend.
- Next, the hook rotates, twisting the wire to the desired strength.
- The tool is carefully removed without loosening the twist.
The tying method does not change fundamentally even when using screwdrivers or special tying guns.
Simple knot
Making a simple knitting knot involves the following procedure:
- Wire pieces 20 cm long are prepared.
- The wire is bent in half.
- The hook is inserted into the loop, catching the free end.
- The worker, holding the free end, turns the hook until a tight connection is obtained.
For ease of crocheting, a wooden or other non-slip handle is placed on its end.
Dead node
A dead knot is usually formed on vertical reinforcing bars. It is considered more reliable. Tying involves the following steps:
- The wire blank should have a length of about 40 cm, bend in half.
- The loop starts from the bottom of the future node.
- The free end is wrapped around the top and bent under the rods until it aligns with the loop.
- The tip of the hook engages the free end and rotates with the necessary tension until the loop breaks.
Condition for reliable knitting: laying the wire as tightly as possible along the reinforcement.
Professional tying gun
The tying of reinforcement cages that require a significant amount of work should be mechanized as much as possible. Using a knitting gun can speed up the process of foundation reinforcement by an order of magnitude.
The automatic tool is brought to the fixation point and the trigger is pressed, and you can move on to the next node. The operation takes a fraction of a second.
The tool is used in professional construction. For a private developer, purchasing such a tool is expensive and does not pay for itself during the construction of the house. Purchase option - rental from specialized companies.
How to use a screwdriver with a hook
Using a tying screwdriver can make the work easier and speed up the process. The role of a hook can be played by a bent roofing nail inserted into a cartridge instead of a bat. It is important for the performer to learn how to select the required speed of rotation of the hook.
Important: if the tightening force is excessive, the wire will break; if it is insufficient, the tightening will be weak.
How to knit with pliers
Pliers can be used as a tool that completely replaces a hook. Knitting sequence:
- A small roll of wire is held in the left hand.
- The end of the wire is pulled from below.
- The second end is captured by pincers.
- The wire is twisted 2-3 turns.
- Excess wire is bitten off by pliers.
The pincer knitting method can compete in speed with a hook, while the wire is consumed more economically.
For strip foundation
The strip foundation reinforcement has two patterns for laying rods:
- system of 4 rods : two at the base of the foundation, two at the top (used if the width of the foundation does not exceed 50 cm),
- system of 6 rods : an additional longitudinal rod is placed between the two main ones (used in cases where the foundation width is more than 50 cm).
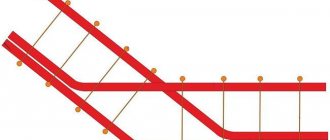
Bent reinforcement is laid at the corners, and the ends should protrude from the corner by at least 40 cm. The reinforcement connection nodes should be located from each other at a distance of no more than 60 bar diameters . For example, if 12 mm reinforcement is used, then the strapping should be every 72 cm or more often. How to choose reinforcement for a strip foundation?
Types of fittings used
Before starting to analyze the topic of how to properly knit reinforcement for a foundation, you need to understand the reinforcement itself. Indeed, today the market offers two varieties of it:
- This is regular steel.
- Composite.
Everyone has long been accustomed to using ordinary steel. But what is the second model, how does it differ from the first, and is it better?
Steel
Metal reinforcement consists of six classes, which differ from each other in the percentage of alloying additives. And the more of the latter, the higher the class, the higher the characteristics.
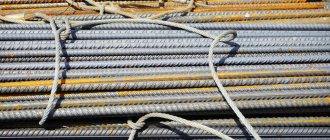
The reinforcing bars themselves are rods with a smooth or grooved surface. The first class is smooth, the rest are grooved.
The relief structure is an increase in the area of adhesion between reinforcement and concrete mortar. In addition, the protrusions act as restraining sides when the reinforcement structure begins to work in tension.
As for the choice taking into account the strength of the reinforcing bar, for foundations, hot-rolled material of class A III with a diameter of 10 - 18 mm is usually used.
Rods with higher characteristics and sizes are too expensive, but they perform the same functions with not the heaviest loads. And the lower class reinforcement for foundations is rather weak. But we must add that even smooth reinforcement is used in reinforcing frames. It is not the main one, but it is used for jumpers, braces, ligaments and other non-loaded units.
When choosing, you need to pay attention to the product labeling, especially the indices. Here are just two of them:
- “C” is a designation that the reinforcement can be welded.
- “K” - anti-corrosion additives were added to the steel. This type is the most expensive, so it is not used in private housing construction.
As for welded reinforcement, it is also not the cheapest option. Therefore, for private owners, the best option is knitting with steel wire. As for the question of what kind of wire is used to knit the reinforcing frame, we will talk about it below.
Composite
This variety is a relatively new material. It is based on plastic, to which filling components are added: glass, carbon, basalt.
The most popular is the fiberglass variety, because it is simply cheaper than the other two with almost the same strength characteristics.
If we talk about the technical characteristics of this material, then:
- The tensile strength of plastic reinforcement is 1000 MPa, and that of steel reinforcement is 390.
- It is 3.5 times lighter than metal.
- Steel corrodes, plastic does not.
- It does not conduct electricity.
- It has low thermal conductivity.
As for the negative aspects:
- Metal reinforcement is better in elasticity.
- Plastic belongs to the category of slightly flammable materials.
- When heated, it softens.
- Fiberglass reinforcement can only be tied with clamps or wire; steel can be welded.
Today, clear recommendations on the technology of using composite reinforcement have not yet been developed, so experts recommend using it in foundations for lightweight buildings. It is better to lay steel under heavy ones.
For slab
A reinforcement frame for a foundation can take the form of a two-dimensional plane, a mesh formed from reinforcement bars. The second option is volumetric, in the form of two meshes of intersecting reinforcement, located one above the other and connected by transverse rods.
Reinforcement - from 12 mm and above, up to 16 in private housing construction. The mesh cell size is 200x200 mm. The distance from the lower reinforcement belt to the pillow (or insulation) is 50 mm. The top belt is also protected from external influences by a 50 mm layer of concrete.
See how to knit plastic reinforcement for the foundation here.
We knit reinforcement with special guns
And they come in a wide variety - electric and battery-powered, from a variety of manufacturers. The Japanese were the first to come up with such a miracle of technology - thanks to their device, the wire on one node is twisted within a second and strictly within a certain tension force: not weakly, but not so much that it breaks.
There's just one problem: these pistols are very expensive. And here Russian craftsmen get out of the situation as best they can: someone buys and then resells a pistol, someone prefers a cheap Chinese counterfeit (enough for one foundation), and someone is looking for an opportunity to rent such a pistol - and In fact, such a possibility exists.
But it doesn’t matter which method or tool you choose - the main thing is that the reinforcement is connected conscientiously. Then the foundation under the bathhouse will delight you for many years with its strength and the absence of any cracks.
Cost calculation (price for work and materials)
Let's take as an example a strip foundation 10 by 10 meters. This is the perimeter of the house. In addition, there will be a foundation for internal load-bearing walls - two walls of 10 meters each. It turns out 60 m.p. foundation.
How much reinforcement and tying wire will be required with the right approach? Let's say the foundation is less than 50 cm wide - it will use a scheme with four longitudinal rods. In this case, in 1 linear meter of the foundation the following will be used:
- 4 longitudinal rods. That means at 60 mp. will be 240 meters.
- 4 vertical. With a foundation height of, say, 50 cm, their height will be no more than 45 cm. 4 x 45 cm = 1.8 m. In 60 meters of the foundation - 108 m.
- 4 transverse. With a foundation width of 45 cm, the width of the transverse ones will not exceed 35 cm. 4 x 35 cm = 1.40 m. In 60 meters of the foundation - 84 m.
How much is it?
For longitudinal rods we use 12 mm reinforcement costing 25-30 r/m.p. 240 x 35(30) =6000 (7200) For vertical and transverse rods, take 6-8 mm costing 12-16 r/m.p. (108+84) x 12(16)=2304 (3072)
So, the purchase of reinforcing rods for this foundation will cost from 8304 to 10072 rubles.
Now let's calculate the required amount of wire. 4 ties for a 4-bar foundation per 1 m.p. This, based on a maximum consumption of 50 cm per tie, is 2 meters of wire per meter of structure. We have 60 meters, so we need 120 meters of wire.
Attention: wire is sold in kilograms. It is necessary to convert from meters to kg.
1 m of wire with a diameter of 1.2 mm weighs 9 grams, respectively, 120 m of wire with a diameter of 1.2 mm weighs about 1 kg, which costs about 50 rubles. The wire is cheap, so you can and should buy it with a double supply - 240 meters for 100 rubles. All that remains is to calculate the cost of installation and tying of the frame. As a rule, it is not calculated separately and is included in the total cost of pouring the foundation. In the regions, such work is cheaper, but the price range is approximately the same - 1000-2000 rubles per cubic meter. This price includes the construction of a trench, installation of formwork, binding of the frame, pouring concrete and removing the formwork.
The total length of the foundation we are calculating is 60 meters, width 0.4 m, height 0.5 m. Let's calculate the volume: 60 x 0.4 x 0.5 = 12 m3. With this volume, the cost of foundation work will be 12,000 - 24,000 rubles.
How to knit reinforcement mesh yourself
The following step-by-step instructions will give you the opportunity to learn how to properly make a frame and provide the foundation with the necessary properties. The easiest way is to knit ready-made reinforcement for a strip foundation on the ground. Straight sections of the mesh are created outside the structure, but the corners are knitted after the frame is lowered into the trench.
- First you need to cut pieces of rods. It is better to start knitting with the shortest section of the foundation in order to gain a little experience. You need to cut to a minimum, trying to use the entire length of the working rods. If we take as an example a width of 40 centimeters and a height of 120 centimeters, then the indicators are as follows.
- The metal is poured on all sides with a layer of concrete at least 5 centimeters thick. The net dimensions of the frame in height are a maximum of 110 centimeters, width – 30. For knitting, add 2 centimeters on both sides for an overlap. It turns out that the blanks for horizontal jumpers should be about 34 centimeters long, and vertical ones - about 144 centimeters. This is for high foundations, but usually a base with a height of about 80 centimeters is used.
- 2 rods are placed on a flat surface, horizontal spacers are knitted at a distance of 20 cm from the ends on both extreme sides: the wire is folded in half, pushed under the fastening point and tightened by twisting the hook.
- At a distance of about 50 centimeters, all the horizontal struts are fastened in turn, the structure is put aside, another one of the same is made - these are the lower and upper frames that need to be tied together: adapt stops for both meshes between the rods and 2 struts vertically at the ends, attach the remaining pieces. The same should be done with all straight sections of the structure.
- Then, pads with a height of at least 5 centimeters are laid at the bottom of the trench, side supports and a mesh are installed correctly. Now you need to knit every corner and joint, creating a single frame. The overlap of the ends of the rods must be equal to at least 50 times the diameter of the rods.
- Next, the lower turn is tied, the vertical posts are attached, and the upper frame is attached to them. Then, on all surfaces of the formwork, you need to check the distances, indentations, and overlaps at the joints so that everything is done correctly and clearly.
- Connecting rods along the length usually does not cause problems, but fastening the frame parts in the corners must be done in accordance with established standards. There are two ways: between two perpendicular structures or at the point where a wall adjoins another.
Corner knitting technologies:
1) Rigid with a foot - at the end of each rod, knit a foot at a right angle with a length of at least 35 diameters of the rod, connect the bent part to the perpendicular section. This is how the outer rods of the wall frame are attached to the outer rods of the other, while the inner ones are also welded to the outer ones.
2) G-clamps - instead of a clamp, take a clamp with a length of at least 50 reinforcement diameters, one side is attached to the frame of one wall, the other is attached perpendicular. The outer rods are connected to the inner ones, the pitch of the clamps is ¾ of the height of the wall.
3) U-clamps - for one corner you need to install two U-shaped clamps with a length of at least 50 reinforcement diameters, each welded to one perpendicular rod and two parallel ones.
Junctions are created using similar fastening methods.

