Country estates have long ceased to be used for their intended purpose, namely for growing various crops in the summer. Currently, an increasing number of land owners are striving to make their summer cottage a place of rest and relaxation, where after everyday work with the typical city bustle they can come, be in silence and just relax. For these purposes, comfortable gazebos are often built, since their construction does not require large financial investments and special construction skills.
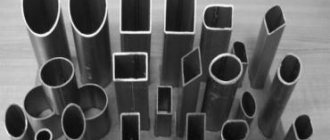
At the same time, one of the most common and inexpensive materials used in the construction of this structure is a metal profile. In the article we will tell you how to properly make a gazebo from a profile pipe with your own hands, show diagrams, drawings, photos and video instructions, and also understand a number of important features of component materials and installation features.
Profile specifics
Specifics of the profile and advantages of gazebos made from it
The structure made using the profile looks quite original. This kind of construction can be done in the shortest possible time. The main condition is to have experience working with welding equipment.
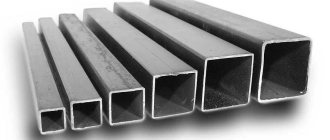
The source material from which the frame of the gazebo is made is pipes, in most cases with a rectangular or square cross-section, made of carbon and low-alloy steel.
The raw materials are characterized by sufficient strength, multifaceted resistance to harmful influences and practicality.
Profile pipe for a gazebo
Profile pipes, taken as the basis of the gazebo, give the building a number of positive characteristics. The main ones are:
- low specific weight of the structure (prevents the preparation of a powerful foundation);
- long period of operation;
- reasonable cost of material;
- fire resistance;
- no need for periodic repairs.
Stationary option
This type of building is being installed permanently. For the frame and lintels, steel profiles, brick and wood are used. A prerequisite for construction is the presence of a foundation. The design of this type is complex, and its creation will require more material and time costs than a collapsible gazebo.
- The presence of a foundation and profile pipe products give the structure high strength and durability. It can withstand high loads from winds, rainwater and snow.
- During construction, it is possible to use different types of execution. The building can accommodate furniture, barbecue, and stove. Electricity can be supplied to it. This design can be glazed and heated.
- An additional advantage of the structure is the possibility of implementing various types of design.
Preparation
When starting to manufacture a gazebo, it is worth deciding in advance on the type of structure, drawing up drawings, and preparing the necessary tools and materials. In the huge variety of shapes used, a gazebo made of profile pipes comes in the following types: rectangular, square, hexagonal, etc.
If you have no experience in building gazebos, you should choose the classic options - square or rectangular, since they are simpler in planning and subsequent installation.
The next step is the selection of materials used. To make a practical and inexpensive gazebo, you will need to prepare the following consumables:
- metallic profile;
- polycarbonate;
- cement or concrete;
- accessories;
- anti-corrosion alkyd primer or paint.
Drawing of a gazebo
Having finished with the previous points, we proceed to consider the question of how to make a sketch. You can draw up a plan either independently or by seeking help from specialists. For greater clarity, you can use the attached drawing, adjusting it to the required dimensions.
The preparation of the drawing must be treated with special attention, since the amount of material used, the aesthetics and service life of the gazebo depend on the accuracy of the calculations made.
The final activity is preparing the instrument:
- drill with a set of drills for working on metal;
- grinder or angle grinder;
- welding equipment;
- channel beams;
- bayonet shovel;
- metal screws and thermal washers in the color of the finishing material.
Drafting
The process of developing a project and further constructing a covered structure intended for recreation using profile pipe products is similar to creating a gazebo from any other types of rolled metal.
Before drawing a drawing of a gazebo made from a profile pipe, the homeowner should decide on the type of structure.
Currently, the most popular designs are the following forms:
- rectangular;
- square;
- hexagonal.
If there is no experience in carrying out such work, then, according to professionals, it is better to opt for the first two options - in this case it will be easier to calculate the parameters of the gazebo and carry out the installation yourself.
Next, you need to create drawings of a gazebo from a profile pipe with your own hands, on which you need to indicate the dimensions of the structure and the dimensions of all its even the smallest elements with a mandatory explanation of how they should be connected to each other.
When designing a building with welded components, one should not forget about tolerances. This is required so that the parameters of the erected gazebo do not differ from those provided for in the design documentation.
When designing a structure, when detailing is required, in addition to the drawings, several sketches are drawn up, containing a general view and images of particularly complex areas from different angles. However, you should not forget about some important points. For example, the length of corrugated pipes when buried in the ground must exceed the designed height of the supports by the amount of deepening of the base of the structure, regardless of whether concreting is planned or not.
The advantage of choosing a square or rectangular gazebo is that the arrangement of roofs for such a structure cannot be called particularly difficult.
Site selection and site equipment
We begin to determine the best location in the local area. If there is a reservoir, it makes sense to place the gazebo on the upper edge of the bank. The building should be located in a clearly visible area, since it is a decoration of the entire landscape design.
Having finished choosing a location, we begin preparing the site. To do this, in accordance with the drawn up plan, you will need to remove the turf from the soil along its perimeter and apply marking lines. Next, we dig holes according to the number of support pillars, 50–60 cm deep.
A profile with a length that takes into account the gap of the pipe in the prepared pit is very often used as racks. The optimal cross-sectional values for the future support element vary from 80×80 mm with a wall thickness of 2.5–3 mm. To give greater stability, it would be useful to weld the heels to the supports.
Construction of a gazebo from a profile pipe step by step
The first step towards erecting a metal structure is choosing its type. It can be open, semi-closed or completely closed, with or without lighting. For this purpose, a construction project is drawn up.
Design
The sketch can be sketched by hand, or you can entrust its development to a professional designer. At this stage, you should decide on the dimensions of the structure. The height of the structure should be slightly higher than the average height of a person (180-200 cm), the width of the entrance opening should be no less than the width of the front door (about 1 m).
a drawing indicating the actual dimensions of the building is needed in order to calculate the number of pipes for installing the frame, as well as other necessary building materials.
Detailed drawing of a metal gazebo
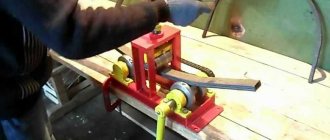
To install an iron structure you will need:
- profile pipes with a cross section of 50x50mm and a wall thickness of 2-4 mm for the frame;
- iron rods or pipes with a cross section of 20x40 mm for the transverse elements of the sheathing;
- roofing;
- electrodes, welding;
- grinder, metal drills;
- screwdriver, self-tapping screws.
Preparatory work
Next, they begin to prepare the place for installing a metal gazebo. This could be a site near a pond, in the shade of trees, or near a house - the main thing is that it is picturesque and comfortable for relaxation. In the selected area, remove the top layer of soil (15-20 cm) and level the base. Since the metal gazebo is light in weight, a columnar foundation will be sufficient for it.
Preparing the site for the gazebo
Next, they begin to install the columnar foundation - the base of the gazebo. To do this, holes 50-70 cm deep are dug in the corners of the site, into which a layer of crushed stone (20 cm) is poured and support profile pipes are poured with concrete.
Preparing the site for the gazebo
Attention: the evenness of the installation of the pillars must be checked with a level.
Formation of a metal frame
After installing the vertical metal posts, begin attaching the horizontal crossbars. To do this, you can use iron rods or pipes of a smaller cross-section. Metal elements can be connected to each other by welding, or using bolts and screws. Transverse pipes for fencing the structure are installed at a height of 1-1.2 m. And the top of the support pillars is fastened with the help of an upper strapping.
Please note: the piping pipes should be welded to each vertical post - this will ensure the reliability of the structure.
Methods of fastening metal gazebo elements, photo drawings
Next, they begin to install the frame under the roof. To prevent precipitation from remaining on it, the transverse logs are attached at an angle (30-45 degrees). For a gable roof, several support triangles are made, which are connected by a common profile at the top point, and their bases are connected to the main frame of the gazebo.
Construction of the frame of a metal gazebo for a summer residence, photo
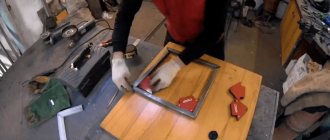
Advice: before installing the roofing, you should prime and paint the metal frame, since this will be problematic after covering.
Roof
One of the simplest and most economical roofing options for a gazebo is polycarbonate. For the roof of the gazebo, 8 mm thick cellular polycarbonate is suitable. It is secured with special bolts with thermal washers. To do this, polycarbonate sheets are cut to the required sizes, and holes for fastenings are drilled in the pipes. The ends of polycarbonate sheets can be covered with special strips - this will provide them with additional protection and give them a neater appearance. As a result, we get a rather cozy and inexpensive gazebo, which only needs to be equipped with benches or other furniture for proper relaxation.
e530c3cdb2eaf85b26c3e7b1dc276bd8.jpe c96b7090affac7b65a7be44bf4449b26.jpe
Attention: when laying the roof covering, install it with a slight overhang. This will protect all structural elements from atmospheric influences. . Do-it-yourself ready-made gazebo made of metal profiles
Do-it-yourself ready-made gazebo made of metal profiles
Metal gazebos at the dacha are a sign of the good taste of the owners of the site. They will become a harmonious addition to landscape design, a reliable and cozy place to relax in nature. These structures can come in different shapes and sizes. Metal combines well with other building materials, which allows you to realize even the most daring design ideas.
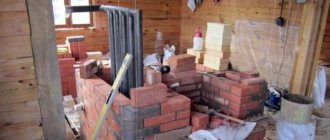
Construction of the foundation
To build a gazebo, it is most rational to use a pile or columnar type of foundation. Having finished digging holes, we proceed to installing support posts and compacting the place of contact with the ground. To achieve this goal, it is necessary to fill the recesses with crushed bricks or small stones, then fill them with a cement-sand mixture or concrete and level them to the building level.
Metal harness
Metal framing involves the production of a metal frame that rests on supports and subsequently serves as the basis for the entire structure. It must be equipped and placed at the optimal height so that in the future a person, when entering and exiting, does not have to do unnecessary actions to overcome this element of the gazebo.
Key Build Options
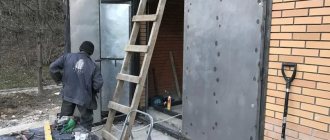
In most cases, metal products are connected to each other using a welding machine. The speed of operation in this case is high, as is the degree of reliability. However, if we are talking about an open summer structure, it may be necessary to dismantle and subsequent re-installation. And it’s not surprising, because if a summer cottage is not guarded, then leaving a bunch of metal on it is at least unsafe. The point is that this hardware can simply be stolen. If so, then the modules must be welded and then connected to each other using bolts. For the most part, such collapsible structures are a metal frame on which an awning is installed or, alternatively, any other material that can be quickly fixed and just as quickly removed.
Construction of walls and roof equipment
The cladding of the structure involves the use of polymer materials. The sheets are attached using self-tapping screws or bolts to the rafter system. The rafters are made from a similar profile pipe presented above. Relying on supports, the beams converge in the center of the structure at an angle of 10–15°. Next, using a thin metal profile, we carry out the sheathing in increments of 35–40 cm - this will significantly reduce the windage of the polycarbonate and will not allow the sheets to sag excessively, loosening the joints.
Having no experience in making a roof, the emphasis should be on the classic gable structure with a triangular shape. If the length of the rafters exceeds 150 cm, then it would be useful to weld additional spacers and a central beam to them.
Decoration of the side parts of the structure
To decorate the walls of the structure, geometric or bizarrely shaped figures made of metal rods are suitable. You can also use wooden sheathing in combination with fresh flowers or grape vines climbing from the base to the roof. If you paint the wooden and metal elements of the gazebo in a timely manner, it will serve you for many years.
Wood is usually coated with an antiseptic and varnish, which can be applied both before and after the installation process. As for metal elements, in this case it is worth considering that surface treatment is carried out after completion of all work, since painted components are quite difficult to weld with each other.
A beautifully designed gazebo
In conclusion, I would like to note that the success of any construction lies in strict adherence to the instructions, the correctness of the drawing and the accuracy of the measurements taken. A gazebo made using profile pipes will not only delight the owner and his guests with its magnificent appearance for a long time, but will also become a place where you can relax, forgetting about the bustle of the city.
Main stages of construction work
The construction of a gazebo from a profile pipe is best carried out in compliance with certain stages of work
Pouring the foundation
To create a gazebo from professional pipes, experts recommend pouring a standard type foundation - a columnar one (see How to make a gazebo on poles according to all the rules). The basis of this foundation are pillars installed in the corners, as well as in places where walls are planned to intersect.
So:
- To install the pillars, it will be necessary to dig holes, the depth of which should not be less than 500 cm.
- The inside of each pit is covered with waterproofing material, and the installed pillars are filled with concrete.
- After this, it is necessary to align each pillar vertically and fix it in this position with the help of supports.
The pillars must be left in this position for at least 24 hours.
Installing the trim from the bottom
An example of a 4-pitch roof
The next stage of building a gazebo from a corrugated pipe with your own hands is the installation of the upper assembly:
- You should first check the length of all pipes that will be used to install the top trim.
- All components of the upper assembly are welded to already installed pillars either on top or on the side.
- If you are working on your own, it is better to weld from above.
If you have assistants, you can weld from the side.
Construction of the roof of the structure
Pitched roof structure
A gazebo with a profile pipe can have two types of roof:
- Flat.
- Sloping.
The choice of roof shape directly depends on the shape of the gazebo itself:
- For example, if the profile gazebo has a hexagonal shape (see DIY hexagonal gazebo for a summer residence - part one), then the roof should also have six slopes,
- If the gazebo is rectangular or square, it is best to choose a flat roof for its construction.
Installation of roof beams is carried out directly on the rafters or risers:
- To strengthen the roof structure, you can also use special lintels.
- For the manufacture of rafters, square profile pipes are mainly used, the slope of which is close to 10 - 15 degrees.
- Triangular rafters can be used when constructing the roof of a square gazebo.
- The lathing is made from a profile pipe of minimal thickness. In this case, the distance between the pipes is approximately 35 - 45 cm.
Interior decoration
How to make a gazebo from a profile pipe as convenient and comfortable as possible
To do this, you need to pay a lot of attention to the interior decoration of the structure:
As for the floor, you can use wood or tiles for this.
- This is due to the fact that wood itself is a warm material that creates comfort and warmth.
- In addition, wood will not heat up in the heat or cool down in cold weather, which cannot be said about tiles or metal.
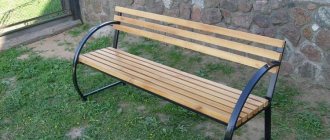
It is impossible to imagine a gazebo without benches and tables installed in it.
For their manufacture you can use the following materials:
- Wood (see Wooden benches for gazebos and other garden structures).
- Metal.
- Plastic.
So:
- Benches can be either stationary (welded or fixed to the floor surface) or mobile. The second option for benches is more practical and convenient.
- The table does not need to be permanently installed in the gazebo. If necessary, you can simply put it there. This way it will not clutter up the free space.
But, if you want to install a table in the gazebo on a permanent basis, then it is best to make it from the same material as the benches. Thus, the internal design of the gazebo will be more harmonious and balanced.
Exterior decoration of the building
Conservative option
Exactly how the gazebo will be finished externally depends only on your desire, capabilities and skills.
There are many different options for exterior finishing:
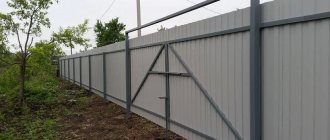
- The lower part of the gazebo is finished using sheets of polycarbonate or wood.
- All walls of the room are covered with polycarbonate sheets.
- The walls of the gazebo are not completely closed, and forged rods or strips are used for their arrangement.
- As you can see, there are many options, the main thing is that the gazebo is cozy, comfortable and has an attractive appearance.
- It would not be superfluous to use hanging flowerpots or a hedge of climbing plants when decorating the exterior.
The video instructions in this article will help you visually familiarize yourself with the stages of constructing a gazebo from a profile pipe.
Schemes and drawings
The diagram makes it easier to make a gazebo. We suggest you choose the appropriate design option:
Gazebo made of profile pipe
Typical gazebo made of profile pipe
Design diagram - top view
Scheme of a gazebo made from a profile pipe
Gazebo plan
Roof drawing
Drawing of a gazebo made from a pipe
Gazebo diagram Canopy drawing
Photo
Glazed structure Hexagonal gazebo made of profile pipe
Rectangular shape Small gazebo made from profile
Beautiful design
Frame for gazebo
Family gazebo
With forging elements
With a gable roof Covered with ondulin
Made from a profile pipe with a hipped roof.
Did the article help you?
Making a canopy
Having dealt with the existing types of structures, now let’s look at how to build gazebos and canopies for a summer house with your own hands
.This process consists of several stages:
- Choosing a location;
- Frame construction;
- Construction of the roof.
There are certain nuances at each of these stages.
Attached carport with sloped roof
Selecting a location
Gazebos and awnings for summer cottages can be of any type and shape, but the main thing is that they fit correctly into the country house interior.
And for this, the structure must be located in a good location and in a suitable environment:
- Country gazebos and canopies, according to design rules, should be installed at the end of the perspective line. The best place is at the junction of garden paths or at an elevated position with a beautiful view.
- It is also customary to place gazebos near streams and ponds so that you can admire the surface of the water.
- It is better to place the structure among bushes and other plantings. Gazebo canopies at the dacha, covered with climbing plants, look especially beautiful.
Diagram of a canopy with a gable roof
Materials
For construction you will need the following materials:
- Beams with a section of 150X150 mm;
- Beams with a section of 150X50 mm;
- Boards 160 mm wide and self-tapping screws;
- Roofing material.
It is best to use pine beams, since the price of this material is quite affordable and at the same time it has good performance properties.
Canopy frame
Construction of the frame
The most difficult thing when building a gazebo is to install the poles in a vertical position with your own hands. The easiest way is to dig them into the ground.
The work is performed in the following order:
- First of all, you should mark the site and dig holes for installing gazebo posts. The bottom must be covered with crushed stone and compacted well. The verticality of the racks should be checked using a plumb line.
- Then the hole must be filled with concrete mortar. After this, you need to wait a few days until the concrete hardens.
- After the racks are installed, they need to be cut to height at an angle. The easiest way is to make a pitched roof; in this case, one row of racks should be 20-30 centimeters higher than the other. The cutting angle must correspond to the angle of the roof so that the rafters rest completely on the ends of the pillars.
In the photo - a gable canopy
Country pavilion
Roof installation
The further construction process is simple, but it requires extreme care. The installation of the roof begins with the installation of rafters - beams with a section of 150x50 mm.
The work will be performed in the following order:
- The rafters rest on support posts or support boards mounted in advance. To connect the rafter system, you can use wood screws. If you have a gable roof, then you can use metal corners to connect the rafters. The step should be about a meter.
- Then, lathing is done on top of the rafters. For this, an edged board with a width of 160 mm and a thickness of 30 mm is best suited.
- At this point, the construction of the wooden canopy is almost complete. You just need to lay the roofing. Gazebos and canopies in the country can be covered with any material, for example, slate. It is screwed onto the top of the wave using galvanized screws. As a rule, eleven screws are required per sheet.
Now all that remains is to pay attention to the floor. The easiest way is to fill it with crushed stone; you can also make a concrete screed, make flooring or cladding with sandstone.