In a previous article, TD Serebro talked about why some metals are considered precious. It turned out that there is a simple explanation for this: they have unique chemical, physical and aesthetic properties.
Each metal is unique in its own way, but our company treats noble silver with special respect. It became the basis of the trading house’s assortment, is one of the main metals in jewelry and is very widely in demand in light and heavy industry. There are amazing facts and several myths associated with silver - we will confirm some, dispel others, and all of this will be interesting.
Disclaimer: We do not try to tell everything, but want to give you a general understanding of those things that will be useful when choosing jewelry. We are a jewelry company. If you want to understand these issues in depth, you might want to consider special education.
Physics
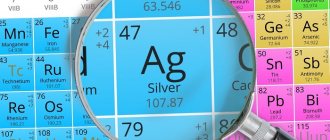
Silver is a white precious metal. Its density is 10.5 g/cm³, temperature 960.5°C, boiling point 2210°C, Brinell hardness in the annealed state (after annealing) 25 kgf/mm². These numbers mean little to a non-specialist, but they are very important for those involved in processing the material. Depending on these indicators, different forces and methods are applied to the metal to give the finished products the desired properties.
Annealing is a high-temperature treatment to give the metal a more stable state, eliminate inhomogeneities, and relieve stress due to deformation. Silver alloys are annealed at a temperature of 600–650°C for up to ten minutes, depending on the mass, and with rapid cooling. Almost all silver jewelry is annealed.
Silver polishes well, is highly reflective, has good malleability and the highest thermal and electrical conductivity of all metals.
Cleaning blackened silver at home
Blackened silver is rarely found in jewelry stores, but it is plentiful at flea markets and in grandma's chests. A touch of antiquity will give the product nobility, but a touch of dirt and dust - not so much. You can clean black silver with soda and salt and a cleaning agent, a regular school eraser, or ammonia with crushed chalk. There is no guarantee that the product will regain its original shine, but it will look much fresher and cleaner.
Chemistry
Silver is stable in water, practically does not react with oxygen in the air at room temperature, but due to the presence of hydrogen sulfide in the air, over time it becomes covered with a thin dark coating of silver sulfide. Silver also reacts with ozone, forming a coating of silver oxide. This is the very darkening that is considered the main drawback of this metal.
Copper, which is the most common alloy for silver alloys, also forms a coating of copper sulfide. The higher the copper content in the alloy, the faster the product will darken, and the lower, the less susceptible the alloy is to tarnishing, so alloys from 875 to 960 are considered the most stable.
Ligature is an alloy of two or more components that is added to a precious metal to bring the jewelry alloy to a certain standard, change the color of the alloy, and also impart various useful properties. The process of adding a ligature is called doping.
Silver dissolves in nitric and hot concentrated sulfuric acid. Like gold, it reacts with alkaline solutions of cyanide. You will probably never encounter these things. And if you do, be very careful.
Blackening technique
Technologists call blackening the process of treatment with a special composition that includes sulphides of sulfur, silver and copper. Russian jewelers have been familiar with this technique since the 17th century. The craftsman applies a layer of powder to the decoration. Then it is sent for firing in a special oven. When the desired temperature is created, the niello melts and is absorbed into the surface of the base. This treatment is characterized by increased abrasion resistance.
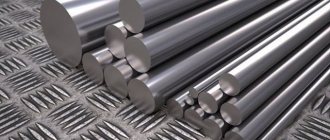
Silver alloys
Pure silver is a heavy (lighter than lead, but heavier than copper and harder than gold), unusually ductile silvery-white metal with a light reflectance of about 100%, therefore, in its pure form, silver is usually used only to cover jewelry made from silver alloys, base metals, etc. component of gold and silver alloys and solders.
In the manufacture of jewelry, in order to increase the hardness and strength of the material, silver is processed in alloys with other metals. Most often these are two-component alloys of silver and copper in varying percentages and with a small amount of impurities.
Silver alloys vary slightly in shade and have approximately the same mechanical properties. Tableware items and decorative table decorations are made from alloys with low silver content. High quality alloys are used to produce jewelry. They are quite flexible and go well with colored stones, pearls and enamel.
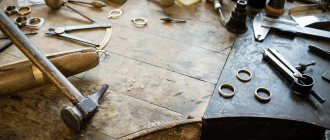
Processing of precious metals
Gold and silver are the most important materials in decorative art.
They have always been valued very highly in themselves; this added value to anything made from them. product; It is convenient to work with them, since products made from them can be remade many times without the loss of precious Metal. Gold and silver were used as money and jewelry as early as around 4500 BC.
Gold is less common in nature than silver and is more valuable.
The methods of working both metals are similar, and a master who has learned to work gold can also work with silver; The term "goldsmith" traditionally meant artisans who worked with both metals. Their professional associations (guilds), which arose in Europe in the Middle Ages, began to be called guilds of goldsmiths. Masters who specialized in a variety of areas of their craft, from forging to embossing, from stamping to engraving, could join such a guild. To certify the purity of the material, stamps were used, which were applied to the products of the craftsmen. The compliance of the declared and actual purity of the metal was controlled, and in general the activities of goldsmiths were subject to strict rules.
Both gold and silver in their pure form are too soft, and items made from them, such as cutlery or jewelry, would be too fragile and impractical for everyday use. Therefore, since ancient times, small amounts of other metals have been added to them to increase hardness. The best additive for these purposes was copper.
In its natural state, gold always contains some silver. Gold with a high silver content is called electron and is also considered a precious metal. The electron was used in ancient Egypt, Greece and Asia Minor. Since ancient times, artisans have been able to refine gold and obtain relatively pure metal, and then increase its strength by adding copper.
Silver was usually obtained as a by-product from the mining of tin or lead. In products made from purified silver, made from ancient times until almost the beginning of the nineteenth century, traces of gold can be found - then they did not yet know how to extract gold, unlike other base metals, from natural silver with impurities. After the silver was refined, in most cases a little copper was added to it. In later times, craftsmen experimented with adding zinc, cadmium and tin to silver so that it would not tarnish as much.
The usual material for a goldsmith's work was the metal in old pieces purchased or received from clients. The master took them apart and melted them down, separating the gold used for gilding. The silver was then cast into an ingot. Before the advent of rollers (miniature jewelry rolling mill), the craftsman had to forge the ingot with a hammer for a long time in order to flatten it to the desired thickness. Then a part of the required shape was cut from the plate. The remaining scraps could be used to make small parts of the product - say, the legs or base of a cup, etc. The parts of the product were connected by soldering or secured to a central rod, a method practiced in England and Germany.
Significant progress in metal processing was the introduction of metal rolling technology, which came from Germany to France more than 400 years ago, although at first, before the use of horse traction in this process (which began to be used in the early 18th century), it was not so widespread. The technology of metal purification (refining) was gradually improved; in the 1750s in Europe there were already quite a few specialized workshops that supplied jewelers with ready-made metal plates for work.
Nowadays, the refining of precious metals is carried out using the method of electrolytic purification, which ensures high stability of the quality of the metal, its physical characteristics and color. Sheets of metal are produced with extremely tight dimensional tolerances; You can get blanks of any shape needed by the craftsman, for example, in the form of a tube, wire, grain balls, etc. Special alloys are created that are optimally suited for various types of processing or enameling, solders with precisely specified characteristics, and much more. However, with all the abundance of specialized workpieces, the master must still have a good knowledge of the properties of metals and constantly monitor changes in their crystal structure during processing and even during grinding. The most important process for maintaining the ductility and strength of a metal is proper annealing.
Annealing
Forging, rolling and other mechanical processing processes of gold and silver change their crystal structure. As a result, the metal loses its ductility, becomes brittle, and cracks may appear in it. Therefore, the most important operation, repeated many times in the production of even a simple product, is annealing. It removes internal deformations of the metal and is necessary for a variety of types of mechanical processing - relief production, stamping, hammering, etc. Deformations (or stress) that occur in metal during machining are called hardening (“metal is hardened”). Annealing restores the structure of the crystal lattice and removes the hart (“releases” the metal).
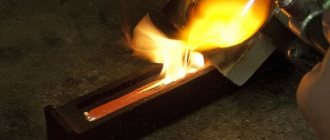
The need for annealing, although without understanding the scientific reasons for it, was recognized by metallurgists thousands of years ago. This process may seem simple, almost primitive, but in fact it requires acquired skill and deep knowledge of the properties of the processed metals and their alloys in order for it to be successful and hidden defects such as cracking, pores or internal cavities do not form in the metal mass , and dark spots did not appear on its surface due to partial oxidation of copper in the alloy due to overheating (this defect can become even more pronounced during forging). Many reasons can prevent successful annealing: overheating, which can change the composition of the alloy, uneven heating, exposure to the atmosphere.
Annealing was carried out like this: the master put the parts he was working with in a special heavy iron vat and rotated it in a flame. Gold or silver was slowly brought to a dark red heat (about 650 ° C), then removed with tongs and transferred to a refrigerated tank with water. How long the annealing lasts is very important; Naturally, heating larger objects required more time. Just as a pewterer (a craftsman who worked with a tin-based alloy, pewter) determined the temperature of the metal required for casting by its smell, a goldsmith usually decided whether the metal was hot enough for proper annealing by eye, by the shade of red heat. Therefore, it is not surprising that annealing usually took place in a dark corner of the workshop, where the color of the hot metal was better visible. Sometimes the annealed part was coated with flux to avoid the appearance of a black deposit on its surface. Upon reaching a certain temperature, the flux melted, and this was a signal that the process was complete. After annealing, the product was immersed in a tank of dilute sulfuric acid (bleach) to remove dirt and oxide.
Soldering
Soldering is the process of joining parts of a product by melting solder between them - an alloy based on gold or silver. Its melting point is lower than that of the base metal (which makes it possible to fasten parts without melting them), and the connection with the mass of the base metal is strong. With the exception of the simplest products, such as bowls or bowls, all products of goldsmiths consist of many small parts fastened together.
Soldering is an operation that requires great skill, since as a result the solder seam should not be visible, and the soldered surface should be absolutely smooth. The surfaces of the parts to be joined must be thoroughly cleaned.
To solder parts of a silver product, solder based on coin-grade silver (925% pure silver) is used. Nowadays, solid silver solder is made from an alloy of silver and zinc, its melting point varies between 700-778 ° C. Previously, to make solder, silver was alloyed with bronze, causing its melting point to be lower than that of pure silver. Solder—made in the form of a rod in the nineteenth century—was introduced into the soldering area while the product was heated in a melting vat, held over a flame. After soldering was completed, the product was immersed in a pickling tank with bleach to remove dirt and oxide.
In the rare cases where solder is visible on older products, it is noticeably different in color from modern solder. In addition, its traces were not previously cleaned out as carefully as on modern silver. When solder is visible on a product (usually the soldered base of a cup or bowl), it can provide strong evidence in favor of one conclusion or another if the product is suspected to be a counterfeit. Sometimes old silver, especially church plate, was rather crudely repaired using lead solder.
The base or leg was attached to the vessel by soldering an enclosing wire around the joint. When making a teapot or coffee pot, the spout was then soldered. If it was necessary to precisely position the spout along the axis of the product, holes could be drilled in the teapot or coffee pot; if the exact location of the spout was not critical, the craftsman could simply cut a single hole in the body of the kettle. Cast handles were soldered to teapots, saucepans and coffee pots in the same way, in early products - often using intermediate soldered plates cut to the shape of the handle, in the period around 1700 - often in the form of a leaf, part of a floral design.
Embossing and drawing
These are the two simplest and most common ways to process gold and silver. They were used to create both flat and hollow three-dimensional products and their parts - handles, spouts, legs. There are no seams on products made using this method, which is very important when producing elegant coffee pots, teapots and goblets. Now these processes have been almost completely replaced by stamping in a mold.
First, the worker cut a circle from a flat silver plate, called a “blank” or “blank.” He calculated the diameter of this
blanks, based on the average diameter and height of the object that was to be made. Then its center was marked on the disk - this point is sometimes visible even on the finished product.
Embossing is a simpler process than drawing or hammering. It involves processing metal with hammers of various shapes on a special wooden base. Using a hammer with a spherical striker, the master beat the workpiece, striking in a circle and moving from the edges to the center, gradually turning the blank. After going through a full circle, the blank had to be annealed to restore the malleability of the silver. Further shaping of deeper vessels, such as bowls and dishes, was done by hammering the metal on a leather pad with sand.
However, for the manufacture of even deeper products, for example, jugs, the drawing technique was used, for which a figured anvil (crossbar) was used, which was fixed in a massive base or, for small objects, clamped in a vice. First, the workpiece was beaten on a wooden block to bend its edges. Then the master turned the blank, which already had the shape of a dish, and, holding it with one hand at an angle to the figured anvil, with the other he hit the outer side with a hammer, passing horizontally row by row, starting from the base, alternately clockwise and then counterclockwise, so that avoid distortion of the product. During this process, it was very important to ensure that the centering of the future product was observed, for which purpose it was necessary to mark the center of the workpiece at the very beginning of the work.
The master continued drawing with a hammer, striking in circles from the base of the future vessel, and the workpiece gradually began to take on the desired shape. Annealing of the product was regularly repeated after a certain drawing cycle. As the diameter of the vessel decreased, the figured anvil was replaced with a smaller one. Each time, reaching the top edge of the future vessel, the master beat the metal in the opposite direction to make the edge thicker and stronger - this process was called compaction. Only when they made a cup or mug did they try to seal not the edges, but the base of the cup, so that it would be more stable.
When the vessel finally took the desired shape, it was necessary to eliminate irregularities in the metal from long hammering. This was achieved, at least in part, by “smoothing,” a process in which hammers with slightly convex wide heads smoothed out uneven areas of the product and tried to eliminate differences in wall thickness.
Cups, dishes and bowls were ironed on an anvil with a round head, and dishes, trays and other flat objects were ironed on a flat one.
As with any jewelry forging, when ironing it is important to achieve a completely flat and smooth surface and constant wall thickness, as this ensures smooth and beautiful lines in areas of complex shape, which is especially noticeable in reflections and reflections on the product.
The process of making trays and dishes required special skills and great craftsmanship. After the product was given the desired shape and the base, legs, etc. were soldered to it, the master once again completely beat it with a hammer to give the silver strength and prevent the metal from distorting during use. The larger the tray or dish was - and they sometimes exceeded 70 cm in diameter - the more strength the product required. To do this, the master used a large hammer with a flat head to beat the dish on a perfectly flat wooden block.
Rolling up and running in
Since metal drawing was a slow, labor-intensive and not always efficient process, other methods of working with sheet metal emerged. One of them was to roll a sheet of silver into the shape of a cylinder or cone and solder its edges. In the manufacture of cups, coffee pots, etc. a flat base was soldered to such a cylinder, and the soldering point was covered with an overlay ring. The seams were not completely hidden, but it was a quick process, and it made it possible to mechanize the production of simple products. The machine designed for him used three parallel rollers, two of which acted like ironing rolls in a laundry, and the third folded the rolled sheet.
In large workshops, hollow silver items were often produced using a rolling technique, which allowed for mass production. This technique was first developed for making copper vessels back in ancient Egypt. As with punching, there were no seams on the resulting products. A blank made of a silver sheet, the thickness of which depended on the success of processing, was attached to a wooden block-form, and together they began to rotate rapidly. A rounded steel iron on a long handle was brought to the workpiece; it pressed on the rotating workpiece, which gradually penetrated the shape of the wooden block. Finally, the workpiece was polished on the same machine with a flat iron.
This silver processing technique is in many ways reminiscent of turning wood on a lathe, with the difference that the excess material is not cut off, but rather deformed. If the product required further processing - for example, making the neck of a vessel - then this was done using the hammer drawing technique.
For successful processing it was important that the silver blank and the wooden form were securely fixed in the rotating chuck and did not change their position; The choice of wood from which the molding block was made was also important. Most often they were made from boxwood and bakout
For vessels of a simple shape, the block could be one piece, but often the blocks were made from many parts, which was necessary when producing products of complex shapes, for example, classical-type vases - in this case, the block could be easily removed from the finished product in parts.
Rolling was much faster than chasing and drawing, which required half a day to make a simple bowl or cauldron. True, it was necessary to anneal the metal more often; for example, the milk jug was annealed about six times. Otherwise, all the production processes for further assembly and final finishing of the product were completely identical for these techniques, except, of course, that the items made by rolling did not require ironing.
Nowadays, suppliers offer a range of standard workpieces, made using the rolling technique, for final finishing in the workshop. They can be decorated with ornamental details made of filigree, filigree, etc.; you can attach elegant handles, lids and other parts made in your workshop to them. The fact that the item was made by rolling can be determined by the horizontal lines inside the vessel; they are very different from knockout marks, which are usually only barely visible on both the external and internal surfaces of the product.
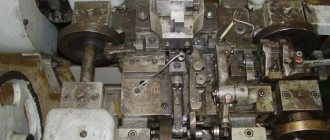
Stamping, pressing and hand forging
Until the 18th century, stamping was a manual process and was used only for decorating spoons, knife handles, boxes, buttons and other small items, as well as for making metal ornaments in the form of long stripes that decorated the edges of the base and lids of goblets, bottles, salt shakers, etc. . During manual stamping, the metal was hammered into a steel stamp, which was a blank with a pattern cut in reverse relief (“reversed”). In the 18th century, when everything necessary to begin the widespread production of silver products appeared - thinner and lighter rolled sheets of silver , hardened steel for stamps, machines that use the force of falling water - it became possible to mechanize stamping.
The quality of machine stamping dies had to be very high, and they were expensive to make, but afterward they did not require such lengthy final finishing, and the item was produced in just one simple operation. The metal sheet was stamped by regular blows of a mechanical hammer with a convex head that matched the concave shape of the die. The same pattern could be repeated many times with great precision because the stamp was made of strong steel and securely fastened to prevent any movement during the stamping process. Later, the die surfaces began to be chrome-plated to give the product a better polish. Sometimes the die contained a relief decoration, and the detailing on it could later be improved by embossing.
Since stamping virtually eliminated the difference in production between simple and complex flat products, from the beginning of the 19th century a myriad of different patterns and decorations for finishing metal objects came into use. Two different dies could be used for the front and back views, and die stamping could be used for different parts of the product.
Some clients and organizations ordered their own stamps. For example, the British Admiralty commissioned a special stamp depicting a chained anchor and a crown, and this design can be seen on teaspoons issued by the Admiralty from 1838 to the present day, both silver and silver plated.
Pressing is another way to shape thinner metal by forcing it into a die. Using a weighted friction press, the press rod is pressed into the molded silver. In small workshops, the press was an economical way to give the desired shape to silver sheets, saving time and effort where casting and rolling were unavailable or unjustified.
In the hand forging process, which was used to make flat wares, a silver rod of length and weight equal to that of a fork and spoon was prepared and roughly worked on a steel anvil with a heavy steel hammer against heated metal. The blank was then driven into the mold using a hammer or screw press. Finally, the craftsman used a file to remove excess metal from the edges and straighten the groove in the spoon and the teeth of the fork.
Some patterns, such as those known as "King", "Queen" and "Shell", were produced directly from stamping because they were cut out in the mold; others appeared on the product later, for example, the “Bright Edge”, which was hand-engraved on the finished product, or the “Ball Edge”, which was achieved by working the edge of the product with a hammer and a special semicircular tool consisting of two cups, each containing two recesses for two balls. The first ball made was placed in the first cavity, the second cavity formed the second ball; After this, the second ball was placed in the recess where the first was, the process was repeated over and over again, so that all the balls were located at the same distance from each other.
Casting
There were several methods for casting products or their parts. The success of the process was determined by the following points: the type and finish of the model and the mold in which the casting was carried out, the purity of the gold or silver and the temperature of the molten metal before casting. A variety of complex objects can be cast, provided that certain techniques are used - in any required quantity. Fine examples of the casting technique can be seen among the superb silver candlesticks, coffee pots, trays and jugs made in the 18th and 19th centuries.
The technique of casting silver in sand was similar to casting iron, and it was used if many copies of the product were not required. One part of the double metal frame was filled with a molding mixture of sand and clay and the model to be cast was placed in it to half its depth. Then the upper frame was installed on top of the lower frame and filled with molding materials. Channels were cut into the molds: “sprues” for pouring molten metal, and air ducts through which air escaped during metal pouring. The next step required separating both halves of the frame in order to carefully remove the model from them; after this, the parts of the frame were reconnected, and the metal, melted in a crucible and brought to the desired temperature, was poured inside and cooled. Then the casting was processed with a file to remove rough edges, minted and polished.
Materials other than sand and clay were also used for molding material, for example, cuttlefish bone, soapstone and various types of sandstones. Models were made from wood, brass, wax or plaster. Since the end of the 17th century, sand casting was especially skillfully done by French emigrants who moved to England. They cast not only handles, stands and other overhead parts, but also beautiful candelabra, coffee pots, teapots and other objects, which were cast in parts and then soldered together. And in our time, handles, noses, legs and small figures are often cast in this way.
Wax casting is a very ancient process; it was used by the ancient Chinese to cast bronze vessels. The model was made from special wax. Then a cast was taken from it, leaving sprues and air ducts through which the molten metal would flow and the wax would be melted. Once the casting process was completed, the mold was broken and the metal casting was removed. This method is only suitable for small objects, and only for those where the wax can be melted out of the mold.
Sanding, polishing and finishing
No matter how the item is made, its appearance can be either brought to perfection or hopelessly ruined by the final finishing. If a complex object consisted of several parts, it was recommended that before assembly, polish and finish those parts and surfaces that could be difficult to access after assembly. It was also advisable to place hallmarks before assembly so that the risk of damage to the product was minimal.
With any processing method - both manual and machine - scratches or marks from the file inevitably remained on the product. The big problem was fire marks - dark spots that differ from the gray matte surface left after annealing. Their removal threatened to drown the walls of the product. To get rid of stains, the surface was treated with an abrasive, such as soft slate, or pumice, or fine sand with rapeseed oil. In modern workshops, stains are sometimes cleaned electrolytically, using an object as an anode, while coating the object in reverse. This is not only expensive, but also a dangerous method that can damage the product.
After serious imperfections were eliminated, the surface was polished on a wheel and brought to a mirror shine with fine abrasives. With this treatment, the scratches on the product were healed. Rubbed with tripoli, a mixture of iron oxide with fat and stearic acid and lime solution. To apply these substances to the surface, circles of walrus or buffalo leather or felt, mounted on a polishing spindle, and soft swabs of cotton, wool and suede were used. For uneven surfaces and inner walls of hollow products, brushes made of bristles or thin brass wire were used. Throughout the polishing process, the product was regularly cleaned of sawdust, metal and residues of coarse polishing agents.
Treatment with ironing tools made of highly polished steel, agate or hematite compacted the metal and imparted shine and strong reflective properties to its surface, which was sometimes used for effective contrast with matte areas or “ice glaze” - a special roughness achieved by chemical treatment of the metal surface, fashionable in the 19th century. century. After the surface of the product was cleaned and polished, it was possible to begin its decorative processing - acid etching, texturing, tinting, etc.
Antiques Art and collectibles No. 9 (69) September 2009 p.56
Silver samples
The Russian Federation has adopted the metric system of samples. Metric fineness is the number of milligrams of the base noble metal that one gram of the alloy contains.
For example, in a 925 silver alloy, there are 925 milligrams of silver per gram. For simplicity, we can assume that at 925 purity the alloy contains 92.5% silver.
- 800. An alloy with a high copper content, which is why it has a yellowish tint. Suitable for cutlery.
- 830. Properties are identical to the 800th sample. Used for decorative decorations.
- 875. It is used in the industrial production of jewelry and household products - for example, pens.
- 916. Used for the production of tableware items coated with enamel.
- 925. In color and anti-corrosion properties it does not differ from pure silver. This alloy is widely used for making jewelry.
- 960. Used for making filigree products.
- 999. Suitable for storing metal in ingots and silvering, that is, covering jewelry with a thin layer of silver to protect and improve decorative properties.
In jewelry production, 875 and 925 are the most common. Modern Russian GOST 30649-99 describes five grades of silver-based alloys. In all, the alloy is copper.
Oxidation
The products are treated with a special composition, in which the main ingredient is sulfur. Thanks to this treatment, unusual color transitions appear on the treated surface. The intensity of the polishing process determines the shade that the silver will acquire.
The jewelry, on which the thinnest film is applied, is polished. As a result, the convex parts become lighter, and the concave parts are visually perceived as dark. Oxidized silver does not require complex care. It is enough to moisten a cotton napkin with soapy water and wipe the product, and then dry it with a dry cloth.
Coatings of silver products
Currently, the most technologically advanced types and methods of coating silver products are:
- “White” boiling is boiling in sulfuric or hydrochloric acid to reduce the content of copper reacting with hydrogen sulfide in the thin surface layer of the product. The surface acquires a matte tint.
- Electroplating — applying a thin layer of precious metal using the electroplating method. Currently, electroplating is the most popular way to protect and decorate silver jewelry. Depending on the metal that performs the function of the protective layer, the following types of coatings are used:
- Silvering is a coating with a thin layer of pure silver, which reacts weaker than alloys with hydrogen sulfide in the air.
- Rhodium plating is coating with a layer of white and, less commonly, black or yellow rhodium. Rhodium is a precious platinum group metal. It is wear-resistant, does not darken, and has a beautiful mirror-like light-steel shine, which is why in the last 10–15 years it has become one of the most popular coatings on the jewelry market. If repaired by soldering, the rhodium plating turns black and cracks. In this case, the old coating must be removed and a new one applied.
- Gilding is gold plating. It is actively used for complete or partial decoration of silver products.
- Passivation (passivation) — transfer of the top layer of the alloy into a passive state, which sharply slows down corrosion processes. Performs a purely protective function.
- Oxidation is a type of passivation, the creation on the surface of a metal of a dense film of oxides that protects it from corrosion. It is both a decorative and protective coating method.
- Electrophoresis deposition - coating with organic polyurethane foam or acrylic by immersion in an aqueous solution of epoxy or acrylic resin under the influence of tension. Performs only a protective function.
Gilding
A thin layer of gold plating is applied to the product. Basically, 750-carat gold is used for this technology. But there are exceptions when the manufacturer uses higher quality metal. Sputtering with precious metal does not affect the declared sample in any way.
The cost of silver items when gilded increases. With constant contact with an aggressive alkaline environment, the gold plating layer can quickly decrease. Therefore, it is recommended to take care of things that have such a coating (remove them before taking water procedures, do not swim with them in the pool). If you follow these simple recommendations, your gold-plated silver jewelry will look great and could easily become a family treasure.
Do you like stylish things inlaid with stones? If you are not indifferent to boxes, cigarette cases, brooches, then go to the online catalogs of our website - you can find a lot of interesting things for your collection in them.
Application
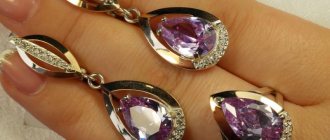
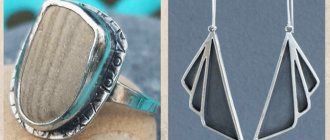
Jewelry, watches, tableware, interior decorations, writing instruments, and decorative elements of weapons are made from silver. Silver can be combined with gold, enamel, niello, precious and semi-precious stones, pearls, corals, and ivory. The metal is widely in demand in the chemical industry, in the production of mirrors, and also as a protective and decorative coating. High thermal and electrical conductivity make silver useful in the production of electronics and electrical equipment.
How to care for silver items?
Rings, earrings and chains made of silver can retain their original appearance for decades. To do this, just follow simple recommendations:
- remove jewelry before washing dishes, showering, or other water procedures;
- periodically wipe the product with a soft flannel cloth;
- Rinse with running water approximately once every 1-2 months;
- Do not store jewelry on holders - air accelerates darkening. It is better to use a box or bag made of thick fabric for storage.
If the product does turn black, you can restore its beauty with a variety of available means - from ammonia to lipstick. If you are superstitious, then silver jewelry will have to be periodically energetically cleaned to remove the negativity that has accumulated in them.
Myths about silver
- Fake silver turns black, but real (old, high-quality) silver does not turn black
A fake can also turn black for a variety of reasons, but if you carefully read our article, you realized that the formation of a thin layer of silver oxide or sulfide is normal for this metal; this is its chemical feature. And in old jewelry, not copper, but palladium and platinum were used as ligatures. This alloy did not really darken, but it was much more expensive. It's chemistry, nothing personal.
- Silver disinfects
This is true, silver has bacteriostatic properties, slowing down the development of bacteria, and a bactericidal effect, killing bacteria with the help of silver ions. But this manifests itself only in concentration, which can be harmful for you and me, because silver is a heavy metal, it is deposited in the body and can cause poisoning. It is safe to wear, but we do not recommend eating it.
You can also remove spoons, rings and pendants from the water: in this case, so few silver ions are released that they are not able to disinfect anything. This also means you don't have to worry about silverware and cutlery. If you use a special ionizer, there will be an effect, but with it it is easy to exceed the permissible concentration and again get poisoned.
If you are reading in English, here is a WHO report on the use of silver for disinfection, which generally repeats the above conclusions and speaks of the lack of information for far-reaching conclusions in most studies on this topic.
- Silver drives away evil spirits
We invite you to check this myth yourself. Find a vampire and stab him with a silver sword, but take precautions: if the sword is rhodium-plated, the effect may be disappointing.
How to clean silver with stones
You can clean silver rings with stones in a jewelry store or at home. You should focus on the density of the stones. Aquamarine, emerald and sapphire can be cleaned with washing powder; laundry soap will help remove grease and dirt from malachite, moonstone, opal and turquoise. Silver earrings with ruby or garnet stones should not be immersed in hot water. It is important to clean jewelry with inserts very carefully and carefully: do not damage the insert itself or loosen the fastenings. Products containing amber, coral or pearls should be washed with lukewarm water and soap. Aggressive cleaning agents can destroy the structure of the stone.
Rules of care
Silver-plated jewelry fades over time. However, silver plated jewelry is more durable than sterling silver due to the base metal, but it is easier to clean. There are a few things you can do to prevent your silver plated jewelry from tarnishing:
- Remove silver jewelry for tasks requiring contact with liquids and chemicals;
- The less often you wear jewelry in general, the slower the coating fades;
- Store jewelry made from the same metals/platings in the same container;
- Sulfur is the main reason why silver loses its shine and turns black. To minimize exposure, store jewelry in airtight containers lined with anti-tarnish paper;
- The thinner the layer of silver, the less the product will last;
- Avoid excessive polishing or cleaning of silver jewelry. This can cause unwanted wear, which can cause the coating to corrode faster than normal.
Looking for advice on how to store silver-plated jewelry to prevent tarnishing? It is important to ensure minimal exposure to air and humidity. For example, store them in sealed bags that can seal tightly, or keep silver jewelry next to silica bags, which will help absorb some of the moisture.
Where can I buy
Naturally, the main question for all those who would like to purchase high-quality silver-plated jewelry is the choice of place of purchase and cost. As for ours, there is a huge selection of products here, the cost of which can pleasantly surprise you. Our company employs specialists whose level of competence can find a solution in any situation and select the ideal position for each buyer. At the same time, the range is constantly expanding, and therefore you can always find stylish products for the most demanding customers.