The simplest and most laconic wooden rack
As often happens, there are more and more things in the house, but there is no place to store them. Then we begin to come up with the most unimaginable options - we put things in boxes, bags and hide them out of sight. But in fact, all you need to do is get a shelving unit.
The same principle applies in greenhouses - seedlings and seedlings need proper care and quick access, which can be provided by making a rack of bars yourself.
What lives in the greenhouse
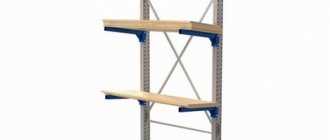
Approximate layout of a greenhouse rack
A greenhouse is needed so that even in the cold season you can grow vegetables and fruits, herbs and even flowers. The temperature in the greenhouse can be the same as in the subtropics, which means that with proper care you can even grow pineapples!
But mostly simpler vegetables and fruits are grown in greenhouses, which are found on markets and store shelves at any time of the year. It is convenient to grow herbs, flowers, some types of seedlings and seedlings on the shelves.
Let's take a closer look at several types of greenhouse activities:
- Greens (see Greens in a greenhouse: a special growing technology) - the cost of a bunch of greens, of course, is not too high, however, this type of product is in demand every day, throughout the year.
When growing greens in a greenhouse, you should know that they are not picky about the conditions; it will be enough to maintain a temperature of up to 19 CO and additionally illuminate up to 14 hours a day. The period of time during which the greens fully ripen is quite short, which means that if the right conditions are maintained, about 10 harvests can be harvested per year.
Another advantage is that it is beneficial to grow greens on racks, because they can be planted closely together and placed in several tiers, which will save space and grow the product in large quantities.
- Flowers (see Growing flowers in a greenhouse and greenhouse: how can you create favorable conditions for plants?) - you can grow garden or indoor flowers in a greenhouse. Garden ones are less demanding, but after cutting they have a very short shelf life.
It is also worth thinking in advance about who will sell your products - will you do it yourself or sell it to resellers. Several types of plants can be placed on different racks at once, for example, one rack is completely dedicated to violets, and the other to flower seedlings.
- seedlings and seedlings on racks, but you need to know that such racks must have high sides for picking.
Classification of wooden shelving
There is a generally accepted classification of shelving made of wood:
- A wall rack is a collection of several shelves that are a single structure. This solution allows you to make the most efficient use of the available space.
- The rotating rack is designed mainly for small items that are used every day. These can be both personal items and kitchen utensils.
- A mobile shelving unit is ideal for people who have not yet decided on the location of this structure. The presence of wheels allows you to move the rack without first unloading its contents.
- The stationary rack consists of vertical racks with crossbars and shelves attached to them. To give additional strength, the structure can be attached to the wall.
Building a rack for a greenhouse
Wooden shelving design with moving shelves
In order to make a shelving unit from timber with your own hands, you do not need a lot of knowledge or extensive experience working with furniture. It will be enough to have all the necessary materials and tools at hand and follow the algorithm of actions.
Such a rack allows you to save money, because the price of the materials needed for self-production is significantly lower than ready-made factory furniture.
We will need:
- Wooden beam with a square section of at least 30 by 30 mm.
- Wooden slats to further strengthen the structure.
- Chipboards, plywood, natural wood, in general, everything that can be used to make shelves.
- Screwdriver, screws and dowels.
- Tape measure, pencil.
- Spirit level (level).
- Wood saw or electric jigsaw for greater convenience.
Important! When selecting material, do not forget that the rack will be in a greenhouse, under the influence of light, water and temperature, which means it must be strong and durable. As an option, a protective coating can be applied to the wooden parts.
In this article you have the opportunity to see several photos of what preparation for work should look like.
Wooden square beam
When creating a drawing, you need to arm yourself with a tape measure and a simple pencil to choose the dimensions of the future rack that are suitable for your greenhouse. The width of the shelves can vary within different limits, but since plants will be placed on these shelves, 60-70 cm will be sufficient.
The length should be selected depending on how many seedlings you plan to place on one shelf. If its weight is too large, the long shelves will sag; to prevent this from happening, stick to the recommended length of 80-90 cm.
You can calculate the height of the proposed structure by measuring the working surfaces in the house; this is done so that the row on which you plan to replant, move or fertilize the plants corresponds to your height.
Wooden shelving with additional artificial lighting
Typically, the bottom shelf is made at such a height that you can put things needed in the greenhouse under it, such as fertilizers, gloves and other gardening tools. If you plan to place flowers on the rack, it is better to make low sides, this will greatly simplify the installation of the watering system to the plants.
After all wishes are taken into account and the parameters are compared, a drawing is made. Usually a schematic drawing indicating all dimensions is sufficient.
Let's move on to the main process
Reinforced wooden shelving structure
Further instructions are not particularly difficult. Let's start with installation - we make the load-bearing support from a wooden beam, this will guarantee that the base of the rack will be strong.
In order to fix the beams with the base boards, 3 cm self-tapping screws are best suited. During the installation process, you must remember that the load-bearing supports should only be placed vertically.
When the base of the rack is finally ready, they proceed to installing the box. The material prepared for this purpose is attached to the beams at the bottom, top and sides. The result is a box, but without a back wall.
Two-level, stepped wooden rack
Once the box is ready, proceed to installing the shelves. For accuracy and convenience, you should make small marks on the sides of the box; they will indicate the places where the shelves will be located. The shelves are also secured using self-tapping screws, but you can choose, for example, metal corners.
Transverse bars are attached to them on top, which will support the shelves. The heaviest load usually falls on the shelves located in the middle, so perhaps it should be further strengthened.
Advice! It is worth paying attention that the self-tapping screws that are used to connect the shelf and the timber must be taken 5-6 mm larger than the thickness of the shelf.
Since the rack will be installed in a greenhouse, it does not require additional finishing, except that for longer operation the structure should be coated with protective agents. In general, the attached video in this article clearly shows the process of creating a rack from timber, which is done in several stages.
Original options for shelving structures
Anyone who believes that a rack is a rough frame with shelves is deeply mistaken. Indeed, for the basement and garage you don’t have to imagine too much. Strength, durability and functionality are the main slogans for these premises.
For the home interior, on the contrary, I want to do something special and non-trivial. Therefore, home-made masters spare no time and effort to capture our imagination. A couple of oak boards and a few glass bottles are all that is needed to create an original design.
Photo No. 1 Rack made of bottles and boards
Despite its simplicity, the strength of such a rack is quite high. You can store not only books on it, but also use it to display your wine collection.
Anyone who has dealt with high shelf structures knows that without a good ladder it is impossible to reach their upper tier. Why not use shelves as steps - a resourceful person thought and created such an original system.
Photo No. 2 Rack-ladder
The classic frame shelving rests on the floor, and to install the rope shelving you only need two hooks in the wall. Of course, it won’t be possible to store heavy cans of preserved food on it, but it is perfect for books, photographs and souvenirs.
Photo No. 3 Hanging rope rack
You can make a rack with your own hands so that others will appreciate your creative nature using steel water pipes and fittings.
How to properly place shelving in a greenhouse
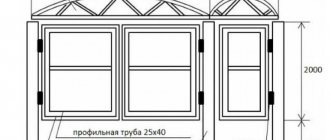
Approximate layout of shelving for a standard size greenhouse
There must be aisles between the racks; there can be one or several. The width of the passage depends on whether you will use additional equipment, such as a wheelbarrow.
For normal walking, 50 cm is enough, and for a wheelbarrow - about 60 cm. When also arranging shelving, it is worth taking into account the watering system, which needs access to the plants, and the placement of additional lighting.
In greenhouses equipped with shelving, it is necessary to designate a separate area for plants that require insulation. For example, a new plant that has just been purchased is not placed next to the others, since there is no guarantee that the soil is not contaminated with parasite eggs or that the plant is not sick.
Usually, for such needs, one shelf on a rack is allocated, where no more than 3-4 plants should be placed. It is additionally fenced on all sides with glass, and care is taken to ensure that the lighting in the quarantine area is not too strong. If no negative changes occur in the new plants, then after a few weeks they can be transplanted to the main racks.
Preliminary work
A wooden rack is a fairly spacious structure, which consists of a number of shelves (cells) connected together and standing on racks, a stand or directly on the floor. The number of tiers depends on the height of the room and the preferences of the owner.
- stationary;
- mobile (on wheels).
Main manufacturing stages:
- Preliminary stage. Drawing development.
- Main works. Selection of materials and tools. Assembling the rack.
- The final stage. Painting, pasting, etc.
The further fate of the rack depends on the first stage. The wrong choice of material or plan can ruin your efforts. To complete the drawing, it is necessary to measure the location of the structure if a stationary option is assumed.
When making a rack for tools, grocery items or household items, it is better to prefer simple straight shapes. To do this, determine the height of the structure and the width of the shelves, which are often made up to the ceiling.
To install small accessories, spans up to 1.5 m long can be made, and for heavy items (books, jars of pickles or jams) 90 cm or less is recommended. This will prevent the shelves from deforming (sagging). It is better to make separate cells for wines.
- The width of the rack depends on the free space.
- The usual length is no more than 1.5 m, but if there are 40–50 mm boards, it is increased to 2-2.5 m.
- The depth of the shelves depends on the items that will be placed on them. For example, for clothes the optimal size is 50–60 cm, and for screwdrivers and pliers no more than 5 cm is needed. One rack can have shelves of different depths.
- The approximate height of the tiers is 25-60 cm. If you need to store large items, for example, truck tires, it is recommended to reconsider the dimensions.
It is advisable to use natural boards (oak, beech, pine, mahogany). They should be treated with special compounds and antiseptics and allowed to rest for several days. It is not recommended to use material made from sawdust or shavings (chipboard, for example). It breaks down quickly.
When developing a drawing, you should not forget about the free space horizontally (between two objects) and vertically (the gap from the edge of the tallest thing to the top tier). The minimum distance should be 3 cm.
It is necessary to place accessories correctly so that the load on the middle of the shelves is small. It is recommended to place bulky and heavy objects at the bottom, and lighter ones at the top.
Tools and materials
Having finished planning and decided on the location and size, you need to get the following list of basic equipment:
- grinding machine, sandpaper;
- two hammers, one with a rubber head, the other with a metal head;
- a hacksaw or jigsaw, as an option – a regular or circular saw;
- square, tape measure, ruler, pencil;
- screwdriver or screwdriver, drill;
- chisel;
- plane.
Wooden base
Next you need to select a tree. The undoubted kings among wood species in this niche are walnut, mahogany, oak and beech. But they are very expensive, and they are not suitable for people inexperienced in carpentry due to the processing features and the fact that there will be too much debris. For beginners, the best alternatives are soft woods:
- spruce,
- cedar,
- pine,
- Linden,
- aspen,
- thuja
The most affordable option in Russia is pine, since it is unpretentious and has long conquered vast areas thanks to its unpretentiousness. In addition to its low price, it is durable, resistant to pests, and easy to handle. It is rich in resin, due to which it has an almost imperceptible pleasant smell that can only be noticed when working with it.
In addition, for the most ordinary bed you will need the following materials:
- screws, self-tapping screws or nails;
- varnish coating and staining agents;
- wood glue.
When all the components have been purchased and prepared, it’s time to put your plans into action.
Nissan Almera >
Cars for sale
Nissan Almera >310,000 RUR
Nissan Almera >265,000 RUR
Nissan Almera >285,000 RUR
Nissan Almera >260,000 RUR
Making flower beds
When preparing such flower beds, designers advise avoiding visual overload. You should not get carried away with majestic decorative forms. You can make beds from wood in the form of a square, circle, oval, or triangle. You can think about sophisticated figured, and multi-tiered, and designs reminiscent of household items.
Tiered structures are created in small areas. It’s quite possible to simply build flower boxes. According to many, a pyramid of flowers can look much more beautiful. However, chasing the number of tiers is stupid; you need to balance your desires and capabilities. A large flower bed with a large volume of soil and a mass of flowers should be made from good building material. Otherwise, there is a high risk of wall deformation.
The general rule is that the underground part should always be twice as large as the above-ground element. If the cross-section of a flower bed is more than 4 m, it should be inclined or convex. A compact flower bed with a diameter below 1 m should not have a slope. The simplest option is a box made of timber. An alternative is a makeshift sandbox or a series of boxes of various sizes.
Detailing and equipment
So, what do we need in terms of details for such a double bed:
Chipboard Rough 16 mm
These parts will be located inside our piece of furniture. They will not be visible, so you should not overpay for laminated chipboard (chipboard), but you can order these parts in rough chipboard:
- Supports (legs) for the mattress shield - 2000*234 mm - 2 pcs.
- Short support strips for drawers - 2000*50 mm - 2 pcs.
- Mattress shield - 1995*1595 mm - 1 piece
The mattress will not lie on slats, like expensive beds, but on a rough mattress pad. It is much cheaper than slats and, thanks to modern high-quality mattresses, you won’t even feel the difference in these details.
MDF overlays White Gloss 10 mm
Headboard and footboard pads – 1532*240 mm – 2 pcs.
These white pads will be used to decorate our bed. We will fasten them using 3.5*25 mm screws from the chipboard side.
Selection of timber
Which timber is optimal for creating furniture or household utensils? Whole, chamber drying.
Why him?
- Timber with natural moisture requires long-term (up to six months) atmospheric drying. In addition, uneven evaporation of moisture can lead to its deformation or the appearance of deep cracks;
- Using laminated veneer lumber will expose the glue seams, significantly degrading the appearance of your masterpiece. In addition, the price of glued material is at least twice as high as that of solid material.
Coffee table. Material – solid oak timber.
What type of wood should you prefer? Unambiguous instructions are impossible here: each option has its own advantages and disadvantages.
| Wood type | Key Features | Cost per cubic meter, rubles |
| Pine | Light, light, resinous with an unexpressed texture. Rot resistance is limited | 8000 – 11000 |
| Larch | Bright, pronounced texture. Does not absorb water, does not rot | 14000 – 18000 |
| Oak | Does not rot, gains strength with prolonged contact with water. Extremely resistant to mechanical stress | 40000 – 80000 |
| Ash | Has all the properties of oak with a more pronounced texture | 35000 – 70000 |
Details
Manufacturing materials
The materials give pretty good results when combined with each other. Wooden shelves can be located on a metal frame. And the boards on the walls are mounted on metal brackets. Metal and wood are painted with protective compounds, and before installation they are treated with antiseptics, anti-corrosion agents, and also compounds against the rapid combustion of wood (fire retardants).
Wooden shelving
Oddly enough, wooden shelves are the cheapest. Wooden models are distinguished by their low weight and high strength. Wood works well in compression and also resists torsional and bending forces. It is best to make shed shelves from hardwood, although they can be difficult to cut or even drill. These types of material hold screws perfectly, and the fastening in them will not become loose.
The advantages of wood are as follows:
- Long service life subject to regular treatment and timely repairs.
- Ecological cleanliness.
- Aesthetics.
- Ease of maintenance.
- Quick and fairly simple assembly.
- Small price.
A noticeable disadvantage is that the material is susceptible to rotting; the wood can be damaged by bugs, which results in rot. But these difficulties are quite easy to overcome through high-quality pre-processing. The simplest method is to saturate the wood with drying oil heated to +65 degrees in 2 approaches.
Metal shelves
The advantages of metal are as follows:
- Easy to assemble using welding equipment.
- Stability, durability and high degree of strength.
- Unlimited number of tiers.
- Possibility of conversion, adding height and length if necessary.
If you weld movable rollers to the bottom of the racks, the racks can be moved to another location throughout the barn. At the same time, there should not be too heavy objects on them. The metal should be treated in advance with anti-rust agents, and then painted with acrylic, oil, latex paints and varnished.
What tools are needed for work?
In order to make shelves from chipboard boards on a wood frame, you should take panels with a thickness of at least 2 cm. For cross beams and racks, use timber (lumber) with a cross-section of 6*7 cm. The elements of the racks are connected using self-tapping screws (from 8 to 10 cm, 4 cm shelves), and for stability they use overhead steel corners. You will need the following tools:
- Machine for fixing sandpaper.
- Electric drill, screwdriver, screwdriver, pliers and knife.
- Tape measure, building level, carpenter's square and pencil.
- An electric jigsaw, a circular saw, and also a wood saw.
For painting, latex and acrylic paints and varnishes are chosen, as well as pentaphthalic enamels. They also buy a protective primer against moisture and an antiseptic, sandpaper (should be No. 120 and No. 200).
Required Tools
Before you start work, you should purchase metal corners, brackets that may be needed for installation, screws, dowels, nails, and prepare the necessary tools:
- Jigsaw or hand saw.
- Drill.
- Grinding machine with different attachments, rings of different hardness.
- Screwdriver.
- Hammer.
- Level.
- Roulette.
- Pencil, chalk.
- Phillips screwdriver.
- Skins with different grinding surfaces.
- Tassels.
You will need quite a lot of tools. If you are making a wooden product, you should buy surface treatment fluids, varnishes, stains, and paint.