Parallel stop Guide rail Copy rings and templates Devices for milling round grooves Milling grooves on narrow surfaces Devices for processing rotational bodies Devices for milling tenons
To fully work with a hand router, in addition to the tool itself, the material and the corresponding set of cutters, you need to have one more component - accessories.
In order for the cutter to be able to shape the workpiece in accordance with the master's plan - cutting the material exactly where it is required - it must be in a strictly defined position relative to the workpiece at every moment of time. Numerous accessories for a hand router are used to ensure this. Some of them - the most necessary ones - are included in the delivery package of the tool.
Other devices for milling can be purchased or made by yourself. Moreover, homemade devices are so simple that to make them you can do without drawings, using only their drawings.
How to make a groove in a beam using a router, a hand-held circular saw and a chainsaw
All photos from the article
Sometimes when carrying out work there is a need to make a groove in a beam, for example, when installing internal partitions or when installing door and window blocks in openings, this is necessary for a better connection of elements and improving the appearance of the structure. Also, sometimes there is a situation when a beam with grooves needs to be joined with a conventional option, in this case a longitudinal recess is needed, we will also consider this in this review.
In the photo: cutting a groove in a timber requires precision; any errors or miscalculations are unacceptable
Tool that can be used
Let's consider what devices can help you when carrying out work:
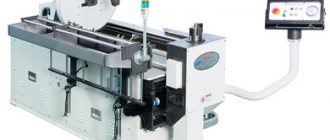
| Fraser | There can be two options here - either a full-fledged machine that can perform any work, or a manual milling machine, with which you can quickly perform some operations right at the construction site. The first solution is used by professionals, since the price of the machine is high; the second type of tool is also suitable for home use |
| Parquet saw | In common parlance it is called a parquet or a manual circular saw, this is a very convenient device with which you can make vertical cuts of a certain depth, the groove is then selected with a chisel and a hammer, the equipment is multi-purpose, so it is available to many home craftsmen |
| Chainsaw or electric saw | Suitable for making grooves for internal partitions, it can be used to quickly make a cut to the desired depth, after which modification is necessary using a chisel and hammer. It’s important to be good at handling a chainsaw, since without a certain skill you won’t be able to make an even cut. |
| Hammer and chisel | Previously, all work with wood was performed with the help of these devices, but nowadays they are used as auxiliary elements, since manual labor is very slow and labor-intensive. But if the amount of work is small and there are no power tools at hand, then you can get by with these simple tools |
Specialists use special machines for longitudinal profiling of timber
Features of the work
Since independent work on cutting longitudinal grooves is impractical (it is much easier to purchase a tongue-and-groove beam, this will save you a lot of time and effort), we will look at how to make slots for partitions, frames, etc. There are several options, choose the one that is more convenient for you.
Tenon-groove-tenon timber is one of the most popular and sought after options among developers
This tool is very suitable for DIY work for the following reasons:
- The device is very simple and easy to use and can be used even by those who have never performed such work. The main thing is that the kit contains instructions; from it you will learn how to prepare the equipment for work and how to use it correctly to achieve the desired result;
- You can make a groove of various shapes, the main thing is to purchase a cutter of the desired configuration. What is important is that the work is carried out in one pass, additional refinement is not required as in other cases, and the quality of the groove is very high;
A correctly selected cutter will help you easily achieve the desired result.
- The kit always comes with a stop, this will save you from the question of how to cut a groove in a beam exactly, the tool will go at the same distance from the edge, which means the cut will be even. The most important thing is to set up the device correctly before work; then you won’t have to be distracted by it.
Before selecting a groove in the timber, move the stop to the required distance
Hand-held circular saws
Very mobile equipment that can be used for cutting elements of small thickness; it is also often used for the purposes discussed in our article, this is due to the following factors:
- Equipment mobility – parquet floors weigh little and have compact dimensions, making them easy to move to the right place and cut even in limited space;
Mobility is the main advantage of this option
Advice! This saw is very convenient for making grooves in window and door openings, where there is little space and it is difficult to position yourself with a chainsaw or router.
- The workflow is simple - you mark the future grooves, and then cut along the lines. The depth is limited by the offset of the disc, remember this factor;
- After you have made the cuts, you need to use a hammer and chisel to remove the excess and level the cut, this is very important.
Working with a chainsaw
This type of tool is available at all sites where structures made of wooden beams are erected, so it can be used for our purposes.
Let's look at how to cut a groove in a beam with this tool:
- First of all, you need to mark the future groove, and it is more convenient to work on elements that lie on a horizontal surface at a height of about 1 meter. If the work is done in this way, then mark the depth so as not to cut too much;
It is important to cut the timber to the required depth
- Some do the job entirely with a chainsaw, and some prefer to remove the cut piece with a wood chisel;
- If you need to cut a groove for a partition on an already installed wall, then you need to draw lines that will be the main guidelines and cut along them. Proceed carefully, try to maintain the same depth along the entire length; in extreme cases, you can then trim individual sections.
Conclusion
It is important to cut the grooves correctly so that all connections are as secure as possible. The choice of tool depends on the characteristics of the work and the availability of a particular tool. This article will tell you the features of working with some types of tools.
How to combine several of your orders into one?
Open the desired order. In the order control panel, click the “add to cart” button. Then click the “archive” button or the “cancel order” button - so that there is no confusion. That. you can transfer the contents of all your orders to the basket, and then opening the last order, add the entire contents of the basket to it, as described in the previous paragraph. If, in the process of combining several orders into one, you need to add something from the site catalog itself, then you can also add the necessary products to the cart or remove unnecessary items from the cart and then transfer the contents of the cart to the desired order. IMPORTANT!!! This operation is available for orders with the “preliminary” category. If the order category is different, then this operation is not available!
Tool for making grooves in wood - All about timber and woodworking
Milling provides virtually unlimited possibilities for processing workpieces. Forming edges, grooves and grooves of various depths and shapes - each operation has its own types of wood cutters for a hand router, allowing you to perform the job as efficiently as possible. What types of cutters are there in terms of size, shape, design and types of blades - all the necessary information in one review.
Before choosing a cutter, you must first decide on the method of its attachment, or more precisely, in what units the diameter of the shank is measured - inches or millimeters. It depends on what collets are included with the router - bushings in which the shank is clamped:
- If they are measured in millimeters, then the most common are 6, 8 and 12 mm.
- When the size is indicated in inches, you usually have to choose from only two of them - a quarter and a half inch.
It is important! When converting inches to SI units, the results are 6.35 and 12.7 mm, but despite such a slight difference, a millimeter shank is not compatible with an inch collet and vice versa. The shaft of the milling machine rotates at speeds of up to 25,000 rpm, so the slightest discrepancies will, at best, lead to damage to the tool.
Types of cutter design
Depending on the cost and purpose, they are produced in the following design modifications:
Prefabricated
It is based on a steel blank of the required shape, to which the cutting edges are welded. Due to the ease of manufacture, there are the majority of such models on the market.
With replaceable cutting edges
They have a long service life, since the knives for them are made double-sided - when the blade becomes dull, it is turned over.
Monolithic
The cutting edges are machined directly into the base - when working with such tools, even the hypothetical possibility that the knife will break off disappears, but after several sharpenings the cutter will have to be changed.
Types of cutter blades
Milling cutters come with vertical, inclined or spiral blades. If they are straight, then the pieces of wood will be cut from the workpiece, and the inclined ones will be cut off, which reduces the likelihood of chipping and increases the overall quality of the milling.
Depending on the material and characteristics of the blades, they are available in two types:
- HM – high-speed. Used for processing soft wood or aluminum.
- HSS – carbide. Designed for hard materials, therefore such cutting edges have a better temperature coefficient and other characteristics, which is also reflected in their price.
In addition to blades, depending on where and what shape you need to make a recess in the workpiece, the appropriate types of cutters for a manual wood router are used.
Grooving cutters
Designed for making a groove of the required width and depth in the middle of the part or from its edge and towards the center. Most often used when creating a tongue-and-groove connection. If necessary, if the design of the milling machine stop allows, the width of the groove can be adjusted without replacing the cutter with a larger diameter one.
Grooved straight
The simplest cylindrical tool, after use of which a rectangular groove in cross-section remains in the workpiece. Mainly used with plunge milling machines, although they can also be used with other models.
Grooved fillets
Their cutting head has a rounded shape, due to which the groove in cross-section resembles the letter “U” - depending on the depth of the cut, the walls are rounded immediately from the surface of the workpiece or initially go from it at a right angle for some time.
Groove fillet V-shaped
Although, by definition, a “fillet” is precisely a semicircular recess, a milling cutter that gives a “V”-shaped groove in the section also belongs to the fillet category. If the work involves making grooves with different angles of inclination of the walls, then you need to have the appropriate set of tools.
Groove structural (T-shaped and dovetail)
In cross-section, the resulting grooves form an inverted letter “T”, the base of which extends to the surface or a regular trapezoid, the larger side of which faces the center of the workpiece. This is one of the most reliable connections; the workpieces slide into one another and cannot be separated in any other way.
Grooved shaped
Along with fillets, it is used to produce figured carvings and edge processing. In cross-section, the grooves resemble curly braces. You can mill as grooves in the center of the workpiece or remove edges from its edges.
If a complex pattern is being made, it is recommended to first go along its contour with a straight groove cutter - this will simplify subsequent alignment and reduce the load on the milling machine when using a shaped cutter.
Edge cutters
Most often they are made with a bearing, which allows processing the edges and ends of workpieces not only by adjusting the support table, but also according to a template.
Edge straight
To obtain a workpiece end plane perpendicular to the face (top of the workpiece). If there is a bearing on the cutter, rounded edges can be processed. The bearing itself can be configured flush to the cutting blades or have a larger/smaller diameter, which expands the possibilities of using the equipment.
Edge molding
To obtain a straight, arched or wavy figured edge - depending on the part of the cutter used, you can soften the edge of the workpiece, round it (double cutters allow you to do this in one pass), make an edge with a rebate and a jaw, or get a semi-rod protrusion. Widely used for making ornaments of complex shapes. When choosing a double cutter, you need to pay attention to the possibility of adjusting the distance between the cutting blades.
Adjustable edging cutter.
Edge seam
Used when it is necessary to select a rectangular or quarter groove on a flat or curved workpiece. Using a double pass, a tenon of the desired size is obtained. The cutting depth is controlled by the position of the milling machine or by a thrust bearing.
Edge cone
Depending on the angle of inclination of the edge of the cutter, they are used to prepare workpieces before joining, obtaining a decorative chamfer, or for processing furniture parts, which will then be joined into products of a round (polygonal) shape.
Edge fillets
They are used to produce a rounded groove on the edge of a straight or shaped workpiece. To eliminate the possibility of the cutter being skewed, it is manufactured with two bearings. The result of the work is the same as when using groove fillet cutters, but in some cases it is much more convenient to use edge cutters.
Edge curly
Another name is multidisciplinary. Since they are quite massive and simultaneously work with a large area of the workpiece, the use of such cutters is recommended on milling machines with a power of at least 1600 watts. For work, the entire profile of the cutter is used at once or in various combinations, which allows you to obtain an edge of a standard shape or a shape specified by the master.
Edge half-rod
The direct purpose of the cutter is to process the edges of workpieces to obtain a semicircular protrusion.
There are also many additional ways to use it - for example, if you process a rectangular workpiece on both sides with such a cutter, it will become a rod.
In addition, it can be used to produce profiles with a chamfer and an edge of complex shape, as well as hinged joints (when processing a workpiece in conjunction with a fillet or molding cutter).
Combined cutters
They are used for joining and splicing wooden blanks - combining them along the edge (for corner joints) or the end part (to obtain a wide board from several small ones).
Combination cutters combine groove and tenon cutters and are designed to create both of these elements in one pass.
Using milling for this purpose increases the bonding area of the boards and polishes the surfaces for maximum adhesion to each other.
Combined universal
Allows you to obtain compatible planes with a tongue and groove located at an angle to each other. The same cutter is used for both jointed workpieces - since it does not have to be changed, this significantly reduces processing time.
Tongue-and-mortise
A set of two separate cutters is used - to create a groove in one workpiece and a tenon in the other. Additional measurements and adjustments are not required, since the dimensions of the cutting edges are already calculated during the manufacture of the tool.
For the manufacture of lining
They are used on the same principle as tongue-and-groove joints, but make it possible to obtain a shaped connection with a larger contact area between the workpieces, which improves the characteristics of the lining produced in this way.
Purpose of slot cutters
Such equipment is a separate group of cutting tools. With their help, the following operations are performed:
- select a groove in a wooden product for further connection of structural elements;
- carry out sampling to create joints called tongue-and-groove joints;
- selection for connections in which wooden tenons are used as elements.
Grooving cutters have different designs. They are performed in the following options:
- In the form of disks. The cutting edges are located around the perimeter. They can be made solid with a disc base or replaceable. The number of such edges is two or more.
- In the form of a cylindrical rod. They are made from two types of steel: high-speed (HM grade) or carbide (HSS grade).
Thanks to these edges, the groove being prepared is sampled, leveled, and expanded.
The production of slot cutters is carried out at tool factories. A corresponding standard has been established for each type of tool. The main characteristics of the first category are:
- tail diameter;
- cutting part length;
- full tool diameter;
- length of the entire tool;
- article number (determines its technical characteristics).
Tool for making grooves in wood
Knowing how to make a tenon and groove with a hand router, you can even at home make not only beautiful but also reliable furniture, but also various wood structures characterized by excellent load-bearing capacity. The tongue-and-groove system connects not only elements of various furniture (tables, chairs and shelves), but also frames of low-rise buildings that experience significant loads during operation.
A tongue-and-groove joint made by hand
In order to make a tenon on a wooden beam using a hand router, several conditions must be met:
- securely fix the workpiece and correctly orient it in relation to the guide sole of the router;
- set the height of the working part of the cutter so that the tool removes a layer of material of the required thickness from the surface of the workpiece.
Even using the simplest tenoning device for a router when performing such processing, you can not only increase its productivity and quality of the result, but also make the technological process safer.
It is especially important to use such a device, which can be made with your own hands, in cases where furniture is produced not in single copies, but in series (in this case, the craftsman has to perform a large number of similar operations both with the same type and with wooden pieces of different shapes and sizes details).
The use of devices will speed up the process of making joinery joints using a router
Tools used
The creation of tenons and grooves, with the help of which the connection of two wooden blanks will be ensured, involves taking a sample of material on the side surface of a beam or board using a hand router. In this case, all geometric parameters of the elements of the future connection must be strictly maintained.
To perform this operation with a hand router, you can use tools with shanks with a diameter of both 8 and 12 mm. The most universal in this case is a groove cutter, the cutting part of which works as follows:
- the lateral surface forms the walls of the groove and the sides of the tenon;
- the end side processes the bottom of the groove and removes a layer of material of the required thickness from the base of the tenon.
Cutting a tenon with a mortise cutter
Thus, using a tool of this type, it is possible to form both a tenon and a groove on the side surface of a beam or board. Moreover, their sizes can be adjusted within a fairly wide range.
In cases where higher demands are placed on the reliability of the connection of wooden parts, the grooves and tenons are made not of a rectangular shape, but of a shape called “dovetail”.
Grooves and tenons of this configuration are created using dovetail cutters.
It is also possible to perform the procedure for forming grooves and tenons of this shape with a manual milling cutter, but for these purposes you should use devices of a different design.
Dovetail sampling using a template
So that the question of how to make a groove in a board or beam or a tenon on their side surface does not cause any particular difficulties, it is better to use a power tool equipped with comfortable side handles, a wide guide sole and the option of protecting the spindle from turning during the process of replacing the cutter. In addition, it is desirable that such equipment have a side stopper, due to which the overhang of the cutter used with it will always remain constant.
How to make a tenon pick-up device
When forming tenons on wooden workpieces with a manual router, it is not fixed in any way in space and is brought to the workpiece manually. That is why it is very important that when using a power tool, the workpiece is in a device that can ensure not only its reliable fixation, but also the accuracy of the spikes formed on its surface.
The design of the simplest device that is able to cope with such tasks is:
- several fixed guides (lower, upper, side);
- movable bar, due to which you can adjust the sampling length.
Device No. 1 – for removing the tenon
Such a device is manufactured, the dimensions of the components are selected individually, in the following sequence:
- Along the edges of the plywood sheet, vertical side elements of equal height are fixed, with cutouts made in the central part.
- Guides are installed on the side elements along which the sole of the hand router will move.
- To limit the movement of a hand router along the upper guides, the side strips should be fixed to them.
- On a sheet of plywood, which plays the role of the base of the device, it is necessary to install a movable element, with the help of which the amount of overhang of the edge of the workpiece will be adjusted. For fixation, you can use a regular thumbscrew or any other suitable fastener.
When manufacturing a device of the proposed design, the following points must be taken into account:
- The height of the upper guides should correspond to the sum of the thickness of the workpiece and the small gap required to install the locking wedge.
- The cutouts in the side vertical elements are made of such a width that it takes into account the length of the tenon being formed.
Device No. 2 – for making a groove
You can work using the device of the proposed design with a hand-held milling cutter of almost any modern model, the options of which provide the ability to adjust the cutting speed, feed rate and overhang of the working part of the tool used.
To create a dovetail tenon on the side surface of a beam or board, a device is used that is manufactured as follows.
- A hole is made in a sheet of multi-layer plywood from which the cutting part of the dovetail cutter will protrude.
- A hand router is attached to the bottom of the prepared plywood sheet. To do this, you can use clamps, screws or any other fasteners.
- A 2.5 cm thick board is fixed to the surface of the plywood sheet on which the workpiece being processed will move. It will act as a guide element. This board is a consumable material and is used once with a cutter of a certain diameter.
Device No. 3 – for dovetail milling
Such a device can be installed between two chairs or a more convenient and reliable design can be used to place it.
Creating tenons on bars and boards
Using cutters for merging wood for a manual router and the device described above, processing is performed in the following sequence.
- The part to be processed is placed on the lower reference plane.
- The edge of the part on which the tenon will be formed is placed in the cutout of the upper guides and is advanced in it until it stops at the movable element of the device.
- The moving element is fixed in the required position.
- Using a wedge element, the upper plane of the part is pressed against the upper guides.
- A hand router is placed on the upper guides.
- Using a tool mounted on a router, the tree is first removed from one side of the tenon being formed.
- After processing one side, the workpiece is turned over and the second side of the tenon is formed.
Cutting a tenon using jig no. 1
Even such a device, which is simple in design, allows you to process tongue-and-groove joints using hand mills with high accuracy and productivity.
Before starting work, such a device must be configured. This can be done using the following algorithm.
- The tool installed in the hand router is lowered until it comes into contact with the surface of the base plywood.
- The thickness of the part is measured.
- The thickness of the workpiece is divided by 4. The result will be the distance by which it is necessary to raise the cutter above the base surface.
Cutting a groove using tool No. 2
Using a dovetail template, grooves and tenons are created at half their thickness, which is explained by the peculiarities of this type of connection. To make a groove in timber and boards, as well as to form a dovetail tenon, the device also needs to be adjusted and its components fixed in the required position.
Device No. 3 for dovetail in action
It should be borne in mind that the tenon and groove created on wooden blocks and boards must be connected to each other with some gap, which is necessary to accommodate the adhesive composition.
And finally, a couple of videos illustrating the process of creating a tongue-and-groove joint using a hand router.
How to make a groove in a beam using a router, a hand-held circular saw and a chainsaw. How to make a groove in a board
MiscellaneousHow to make a groove in a board
All photos from the article
The type of connection based on the insertion of a tenon into a groove appeared in Europe almost simultaneously with floorboards and lining. The finishing material is simple and easy to install and has a lot of advantages. True, the cost is more expensive than ordinary boards and strips, but the joints are much neater, and the service life is much longer.
The groove connection increases the strength of the coating.
Types of groove boards
Symmetrical groove.
Many users have no idea how to choose a groove in a board, believing that the store will offer them only one option for connection and material.
Is it possible to drill a hole in a load-bearing concrete or brick wall of a panel house with a regular drill, hammer drill or screwdriver without dust, how to do it
When making renovations in an apartment or house, the question of drilling the wall always arises. You can use different tools depending on the purpose of the hole and the material from which the surface is made.
There are nuances when working with each tool, especially when drilling a wall. How to make the right hole correctly, and what recommendations should you follow?
Drilling holes in the wall correctly: general rules and recommendations for what to drill
In order to correctly drill a wall, you need to take into account the material from which it is made, based on this you need to select a tool.
General recommendations:
- When working, hold the tool correctly. For example, a drill should be held straight in your hands and enter the surface in a vertical direction;
- for convenience, use an additional handle;
- Depending on the surface material, select the necessary drills.
Tools for different surfaces:
- concrete, stone, brick wall - use a carbide drill, usually a Pobedit one;
- metal – metal drill;
- tiles, ceramic tiles - special drills for these materials, sometimes they can be replaced with a drill for concrete with Pobedit surfacing;
- Chipboard, wood - for holes smaller than 10-12 mm, a metal drill is suitable; for larger ones, special wood drills are used.
Tools for work
For work they use different tools, the main ones: drill, hammer drill, screwdriver. There are nuances to using each.
Drill
The tool is suitable when you need to make several holes. You can use a regular drill.
When plunging a Pobedit drill into the body of the wall, sometimes you need to break the concrete with a punch that matches the diameter of the hole.
This is necessary when the drill begins to get stuck in the surface, bumping into areas that are too dense. The process is quite labor-intensive.
For greater efficiency, you can use universal drills that have diamond coating. They are installed only on a conventional drill or on a tool where the vibration function is disabled.
For large-volume work, an impact drill and drills with pobedit tips are used. They are designed for holes up to 12 mm. The drill is suitable for working with metal and concrete.
Hammer
A hammer drill is a universal tool. It can be used to make a hole in a wall made of wood, tiles and concrete.
The tool has several functions - drilling, hammer drilling and impact mode. To make a hole, you need to select the desired drill depending on the surface and carry out the work by selecting the mode.