Drill sharpening angle
If we talk about those drills that are used by craftsmen at home, their cost in stores is low.
But even in this case, you should not use them as a consumable for one-time use. After all, updating the drill to the best working condition will not be difficult if the master has the skill or special tools. There are factory-made machines that are designed for sharpening, but this is a separate expense item, so most often craftsmen create such devices with their own hands.
Most of the problems are caused by drills for metal, and wooden blanks do not quickly reduce the sharpness of the cutting edges.
To make a machine for restoring the sharpness of cutting elements, the necessary control means (template) are used to check the tool.
Typically, tools for ferrous metal, carbide bronze, steel or cast iron - with an edge angle of 115-125 degrees. The length of another material, these parameters are different.
for soft bronze, red copper – 125, for brass alloys – 135;
for aluminum and soft aluminum alloys, granite, ceramics and wood – 135 degrees;
for magnesium and its alloys – 85 degrees;
for plastic, textolite and silumin - from 90 to 100 degrees.
Masters, if necessary, make templates in accordance with the above data. By the way, theoretically, a single drill can be suitable for all these metals and other materials, if you sharpen different working surfaces each time.
An elementary handicraft device that is often used, bushings attached to the base. There are many drawings on the Internet for self-production. It is necessary to take into account that the tool must be well clamped, the accuracy depends on 1 degree.
If desired, you can make a large-sized holder by using aluminum or copper tubes corresponding to the standard characteristics of drills, or drill many holes in a soft metal workpiece. It is necessary that the sharpener has a comfortable hand rest to move the device and hold the stop.
This primitive sharpening machine is easy to install on a workbench or table.
A practical example of working with a drawing
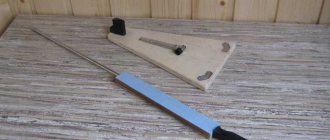
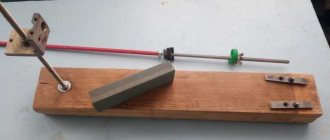
The essence of the problem: there are drills, they need to be sharpened. We will use one of the sharpening methods, close to the factory ones. Too lazy to catch with your hands. Better than the monkey method - set it and you're done. It took approximately 1 hour to manufacture the device according to the finished drawing.
A little welding work according to the template. A corner was made. We put the washer on, it’s just pressed on.
Let's try the first sharpenings, if everything is assembled correctly, we will refine and refine it, make a quick adaptation.
After sharpening the drill, we carry out a test. Two casting chips are visible, which means that sharpening was carried out correctly.
The only drawback is that one chip is longer than the other, which means they missed the length of the edges. It is necessary to make a stop that will regulate the sharpening length and ensure the symmetry of the edges. To do this, we will make a thrust washer that will be aligned and machined. Or we’ll cut it to make it possible to process shorter drills.
Video of the channel “Anton Fomenko”.
DIY emery tool - Metals, equipment, instructions
Many business people wouldn't mind having a functional sharpening machine on hand. Equipment of this type from a good manufacturer is not cheap. It is not at all necessary to spend money on buying a new machine, since it is quite possible to make emery with your own hands, spending a minimum of money and effort.
Among the many power tools needed in the household, emery takes pride of place in demand. It will be useful in the garage for sharpening knives, in the country; will be indispensable for any craftsman.
Guided by the photo and video materials in the article, possessing the necessary set of materials and tools, and with minimal skills, you can easily make homemade emery. The design of the future machine will include: an emery stone (sharpener), a support frame, an auxiliary table, and electrical equipment.
Homemade emery from a washing machine engine
The task: how to make emery with your own hands will be greatly simplified by having an old washing machine with a working electric motor on the household.
The operating characteristics of the electric motor should be as follows: voltage - 220 Volts, power - 370 Watts, speed - 2800 rpm.
By removing the engine from a washing machine that has become unnecessary, you can solve the problem of providing the future emery with an electric drive.
Necessary materials
To make a sharpener, you need to have the following list of materials and structural elements available.
1. Electrical equipment set:
- a capacitor for starting the engine (you can use the one that was in the washing machine);
- switch;
- wires;
- plug with cable.
2. Engine elements:
- flange for attaching an emery wheel;
- grinding wheel for the sharpener (as an option, you can purchase several wheels with different degrees of grain);
- a piece of galvanized sheet.
3.Materials for support frame:
- 2 corners;
- a piece of pipe with a large rectangular cross-section;
- 2 pieces of pipe with a smaller rectangular cross-section;
- rubber shock absorbers.
4. Materials for the auxiliary table:
- 2 metal plates;
- a piece of square pipe;
- set of bolts and nuts.
5. Auxiliary materials:
- primer paint for metal.
Required Tools
Among the tools and devices for making emery, it is advisable to acquire:
- an angle grinder with a cutting wheel for metal and a brush for cleaning metal;
- welding machine;
- drill with a set of drills;
- a set of files;
- vice;
- screwdriver;
- a set of keys;
- tape measure;
- hammer;
- ruler;
- pencil;
- with brushes.
Stages of work on making emery
1. Initially, it is necessary to decide on the dimensions of the future emery machine, develop its diagram, drawings of structural elements. If you wish, you can use the drawings published in the article. The dimensions of the future emery must be brought into line with the dimensions of the available electric motor.
2. It is advisable to order a special flange from a turning workshop for attaching an emery wheel to the electric motor shaft with a set of fastening nuts, since independent production of this element requires special machines, as well as appropriate professional experience.
3. Manufacturing of the support frame.
3.1. Using an angle grinder, on the wide edge of a large rectangular pipe, according to the drawing, a groove should be cut into which the capacitor will subsequently be placed. Also, you will need to cut appropriate recesses in the corners for future installation of the electric motor.
3.2. From the available pipe blanks and corners, it is necessary to weld the frame using a welding machine.
3.3. Using a drill, you need to drill a specified number of holes for mounting the washing machine motor.
4. Making an auxiliary table.
4.1. On the horizontal surface of one of the metal plates, it is necessary to drill longitudinal grooves with a drill, which will serve as guides for moving the table to a certain working position. The surface of the second (top) plate is left smooth.
4.2. Using a welding machine, the elements of the table are welded: 2 metal plates, a square pipe.
5. Due to the bolted connection, the table is fastened to the frame.
6. Using a metal brush attached to a grinder, all roughness and irregularities in the resulting structure are cleaned.
7. All metal parts of the structure are coated with metal paint.
8. Rubber shock absorbers are attached to the lower part of the frame using self-tapping screws.
9. The electrical circuit is assembled and the switch is attached to the frame.
10. A protective apron is made and installed on the engine from a piece of galvanized sheet.
11. The sharpener structure is completely assembled, with all electrical elements connected. The collected emery is ready for use.
The process of making a sharpening machine yourself is guaranteed to be simple even for a person who has little skills in working with metal and has basic knowledge of electrical engineering. This type of emery will be a good auxiliary equipment for every business person who prefers to solve everyday problems on their own.
making emery with your own hands
A tool for sharpening drills should be in the arsenal of any home craftsman.
When working with hard workpieces, the working surface of the drill wears out quickly. A dull drill becomes very hot and loses strength. This occurs due to the “releasing” of the metal. The tool must be sharpened periodically. However, this applies not only to drills.
Drills are inexpensive devices. In any case, those models that are used in the household. However, it is wasteful to buy a new tip every time it becomes dull.
There are factory-made sharpening devices, but this violates the concept of economical use of home tools.
Wood drills practically do not become dull, except that the tool can be “driven” at high speeds into a resinous workpiece. Pobedit tips for concrete and stone cannot be sharpened. All that remains is to sharpen the drill for metal. Many experienced locksmiths carry out this procedure with their own hands, without any equipment.
However, the accuracy of the work leaves much to be desired, and not every home craftsman has such a professionally developed eye. In any case, minimal mechanization is necessary.
How to make a homemade device for sharpening drills?
First of all, you need to acquire a means of control. No matter how you sharpen the drill, you need a template to check the accuracy of the work.
Conventional drills for working with ferrous metals have an edge angle of 115-120 degrees. If you have to work with different materials, check out the table of angles:
| Processed material | sharpening angle |
| Steel, cast iron, carbide bronze | 115-120 |
| Brass alloys, soft bronze | 125-135 |
| Red copper | 125 |
| Aluminum and soft alloys based on it | 135 |
| Ceramics, granite | 135 |
| Wood of any species | 135 |
| Magnesium and alloys based on it | 85 |
| Silumin | 90-100 |
| Plastic, textolite | 90-100 |
Knowing these values, you can prepare several templates and, in accordance with them, sharpen yourself. In this case, you can use the same drill for different workpieces, you just need to change the angle of the top of the working area.
Popular: How to use a tile cutter, and is it possible to do without it?
The simplest, but very effective sharpening device is bushings of different diameters, mounted on some kind of base. Schematic drawing of the device in the illustration:
It is best to make a whole clip of copper or aluminum tubes, to fit standard drill sizes. Or drill a sufficient number of holes in a block of soft material. The main thing is to install a comfortable tool rest on your sharpener, which will allow you to move the sharpening device at the right angle and serve as a reliable support.
Our grandfathers used this method. Only an oak block was used as a material for the manufacture of a sharpening machine - an angle.
In principle, it was enough to place a table or workbench opposite the side surface of the emery - and the sharpening machine was ready. At the same time, the quality and accuracy of processing was at a high level.
There are different drawings of sharpening devices.
You can use a ready-made one, or develop it yourself. The main thing is to understand the principle of working with a drill.
DIY sharpening machine
Electric grinders, or, as people say, emery stones, are collected in a great variety from everything that falls to hand; they are often made from motors from washing machines.
I also decided to make myself a homemade machine for sharpening drills, knives, etc. I have a Chinese sharpener, but its quality is
