Many drivers have encountered the problem of cracks appearing on their car bumpers. If it is plastic, then you can repair the damaged area yourself. There are many different ways to restore the aesthetic appearance of a bumper made of this material without resorting to the services of a car service.
Below we will discuss in detail the process of self-repairing damaged parts of a car body.
How to repair a bumper by hand is possible, but it’s better not to
- Let's start with the most famous and controversial method - soldering a brass mesh into a fracture. The essence of the repair is to use a powerful soldering iron to heat the mesh until it is immersed in the molten plastic. The method really allows you to hold together cracked pieces of the bumper, and you will be able to meet dozens of craftsmen who “have been doing this for 100 years and no one has complained yet,” but this technology has a number of disadvantages: metal, brass plates and plastic have different temperature expansion coefficients, so the repair area is not a monolithic structure;
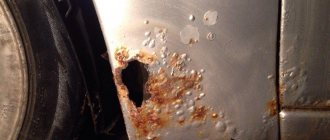
- metal corrosion. Brass has very good resistance to rust, but often damaged parts are soldered or screwed into metal parts, which begin to corrode over time. The process occurs especially quickly if individual fragments of soldered metal parts remain openly sticking out from the inside of the element. Rust will penetrate inside in a relatively short time, thereby compromising the strength of the connection, and can even cause a defect in the paintwork (paintwork) on the outside of the bumper;
- loss of elasticity with a large repair area. In the cold, long cracks after soldering the mesh plates become oak, which is why even a slight deformation of the bumper can lead to new cracks.
Repair errors
The main mistakes during repairs usually relate to the final part of the processing - painting. If you make a mistake with the choice of materials and technology, then the repair simply will not take place.
There are four main mistakes that can result in a repaired bumper quickly losing its attractiveness:
- poor processing of plastic with cleaning agents. The cleaner should remove not only dirt, but all types of oils and fats;
- wrong type of putty. The putty should be specifically for plastic, not metal;
- The old paintwork has not been cleaned well enough. Before priming, the bumper must be sanded completely from the front side. This way the surface of the old paintwork will be “matted” and the primer will adhere equally well to the entire part.
They “forgot” to improve surface adhesion. The bumper must first be treated with adhesive primer. And then apply primer-filler for plastic, base and varnish.
Instructions. DIY soldering of plastic using brass mesh
For repairs, you will need a soldering iron with at least 40 W (preferably 60 or 100 W). Prepare pieces of brass mesh of such a size that, after soldering, there is about 2 cm of overlap to the sides of the crack. You need to solder the mesh on the inside of the bumper.
If the bumper is split or a large missing piece needs to be soldered, secure the parts with plastic ties or metal plates before starting soldering.
Drill holes along the perimeter of the fault in increments of 2-3 cm through which you can stretch the ties. The plates are fastened with bolts and nuts using the same principle.
After tacking in several fragments and reliably connecting the screed sections, the plates should be removed in order to properly solder the fracture site. If the broken pieces are small, grab them from the outside with a heated soldering iron (the tip must be recessed to half the thickness of the bumper).
Soldering points must be cleared of old paintwork. After tacking, be sure to reinforce the structure from the inside with mesh or epoxy and fiberglass. To reinforce the mesh, use a heated soldering iron to press it down approximately to the middle of the thickness of the plastic. On the front side, try to leave the surface as smooth as possible, since you most likely do not have an orbital sander, and it is difficult to sand the plastic by hand.
Painting with structure spray (using structure paint)
Deep scratch on the bumper or scuffs, scratches on the black unpainted bumper protection strip? There is no need to replace the bumper or its element, however, chemicals will not help here either.
In this case, texture paints (those that create a rough surface that imitates the original, typical texture of a bumper or black buffer on a car's bumper or side moldings) are best suited for repairing such elements.
To remove scratches, they must be sanded with abrasive paper, and larger voids will need to be primed, having previously degreased the surface. You can start painting.
It is important to know!
An experienced specialist can paint even part of the bumper in such a way that you will not be able to see the “transition” between the untreated and updated surface. However, if the bumper is old and covered with a network of small scratches, faded and generally looks unsightly, it is better to restore the entire element.
As experts say, in general, to apply this paint you can use a wide brush with soft bristles, but wisely, for a better result, you should use a sprayer.
Any paint manufacturer can be used, however, application and painting instructions must be strictly followed, otherwise the paint will begin to flake and fall off.
Minuses
One of the disadvantages is the relative high cost of restoration work at service stations. With proper painting, you will need to remove elements (bumper, moldings) from the car, carry out painting work and put everything in place. Depending on the prices of the workshop and the scope of work, a turnkey restoration can cost a pretty penny. True, the result will be of the highest quality.
You can do everything yourself, saving many thousands of rubles. But no one will guarantee quality in this case. You need to carefully read the instructions for use, read forums, pay attention to the experience of other repairmen, and only then begin to act.
Example from Drive2 website from user Frazer17: www.drive2.com
A hybrid option is also possible. Remove the bumper and moldings and send them for painting. Perhaps this option will be the most relevant for the majority. Here, the quality will remain high, and the check will not hit your pocket as much.
Do-it-yourself plastic restoration using fiberglass
For DIY repairs, you can buy a kit for repairing plastic bumpers, which includes:
- polyester resin;
- hardener;
- a small piece of fiberglass fabric.
- Fiberglass can be used as a replacement for brass mesh to reinforce the inside of the bumper. Using fiberglass, it will be possible to restore the missing elements of the part, holes for parking sensors, etc. Without the use of fiberglass, it is almost impossible to repair tuning bumpers, the construction of which uses polyurethane foam or fiberglass.
Technology
The repair instructions are based on the example of the Novol Plus 710 Repair box.
- Clean the repair area from dirt and bitumen stains.
- Using abrasive P80-P120, sand. Sanding removes the outer layer of plastic and thereby increases resin adhesion. The old paintwork is polished with the same abrasives if work is carried out on the outside of the bumper.
- Cut the glass mat so that the finished pieces protrude beyond the crack by at least 2-3 cm.
- Degrease with a clean rag soaked in 646 solvent.
- In a separate container, prepare a polyester mixture (2-3 g of hardener per 100 g of resin). At a temperature of 20C you have 10-15 minutes to work with the finished mixture, so you need to knead it in small portions.
- Using a brush, apply epoxy to a small area of the repair area and lay glass mat on it. Using a brush soaked in the adhesive, press the fiberglass fabric evenly and expel all air bubbles.
- Applying more than 3 layers of fiberglass at a time prevents the bottom layer from drying out quickly. We recommend observing intervals between layers of drying (approximately 10-15 minutes at 20? C). Full polymerization occurs in 50-60 minutes, after which the section can be polished with abrasive materials.
Some subtleties
Retail fiberglass is classified in grams per m2. The coarser the fiberglass, the lower the grams/m2. For the final layers of the front component of the bumper, it is best to use glass mat (600-700 g/m2), since it is the easiest to process in preparation for painting. On the outside, try to apply the resin and lay the fiberglass mat as evenly as possible by hand to reduce the amount of sanding required later in preparation for painting. For initial processing by hand, use P80-P120 sandpaper. To level the surface of the bumper, plastic putty is applied to the repair area.
The putty is polished with abrasives P120, P240, P320.
An acrylic primer is applied to the prepared and degreased surface in several layers. Before painting, primed areas are sanded with P320, P600 abrasives.
This preparation method is universal and is suitable both for fiberglass repairs and for preparing the front side after soldering the bumper with electrodes.
Answers to frequently asked questions
How to solder the fastening (ear) of a plastic bumper?
In order to reliably solder the bumper fasteners without loss of strength, the repair site must be reinforced with reinforcement. You can use wire mesh, hot staples, or regular construction staples for this.
How to solder a large crack on a car bumper?
A large crack must be sealed, ensuring that its edges are tightened and reinforced. Large holes and breaks can be repaired using composite material (fiberglass or fabric + polyester resin).
Is it possible to solder a bumper with a metal rod?
It only makes sense to use a non-melting metal rod as a heating element. You should not solder plastic parts with metal solder.
DIY tool for welding bumpers with electrodes
The technology of welding plastic parts currently makes it possible to achieve excellent quality repairs at home. For repairs you will need:
- soldering station or heat gun with a special nozzle for soldering car bumpers. A professional soldering station complete with a soldering iron will cost about $100, but a soldering iron can be purchased separately. The only drawback of construction hair dryers is that the soldering attachments lead to overheating of the heating element and rapid failure of the hair dryer. If you plan to repair bumpers and other plastic elements, then purchasing a soldering station will be the best solution.
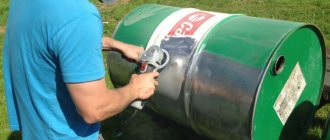
- Electrodes. Unfortunately, the cost of ready-made twigs for soldering is quite high. Therefore, it is better to make them yourself from available materials. Only compatible types of plastic can be used as electrodes. Most car bumpers are made of polypropylene alloys (PP, PP-EDM) or ABS. Without much difficulty, a similar type of plastic can be found among headlight housings and fender liners, of which there are a great many in the landfills of garage cooperatives and body repair stations. It is most convenient to use an engraving machine to sand and clean the repair area.
Repair technology
Each type of plastic has a threshold melting temperature, significantly exceeding which leads to loss of elasticity and strength. How to weld a bumper yourself:
- sand the old paintwork at the repair point with P80-P120 abrasive;
- to form a strong Y-shaped seam, the crack walls need to be slightly expanded;
- Observing the temperature regime, first heat the plastic and then the electrode itself. When laid correctly, the descending rod should be preceded by a ball of molten plastic.
- For reliable welding, it is important that the area where the electrode is placed is also heated.
- Following the technology, place the electrodes not only along the crack, but also at several points across the fault line.
How to repair minor damage to a plastic car bumper
Bumper damage comes in many different types, from minor scratches and small dents to serious cracks. Small dents and scratches can be removed yourself.
If the car bumper is made of thermoactive plastic, then minor damage to it can be easily eliminated using the polishing method with special chemicals. means.
Related article: We remove chips and scratches on the car body with our own hands
For example, if there is a shallow scratch, it can be treated with WD-40 universal cleaner.
In order to polish a scratch or chip, you will need a sponge, a soft rag and a chemical reagent. First, you need to clean the damaged area from dirt and dust with a sponge and water. After applying chemical. spray or sponge. Next, the damaged area is intensively polished with a rag until no damage is visible on it.
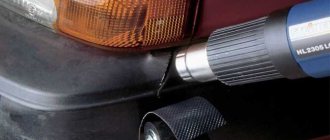
The second way to eliminate small dents and scratches on a plastic car bumper is to straighten the damaged area with a hot air gun. The essence of the method is that the damaged surface is evenly heated with a hair dryer. Due to heat treatment, the damage is leveled and straightened.
The method is simple and does not require special skills to perform, but it is not without its drawbacks: there is a possibility of deformation of the plastic; heating with a hairdryer can only be used on unpainted areas.
Also, a wax pencil is considered a simple and inexpensive way to eliminate minor damage to a plastic car bumper.
With its help, scratches and chips are simply painted over. Chem. the composition of the pencil fills the damaged areas, leveling them with the general surface and forms a protective layer. The process of removing chips and dents with a wax pencil takes no more than 5 minutes.
How to determine the type of plastic without markings
- take a glass of cold tap water,
- cut a small piece of your plastic, about 1 centimeter in size, a couple of millimeters thick,
- clean this piece so that it is free of dust and oils,
- dip a piece into a glass: if the plastic floats easily on the surface, it is most likely thermoplastic labeled PE, PP, PP+EPDM ;
- If a piece has sunk, try to set it on fire; if it burns, most likely it is thermoset, marked PUR/TPUR , if it does NOT burn,
- most likely it is PC
The most persistent “chemistry” for blackening
The Finish Black Plastik & Vinyl Restorer solution is one of the most expensive restoration options we found. True, the drug is mainly sold abroad, for example on Amazon.com
A 12 ounce (355 ml) bottle costs RUB 1,600, but it is one of the few products that contains a large amount of black plastic dye.
See also Why a spring cracked on a car: causes, signs and consequences
Since the product contains a large amount of pigments, even a minimal amount of it qualitatively colors the material black. A small amount applied to the black strip using a sponge applicator or cloth is enough to turn the element black - and it will be black with an optimal matte sheen. Still, it's not paint. After cleaning, the black bars remain black. In a month they will also be black. This thing works well!
