If you know how to harden metal correctly, then even at home you can increase the hardness of products made from it two to three times. The reasons why there is a need for this can be very different. Such a technological operation is required, in particular, if the metal needs to be given hardness sufficient to enable it to cut glass.
Hardening metal at home
Most often, a cutting tool needs to be hardened, and heat treatment is performed not only when its hardness needs to be increased, but also when this characteristic needs to be reduced. When the hardness of the tool is too low, its cutting part will jam during operation, but if it is high, the metal will crumble under the influence of mechanical loads.
Few people know that there is a simple way to check how well a steel tool is hardened, not only in production or at home, but also in a store when purchasing. In order to perform this test, you will need a regular file. It is passed along the cutting part of the purchased tool. If it is poorly hardened, then the file will seem to stick to its working part, and in the opposite case, it will easily move away from the tool being tested, while the hand in which the file is located will not feel any irregularities on the surface of the product.
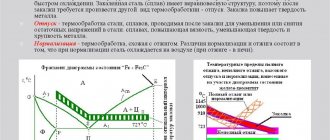
Dependence of steel hardness on heat treatment mode
If it turns out that you have at your disposal a tool whose hardening quality does not suit you, there is no need to worry about it. This problem can be solved quite easily: you can harden metal even at home, without using complex equipment and special devices. However, you should know that low-carbon steels cannot be hardened. At the same time, the hardness of carbon and tool steel alloys can be easily increased even at home.
Introduction to Metallurgy
The technology of heat treatment of steels provides for a number of methods of thermal influence. As a result, the grain size changes. This changes the hardness.
The steel contains:
- Ferrite is the main component. Metal grains are easy to see under a microscope. They are usually presented in thin sections as white or light gray.
- Perlite is a eutectoid mechanical compound of iron and carbon. This component is noted for its high hardness and strength.
- Cementite is a limiting compound of iron with carbon Fe₃C. One pure cementite is a rather brittle substance.
- Graphite is a form of carbon. In metals it can be presented in the form of spherical inclusions. Its presence is noted in Damascus steels, which are produced by forging.
- Austenite is one of the forms of alloy. It occurs at temperatures of 727 ⁰C and above. This component represents fluidized metal. It is characterized by high plasticity and pliability. The appearance of austenite upon heating is determined by the absence of magnetic properties.
The accepted classification of the compound is iron-cementite in the following meanings:
- 0.0...2.18% carbon is steel;
- 2.14...6.67% carbon – cast iron.
Steels also have other differences:
- 0.0…0.8 – low-carbon steels;
- 0.8…2.14 – carbon steels.
Diagram Fe – Fe₃C. Depending on the temperature and concentration of iron and carbon, different types of compounds are formed. They determine the mechanical properties of the metal:
Heat treatment
Heat treatment of metal is performed to change the characteristics of the iron-carbon alloy.
Annealing is a heat treatment whose purpose is to reduce the strength properties of steel. It is produced by heating to a temperature above the austenitic state, followed by slow cooling (up to 6...8 hours) in the chamber where the heating took place.
Normalization is a variant of annealing performed to reduce stress inside the metal. Normalization is usually carried out by heating to 727 ⁰C and higher with slow cooling (up to 1...2 hours) with the doors of the heating furnace open.
Hardening is a method of changing grain sizes by rapidly cooling a metal from the austenite state to ambient values.
Tempering is a heat treatment that relieves internal stress in the metal. There are: low, medium and high vacation. Each has its own temperature values.
Hardness test
The hardness of metals is determined by two methods:
- According to Brinell, a metal ball is pressed into the metal.
- According to Rockwell, it consists of pressing a small cone from a strong pyramid (diamond).
When determining Brinell hardness, the size of the mark left by a ball when pressed with a force is measured, the magnitude of which depends on the expected hardness and the ball used. Balls of different diameters (1,...10 mm) are used in the tests. Recalculation of readings is performed according to the formula:
Where F is the force applied on the device, N; D – diameter of the ball used to test hardness, mm; d – imprint diameter. It is measured under a microscope that has a special ruler. Measurement accuracy up to 0.01 mm.
This method is recommended for determining hardness of no more than 300...320 units. If it is necessary to determine harder objects, then use the Rockwell device. On this scale, information is indicated by HRC and numerical value.
Based on numerous studies, it has been established that for knife steel the HRC 55...63 will be quite high. When designing gears and manufacturing gears, hardening of the tooth surface is also performed. Designers set hardness to HRC 52…58. Metal-cutting tools (cutters, drills, cutters, milling cutters) have a hardness of HRC 60...65.
Quenching and tempering
Hardening is carried out by heating to a temperature above the production of austenite. For some steels, some overheating is recommended, which is necessary to obtain a fluidized state throughout the entire mass of the metal.
Carbon steels in which the carbon content exceeds 0.8% can be hardened. With a lower value, hardening does not work. Rapid cooling does not form fine metal grains.
The crystal lattice of steel before (a) and after (b) hardening. Obtained by examining sections of steel samples
Hardening is performed in air, water and oil. It is generally easier to quench in oil, the reasons are as follows:
- When immersed in oil, bubbles of boiling liquid do not form on the metal surface, which reduce the cooling rate.
- A circulating fluid flow is formed around the metal object, which activates the process of convective heat transfer.
- Before hardening, the oil can be heated to a temperature of 250…350 ⁰С. Then a two-stage hardening process is carried out (in oil and water, one after the other).
Attention! In some sources you can read that hardening is performed on a gas stove. Only amateurs who have never achieved real results can write something like this.
The temperature is determined using a radiation pyrometer. Measurement accuracy up to 1...3 ⁰С. But the cost of such a device is quite high. Therefore, heating to one or another value is determined visually. For this purpose, special tables are used. Based on the colors, you can try to harden the metal yourself.
Steel heating color chart:
Tempering is carried out to relieve internal stresses in the metal. The part is heated to the desired temperature, and then allowed to slowly cool in air.
There are several types of vacation:
- Low, used for metal-cutting tools.
- Medium, used for woodworking tools.
- High, is used in mechanical engineering for gears or pulleys of V-belt transmissions.
To visually determine the heating temperature, a pyrometer is used. You can approximately set the heating temperature by comparing the type of workpiece during heating with the base table. When heating steel, tarnish colors are observed on the surface; they have different colors.
Colors of tarnish when heating steels:
In addition to carbon steels, heat treatment is performed for alloy alloys. The presence of additional elements in the metal improves the strength characteristics.
The table shows the recommended quenching and tempering modes for different types of steels. All types of materials presented are used for the knife.
| Heat treatment mode and steel hardness | |||||||
| Steel grades according to GOST | Metal heating temperature, ⁰С | Cooling medium | Hardness after hardening, HRC | Tempering mode (⁰С) and the resulting hardness HRC | |||
| 170…210 | 220…350 | 360…420 | 420…550 | ||||
| U7…U7B | 780…830 | oil | 58…62 | 59…63 | 57…60 | 52…54 | 48…53 |
| У8...У8В | 790…835 | oil | 60…64 | 60…65 | 58…60 | 51…55 | 47…50 |
| U9…U9A | 780…840 | oil | 56…63 | 58…62 | 54…59 | 49…53 | 48…53 |
| U10…U10A | 730…800 | oil | 58…62 | 57…64 | 57…64 | 48…53 | 49…52 |
| U12…U12A | 760…810 | oil | 59…64 | 60…65 | 58…60 | 49…52 | 49…52 |
| 40 | 740…820 | oil | 48…53 | 49…55 | 39…45 | 32…40 | 28…31 |
| 40X | 720…830 | oil | 50…54 | 52…57 | 48…50 | 44…49 | 29…32 |
| 35ХГSN | 780…810 | oil | 45..52 | 45..52 | 35..42 | 45..52 | 38…40 |
| 5ХНМ | 790…835 | oil | 45…50 | 46…52 | 40…48 | 46…52 | 36…40 |
| 5ХНВ | 780…840 | oil | 48…52 | 48…52 | 44…47 | 40…48 | 38…40 |
| 65G | 730…810 | water/oil | 59…64 | 59…64 | 55…57 | 51…54 | 46…48 |
| HVG | 760…820 | water/oil | 54…59 | 56…60 | 48…50 | 42…47 | 33…36 |
| HVS | 740…820 | water/oil | 54…58 | 52…56 | 44…47 | 40…44 | 39…42 |
| X12M | 720…830 | water/oil | 50…57 | 48…53 | 55…57 | 53…55 | 36…38 |
| 9ХС | 760…810 | water/oil | 59…64 | 59…64 | 48…50 | 42…47 | 29…34 |
| ShKh15, ShKh15SG | 760…820 | oil | 59…64 | 59…65 | 58…60 | 52…57 | 39…42 |
| 20X | 730…810 | water/oil | 48…52 | 42…50 | 38…41 | 36…38 | 36…38 |
| 45 | 760…820 | water | 41…49 | 34…37 | 32…35 | 30…34 | 29…32 |
| 14C28N | 740…845 | water | 50…57 | 45…49 | 41…44 | 39…42 | 32…34 |
| 8Cr13MoV | 780…860 | water/oil | 59…64 | 60…65 | 55…57 | 55…57 | 48…50 |
| 65Х13 | 760…855 | water/oil | 48…52 | 49…55 | 48…50 | 44…48 | 38…40 |
| 95Х18 | 740…820 | water/oil | 41…49 | 52…57 | 44…47 | 42…45 | 36…40 |
Tempering brittleness
For almost all steels, a standard relationship applies: the higher the heating temperature during tempering, the greater the ductility and toughness of the tempered product.
However, for some brands, as the temperature increases, these physical characteristics decrease and hardness and brittleness increase. This phenomenon is called temper brittleness and occurs during heat treatment of both carbon and alloy steels. It manifests itself in two temperature ranges: 250÷400 ºC and 500÷550 ºC and, accordingly, is called type I and II temper brittleness (see figure below).
The first is typical for carbon steels, and you can get rid of it by heating the part again a little above 400 ºC. As a rule, it does not appear again, but at the same time the metal exhibits a slight decrease in hardness. Type II temper brittleness can occur in alloy steels, which, after heating to the specified range, are subjected to slow cooling.
To counteract this problem, the cooling rate is usually increased, but reheating the product may again cause such brittleness to occur. Another way to get rid of this phenomenon is to introduce small amounts of molybdenum or tungsten into the steel composition.
It is preferable for tempering large-sized parts, since a high cooling rate can cause their deformation and the occurrence of excessive internal stresses.
Step-by-step making of a simple forge
Fireclay bricks are used for production. It differs from ordinary brick in that it contains fireclay clay, which can withstand heating of more than 2500 ⁰C.
It is not difficult to distinguish fireclay bricks from ordinary bricks. On the surface there is an extruded circle with a diameter of 55 mm. The structure itself is noticeably different from the fired product.
To ensure that the bricks maintain a constant shape, they can be held together using a special mortar. But in practice they do things differently. A frame is welded from the corner. It will not allow you to change shape. A cast iron cylinder is installed in the center (used in internal combustion engines). In this case, a cylinder from a V-2M tank engine was used.
To prevent bricks from falling out, support ribs are welded. The load from the main fragments of the forge will be distributed on them.
Having placed the cylinder on the corners, mark the cutouts. They will have to be done using cutting discs and angle grinders.
After marking, the lines left by the scriber are visible.
The necessary cuts have been made. All that remains is to weld the ribs in place.
Holding the parts in place, spot weld the components. After making sure that the parts are located in the right place, the final welding of the forge frame is carried out.
Turning the frame over, they look at how the frame of the forge will look in working position.
Now you need to lay the bricks correctly. It is clear that they have been sampled. A certain ledge is formed, located below the level of the brick surface.
Having laid all the bricks in place, you can see the formation of a recess. Its purpose is to install a grate.
The grate is installed in the center of the forge. It is designed to supply air from below into the combustion zone. Only with air flow can constant combustion of the fuel be guaranteed. But to obtain temperatures above 1300 ⁰C, forced air flow from a fan will be required.
You will need to weld a pipe to the cylinder, which will have:
- centrifugal fan;
- plug for venting combustion products.
The fan is being fitted. To supply it you need an intermediate profile pipe. It is necessary to weld it so that the air flow enters the combustion zone without unnecessary resistance.
A hole is marked in a cylindrical pipe.
After the first cuts, you need to mark the remaining elements.
The parts are ready for assembly. All that remains is to fix the parts and then weld the entire blower structure.
The result was a structure welded to the cylinder. Now we have to install the fan.
The forced air supply system to the forge is ready. It's time to assemble the rest of the small-sized forge structure.
Another view. The quality of welds is checked.
After painting, the forge takes on a professional look. It is mounted on supports. The height is selected according to the height of the master who will work on this forge.
There is a rotary valve on the pipe. It is needed to temporarily block access to the fan. Usually they are closed when there is a need to clean the grates.
There is a lid at the bottom. In the “closed” position it is held by a counterweight. To open the passage for slag and other combustion products, simply turn the counterweight slightly. The hole will open. The slag will leave the furnace.
The bricks take their place. Soon the forge will be ready for use.
To limit heat loss, a screen is installed. This is sheet steel that is installed around the perimeter of the hearth. A handle is mounted on the front. It is needed for hanging auxiliary tools that the blacksmith uses when performing work.
Having laid the fuel (start ignition with ordinary shavings and wood chips), light the fire. Gradually add coal. It is the main fuel for the forge.
After turning on the fan, the combustion intensity increases. The coals begin to burn not red, but white. The flame temperature increases above 1000 ⁰С. Now you can heat up parts on the forge in order to further forge metal or harden workpieces.
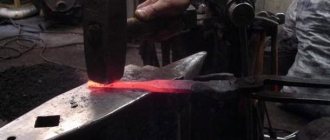
In addition to the forge, blacksmiths use anvils. The main work on forming the desired shape is performed on it. They work with heavy and light hammers. Additionally, streams of different shapes are used.
How to harden steel over an open fire
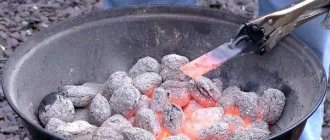
As mentioned above, you can harden steel at home, using an open fire for heating. Naturally, such a process should begin by starting a fire, in which a lot of hot coals should form. You will also need two containers. You need to pour mineral or synthetic oil into one of them, and ordinary cold water into the other.
In order to remove hot iron from a fire, you will need blacksmith tongs, which can be replaced with any other tool of a similar purpose. After all the preparatory work has been completed, and a sufficient number of hot coals have formed in the fire, objects that need to be hardened can be placed on them.
The color of the formed coals can be used to judge the temperature of their heating. Thus, coals whose surface has a bright white color are hotter. It is also important to monitor the color of the fire’s flame, which indicates the temperature regime in its interior. It is best if the fire flame is colored crimson rather than white. In the latter case, indicating that the flame temperature is too high, there is a risk of not only overheating, but even burning the metal that needs to be hardened.
Heated steel colors
The color of the heated metal must also be carefully monitored. In particular, black spots must not be allowed to appear on the cutting edges of the tool being processed. Blue discoloration of the metal indicates that it has softened greatly and become too flexible. It cannot be brought to such a state.
After the product has been calcined to the required degree, you can proceed to the next stage - cooling. First of all, it is lowered into a container with oil, and this is done often (every 3 seconds) and as sharply as possible. Gradually the intervals between these dives increase. As soon as the hot steel loses its brightness, you can begin to cool it in water.
Steel tarnish colors
When cooling metal with water on the surface of which droplets of hot oil remain, care should be taken, as they may burst into flames. After each dive, the water must be agitated to ensure it remains cool at all times. A training video will help you get a clearer idea of the rules for performing such an operation.
There are certain subtleties when cooling hardenable drills. So, they cannot be lowered flat into a container with coolant. If you do this, then the lower part of the drill or any other metal object that has an elongated shape will cool sharply first, which will lead to its compression. That is why it is necessary to immerse such products in coolant from the wider end.
For heat treatment of special grades of steel and smelting non-ferrous metals, the capabilities of an open fire are not enough, since it will not be able to heat the metal to a temperature of 700–9000. For such purposes, it is necessary to use special furnaces, which can be muffle or electric. If it is quite difficult and expensive to make an electric furnace at home, then with muffle-type heating equipment this is quite feasible.
How to harden?
When you have a forge, hardening can be done quite simply:
- First the fire is lit. Small-sized wood (chips, small branches, woodworking shavings and paper) is used for ignition.
- Prepare the containers in which the hardening will be carried out. Mineral oil (from internal combustion engines) is the best cooling for parts. The container must allow the part to be loaded completely. Synthetic and semi-synthetic oils can be used, but keep in mind that some may boil. The cooling rate will decrease. Therefore, the use of such oil is used with caution.
- A water container is needed to rinse parts after hardening.
- You will need coal. Brown and black coals are used. In practice, charcoal obtained after processing birch is often used.
- To pick up the workpiece and move it around inside the forge, you will need pliers. Experienced blacksmiths have several types of pliers.
- After obtaining a stable fire on the grates, you can add coal. It burns slowly at first. When the air supply is turned on, intense heating begins. The coals change color to white.
- It's time to lay down the part that they want to harden. She is put into the fire. Watch the warm-up.
- Need a magnet. It will show whether the required heating has occurred or not. Austenite is not magnetic.
- If a dark cherry-colored glow occurs, you can count on heating to similar temperatures.
- Take out the workpiece and try whether it is magnetized or not. If not, then the temperature has been reached.
- Warming up is required for at least 15...20 minutes. The thermal conductivity of heated metal is low, so incomplete heating may occur inside massive objects. In this case, bends are observed during hardening.
- After removing the part from the fire, it is dipped into oil in several stages. Lower and raise with rhythmic movements. This is how high cooling rates are achieved. Raising and lowering stirs the coolant during the hardening process. A fire may occur. It will go out quickly.
- All that remains is to rinse the part.
- You can check whether hardening has occurred or not with a file. If the file “does not take”, it means that hardening has occurred.
Test the quality of tempering on glass. If it is possible to leave a mark on the glass with a tempered part, then an HRC hardness of more than 55 units is obtained.
Video: how to harden metal with your own hands?
Technological nuances of hardening
Hardening, which is a type of heat treatment of metals, is performed in two stages. First, the metal is heated to a high temperature and then cooled. Different metals and even steels belonging to different categories differ from each other in their structure, therefore their heat treatment modes do not coincide.
Heat treatment modes for some non-ferrous alloys
Heat treatment of metal (hardening, tempering, etc.) may be required for:
- its strengthening and increasing hardness;
- improving its ductility, which is necessary when processing by plastic deformation.
Many specialized companies harden steel, but the cost of these services is quite high and depends on the weight of the part that needs to be heat treated. That is why it is advisable to do this yourself, especially since you can do it even at home.
If you decide to harden the metal on your own, it is very important to correctly carry out such a procedure as heating. This process should not be accompanied by the appearance of black or blue spots on the surface of the product. The bright red color of the metal indicates that heating is occurring correctly. This video demonstrates this process well, which will help you get an idea of the degree to which to heat the metal subjected to heat treatment.
As a heat source for heating the metal product that needs to be hardened to the required temperature, you can use:
- a special oven powered by electricity;
- blowtorch;
- an open fire that you can make in the yard of your house or in your country house.
Hardening a knife on open coals
The choice of heat source depends on the temperature to which the metal to be heat treated must be heated.
The choice of cooling method depends not only on the material, but also on the results to be achieved. If, for example, it is not necessary to harden the entire product, but only a separate section of it, then cooling is also carried out pointwise, for which a stream of cold water can be used.
The technological scheme by which metal is hardened may include instant, gradual or multi-stage cooling.
Rapid cooling, which uses one type of coolant, is optimal for hardening steels classified as carbon or alloy. To perform such cooling, you need one container, which can be a bucket, barrel, or even an ordinary bathtub (it all depends on the size of the item being processed).
Cooling the knife blank in oil
In the event that steels of other categories need to be hardened or if, in addition to hardening, tempering is required, a two-stage cooling scheme is used. With this scheme, a product heated to the required temperature is first cooled with water and then placed in mineral or synthetic oil, in which further cooling occurs. Under no circumstances should an oil-based cooling medium be used directly, as the oil may ignite.
In order to correctly select the hardening modes of various steel grades, you should focus on special tables.
Heat treatment modes for high-speed steels
Heat treatment modes for alloy tool steels
Heat treatment modes for carbon tool steels
