The ideal welding seam - what is it?
How to weld seams? Today we will look at the process of obtaining an ideal weld, the quality of which even an experienced welder will envy. However, the article was written specifically to help beginners in electric welding.
Unlike previous articles, this one is written in a slightly different style. Here I tried to avoid long prefaces and long descriptions of the welding processes themselves. I hope that the article will be useful to all novice welders, and they will be able to learn something new from it.
Electric welding technology
Electric welding is a process that occurs under the influence of high temperatures above the melting of the metal.
As a result of welding, a so-called weld pool is formed on the surface of the metal, which is filled with a molten electrode, thereby forming a weld seam. Therefore, the main conditions for carrying out electric welding are to ignite the electrode arc, melt the metal on the workpieces being welded and fill the weld pool with it. It would seem that in all its simplicity, it is very difficult for an unprepared person to do this. Firstly, you need to understand how quickly the electrode burns, and this depends on its diameter and current strength, and also be able to distinguish slag during metal welding.
In addition, you need to maintain a uniform speed and correct movement of the electrode during welding (from side to side) to ensure that the weld is smooth and reliable, able to withstand tensile loads.
How to strike an arc
You should begin mastering electric welding with the correct ignition of the arc. It is better to carry out training on an unnecessary piece of metal, but it should not be rusty, as this will seriously complicate the task and can confuse a novice welder.
There are two simple ways to light an arc:
- Quickly touch the electrode to the surface of the workpiece and then move it upward to a distance of 2-3 mm. If you tear the electrode away from the metal above, the arc may disappear or become too unstable;
- By striking the electrode against the surface of the workpiece being welded, as if you were lighting a match. You need to touch the tip of the electrode to the metal and move it 2-3 cm along the surface (towards the welding site) until the arc lights up.
The second method of igniting the arc is best suited for beginner electric welders, since it is the simplest. Also, briefly touching the metal warms up the electrode, and further cooking with it becomes much easier.
After igniting the arc, it should be kept as close as possible to the surface of the workpiece, at a distance of no more than 0.5 cm. In addition, this distance must be kept approximately the same all the time, otherwise the welding seam will be ugly and uneven.
Welding speed
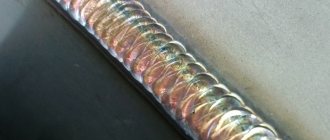
The speed at which the electrode moves depends on the thickness of the metal being welded. Accordingly, the thinner it is, the faster the welding speed is, and vice versa. Experience in this will come with time, when you learn to light an arc and start cooking in the slightest degree. The pictures below show illustrative examples by which you can understand exactly at what speed the welding was carried out.
If it is slow, the welding seam will be thick and its edges will be heavily melted. If, on the contrary, you move the electrode too quickly, the seam will turn out weak and thin, as well as uneven. At the correct welding speed, the metal completely fills the weld pool.
In addition, when practicing cooking, you need to ensure the correct angle of the electrode in relation to the metal surface. The angle should be approximately 70 degrees and can be changed if necessary. During the formation of a welding seam, the movement of the electrode can be longitudinal, translational and oscillatory, from side to side.
Each of these techniques for guiding the electrode allows you to achieve the desired seam, reduce or increase its width, and also change some other parameters.
How to cook a vertical seam
Due to the fact that the seam is located vertically, and the force of gravity acts constantly, the molten metal rushes down. This is the main difficulty that prevents a novice welder from completing the job with more or less acceptable quality.
All actions of the specialist in this case (in addition to the main work) are aimed at keeping the molten mass within the working area of the joint. Stability in operation helps solve the problem: the electric arc must be constant. It should be kept at the minimum possible distance between the weld pool and the electrode.
Bottom-up welding technique
The most common method is welding in the direction from the lowest joint point to the highest. Thanks to this direction of movement, stable control of the melt is ensured, which is easier to keep within the bath. It is with this method of welding that it is possible to lay a high-quality seam and create a reliable connection.
Naturally, before starting the welding process, you need to prepare the edges of the parts to be welded. They are processed with abrasives in exact accordance with the requirements. The device is configured separately, the required resistance and current strength are set, and the most suitable electrode is selected.
At the first stage, the welder makes several clamps 1-2 cm long, which are evenly spaced along the entire length of the joint. This is necessary to avoid deformation of the surface of the parts being connected as a result of a sharp increase in temperature. When vertical welding, the angle between the electrode and the working surface is maintained in the range of 45-90 degrees.
According to the developed instructions, the welder’s actions consist of four points:
- Connect the electrode to the metal to strike an arc.
- Make several tacks from the middle to the edges. They are located at approximately the same distance, and the number depends on the length of the joint.
- Form a seam in the direction from the bottom point to the top.
- Make sure that the melt does not leak out of the working bath.
There is no need to move the electrode too quickly. In this case, it is impossible to achieve good heating of the workpieces. But you shouldn’t hesitate, since a large amount of melt will cause it to flow down. The speed of movement of the electrode should ensure the optimal amount of melt in the bath.
Along with the forward movement from bottom to top, the welder must also take care of the transverse movements of the electrode in a crescent, herringbone or other manner. It is worth considering that the technique of transverse movement of consumables is relevant only when the thickness of the workpieces being connected is more than 4 mm.
When welding vertically, it is important to go through the joint in one pass without stopping. This is precisely the main difficulty for novice welders.
With experience, the necessary skills are acquired, and vertical welding ceases to be a problem.
Welding technique from top to bottom
Over time, welders easily form vertical seams by moving the electrode from top to bottom. Here you need to know about a little trick, without which doing the work would be very problematic. When igniting an electric arc, the electrode must be placed at a right angle to the working surface. After starting the process, the holder should be lowered a little. Until the moment when the angle between the electrode and the metal is approximately 15-20 degrees.
The electrode is passed through the joint using transverse movements. They can be straight (rectangular), sawtooth or wavy. The choice of method is at the discretion of the welder
It is important that the payment is evenly distributed in the bath and does not leak out of it. This method of vertical welding is more difficult than when moving from bottom to top.
But it is popular with experienced professionals because the result is a higher quality and stronger seam.
Defects and sewing defects
The most common defect in a beginner’s work is a crooked seam with uneven filling. This picture is the result of uneven guidance of the electrode; it literally dances in the hands of the young master. Here you will need perseverance and work: with experience, all this passes without a trace. The second most common mistake is the incorrect choice of current strength or arc length, which leaves “undercuts” or uneven filling. With some defects, aesthetics suffer more, with others - strength.
Lack of penetration - insufficient filling of the joint of parts with metal. It needs to be corrected, since we are talking about the strength of the connection.
In what cases does lack of penetration appear:
- Poor quality processing (or lack thereof) of surface edges;
- The current is too weak;
- Electrode movement too fast.
An undercut is an unnecessary groove along a seam. The diagnosis is simple: choosing an arc that is too long. The treatment is also clear: either a shorter arc, or a higher current intensity.
Examples of electrode movement patterns.
A burn-through is a banal hole in a seam for the following reasons:
- Wide gap between edges;
- The current is too high;
- Low electrode speed
And here we are looking for the optimal ratio of three components: current, gap width, electrode movement.
Pores and nodules are multiple small holes. This is a critical defect that affects the strength of the connection.
Causes:
- Dirt and rust on metal;
- Oxygen reaching the molten metal (in a draft);
- Poor quality edge processing;
- Low quality electrodes;
- Use of filler wires;
Cracks are serious violations of the integrity of the seams. They appear after the metal has cooled and are essentially harbingers of the destruction of the seam itself. In this case, only new welding or complete removal of the old seam and re-applying a new one will save.
Classification
Today there are various welding methods. GOST classifies welding processes into more than 150 varieties. The classification is based on the following characteristics: physical, technical and technological. The classification of welding methods according to physical characteristics divides all types into three classes: thermal, thermomechanical and mechanical. The basis of this separation is the form of energy that is used in the welded joint.
The thermal class includes those types where thermal energy is present:
- gas;
- arc;
- electroslag;
- electron beam;
- laser, etc.
The thermomechanical class includes those types of welding where thermal energy and pressure are present:
- contact;
- diffusion;
- gas press;
- arc press;
- blacksmith shop, etc.
The mechanical class includes pressure welding, i.e. where mechanical energy is used:
- cold welding;
- friction welding;
- ultrasonic, etc.
The technical characteristics of the classification are as follows:
- a method of protecting metal at the welding site;
- continuity of the process;
- mechanization of the welding process.
Each method has its own technological characteristics and are set individually. For example, the classification of arc welding may be based on: the type of electrode, the nature of the protection, the level of automation, etc.
Types of connections
Depending on the relative position of the parts, welding joints occur:
- end-to-end;
- overlap;
- in an angular way;
- in a tee way.
When butt welding, the ends of two parts located in the same plane are welded. The joint can be made with a flange, without a bevel, or with a bevel. The shape of the bevel may resemble the letters X, K, V.
In some cases, welding is done with an overlap, then one part is partially mounted on another, located parallel. The combined part is an overlap. Welding is done without bevel on both sides.
Often there is a need to make a welded corner. This connection is referred to as the corner type. It is always done on both sides and may not have bevels or have a bevel on one edge.
If the welded parts result in the letter T, then a T-joint has been made. Sometimes parts welded with a T-seam form an acute angle.
In any case, one part is welded to the side of the other. Welding is carried out on both sides without a bevel or with bevels on each side.
What does a welding joint consist of?
The welding joint consists of the following elements:
- The weld itself is the area where the parts meet.
- Fusion zone.
- The heat-affected zone of a welding machine is an area of metal where thermal changes are noticeable as a result of the effects of welding.
- Base metal - the remaining area of metal parts that are connected by welding.
The terms “welded joint” and “weld seam” are sometimes confused.
The permanent connection of two or more metal elements is called a welded joint. A seam is the area where two metal parts meet. In turn, the welded joint is part of a welded structure - a metal structure consisting of several elements welded into one. When welding in several layers, the root seam is also isolated - this is the very first welding layer, located deeper than the others. When performing it, the impact should be maximum and, if possible, continuous.
Shape and extent
The shape of the seam can be convex, even (flat). Sometimes it becomes necessary to make a concave shape. Convex joints are designed for increased load.
The concave areas of the alloys withstand dynamic loads well. Flat seams, which are made most often, are characterized by versatility.
The length of the seams is continuous, without intervals between the fused joints. Sometimes interrupted stitches are sufficient.
An interesting industrial variation of the intermittent seam is the joint formed by resistance seam welding. It is done on special equipment equipped with rotating disk electrodes.
They are often called rollers, and this type of welding is called roller welding. Continuous connections can also be made using such equipment. The resulting seam is very strong and absolutely airtight. The method is used on an industrial scale for the manufacture of pipes, containers, and sealed modules.
https://youtube.com/watch?v=z1m34-RYFb0
Fillet Welding - How to Make the Correct Welding Seam
The technique of making welding seams (they are also called roller welds) involves choosing a mode and method of manipulating the electrode. The video on our website will show you everything in detail and in an accessible manner on how to make a welding seam correctly.
There are two types of fillet welds: T-welds (for T-shaped joints) and lap welds, both types are very common in welding. Let's look at each one separately.
Welding technique for T-joints
To get the correct welding seam, you need to place one plane horizontally and the other vertically. Welding a fillet weld must be done strictly at a right angle. If the vertical welded product is no thicker than 12 mm, then it does not require additional processing. The only thing you need to ensure is that the bottom edge of the vertical product is cut as evenly as possible, and that the joint gap does not exceed 2 mm.
In the welding structure of T-joints, all parts are important, more precisely their thickness. So, for example, if a vertical product has a thickness from 12 to 25 mm, then you need to make preparation in a V-shape
If the vertical sheet is from 25 to 40 mm thick, then the bevels of the edges need to be cut in a U-shape on only one side. And if the thickness is more than 40 mm, then a cut is made on both sides of the V-shape.
It is dangerous when a seam has one side unwelded or a corner unwelded. Therefore, in the process of welding a fillet weld, the electrode must be positioned so that it is in the plane that divides the corner in half. And the end of the electrode performs oscillatory movements so that the edges of the metal melt. It is necessary to determine in advance that the length of the welding seam is commensurate with the angle between the products.
How to apply a corner seam correctly
Welding a fillet weld depends primarily on the correct ignition of the electric arc. Ignition of the electric arc is a very important and fundamental point in welding work. The arc must be ignited immediately before starting the welding process, and re-ignited only if it breaks during the process.
The arc is excited on the lower horizontal sheet at a distance of 3-4 mm from the top of the corner, then the arc must be brought to the top of the corner and held there in order for the corners to melt better. Next, the arc needs to be raised to the height of the seam leg along the vertical product and smoothly moved back. Then, a little faster, you need to lower the arc down onto the horizontal product and bring the thickness of the seam on it to the size of the leg.
The biggest mistake is to start welding a seam from a vertical piece being welded, since the molten metal from the electrode will float onto the lower unmolten metal and block the top of the corner. In this case, penetration will not work, and it can only be detected by breaking the metal.
When the welding process is carried out with thickly coated electrodes or with increased current, a large area of molten metal is formed, which makes fillet welds impossible, because the molten metal flows onto the horizontal product, and the seam will simply turn out incorrect.
To avoid this, the products to be welded must be positioned tilted to the horizontal at a 45 degree angle, and welding must be done with a boat. See clearly how to make a welding seam - a video on our website that shows all the equipment, as well as practically how to properly clean the seams after welding.
Lap joint welding technique
This type of welding is used mainly in sheet structures. The ends of the sheets that will be welded are overlapped by a certain amount, equal to approximately 3-5 sheet thicknesses. They need to be welded along the perimeter or along the edge of the corner seam, which was formed by covering the sheets. The positive thing about this type of welding is that there is no need to process the edges. The negative point is that excess material is wasted and the structure becomes heavier. However, lap joints are often used.
Share a link to this material with your friends on social networks (click on the icons):
Geometric parameters of the seam
To know what a weld should be, it is necessary to take into account the characteristics of its dimension. There are 3 main types of suture joints:
- Convex
- Normal
- Concave
Convex seams are recommended for use in those metal structures that will be subjected primarily to static loads. Convex seam is well suited for support structures . This could be the metal frame of a building or the support of some equipment.
A seam of normal shape , that is, with minimal convexity (almost flat), is designed mostly for structures that are subject to dynamic loads. An example of such metal structures can be a bridge crossing or a staircase.
Concave seams are typical for those metal structures that are practically not exposed to external mechanical loads. A striking example of such structures are gates and fences. A concave seam allows you to reduce the consumption of expensive electrodes or wire.
These are the main types of welds that are actively used in industry today.
Seams of different types of joints
A classic butt joint seam includes the following parameters:
- Width
- Thickness
- Penetration depth
- Convex height
When joining workpieces of large thickness, from 30 (mm) and above , it is permissible to fill the bevels in layers. Each of the vertical layers can be filled with multiple horizontal passes.
For a corner joint weld, completely different characteristics are important:
- Horizontal leg
- Vertical leg
- Thickness
- Convex height
When angularly joining workpieces of the same thickness, it is recommended to hold the electrode at an angle of 45˚. This suture connection is called a "boat" . If a perpendicular of smaller thickness is welded to a horizontal workpiece, then the electrode should be held at an angle of 60˚. With this position of the electrode, the weld pool shifts towards a thicker surface , which protects the thin workpiece from through burning.
Knowing the main types of welding seams, you can easily select the most effective and efficient scheme for assembling metal structures.
Types of seams and technology
When the master has already mastered how to properly weld, you can proceed directly to the types and techniques of the seam. The key to a quality connection is the correct settings on the welding machine (transformer or inverter), in accordance with the characteristics of the metal and its melting point. Soft metals are cooked at low currents, dense metals at high currents. It is also necessary to take into account the type of weld, since each of them has its own technique. The most common types of seams:
1. In appearance – flat, reinforced and weakened.
2.According to the technique of execution - single-sided and double-sided (in which the master solders the workpieces on both sides).
3.By the number of layers - one-, two-, three-layer.
4. By length - point, double-sided chess, chain, point, continuous.
5.In the direction of force - transverse, longitudinal, oblique, combined.
6. According to spatial placement - horizontal, vertical, ceiling, bottom.
Let's now move on to the technology of making the seam. Let's consider the main stages of work:
1. Preparatory. This step requires some preparatory work to be done. First, prepare the workplace in accordance with safety rules. Secondly, stock up on overalls and a protective mask to prevent eye burns. Third, prepare the product for use. To do this, it must be cleaned of any remaining paint, varnish, oil, dust and other contaminants. To do this, use a metal brush or highly abrasive sandpaper. Then you need to set all the settings on the welding machine and you can start.
2.Creating an arc or igniting the torch (depending on the type of welding). Features of electric arc welding can be read here, and gas welding here.
3. At this stage, welding seams are created (consider electrode guiding techniques in more detail).
4.Final stage. When the track is ready, you must remember to knock off the slag from the roller (for arc welding). Connections created by gas and plasma welding do not slag, that is, there is no debris from them.
Facial layer
The front layer is cooked to a depth of 0.5-2 mm. It can be cooked in several passes or in one pass.
- Welding in 1 pass with a recess of 0.5-1 mm is welded using the “forward arc” method. The pitch must be selected depending on the roller.
- If the depression is 1 - 2 mm, you need to use the “ladder” method.
- If several passes are necessary, the near-edge side beads are welded in different ways: with a ladder, with an arc forward, with manipulation. The last roll in the center is cooked, connecting the 2 side ones.
How to weld a ceiling seam
Choosing a ceiling cornice
How to cut a ceiling plinth
How to hang curtains on a ceiling cornice
Ceiling welding is considered one of the most difficult connections. This can be explained by the fact that during operation it is turned upside down, as a result of which there is a huge probability of leakage of molten metal. How to weld a ceiling seam correctly? When connecting ceiling structures, it is necessary to especially observe the safety rules for performing welding work, since the possibility of hot metal getting on the welder’s hands and face cannot be ruled out.
Any welding professional must know and be able to correctly perform seam joints of this type. If in ordinary production such a technique is used quite rarely due to the ability to turn over the structure being welded, then in the shipbuilding industry during installation work, when connecting pipeline communications, this technology is often used.
Crescent
When using this technology, the electrode relative to the ceiling is held by the welder at an angle of more than 90 degrees, while the maximum angle should not exceed 130 degrees. In this case, professional welders perform zigzag movements with the electrode that resemble a crescent. Welding with an inverter using this technology involves performing work in several approaches, but it is considered quite simple. This technique can be used even by a young, inexperienced welder.
The main thing is that in order not to spoil the seam joint, it is necessary to constantly monitor the welding speed and not allow wide beads to boil out, so that there is no leakage of molten metal.
Reciprocating
This technique for welding seams on the ceiling also involves several passes with an electrode. The root weld is first made with an electrode, the cross-sectional diameter of which is 3 mm, and the current supply should not exceed the average value.
Ladder
The location of the electrode to the ceiling base is more than 90 degrees, with no more than 130 degrees. The main difference of the technology is the removal of the electrode to the side during welding in order to prevent the metal from spreading. After it cools down, the electrode is returned back to the seam and welding work is resumed. When using this technique, the suture joints are longer.
Electrode movements
An ideal welding seam, or rather an approach to it, is possible with a successful choice of the method of moving the electrode during welding. The most common movements are along the axis of the electrode and along the axis of the seam. But simply moving in a given direction will not bring the desired result. This will create a narrow thread-like seam. It can be used as the first seam in multi-pass welding.
To obtain the desired effect, movements must be oscillatory in nature. This will ensure that the seam is of the required width and ensures good heating of not only the root of the seam, but also its edges.
Trajectories along which oscillatory transverse movement occurs:
- zigzag;
- a loop;
- broken line;
- herringbone or triangles;
- crescent;
- sickle.
All movements are performed transverse to the direction of the weld.
A broken line is used when metal sheets are to be butt welded in the lower position. Crescent is chosen for butt and fillet welds. Before herringbone welding, it is necessary to first deposit a small surface on which it will be held. A simple technique for guiding the electrode in a herringbone pattern is to move it horizontally and then place it a little higher in the middle of the seam.
The crescent motion can be used in TIG welding. In this case, the width of the seam will be large, but it can be controlled during the welding process itself. Transverse movements with a crescent guarantee good welding of the edges of the parts.
The use of a loop provides beautiful connections when welding thin metals. The chain of loops must be continuous. The use of loop-like movements is justified when it is necessary to warm up the edges of the seam well
This is especially important when welding parts made of high-alloy steel. The amplitude of the reciprocating movements is selected depending on the required seam width
The choice of motion pattern to solve the problem of how to make a beautiful weld depends on its position in space. Seams can be horizontal or vertical. The horizontal seam located at the top is called the ceiling seam. It is the most difficult to perform, since the welder must remain in an uncomfortable position for a long time. A horizontal seam can be performed in two ways - with movements to the left or to the right.
When welding in the vertical direction, the direction of movement of the seam is from bottom to top. Creating a vertical seam is more difficult than a horizontal one, since the molten metal flows down intensively. If you move from top to bottom, then the drops of metal, when solidified, form a solid barrier for the continuation of the seam. Welding a vertical seam should be carried out with a short arc.
Layers and spatial arrangement
A metal seam can consist of a bead made in one pass. In this case it is called single-layer. If the parts being welded are thick, several passes are performed, as a result of which beads are sequentially formed one on top of the other. This welding joint is called multilayer.
Considering the variety of production situations in which welding occurs, it is clear that the seams are oriented differently in each specific case. There are lower, upper (ceiling) seams, vertical and horizontal.
Vertical seams are usually welded from bottom to top. The trajectory of moving the electrode along a crescent, herringbone or zigzag is used. It is more convenient for novice welders to move the crescent.
When welding horizontally, several passes are made from the lower edge of the parts being joined to the upper edge.
In the lower position, butt welding is carried out or by any angular method. A good result is obtained by welding at an angle of 45 °, “in a boat”, which can be symmetrical or asymmetrical. When welding in hard-to-reach places, it is better to use an asymmetrical “boat”.
The most difficult thing to do is weld in the ceiling position. This requires experience. The problem is that the melt tries to drain out of the work area. To prevent this from happening, welding is carried out with a short arc, the current strength is reduced by 15-20% compared to normal values.
If the thickness of the metal at the welding site exceeds 8 mm, then several passes must be performed. The diameter of the first pass should be 4 mm, subsequent ones - 5 mm.
Depending on the orientation of the seam, select the appropriate position of the electrode . To make horizontal, vertical, ceiling connections, and weld non-rotating pipe joints, the electrode is directed at an angle forward.
When welding corner and butt joints, the electrode is directed at an angle backwards. Hard-to-reach places are welded with an electrode at a right angle.
Cleaning welds
After welding, splashes of scale, drops of metal and slag remain on the metal surface. The seam itself is usually convex, protruding above the surface. All these shortcomings can be eliminated: cleaned up.
Cleaning the seams after welding is done in stages. At the first stage, using a chisel and a hammer, knock off scale and slag from the surface. On the second, if necessary, the seam is compared. Here you will need a tool: a grinder equipped with a metal grinding disc. Depending on how smooth the surface should be, different abrasive grain sizes are used.
Sometimes, when welding ductile metals, tinning is required - covering the weld with a thin layer of molten tin.
https://youtube.com/watch?v=n3DtsW-YPQg
Some tips for welding various joints
Is it possible for a beginner to learn how to apply high-quality sutures on his own? Yes, without a doubt. Some sources use the word “with ease.” It’s better not to promise ease, because welding has never been an easy or safe process. But it is quite possible to determine consistent and feasible steps on your own. The principle is from simple to complex. Of course, all the main types of welding joints have their own secrets and subtleties that need to be mastered.
For beginners, electric arc welding is best suited. The best option is to start studying under the supervision of an experienced mentor. But if this is not possible, there are a huge number of videos on the Internet showing all the actions and detailed explanations for them.
Single-pass and multi-pass seams.
The main initial stage is the competent preparation of the necessary equipment.
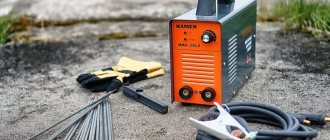
Here's what you need to prepare for electric arc welding:
- Welding equipment (various types);
- Electrodes with the correct diameter (extremely important!)
- Hammer for cleaning the cooled seam;
- Metal brush for the same cleaning of the welded area
- Mask, special light filter.
The requirements for clothing are simple: it must be thick, with long sleeves and gloves. A rectifier with a transformer will come in handy (especially if the equipment is old).
https://www.youtube.com/watch?v=AoRkP_DqEKs
Pipeline welding
Using electric arc welding, you can make a horizontal seam that runs around the circumference of the pipe and a vertical seam that runs from the side, as well as top and bottom seams. The most convenient option is the bottom seam.
Steel pipes must be butt welded, welding all the edges along the height of the walls. During operation, the electrode must be installed at an angle of 45 degrees - this is done in order to reduce sagging inside the products. The seam width should be 2-3 mm, height - 6-8 mm. If welding is overlapped, then the required width is 6-8 mm, and the height is 3 mm.
Immediately before starting work, you need to carry out preparatory procedures:
- The part needs to be cleaned.
- If the edges of the pipe are deformed, then straighten them or cut them off with an angle grinder, or simply with a grinder.
- The edges where the seam will go must be cleaned to a shine.
After preparation, you can start working. It is necessary to weld all joints continuously, completely welding. Pipe joints with a width of up to 6 mm are welded in 2 layers, with a width of 6-12 mm in 3 layers and with a wall width of more than 19 mm in 4 layers. The main feature is the constant cleaning of pipes from slag, i.e. after each completed layer it is necessary to clean it of slag and only then weld a new one. Particular care must be taken when working on the first seam, it is necessary to fuse all blunts and edges. The first layer is carefully checked for the presence of cracks; if they are present, then they must be melted or cut out and welded again.
All subsequent layers are welded while slowly turning the pipe. The last layer is welded with an even transition to the base metal.
Mistakes of novice welders
To learn how to cook with electric welding correctly, you need to consider the main mistakes that beginners make:
- Moving the electrode too quickly, resulting in an uneven seam.
- The seam moves too slowly, resulting in holes and burns in the metal.
- The seam is too uneven and flat. The main mistake here is the angle of the electrode.
- Lack of welding of metal. This happens because the 5 mm gap between the metal and the electrode was not maintained, i.e. the gap was too small.
- Otherwise, when the gap is too large, the metal is not welded.
All of the above mistakes are just the most serious ones. There are many more nuances that can only be understood with experience.
When welding thin-walled metal or profiles, a careful approach to work is required. Thin parts can be welded by applying a cleaned electrode and welding directly on top of it.
Welding on non-ferrous metals is strikingly different, as it requires different electrodes. A special protective environment is also required. Now you can buy universal machines that cook almost any metal.
There are also semi-automatic devices for working with thin-walled metals. Its essence lies in fusing a special wire.
Today, in the age of innovative technologies, a beautiful electrode welding seam remains a popular method for joining metal structures of various parts. But in order to know and be able to perform high-quality welding, you will need to study the question of how to make a beautiful welding seam using electric welding. On the Internet, as well as in scientific and technical literature, there is a sufficient amount of information that can help create a beautiful and durable seam for any surface of the product.
Read also: Features of semi-automatic aluminum welding
Vertical welding using an inverter
After analyzing how to properly weld a vertical seam using electric welding, you can learn how to weld a vertical seam using an inverter. The second method is manual, but it works on a slightly different principle, using a welding wire electrode (consumable). With this method of work, you should carefully monitor how the end of the device is guided. If you choose the wrong position of the holders or the angle of inclination, you will end up with a defect.
The parts should be connected in separate sections (points), constantly removing the electrode and putting it back so that the material splashes over the surface. This way the seam comes out better than with a conventional machine, since the arc will be in continuous contact with the surface while the point is being formed.
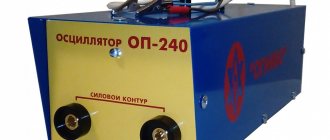
Inverter Source i1.rozetka.ua
Types of seams and joints
All welding joints are interesting and original in their own way. But the main thing is that they are of high quality and durable. There are several types of such seams:
- Butt. The most common connection for different methods. Advantages: high welding productivity, low material consumption, high strength, no structural stresses. But for this seam it is necessary to carefully prepare the edge, and also position the parts so that there are no errors. Used for welding sheets, pipes and rolled metal products.
- Angular. They can be single-sided or double-sided (thus increasing strength). By pre-preparing the edges, you can make any angle of inclination. Used for joining sheet, pipe and shaped blanks.
- Tavrovy. On the element that is welded on top, perpendicular to the bottom, it is necessary to make a trim edge. It is advisable to do this action on both sides so that after welding all parts are held tighter. Used for joining sheet blanks.
T-seamSource mash-xxl.info
- Lapped. For such a seam, you do not need to cut the edges, but it is recommended to use them trimmed. To prevent corrosion between the sheets in the future, it is necessary to weld the connection on both sides. Used for spot and resistance welding.
- Slotted. It comes in closed or open version. Used when it is necessary to strengthen the lap joint.
- With overlays. Also used to reinforce butt or lap joints.
- Tortsovy. The sheets must be placed on top of each other and welded at common ends.
- With electric rivets. The top sheet must be drilled before use, then welded while gripping the bottom part. The connection is considered strong.
Also, the connection can be made in various ways depending on the position of the part:
- horizontal;
- vertical;
- ceiling seam;
- bottom seam (the most convenient, as it is easily controlled, unlike the others).
The first 3 options are complex and require experience in this type of work to complete them.
Bottom connectionSource svarkka.ru
Types of welding
Different types of welding differ from each other in the way they influence the materials being joined.
- Dugovaya. The most commonly used method due to its simplicity. In arc welding, an electrode is used as a melting tool. With its help, the arc is excited and maintained throughout the welding process. The electrode is selected depending on the grade of metal, and its diameter - on the width of the weld.
- Gas. The heat source in gas welding is the torch. From it, under the influence of strong pressure, a flame emerges, which was formed during the combustion of a mixture consisting of a flammable gas such as acetylene and oxygen.
- Semi-automatic. A mechanical device is used - semi-automatic. The role of the electrode is performed by the wire during its automated feeding. Gas also enters there, the task of which is to protect the molten metal from the aggressive influence of the environment. It is possible to set various modes, which makes it possible to weld multi-pass seams with a semi-automatic machine.
- Automatic. Unlike semi-automation, the entire process is carried out using a welding machine. All you need to do is configure the machine for a specific operation.
- TIG welding. Popular with professionals. I am attracted by its versatility and the ability to weld metal of different thicknesses.
Regardless of what type of welding is used, the correct welding seam will be obtained as a result of compliance with the requirements of the technological process, carrying out preparatory work, and following recommendations.
Standards and the concept of leg
The weld begins to form in the working area when the metals are molten, and is finally formed after solidification.
The existing classification groups seams according to various criteria: the type of connection of parts, the resulting shape of the seam, its length, the number of layers, orientation in space.
The types of possible welded joints are shown in the standard for manual and arc welding GOST 5264. Connections made by arc welding in a shielding gas atmosphere are standardized by the GOST 14771 document.
GOSTs have a designation for each welded joint, as well as a table containing the main characteristics, in particular the values of the leg of the weld.
It’s quite easy to understand what a leg is by looking at the drawing of the parts being connected. This is the side of a speculative isosceles triangle of maximum dimensions that will fit in the cross section of the seam. A correctly calculated leg value guarantees the strength of the connection.
For parts of uneven thickness, the cross-sectional area of the part in its thinnest part is taken as a basis. You should not try to unduly increase the leg. This can lead to deformation of the welded structure. In addition, the consumption of materials will increase.
Checking leg dimensions is carried out using universal reference templates presented in specialized literature.
Conditions for a high-quality vertical seam
Almost all novice specialists are not familiar with the basic conditions for obtaining a high-quality vertical seam. In addition, it must be characterized by high strength, be made with high quality and have an aesthetic appearance.
There are several main mistakes that are made when carrying out such work:
- At the time of arson, the rod must be in a perpendicular state. If there is an angle, the arc may be unstable.
- The shorter the arc length, the faster the material crystallizes. This reduces the risk of leaks. However, many do not follow this recommendation, since a small arc reduces the performance indicator.
- The rod is tilted to reduce the likelihood of smudges, but maintaining an acute angle is quite difficult.
- If a leak appears, it is recommended to increase the current and the width of the seam. Due to this, the process of crystallization of the substance can be significantly accelerated.
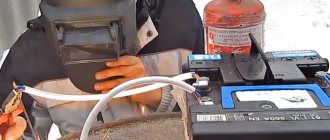
To obtain a compound with a high quality index, you need to pay attention to the preparatory stage. An example is the removal of dust and dirt, paint and oil residues, rust
In some cases, spot welding is carried out, due to which the risk of drips is reduced several times.
High-quality vertical seam
In conclusion, we note that the quality of the weld depends on a fairly large number of parameters. An example is the skill of the welder or the characteristics of the materials being joined. Depending on some of the above parameters, the most suitable technology is selected.
If you find an error, please select a piece of text and press Ctrl+Enter.
Almost every person has encountered a situation where it was necessary to weld some metal part. Most often this happens during construction work. It’s great if a man knows this process, but sometimes you have to turn to professionals in your field. But you can learn welding on your own. Beginners usually start by learning seams. Complex work should begin only when the home craftsman learns how to weld using electrodes correctly.