Laser cutting is the most advanced, but also expensive technology. But with its help you can achieve results that are beyond the power of other metal processing methods. The ability of laser beams to give any material the desired shape is truly limitless.
The unique capabilities of the laser are based on the following characteristics:
- Clear directionality - due to the ideal directionality of the laser beam, the energy is focused at the point of impact with a minimum of losses,
- Monochromaticity - the laser beam has a fixed wavelength and a constant frequency. This allows it to be focused with ordinary lenses,
- Coherence – laser beams have a high level of coherence, so their resonant vibrations increase the energy by several orders of magnitude,
- Power - the above properties of laser beams ensure that the energy of the highest density is focused on a minimal area of material. This allows you to destroy or burn through any material in a microscopically small area.
Design and principles of operation
Any laser device consists of the following components:
- energy source;
- working body that produces energy;
- an optical amplifier, a fiber-optic laser, a system of mirrors that amplify the radiation of the working element.
The laser beam produces precise heating and melting of the material, and after prolonged exposure, it evaporates. As a result, the seam comes out with an uneven edge, evaporating material is deposited on the optics, which reduces its service life.
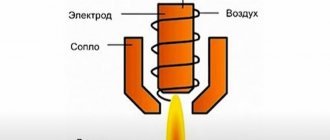
To obtain smooth thin seams and remove vapors, the technique of blowing melt products from the laser impact zone with inert gases or compressed air is used.
Factory laser models equipped with high-grade materials can provide good indentation rates. But for household use they are too expensive.
Models made at home are capable of cutting into metal to a depth of 1-3 cm. This is enough to make, for example, parts for decorating gates or fences.
Laser cutting of metal
Depending on the technology used, there are 3 types of cutters:
- Solid state. Compact and easy to use. The active element is a semiconductor crystal. Low-power models have quite affordable prices.
- Fiber. Glass fiber is used as the radiation and pumping element. The advantages of fiber laser cutters are high efficiency (up to 40%), long service life and compactness. Since little heat is generated during operation, there is no need to install a cooling system. It is possible to produce modular designs that allow you to combine the power of several heads. The radiation is transmitted via flexible optical fiber. The performance of such models is higher than solid-state ones, but their cost is higher.
- Gas. These are inexpensive but powerful emitters based on the use of the chemical properties of gas (nitrogen, carbon dioxide, helium). With their help you can weld and cut glass, rubber, polymers and metals with a very high level of thermal conductivity.
Useful tips
When equipping your home workshop with a plywood laser cutting machine, provide a good compressor for stable airflow (at least 1.5-2 atmospheres). The presence of a powerful compressor allows you to get a cleaner end when cutting. But for engraving work, on the contrary, a lower level of air pressure is required.
Expert opinion
Torsunov Pavel Maksimovich
A compressor is especially necessary when working with material with a layer thickness of 3-4 mm.
Consider the power of the laser tube. The higher these indicators, the thicker the sheets can be cut. On average, for every 10 kW of declared laser power, 1 mm of plywood sheet is cut. For example, with a tube power of 50 W, you can cut sheets 5 mm thick. But keep in mind that for a longer tube life, it is recommended to use no more than 80% of the power. Which means that when the machine operates with a laser power of 50 kW, it is possible to cut through up to 4 mm of material thickness.
To avoid charred edges, keep the power to speed ratio at an optimal level.
Keep in mind that there are knots on the plywood layer and these areas will not be able to be cut through completely with the standard parameters set.
Much attention is paid to the quality of the processed material itself:
- the higher the quality of the plywood sheets, the cleaner the final work will be, and the cutting process will be easier and more comfortable;
- when carrying out engraving work, additionally press the sheets with magnets (for these purposes it is better to use a metal table);
- To reduce the load on the device, if this is permissible, then it is better to cut large sheets into smaller pieces in advance.
Modern plywood laser cutting machines are simple and easy to use. They provide precise and efficient work with minimal waste and pay for themselves quickly. All models have instructions that are easy to study and understand. And knowing the basic nuances of choosing a device will allow you to do this without error.
Homemade household laser
To carry out repair work and manufacture metal products at home, do-it-yourself laser cutting of metal is often required. Therefore, home craftsmen have mastered manufacturing and successfully use hand-held laser devices.
In terms of manufacturing cost, a solid-state laser is more suitable for household needs.
The power of a homemade device, of course, cannot even be compared with production devices, but it is quite suitable for use for domestic purposes.
How to assemble a laser using inexpensive parts and unnecessary items.
To make a simple device you will need:
- laser pointer;
- battery-powered flashlight;
- CD/DVD-RW writer (an old and faulty one will do);
- soldering iron, screwdrivers.
How to make a handheld laser engraver
What is the difference between ready-made models
Cost is the main reason why many craftsmen resort to making a laser cutter with their own hands. And the principle of operation is as follows:
- Thanks to the creation of a directed laser beam, the metal is exposed
- The powerful radiation causes the material to evaporate and escape under the force of the flow.
- As a result, thanks to the small diameter of the laser beam, a high-quality cut of the workpiece is obtained.
The cutting depth will depend on the power of the components. If factory models are equipped with high-quality materials that provide sufficient depth. Then homemade models can handle cutting 1-3 cm.
Thanks to such laser systems, you can make unique patterns in the fence of a private house, components for decorating gates or fences. There are only 3 types of cutters:
- Solid state. The operating principle is based on the use of special types of glass or crystals of LED equipment. These are low-cost production plants that are used in production.
- Fiber. Thanks to the use of optical fiber, it is possible to obtain a powerful flow and sufficient cutting depth. They are analogues of solid-state models, but due to their capabilities and performance characteristics they are better than them. But also more expensive.
- Gas. From the name it is clear that gas is used for operation. It can be nitrogen, helium, carbon dioxide. The efficiency of such devices is 20% higher than all previous ones. They are used for cutting and welding polymers, rubber, glass and even metal with a very high level of thermal conductivity.
In everyday life, without special expenses, you can only get a solid-state laser cutter, but its power, with proper amplification, which was discussed above, is enough to perform household work. Now you have knowledge about making such a device, and then just act and try.
Do you have experience in developing a DIY metal laser cutter? Share with readers by leaving a comment under this article!
Laser cutter manufacturing process
- You need to remove the red diode from the computer disk drive, which burns the disk when recording. Please note that the drive must be a write drive.
After dismantling the upper fasteners, remove the carriage with the laser. To do this, carefully remove the connectors and screws.
To remove the diode, you need to unsolder the diode mountings and remove it. This must be done extremely carefully. The diode is very sensitive and can be easily damaged by dropping it or shaking it sharply.
- The diode contained in it is removed from the laser pointer, and the red diode from the disk drive is inserted in its place. The pointer body is disassembled into two halves. The old diode is shaken out by picking it up with the tip of a knife. Instead, a red diode is placed and secured with glue.
- It is easier and more convenient to use a flashlight as a body for a laser cutter. The upper fragment of the pointer with a new diode is inserted into it. The glass of the flashlight, which is an obstacle to the directed laser beam, and parts of the pointer must be removed.
Laser pointer
When connecting the diode to battery power, it is important to strictly observe the polarity.
- At the last stage, they check how securely all the laser elements are fixed, the wires are connected correctly, the polarity is observed and the laser is level.
The laser cutter is ready. Due to its low power, it cannot be used when working with metal. But if you need a device that cuts paper, plastic, polyethylene and other similar materials, then this cutter is quite suitable.
Strengthening a homemade installation
To enhance the power and density of the beam, which is the main cutting element, you should prepare:
- 2 “conders” for 100 pF and mF;
- Resistance 2-5 ohms;
- 3 rechargeable batteries;
- Collimator.
The installation that you have already assembled can be strengthened to get enough power at home for any work with metal. When working on gain, remember that plugging your cutter directly into an outlet will be suicide for it, so you should make sure that the current first gets to the capacitors, and then goes to the batteries.
By adding resistors you can increase the power of your installation. To further increase the efficiency of your device, use a collimator that is mounted to focus the beam. This model is sold in any electrician store, and the cost ranges from 200 to 600 rubles, so it’s not difficult to buy it.
Then the assembly circuit is carried out in the same way as discussed above, only you need to wind an aluminum wire around the diode to remove static. After this, you have to measure the current strength, for which you take a multimeter. Both ends of the device are connected to the remaining diode and measured. Depending on your needs, you can adjust the readings from 300 mA to 500 mA.
Once the current calibration is completed, you can move on to aesthetically decorating your cutter. An old steel LED flashlight will do just fine for the case. It is compact and fits in your pocket. To prevent the lens from getting dirty, be sure to get a cover.
The finished cutter should be stored in a box or case. Dust or moisture should not get there, otherwise the device will be damaged.
How to increase laser power for metal cutting
You can make a more powerful laser for cutting metal with your own hands by equipping it with a driver assembled from several parts. The board provides the cutter with the required power.
The following parts and devices will be needed:
- CD/DVD-RW writer (an old or faulty one will do), with a writing speed of more than 16x;
- 3.6 volt batteries – 3 pcs.;
- 100 pF and 100 mF capacitors;
- resistance 2-5 Ohm;
- collimator (instead of a laser pointer);
- steel LED lamp;
- soldering iron and wires.
You cannot connect a current source to the diode directly, otherwise it will burn out. The diode draws power from current, not voltage.
Laser collimator
The beams are focused into a thin beam using a collimator. It is used instead of a laser pointer.
Sold at an electrical goods store. This part has a socket where the laser diode is mounted.
Description of laser for cutting plywood
Source: all3dp.com
The operating principle of a laser plywood cutting machine is easy to understand: a laser emitter creates a beam of light of a given wavelength, and the beam power is sufficient to burn through the fibers of a wood board. The higher the power, the deeper the beam penetrates into the plywood, and the thicker the sheet that can be cut in one pass. The power range varies, starting from several watts.
Assembly Tips
To check the operation of the driver, use a multimeter to measure the current supplied to the diode. To do this, connect a non-working (or second) diode to the device. For most homemade devices, a current of 300-350 mA is sufficient.
If you need a more powerful laser, the indicator can be increased, but not more than 500 mA.
It is better to use an LED flashlight as a homemade housing. It is compact and convenient to use. To prevent the lenses from getting dirty, the device is stored in a special case.
Important! A laser cutter is a kind of weapon, so it should not be pointed at people, animals, or given to children. Carrying it in your pocket is not recommended.
It should be noted that do-it-yourself laser cutting of thick workpieces is impossible, but it can cope with everyday tasks.
What is a laser head for cutting plywood
Source: all3dp.com
A laser head for cutting plywood is an optical element of the machine, consisting of a radiation source (laser) and a focusing lens that directs the beam onto the surface being processed.
There are mainly two types of lasers used in plywood cutting machines:
- CO2 (carbon dioxide) - the source of radiation is a tube filled with gas. Such installations can have great power, but they have relatively large dimensions.
- Diodes - with a semiconductor laser - usually (but not always) have lower power, but very compact dimensions. Due to their compactness and ease of use, they are often used on small machines.
