Very easy to make, homemade scoops from empty drink containers that can be used for various household needs.
Greetings to all DIYers!
Today I want to touch on the topic of making homemade scoops from scrap materials (plastic and cardboard drink containers), which can be used for various household needs. Moreover, I will show three of these scoops, very easy to make.
In general, I must say that initially I made all these scoops to sweep away shavings from the work table, which I use at home for minor repairs or making homemade items.
So, in the warm season, I do all my homemade products in my workshop in the barn, where I use this very convenient, large homemade scoop to sweep away shavings (mostly wood).
However, in the cold and frosty winter, I have to go home, where I work at a small folding table. Of course, full-fledged woodworking cannot be carried out on it, but, nevertheless, small operations, for example, drilling holes, sawing small workpieces, etc., are quite possible.
And here, naturally, the problem of chip removal arises. In such conditions, it is best to remove shavings using a small dustpan and a brush, or a wide brush. So a few years ago, I started making small homemade scoops.
To make them, I used approximately the following accessories:
How to make a scoop with your own hands?
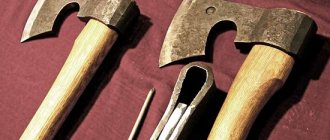
| This refers to a scoop for removing ash. Anatmar [41.6K] 3 years ago I can offer step-by-step instructions on how to make a metal scoop with a wooden handle with your own hands. Here is a detailed drawing of a galvanized steel bucket indicating the locations and directions of bends, their radii, hole diameters, and angles. So, the sequence of work:
If the farm does not have a hexagonal wooden block or there is no way to make one, you can use a square block, but then you will have to make your own markings for fastening.
We select the length of the handle at our discretion, but it should not be less than 20cm.
the author of the question chose this answer as the best favorite link thank Figaro [13.9K] 4 years ago Eh... How many of them my father remade in his time! For every taste and for any purpose. Both for raking out ash and for grain and flour. I remember he did it without welding and without a drill and without bolts. Hands grew from that place... I would like to offer several of the most popular options. Option for a scoop for removing ash. Any metal with a thickness of about 2 mm is taken as the starting material. It can be galvanized or simple wire rod and aluminum. What is at hand in one word. The picture shows approximate calculations. Typically the size of the scoop should fit in the furnace vent. We cut the metal according to the template, bend it and secure it with rivets. The handle is made from the same material. We bend it for greater stability, as shown in the figure, and at the place of attachment to the scoop, we rivet it a little - to capture most of the scoop. We attach either with rivets or bolts. Option two is a grain scoop. Typically, scoops for grain, flour and other bulk products are made in this form. That is, rounded. It's easier to make them. But again, metal is needed. Although nowadays it can be replaced with plastic, in those days it was not. So, use a jigsaw to cut out a semicircle from the board. As a handle, you can choose either wood or any other material, such as a PVC pipe of a suitable size. We attach the handle to the base, and cut out the scoop itself from metal, which we nail or take with screws to a semicircle from the board. That's it - the scoop is ready. Well, another option is modern. It can be used everywhere, except at elevated temperatures and various chemicals. And you can make it from plastic canisters with a similar configuration. favorite link thank stalonevich [3.3K] over a year ago An ash scoop is best made of metal. It is necessary to find a piece of tin on the farm or buy it on the market. For the drawing I proposed, a piece of 22x20 cm will be enough. Thickness 0.5-2 mm. I took a thicker one - 2 mm, so that it would probably last a long time. Draw the following diagram on a sheet of metal (you can use a marker or just a nail for marking): After applying the markings, it is necessary to cut out the shape of the base of our scoop. You can use metal scissors, but I cut it with a grinder, since I took a thick sheet. To make it easier to bend the metal, I walked a little with a grinder along the bend lines. At the next stage of work, you need to bend our scoop along the fold lines. You should start with the sides (1), then the top (2): As a result, the upper part of the sheet should “encircle” the wings (those 45x30 mm each). Next, in the places where the yellow dots are placed on the diagram, we drill holes and fasten the structure with rivets or bolts. Then you need to make a handle. I took 1 m of aluminum pipe with a diameter of 20 mm. One end of it needs to be made flat by 2.5 centimeters using a hammer, and then bend the pipe at the base of the plane to get an angle of approximately 100 degrees. Next, we drill 2 holes with a distance of 1-1.5 cm from each other on the scoop (where the blue dot is), the same ones on the flat end of the pipe. We fasten the handle and the scoop itself with bolts. The scoop can then be painted any color. You can also pick up a handle like this for the pipe:
There is this simple version of a scoop, in which the handle is made of the same material as the scoop itself. We take tin, preferably up to a millimeter thick, so that it can be cut with metal scissors, and no thinner than half a millimeter, so that the entire structure has the necessary rigidity. First, we cut out a rectangle from tin with sides 210 by 260 millimeters. Next, you will need to draw (with a line, a nail or a pencil) the cutting lines for the corners and the bend lines for the base of the scoop. First, we bend the shoulders of the longitudinal edges of the scoop 1 centimeter wide. After this, line by line, we “align” the gussets of the corners so that they wrap behind the back wall of the scoop. We drill two holes in the middle of the back wall at a distance of approximately 15 mm. from each other, with a diameter of 4-6 mm. We cut out the handle of the scoop from the same steel and rivet it to the base using aluminum rivets. add to favorites link thank Vladlen [25.1K] more than a year ago The fact is that scoops are different. And they are used for different needs. But in this answer I will present real scoops that I had to make myself. And first of all, I'll start with the stove scoop. It is clear that this scoop must be metal. So to make such a scoop you will need.
First of all, we draw a sheet of iron, as shown in the figure. And after assembling the bucket, we weld or rivet the handle. So in the end you should end up with a scoop like this. And for other needs, you can make a scoop from what is available. This could be a plastic bottle or plastic container. The main thing is to choose a shape and cut out the shape that you like. Here's an example like this.
more than a year ago In my time, making a scoop was included in the school curriculum for labor; in fact, it is so easy to do that even a schoolboy can do it. You just need to make the right template. So what do you need:
And now the algorithm for making a scoop: 1) You need to draw a template on a sheet of paper or directly on a sheet of metal, set the dimensions of the scoop yourself, based on the size of the stove firebox door, the most convenient option is 70-75% of the door width. Here is a typical version of the scoop diagram: 2) We cut along solid lines and bend in one direction along the dotted lines. 3) On the resulting bends, drill holes in the corners and tighten the metal with bolts. 4) we make a handle, for this we bend the sides of the rectangle towards each other, and then we bend everything in half, spreading the ends apart (solid line - cut, dotted line - bend). We drill holes on the separated parts. 5) all that remains is to attach a scoop to the handle and drill holes there, secure with bolts.
2 years ago Scoops are used not only for collecting garbage, but also, for example, for pouring certain bulk materials (sugar, cereals, and so on). That is, at the beginning we determine what the scoop is needed for. A scoop can be made from tin (the most labor-intensive option), or from a plastic bottle, but you need one with a handle, here you can use either a plastic oil canister or a milk bottle. They even make scoops from thick paper. The most convenient, fastest and inexpensive option is a plastic scoop. Here's a photo
After marking, we cut out the scoop, you can use a knife, but in my opinion scissors are convenient (although we take into account the material, if the plastic is very dense with thick walls, then only a knife is needed). The edges after the cut can be sanded. If you leave the neck, then screw the plug into place,
2 years ago The simplest option for making a scoop with your own hands is a scoop made from a canister. We find a canister, it is important that it has a flat side. We will cut it using a knife. First, using a marker, draw lines along which we will cut the canister. All that remains is to cut it off and throw in the excess part of the canister. Anyone can make such a scoop. add to favorites link thank Do you know the answer? | See also: |
www.remotvet.ru
Manufacturing technology for forged devices
(Blacksmith tools)
Everyone knows how necessary fireplace and stove appliances are in the everyday life of rural residents and summer residents. Before we get acquainted with the technology of their manufacture, let's look at modern designs of forges, using which you can count on success in your undertaking.
Rice. 1. Blacksmith’s forge with “two fires” with a fan: 1 - umbrella; 2 — furnace nest (hearth); 3 - stand; 4 - fan; 5 - air duct; 6 - air damper; 7 — water tanks; 8 - partition.
Rice. 2. Cast tuyere (a) with replaceable grates (b): 1 - tuyere body; 2 - air damper; 3 - pipe; 4 - bottom cover; 5 - load.
In Fig. 1 shows a “two-fire” forge. Two blacksmiths can work with such a forge. The air supply to its centers is carried out by a fan with a 0.5 kW motor, and this supply is regulated by a special damper. Its design is shown in Fig. 2.
A modern lance is made of cast steel and has replaceable grates with different blowing holes. Holes located in a circle produce a wide torch flame, slotted holes produce a narrow, oblong flame. To heat small massive workpieces, a torch flame is required, and for local heating of a long workpiece, a narrow flame is required.
We can offer two designs of forges (Fig. 3) with hand and foot drives for air supply. If you can’t find a suitable fan, then “wind blower” 4 can be made from plywood the way it was made in the old days.
Rice. 3. Ancient forges: a - with a “wind blower” and manual drive; b - with foot drive, 1 - box with sand and burnt earth; 2 - hearth; 3 - brick screen; 4 - “wind blower”; 5 - manual drive.
Rice. 4. Forging pliers: a - for round and square workpieces; b - for flat workpieces.
Rice. 5. Backing blacksmith tool: a - chisel; b - ironing board; c - acceleration; g - punch; d - cutting; e - cone; g - fork; z - slope.
Rice. 6. Poker (a) and its manufacturing technology (b - h).
Rice. 7. Grip (a) and forging sequence (b-d).
Rice. 8. Chapelnik (a) and forging operations (b - d).
To manufacture complex blacksmith products, you need to purchase: two types of pliers (Fig. 4); backing tool: chisel, smoother, straightener and punch (Fig. 5, a-d); as well as undercut, cone, fork and slope (Fig. 5, e-h).
Let's consider the backing tool of the first group. Work with it is carried out in a pair of “blacksmith - hammer hammer”.
Chisel
in our case it is intended to cut metal. Depending on what material needs to be cut (cold or hot), the sharpening angle a is selected. For cutting hot metal, a is taken to be 15-30°, and for cold metal - 60-90°.
ironer
used to level the forged surface of a product in a heated state.
Overclocking
used where it is necessary to “disperse” - expand a part of the workpiece in a certain place.
Punchers
, as the name suggests, punch holes. Each hole profile requires its own punch with a given bit cross-section.
The blacksmith holds a backing tool (chisel, smoother, sharpener or punch) and gives commands to the hammer: “hit”, “harder”, “quieter”.
The backing tool of the second group is installed with a shank into the square hole of the anvil and is designed to perform various forging operations. The undercut allows you to cut workpieces by placing them on the undercut blade and hitting them from above with a hammer. The cone helps to straighten and make ring elements. The fork is widely used in all kinds of bending operations. The slope makes it easier to forge conical elements of products.
Let us now consider the technological methods of forging devices for the Russian stove.
The poker (Fig. 6) consists of two elements: a forged hook and a wooden handle (handle).
We forge the hook from a round piece, dia. 20-25 mm. To keep it heated, we use special pliers. The first heating is to heat the central part of the workpiece and “pull out” the neck (Fig. 6, b) on the anvil. Then we heat the front part of the workpiece, stretch it onto a “rectangle” (Fig. 6, c) and, using a backing tool (straightening), we begin to forge the metal into a “wide wedge”. In this case, first we set the alignment in the center of the workpiece and make the first “punching”, then the second and third (Fig. 6, d). After the next heating, we make two more punches - the fourth and fifth. The surface took the shape of a wide wedge - a fan. Now it needs to be well leveled (Fig. 6, d) and pulled with a hammer to a thickness of 0.5-1 mm.
Then we proceed to molding the sleeve. Using the undercut and the back of the hammer (Fig. 6, e), we bend the sleeve.
Gradually tapping the bushing (Fig. 6, g), we obtain a conical surface.
Making the working part of the hook is much simpler: we pull the round part of the workpiece to a rectangular shape and bend the hook (Fig. 6, h). Now let's mechanically process the hook, drill a hole in the sleeve for the screw, drive in the handle - the poker is ready.
Grip
(Fig. 7) has its own characteristics. Let us determine for which cast iron (by size) a grip is needed and set two sizes: the clearance between the horns Q (Fig. 7, a) and the diameter of the inner circle 0. The clearance between the horns should be slightly larger than the diameter of the bottom of the cast iron, and the internal diameter of the grip 0 - slightly less than the maximum diameter of the cast iron shoulders. Thus, the housewife should have as many grips as there are cast iron pots of different sizes.
Now let's move on to making the grip itself. We make the sleeve in the same way as for the poker. After forging the other end into a rectangle, we cut it lengthwise using a chisel (Fig. 7, b) and bend it 90 degrees. one branch. After this, we extend the second branch onto the pyramid, make a small curl at the end (Fig. 7, c) and bend it 90 degrees. We heat the first branch, straighten it, pull it onto the pyramid and make a small curl at the end (Fig. 7, d). Then, after the next heating, using a fork, we successively form the grip horns (Fig. 7, e).
We process the grip with a file and insert the handle into the sleeve. Ready.
Frying pan
or
chapelnik
(Fig. 8), as it was called in the old days, is also included in the set of accessories for the Russian stove.
The technology for making a chapel is initially exactly the same as for a grip. After the sleeve is made and the second end of the workpiece is pulled onto the rectangle, we begin to forge the hook.
First, bend it 90 degrees at the edge of the anvil. part of the workpiece and forge the edge of the fold, forming a spatula (Fig. 8, b). Then we form the hook itself, gradually bending it at the edge of the anvil (Fig. 8, c). The final bending of the hook must be carried out taking into account the shape of the edge of the frying pan (Fig. 8, d).
Fireplace appliances differ from stove appliances in their lightness, elegance and beauty. They perform not only their direct functions, but also serve as decoration for the fireplace room.
Poker
(Fig. 9, a) can be made from rods of both round (dia. 12-14 mm) and square (10-12 mm) sections.
Let's consider the technology of making a poker from a rod of dia. 12 mm.
We stretch one end of the round piece onto the rectangle and make a small curl at its end. After that, use a fork to bend and form a handle. Similar operations are necessary to form a hook: drawing into a rectangle, forming at the end of a curl, and bending “on a fork.” To make the poker more elegant, we will make a twist in the middle of the rod. First, we stretch the central part onto the rectangle, and then, using a blacksmith’s (or metalworker’s) vice and a poker hook as a lever, we twist it (Fig. 9, b).
Rice. 9. Fireplace poker (a) and twisting operation (b).
Rice. 10. Scoop (a) and its forging (b-d).
How to make a scoop with your own hands from tin or metal
An indispensable attribute for home use, in everyday life, even in the workplace is a scoop. The necessary item, a scoop, helps you get rid of trash in your home, work, streets, and just everywhere.
In past times, when heating with coal, removing and cleaning the stove from ash, a slotted spoon was used, in translation - a scoop. When heating a bathhouse, a house, a farmstead, or any room with birch firewood, ash accumulates. You need to remove it with an iron scoop.
In stores, of course, they sell plastic scoops, beautiful, aesthetic scoops, for other uses. There are even iron ones of the same type, often not suitable for your size. After all, you need a dustpan not only to clean the stove. It happens that in a hard-to-reach place, you need exactly the item to clean up dirt, remove various liquids, bulk materials, a small set of items, etc.
Do it yourself
In this article we will look at how to make a scoop from tin or metal with your own hands to suit your dimensions. The dimensions in the drawing are arbitrary , you must have your own.
In the drawing, the blue color indicates a flange for additional metal rigidity and protection of hands from injury. That is, if the scoop is made of tin metal with a diameter of 0.5 - 1.5 mm. Above 1.5 mm, bending metal without a special clamp (bend) will be more difficult. Thick metal has the property of rigidity..
Carefully cut out the outlined and marked part using metal scissors. Fold it inward along the lines around the square to create an envelope. Look at the picture to see how it’s done, I’ll show you an example on paper .
Regarding the flanging which I wrote about above in the text. It is needed to make a scoop made of thin tin or metal rigid. You can bend it inside or leave it outside, at your discretion, your convenience in using this part of the scoop.
The scoop, made in the form of an envelope, is convenient to use where water or other liquid is present.
Make the handle as you wish. It can be made of metal, in the form of a bracket. so that it doesn’t cut your hands and is tough.
Before making a product according to a template. Practice on paper.
xn—–dlckc9bidcgrpu.xn—p1ai
Materials
To make a snow shovel, you will have to acquire high-quality materials so that the structure does not collapse after several days of use. It is best to purchase everything you need at a construction base, since the prices for products there are much lower than in stores or on the market. For a shovel you will need the following material:
- Strong plastic (you can use an old barrel or canister).
- Galvanized sheet or aluminum.
- Sheet of plywood.
It is easy to guess that the most short-lived material is the last one on the list, but today it is also the cheapest. In addition to all of the above, you will also need material for making the handle and frame of the shovel:
- A wooden beam with a cross-section of 4 by 4 centimeters and a length of about 2 meters (other sizes are also suitable, but this one is the most optimal).
- The board is 7 centimeters wide and 50 centimeters long.
- Three strips of any flexible metal.
An alternative to all of the above can be a ready-made cutting, which can be purchased at any hardware store. This thing is relatively inexpensive. If you don’t want to spend a lot of time making a holder, then this option is perfect.
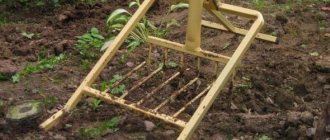
Homemade scoops from plastic canisters
How to make original, lightweight and convenient dustpans for collecting garbage from a used container for auto fluids with your own hands.
For a dacha where DIY is widely practiced and encouraged, I suggest making a couple of dustpans with your own hands for collecting garbage. There are no costs. Every motorist has an empty canister. Well, for example, from washer fluid. Labor costs are also scanty, but the benefits are great. What is needed for this? - a knife, a screwdriver, a piece of round wood for a handle, a couple of washers, a screw (or a screw with a nut - I used a school pencil case instead of a piece of wood).
Cut off the neck.
Draw the cutting lines.
We cut it into two halves and at the same time one scoop, which has a canister handle, is already ready for use, and we will finish the second.
I screwed a school pencil case to the second one as a handle.
These are the two tools we ended up with. One was lost at the dacha - the second one will be found!
And so that they don’t get lost, you can insert one into the other. And they won’t take up space! Good luck!!!
Category: Homemade products for summer residents / Homemade products from unnecessary things
Tags: Homemade products from plastic canisters
www.freeseller.ru
Painting the stalk
After completing all the work, it is recommended to paint the handle (you can also paint the scoop) in a bright color so that the shovel stands out against the background of the snow. This way you won't forget to put it back in the garage after cleaning. It is best to use acrylic paint for this, although almost any composition will do. This will also eliminate the “clumsy” look of your product, after which the shovel will look like shop tools.
Now you know how to make your own snow shovel. This process is not particularly complicated. Even someone who rarely makes anything can handle this task. You just have to acquire the necessary materials and tools, and then follow the instructions given in our article. For clarity, we provide a short video that will help you understand the workflow in more detail.
How to make a tin scoop with your own hands
How to make a tin dustpan with your own hands, the necessary equipment for cleaning premises. An inexpensive homemade item will bring a lot of positive emotions while using it.
Consider a design consisting of only two parts:
• scoop bucket • handle
LADLE
Let's cut out the figure shown in the figure from galvanized sheet steel GOST 14918-80
The dotted line shows the places of bends, their radii, directions and angles. Punch holes in the teeth or drill them with a drill. We bend the metal along the bend lines on the beam and beat it with a mallet (a flat wooden hammer) and get a scoop bucket.
If you make a false seam on the top edge of the scoop, from the side where the handle is attached (this will give the structure additional rigidity),
then on the development it is necessary to add an additional sector with a length of 200 (mm) and a width equal to the length of the seaming line.
In the figure, the additional sector is indicated in blue.
PEN
Let's make it from a wooden block measuring 25x25x200 (mm). Secure the block with its sharp edge facing up. We plan the sharp edge of a wooden block. Install the block with the next sharp edge facing up. In this way we process four edges and get a regular hexagon. Use sandpaper to smooth out the sharp edges where the hand is located. We will cover it with a protective decorative coating for wood.
Alternatively, you can use the handle from a blueberry harvester as a base.
Assembly order:
1.
We use steel rivets to connect the edges obtained after bending.
2.
We screw the handle with self-tapping screws and a press washer to the curved triangles of the hexagon.
3.
Use sandpaper to smooth out the sharp edges on the metal.
Having an idea of how to make a tin scoop with your own hands, you can improvise and make a product of various shapes and sizes and for various purposes.
Tip:
For large-sized products, it is necessary to replace the false seaming with a wire one. Do this on three sides of the ladle (on top of the ribs). It is better to punch holes for rivets on a bent part.
Order a drawing
Share with friends!
kak-cdelat.ru
Wheeled roller for snow removal
A rollback is a type of snow shovel. It is also called a dump. This tool allows you to achieve maximum results with minimal effort. Materials that will be needed when making a rollback:
- Wheels from a cart.
- Sheet of steel 1−1.5 mm thick.
- Metal tube.
- Bulgarian.
- Welding machine.
Manufacturing is not as simple as in previous variations. In this case, you need to know a little about welding metal. But the result is worth it. Step-by-step manufacturing instructions:
The first step is to make a kickback blade. You need to cut a piece of sheet steel with a grinder. The optimal dimensions are 70x40 cm.- A small metal plate should be welded to the back of the blade to strengthen this area. Drill three holes in it: one will serve for fastening, the other two are needed for a stopper that holds the blade at the desired angle.
- Make a cutting from a metal tube.
- Two flanges are welded to the bottom of the handle. Holes are pre-drilled in them in order to subsequently install the wheel axle.
- A handle is welded to the top of the handle.
- Next, 60 cm of steel tube is sawn off and threaded through the flanges on the handle. This is a wheel axle. The wheels are put on it, and then the retaining rings.
- A small tube is welded horizontally to the bottom of the handle. It is needed to attach the blade to the wheelbase. The blade is secured with a bolt.
- Paint thoroughly.
To make the shovel glide better, you can attach a rubber band to the bottom of the blade. An alternative version of this mechanism is a four-wheel recoil.
Roof scraper
In winter, not only the paths on the plot, but also the roofs of houses require snow removal. Assembling a snow blower for roofs with your own hands is a completely doable task. A roof cleaning shovel looks like the letter P attached to a long handle. A strip of plastic extends from it - a tape for throwing snow off the roof. The procedure for making a scraper with your own hands:
- Bend a U-shaped profile from sheet metal. Width - 55 cm, length - 65 cm, height - 35-45 cm.
- Cut a strip of any metal 65 cm long and up to ten centimeters wide. Attach it with bolts to the side walls of the resulting profile.
- You need to attach a cutting to the strip.
- A plastic tape is attached to the bottom of the side edges using small nails. The plastic must always be rolled into a roll. When snow gets in, the roll will unwind.
The snow will slide down the plastic strip on its own, and if it gets stuck, it will be enough to lift the shovel a little.
How to make a metal scoop with your own hands
How to make a metal scoop with your own hands, easy to make and easy to use.
The figure shows the design of a garden scoop in section and all its components are indicated.
.
1.
Scoop bucket.
2.
Pen holder.
3.
Metal ring.
4.
Wooden handle.
BUCKET SCOOP
We will make it from a scrap of thin-walled pipe Ø 76 (mm) and length 200 (mm). For these purposes, electric-welded steel pipe GOST 10704-91 is well suited. Let's cut off everything unnecessary from the pipe and get the specified contour according to the dimensions of the drawn up drawing.
Round off sharp edges and corners with a file.
PEN HOLDER
We will make it from round steel GOST 2590-88, Ø 8…10 (mm), which we will bend at the required angles. We set the angles and dimensions of the holder so that it would be convenient to use gardening tools at work. On the side of the long part, we grind down four or three edges at a slight angle, on which we will attach the handle.
METAL RING
Let's make it from scraps of a thin-walled metal tube.
Reference:
The metal ring serves as protection against cracking of the wooden handle when placing it on the holder.
WOODEN HANDLE
We will carve it from a wooden block or buy a finished product. At the end, in the center of the handle, from the side of the metal ring, drill a hole with a diameter slightly smaller than the diameter of the holder. Use sandpaper to smooth out all burrs and irregularities on the surfaces of the handle and coat it with a protective wood antiseptic.
How to make a metal scoop with your own hands if you have the following parts:
1.
We weld the handle holder to the scoop bucket.
2.
Use an abrasive wheel to smooth out the unevenness of the weld.
3.
Place the metal ring (on glue) with a slight tension on the wooden handle.
4.
We hammer the wooden handle onto the holder, first treat the touching surfaces with a thin layer of glue.
5.
Sharpen or adjust the cutting edge of the bucket.
That's all, the garden metal scoop from a pipe cut is made, you can start using it and enjoy the results of your work.
Order a drawing
Share with friends!
kak-cdelat.ru
Technology 5th grade
““Modeling an apron” 5th grade” - Artistic modeling. Applying the names of parts. Modeling the bib. Types of finishing. The process of creating clothes. Studying the material. Drawing of the base of the apron. Strap. Familiarize yourself with artistic design techniques. Repetition of covered material. Pocket modeling. Modeling the bottom of the apron. Fixing the material. Safety rules when working with scissors.
"Embroidery" 5th grade - Types of embroidery. Smooth surface. Five. Routing. History of embroidery. Embroidery. Physical education break. Your mood. Image. Magic chest. Get acquainted with the history of embroidery. Safety precautions. The young girl is not big, but she dresses the whole world. Counted embroidery. Safety precautions when working with an iron. Hand tools and materials.
“Natural fibers” - The finished fabric is dyed or printed with a design. Packaging in bales (pressing). The basis. Sewing materials science. In the spinning shop, threads are drawn and twisted from the roving. Carding shop. Pre-cleaning. Classification of natural fibers. How is the fabric obtained? Tape shop. Get yarn. Edge. A thin thread obtained by twisting fibers. Dividing the fiber into narrow strips (roving). Shuttle.
“Product manufacturing” - Selecting an option. Basics of design. Product.
DIY scoop – Home workshop
A useful household item made from something that has already served its useful life.
The gardening season is approaching. Sowing seeds for pepper seedlings has already begun, and soon tomatoes will need to be sown. Soil in bags was purchased specially for this purpose, and containers were prepared in which this soil should be distributed. Just pouring it straight from the bag is inconvenient, you can spill a lot, and it doesn’t hurt to mix the soil first, so I specially made a simple scoop from what I had on hand. The dishwashing liquid (AOS) had just run out and the container was about to be thrown away, but the shape of the bottle seemed suitable for a scoop, and the color was so bright that the scoop wouldn’t get lost in the garden in the summer. The bottle has fairly thick walls, so the scoop will be rigid and strong enough to use for scooping up and pouring loose soil. I trimmed it with a knife, trimmed it with scissors and the scoop is almost ready. All that remains is to attach the handle. First I wanted to make a wooden one - to cut some kind of stick from scraps from my carved crafts, but then I accidentally came across a thin metal tube in my workshop - the handle from an old mop. It turned out that it was exactly the same diameter as the neck of the plastic bottle. I sawed off a piece of the required size with a metal hacksaw, inserted a wooden boss into one end for strength and so that the scoop could be secured to the handle with a couple of small nails. I slightly bent the handle of the dustpan to make it easier to use, and put a plastic tip on the end of it, still from the same old mop. The whole job took no more than 5 minutes, and the result was a scoop quite suitable for working with seedlings. If you don’t have just such an empty container on your household, it doesn’t matter: for this purpose you can use any other plastic shampoo bottles with flat shapes on both sides (not round), which can certainly be found in any home. They are, as a rule, also made of durable and thick plastic; their strength and rigidity will be sufficient to make a similar scoop. But their color is usually not so bright, which is why I chose the AOS bottle. www.instrument-mastera.ru
Formation of the end part
When making a scoop, it is necessary to form its end part so that the snow does not spill out during the collection process. It is best to use a wooden board for this, since sawing and welding the metal will be too much of a hassle.
We proceed as follows:
- We cut out a crescent, the length of which is 50 centimeters.
- We make a hole in the middle of the part into which the cutting will go.
- We attach the crescent to the shovel using several corners and screws.
After this, all that remains is to make a cutting and insert it into a shovel. However, this process requires great responsibility.
Ash scoop and poker for stove maintenance
If you have a wood-burning stove in your house or dacha, then it must include accompanying accessories, namely an ash scoop and a poker.
These furnace maintenance items can be purchased. True, in some places they are unreasonably expensive. And the quality sometimes leaves much to be desired.
Therefore, if you have the necessary tools and materials, you can make an ash scoop and poker with your own hands.
We also recommend reading a review article on the topic: how to make a brick barbecue oven for a private home.
We will make a set for servicing the furnace from a square steel bar using the cold forging method.
To do this you will need a bending machine. If you don’t have a bending machine, you can make it yourself - read more here.
Poker for barbecue
A barbecue poker is a long, curved metal rod with a handle at the end. With its help, the barbecue man casts a spell by the fire:
The simplicity of the design allows you to make a poker with your own hands quickly and with a minimum budget. The starting material is a square rod or a finished forged blank 1-1.2 m long.
We bend the rod on one side, we get a handle. The handle can also be made wooden:
From the other end of the reinforcement we mark 3-5 cm. We bend this part 90 degrees. We weld a metal plate to it.
To avoid welding, heat the working end of a rod 10-12 cm long over a fire and use a hammer. Bend it at a right angle.
Recently, instead of a poker, long metal tongs for coals are used. With their help, it is more convenient to transfer firewood, large pieces of coal or briquettes, especially if they are lit in another container. And yet, the poker remains a classic of the genre, penetrating into the depths of the firebox of brick barbecues and metal structures.