Suspension lift UAZ loaves
The lift of the UAZ-452 car, made by increasing the suspension travel, significantly increases the center of gravity and worsens its handling.
To do this, you need to take into account the height to which you are going to raise the car. You need to choose the right proportion between increased cross-country ability and the likelihood of a coup. The possibility of lifting is also limited by cardan shafts; it is necessary to take into account at what angle they will stop performing their direct work.
The greater likelihood of capsizing can be compensated for by widening the track by installing spacers in combination with wide disks and tires. You can install rear axles of the Spicer or Bars type.
It is possible to increase the track by installing disc brakes, and installing spacers between the bridge and cardan flanges and extended cardan shafts will allow us to solve the problem with the shafts.
Basics
Before we tell you how to lift a UAZ loaf, let’s understand that there are two types of car lifting (depending on exactly how the intervention in the car’s structure is carried out):
- body lifting;
- suspension lift.
The first option is more simple and at the same time much more secure.
What does security have to do with it? The fact is that body lifting practically does not change the car’s center of gravity, so the loaf’s stable behavior when cornering or off-road is maintained. As for the suspension lift, there is a certain risk due to the increase in the center of gravity, but this method significantly improves cross-country ability.
Let's talk about each of these methods in more detail.
Suspension lift options for UAZ-452
Lifting options that make it possible to raise the “loaf” suspension:
- Small elevator. If it is necessary to raise the car to a small height, it is enough to install additional leaf springs, or lengthen the spring earrings.
- Medium and large elevator. When performing a medium and high lift, we install a spacer between the bridge and the spring, or if this method is not suitable, then we install spacers on the spring mounting brackets. The advantage of lifting the suspension is that we have the ability to adjust the height and the fact that we still have original spare parts.
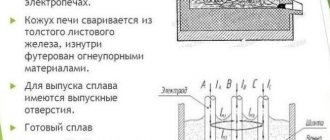
OFF-ROAD PREPARATION
Bukhanka body lift 6.5 cm (UAZ 452 and its modifications 2206.3741)
Preparation of the Loaf (UAZ 452,2206,3741), body lift - stages of construction smirnoffroad style.
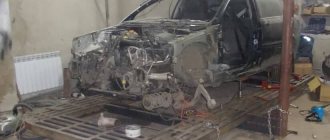
What we had in the source code was a 2005 UAZ, in average condition, that is, corrosion everywhere, but no rotten iron.
First of all, we dismantled the passenger compartment, since the floor was covered with plywood and there was no other way to get to the bolts securing the frame to the body. Advice for Loaf owners - if you want to preserve the body, then treat it inside with anti-corrosion mastic and make a couple or three holes for drainage and ventilation in the floor. We removed the plywood and raked out 7-10 kg! wet sand and earth. The state of the floor is sad, but that is a topic for another day.
So let's get started. The body is attached to the frame with ten “furniture bolts” and this is no joke. Six of them are in the passenger compartment, two behind the front wheel arches, two at the feet of the driver and passenger. The bolts are secured at the bottom with second nuts.
Before we begin dismantling the bolts, we disconnect the battery, disconnect the ground from the engine - behind the hood compartment and raise the car on a lift.
Next, we disconnect the wires from the starter (in our case, the starter and the wiring to it were new and we took into account the length of the wires for the elevator; if the wires are standard, they may be short).
Next, we disconnect the radiator fasteners from below or from above (we disconnected from below, but then during installation we left the standard lower fasteners, and slightly modified the upper one in place)
Disconnect the gearbox lever drive rods and the brake booster rod.
Then, drain the coolant (don't forget to open the radiator cap), and remove the hose from the heater.
We unscrew the support for fastening the transfer case levers and the fasteners for the sump filter of the pumping line between the tanks.
After this, completely unscrew the nuts from the six rear body bolts and loosen the front nuts. At the same time, since the fasteners are old and rusty, and the bolts resemble “furniture” bolts with a tetrahedron under the hat, you need to act carefully; if the bolt turns in the body, then there will be nothing to hold it, and this is extra work to weld a nut or bolt to it etc. Therefore, holding one nut with a wrench, use the head to unscrew the lock nut, and only then the main nut.
There is nothing else to do under the car for now, lower the car onto the wheels and disconnect the steering column and unscrew the boot on the floor.
Actually, when all this is done, you can begin lifting the body over the frame. We perform the operation by placing stops under the wheels so that the car does not move. We start lifting from the rear of the car, keep in mind that when removing the load from the frame, it rises on springs and if you lift the body with jacks, then you need a good headroom. We lifted it with a lift and didn't have this problem.
So, we tear the body off the frame by about ten cm and be sure to place a safety wide wooden beam between the frame and the body. Next, take out the standard bolts and drill holes with a diameter of 12 mm. Standard bolts are 10mm.
The spacers will need some modification. In our case, these were welded barrels 6.5 cm high. On the last and middle spacers, it is necessary to cut off a small sector at an angle of 45 degrees, because there are protrusions on the frame. And the rear “barrels” should be 1 cm higher than all the others, but we all had the same ones, so we had to put 5 wide washers.
Next, we insert four rear spacers, insert bolts and attach nuts to two bolts closer to the middle of the body. We also raise the body and insert middle spacers. At the same time, we increase the size of the belay lining with the help of boards to approximately 150 mm. Remove the nuts from the front bolts. We remove the insurance and lower the body.
We roll the car over, fix it, remove the standard bolts and begin lifting the body from the front. First, we insert the spacers and front bolts, and attach nuts to them. The front bolts should be 180-200 mm. The remaining 150 mm.
Next, we raise the body further and insert a second pair of spacers and bolts. We lower the body. We tighten all the fasteners from the center to the stern and then to the front. We used wide washers and self-locking nuts, but you can also use locking washers and regular nuts if you like. Bolts with a strength of at least 8.8, and preferably more. And preferably with fine thread.
Now the most interesting thing is that we need to secure everything that we unscrewed, but the body rose by 6.5 cm.
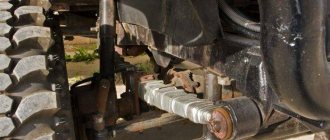
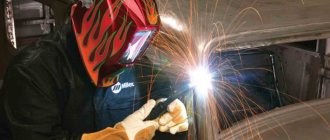
We do the following, we lengthen the rods by welding inserts (don’t forget to paint them or treat them with anti-corrosion agent)
Place the rods in place and secure them with cotter pins.
Next, we make a support for attaching the transfer case control lever
We put it in place and fasten it with long (90mm) M8 bolts
We make a filter support and also put it in place
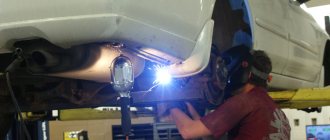
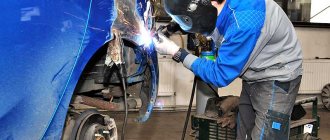
Now the most difficult thing, after lifting the body, the steering wheel began to lie on the balls... ah, sorry, on the stomach. We need to make an adapter bracket for the steering gear, like this.
Let's try it on...
Let's paint...
We put
Please note that the heads of the lower bolts must be cut so that the rod does not touch them. After that, the steering column and its boot were secured.
We put a new, longer hose on the heater, tighten the clamps, and fill in antifreeze.
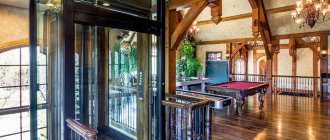
Well, all that remains is to screw on the new extended ground wire and the radiator, connect the battery, install the big wheels (in fact, it was for them that everything was started) and you can be free - INTO THE PAMPAS.
Finally, photos of the spacers between the body and frame. They fastened it rigidly, without any rubber bands, since both the frame and the body of the loaf are not very strong, and this gave some reinforcement. Although, if you prefer, it would be better to strengthen the frame with additional spacers and gussets.