This drill is recommended to work on light, soft soils. On dense loams and rocky soil, the blades will begin to deform under load. The reason for this is the use of non-hardened steel. The solution is to reinforce the blades with metal corners.
From a saw blade
The best saw blade option is a diamond one. It is highly durable.
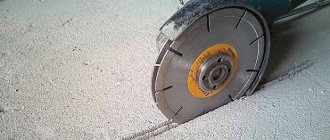
Used disks from circular saws will also work. They are made from hardened steel. They have a well-sharpened edge and are reliable, but they cannot be bent, so the disk is sawed in half and the two parts are placed at an angle. To make the drill go easier, the side edges are additionally sharpened on a machine or by hand.
A drill made from a saw blade is more productive than others and is suitable for all types of soil.
Welding
It is carried out wearing a chameleon-type protective mask (preferably) and gloves. The blades are welded to the rod both from the inside and outside, and the seams are cleaned.
Corrosion protection
The finished product is sanded with sandpaper and treated with an anti-rust primer. An alternative is a phosphating solution.
After priming, the drill can be painted.
It is recommended to periodically disassemble it, clean it of accumulated dust and dirt, and lubricate it with a water-repellent solution. This will avoid jamming of parts, repair or replacement of individual parts and will extend the service life of the product.
Looking for energy efficient solutions?
Pay attention to FORUMHOUSE geothermal heat pumps
Ground source heat pump EU (start/stop)
Geothermal heat pump IQ (pseudo-inverter)
IQ ground source heat pump (inverter)
A hand drill is an indispensable thing on a personal plot. Drill holes to install fence posts or bored piles under the foundation, make holes in the garden soil for planting plants. There is always a use for this hand tool. Users of our portal know how to make this tool yourself, and whether it is possible to somehow improve factory-made devices.
Before you buy or make your own hand drill, you need to ask yourself the following questions:
- For what purposes and work do you need it;
What type of soil will be drilled at the site.
Sand, rocky soil, abandoned garden soil, hard clay, loam, soil with a lot of roots. Drilling a hole for installing fence posts and posts of small diameter, drilling out “heavy” soil for powerful bored piles for the foundation of a house. All these factors have a significant impact on the design of a hand drill.
In my opinion, the best hand drill is the one that is “tailored” for work in a specific area, taking into account the characteristics of the soil and its layers. Those. the earth drill must be made for specific tasks: installation of pillars, piles, etc.
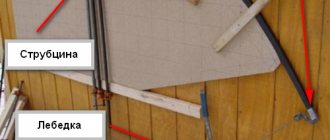
A user of our portal offers the following mechanical design for a homemade drill. How it was made can be clearly seen in this photo.
Two knives are used to preliminary loosen the soil, which simplifies the cutting of the main blades, set at an angle, into the ground. Moreover, the main blades can be made replaceable by attaching them to bolts and nuts. Thanks to this, it is possible to drill holes of different diameters using one rod.
Although the purchased and homemade drills are similar in appearance in many ways, it is the homemade hand drills that show the best results. They are stronger and more convenient to work with, because... they are made to suit you.
My neighbor and I once conducted the following experiment: we decided to compare the performance of my homemade drill (blade diameter 25 cm) and its purchased one (blade diameter 14 cm).
The soil on the forum member’s site is like this:
- 0.7-0.8 m – “fertility”;
- 0.2-0.4 m – coarse limestone stone;
- then a layer of marl (yellow, with fine limestone chips).
During the competition, the drillers almost simultaneously went 0.8 m deep. Then the purchased tool stumbled on the marl, while, working as a homemade garden drill, Mikhail continued to drill as if nothing had happened. The neighbor had to loosen the marl with a crowbar and only then drill further.
The result of the experiment: it took Mikhail a little over 5 minutes to drill a hole under a pillar 1 meter deep, and he was not at all tired. The neighbor fell hopelessly behind in the last 0.2 m.
That is why homemade hand drill designs are so popular among users of our portal. To make one, all you need is scrap materials and basic welding skills.
The tool is made like this: take a round or square pipe, its length is selected depending on the expected depth of the hole. In the case of mechanical drilling of deep wells, the pipe can be extended by extending it with an additional rod. The diameter of the blades is selected depending on the expected diameter of the pit and the planned work.
Large-diameter saw blades from circular saws have worked well as blades. Such a disk is sawn into two parts with a grinder. The halves are welded to the pipe, and the blades must be spread to a certain angle (approximately 25-30°). This way they penetrate better into the ground. A lance or a large-diameter “killed” drill is welded to the end of the pipe. The tip is needed to center the drill at the beginning of drilling. Due to the saw teeth on the blades, such a tool cuts roots well when rotating.
The main thing when working with a hand drill is to stop in time and lift it out of the pit in order to dump the rock.
I made two earth drills for the beginning of the summer season. The first is with a diameter of 210 mm, the second is 160 mm. Circular discs were used on the blades. The rest was made from what was literally lying under our feet. I also made a collapsible extension rod. I spent 200 rubles on everything, as they say, cheap and cheerful.
If you don’t have a welding machine at hand, then such a tool can only be assembled using bolts and nuts. Also, as a drill for light soil and for drilling small-diameter holes, you can use a used ice auger (since buying a new one is an economically unjustified idea). For ease of operation of the ice device, you need to cut off the handle-turn and attach a standard T-shaped collar.
In addition to the tools described above, an interesting approach to making a homemade drill for drilling wells in the ground is from a forum member with the nickname VyacheslavK.
A conventional earth drill was used to drill to a depth of 2.5 m. The forum member cut the blades with a grinder from a piece of sheet metal 3 mm thick, onto which a paper template was previously glued.
Then a hole with a diameter of 20 mm was drilled in the resulting workpiece.
A cut was made along the radius of the circle.
Next, Vyacheslav K welded a pin into the blade, which he inserted into the pipe. The pipe is also welded to the blade.
The result is a drilling device like this.
During the work, the following shortcomings were identified and eliminated:
- The blades are brought together during drilling, which significantly reduces drilling efficiency. To prevent the blades from collapsing, bracing partitions were welded between them and to the pipe.
- When drilling holes for installing a fence, the tool, if it bumped into stones or roots, was pulled to the side. To eliminate this drawback, an arcuate side of 30x10 cm was welded one blade at a time, starting from the bend of the circle.
- Low efficiency when passing through oily clay. For working with clay, the so-called was made. frame drill designed by a user of our site with the nickname KND.
This device is best suited for working with lamellar clays. It has a minimum coefficient of friction against the rock. It is easy to remove from the hole (there is no “piston effect” like an auger drill). After lifting the drill, the clay is simply shaken out of the frame.
Although such a tool is most often used when drilling homemade water wells, its design turned out to be so successful that it is worth focusing on it.
VyacheslavK did this:
From a strip of metal 5 cm wide, he cut two identical strips and made angular bevels, moving 2 cm from the end of the strip. For the strips, you can use old car springs.
Cut and sharpened knives.
I welded the knives to the drill, pointing the sharpened sides in opposite directions.
I spread the knives apart using a corner so that the distance between the ends was 25 cm.
Using a gas wrench, VyacheslavK turned the knives at an angle.
I assembled and welded the entire structure.
It is worth noting that the drill quickly broke off. Therefore, VyacheslavK sharpened the fragment, as shown in the next photo.
Also interesting are the designs intended for making a widening - “heel” - during the construction of the TISE foundation.
I modified the purchased drill and installed a second folding shovel on it. To make it easier to work, I made a T-handle 1 m long. Thus, I increased the force on the lever. The length of the rod is 3 meters. Now you can drill holes 2 meters deep while standing upright, rather than on all fours. I cut off the teeth from the land receiver because they are of little use.
The “improvement” did not end there. To increase the efficiency of the earth drill when drilling out the widening, Subarist bent the blades - straight ones did not cut the soil well. The forum member’s future plans include installing blades made of alloy steel, because... ordinary ones quickly become dull on stones.
I made an earth drill using an ordinary saucepan as a soil accumulator. With this tool I made widening at a depth of 2.5 m.
There are stoppers at the bottom of the pan that rest against the ground. When drilling the expansion, the pan stands still , this increases work efficiency, because no effort is wasted on turning the earth receiver itself. When the handle rotates along the threaded shaft, the blades open and cut the soil. After the pan is filled, the handle of the drill rotates in the opposite direction, the blades fold, and the drill rises to the surface. In 4-5 lifts, the hole with widening is completely drilled out.
It is worth considering that making such a tool is more difficult than a regular one - you will need a welding machine and a lathe.
The design turned out to be successful and in demand. Using this principle, forum members make their devices with two blades, which most often work in tandem with motor drills.
Holes for supports
To securely install fence posts, they must be buried in the ground. Not everyone knows how to choose the right depth and drill holes for posts, as a result of which many fences sag over time or even fall. Meanwhile, there is nothing complicated about this, the main thing is to accurately determine the type of soil and calculate the weight of the fence and the parameters of the pillars.
Drilled hole for fence support
Drills for excavation work
A hand drill for excavation work is a popular and very necessary device used in private garden plots, as well as in construction work of small architectural configurations and small-scale construction.
To make deep holes in the soil, you will need to purchase special tools - a hand-held earth drill. It is extremely necessary when applying fertilizer to plantings and when planting seedlings. An excavation drill is necessary when installing benches, swings and other structures with a base dug into the ground. In order to mount the log you will need a hand-held excavation drill. Having made a hole in the ground with his assistance, you will be able to put up a pile or a waymark, or plant a tree or bush. When using a bayonet shovel, it is not possible to make the size of the intended hole less than the width of the bayonet. With all this, a larger volume of the prepared hole is, as a rule, an overuse of concrete solution when installing a pillar, or an excessive waste of effort on restoring the torn soil back into the depression with its further compaction. And all this without thinking about the working time spent, to put it simply, is useless. If it is necessary to install ten supports, the overuse of building materials and your time, as well as effort, turns into a big problem: the greater the number of holes that need to be made in the ground, the less interesting the undertaking is supposed to be.
Shovel: pros and cons
This tool is the cheapest and simplest, but in this case it is also the most ineffective. For digging trenches or wide shallow holes, a shovel is very convenient, but you won’t be able to dig a deep and narrow hole with this tool.
Firstly, this will require a lot of physical effort, secondly, the width of the hole will still be much wider than necessary, and thirdly, it will take a lot of time. But if the pillars are made of brick, a shovel will be ideal. For such pillars, the pits should be square and wider so that it is convenient to pour the foundation.
In addition, there is a shovel in almost every estate, and more than one; it does not require gasoline or electricity; if it breaks, it is not difficult to fix it.
Digging with a shovel
Design
The main working part of a manual auger for excavation work is the auger. The configuration of the auger directly determines the magnitude of applied stresses and the haste of drilling, and the proper quality of the material from which the auger is made determines its wear resistance. The hand-held pole drill is equipped with an auger made of first-class steel, which provides a guarantee that it will operate for quite a long time.
The earth drill is characterized by its characteristic T-shaped design. The production part is located on one side of the rod, and the handle is fixed from the opposite position. One or two auger-shaped cutting parts and a pointed tip are located on the working part.
For drilling, the running side is positioned in place of the desired hole. It is necessary to press on the tool in order for the sting to enter the ground, as a result of which the handle must be turned. When the earth drill rotates, the tip is screwed into the soil, and the hole is deployed with the assistance of the cutting segment.
Using a motor drill
This method is the fastest and easiest, although expensive. A motor drill consists of a drive and a drill with an auger attached to it, and the drive can be gasoline or electric. Using a hand-held motor drill, you can dig a hole up to 3 meters deep, spending just a few minutes on it.
As for the disadvantages: such a device is very noisy during operation, it requires a close location of the electrical network or the presence of gasoline.
Main settings
Well size . Depending on the parameters of the cutting parts, the device makes it possible to make holes with a diameter of 100-300 mm. For planting seedlings, a model of an earth drill with a maximum diameter of 150 mm is sufficient. To make holes for construction and installation processes and for planting trees, it is advisable to select a device with a diameter of 200-300 mm.
Drilling depth . Today you can buy a garden drill for wells up to 1 meter deep. The length determines the depth of the hole being drilled and can be up to 1100 mm.
Drilling tools
Preparing the post holes is considered the most tedious process when installing a fence. Each of them must be made of the same depth and width, there is a lot of soil to choose, and besides, such work is too monotonous and takes a lot of time. The choice of tool directly affects labor productivity as well as the overall cost of the installation.
So, for digging holes for fence supports, the following are most often used:
- shovel;
- garden auger;
- motor drill
Drill diameters for excavation work
+7;+7; [email protected]
Stores in Moscow: +7;; +7; +7
| BASKET | ||
| 0 products | 0 rub. | |
- HOME
- PRICES
- REVIEWS
- ONLINE STORE
- FAKES
- HOW TO BUY?
- WHERE CAN I BUY?
- NEWS
- HOME
- PRICES
- REVIEWS
- ONLINE STORE
- FAKES
- HOW TO BUY?
- WHERE CAN I BUY?
- NEWS
- ABOUT COMPANY
- PARTNERSHIP
- HELP IN SELECTION
- VIDEO
- ARTICLES
- GUARANTEE
- PRIVACY POLICY
- TERMS OF USE
- CONTACTS
- DELIVERY
- EARTH BOGS Series ECONOMY (LITE)
- STANDARD series
- PREMIUM Series (SLIT)
- PROFI series Drills for deep drilling
- Drills for piles and foundation pillars
Certificate of conformity
Patent for industrial design for Cultivator Master drill
Download Price list
OUR PARTNERS
Features of application
The main purpose of using a drill is to help make holes of the required diameter. This is much easier than digging a shapeless hole with a shovel, while spending a colossal amount of time and effort to fill it up at the end of the process.
The drill is useful in such cases as:
- mounting pillars under the foundation during the construction of a house;
- holes for planting trees and bushes in large quantities;
- help for loosening the soil at great depths near growing plants;
- digging straight or inclined tunnels;
- well or pit for compost.
These are just the most common types of work for which a drill is used. The peculiarity of this tool lies in its design, which includes a rod, many blades or a spiral system that allows you to loosen and retain the earth on them . After this device is completely inserted into the ground by rotation, it is taken out without reverse rotation so that the earth remains on the spiral. The result is a hole of even diameter and the required length.
Unlike the industrial type, you can make a drill with a collapsible design with your own hands. That is, for drilling holes, it will be possible to easily select the required diameter and length by simply replacing several parts.
The industrial type of drill is distinguished by the high strength of its parts, the possibility of choosing mechanical types that do not require manual action, but the cost of the equipment is sometimes simply scary, and this is especially true for cases when the drill is needed only for single jobs.
How to fix a pole
Before installation, it is necessary to protect the underground part of the support from moisture: wooden poles are burned with a blowtorch and treated with resin, metal ones are painted. Next, the prepared support is installed strictly vertically in the center of the hole on a sand or crushed stone cushion and fixed with spacers.
Concreting a support can be done in two ways:
- The traditional, “wet” method involves filling the space around the pillar with a concrete mixture and then vibrating it. The method is used on sandy soils that are unable to accumulate large amounts of water.
- If the soil on your site is clayey, absorbing moisture like a sponge, the force of frost heaving will push out the pillar along with the concrete sleeve. In this case, butting is performed (“dry” concreting): that is, the space around the pillar is simply covered layer by layer with crushed stone. Each layer is carefully compacted.
Individual particles of crushed stone remain mobile relative to the support and each other, therefore, when the surrounding soil swells, they simply shift, and the pillar remains motionless. In addition, the crushed stone layer, working as drainage, removes moisture from the pillar.
The disadvantage of this method is that even with careful compaction, over time the crushed stone sags and the pillar becomes loose, so after a few months it is necessary to add crushed stone, and until then further arrangement of the foundation is impossible.
When creating a light fence on soft soil that is not prone to heaving, it is possible to install pillars without concreting, by driving them into the ground: in this case, a small hole is made along the diameter of the support, the post is installed in it and driven in with a sledgehammer. The method requires great physical strength and experience.
Maximum effect
So, we found out that the most economical and optimal drilling method is to use a garden auger. However, you should ensure that it is constantly sharpened. When preparing for work, it is better to carry out this procedure yourself to be sure of the high speed of work.
To soften the soil, pour half a bucket of water into the hole.
Now it’s worth talking directly about the technology of digging holes with its help. In fact, drilling with such a tool can be called primitive. The equipment is installed strictly in a vertical position in the place where the future pit should be located. Next, you need to start turning the drill while pressing the handle.
Preliminary calculations
Before you start drilling holes for pillars, you need to make preliminary calculations. To install any pole you need a hole. Its diameter is slightly larger than the size of the structural element itself. The pit must strictly correspond to the parameter of the pillar. For this purpose, preliminary calculations are made. They are often quite simple. If the hole is made too spacious, it will lead to loosening of the soil. This is unacceptable for a columnar base. The foundation will be shaky and not rigid.
Schemes of holes for drilling.
It is very important to calculate the distance between the pillars. Simple formulas are used for this. Everything here is actually extremely simple. The weight of the structure directly affects the number of pillars. The heavier it is, the greater their number should be. Holes for pillars need to be drilled to a certain depth. This is done using various devices, which will be discussed below. Moreover, the depth directly depends on what type of soil is present in a given region. The more buoyant it is, the deeper you need to dig. This is a simple pattern that allows you to create a high-quality foundation.
Useful tips
If you are going to soften the soil with water to make drilling easier, drill several holes at the same time: this will help avoid downtime. Do not try to jerk the garden auger out of the hole, as this may damage your back. It’s better to swing it slightly, after which you can get the tool out without any tension.
You should sharpen not only the end parts of the auger, but also the edges of the round plates: they are not directly involved in drilling, but by cutting off the roots of plants, they will help complete the job faster.
One last piece of advice: if this is your first time getting started, try your hand at a post hole located in the most inconspicuous place, and no one will notice your mistakes. And only then, having gained experience, you can start drilling the remaining wells and do the job flawlessly.


