Every person who has used a circular saw at least once knows how difficult it is to make an even cut. To somehow simplify this task, some use a special guide. This design will help you make perfectly straight cuts. Create a guide for a circular saw with your own hands.
A circular saw is often used in the household for cutting wood.
A circular saw. Concept
A circular saw is a special electric tool that allows you to quickly and smoothly cut wood products, plywood, laminate and various boards.
There are household and professional models. The former can function with pauses. Their engine needs breaks of 15-20 minutes. They cannot withstand significant loads.
The latter have more powerful engines. They can work intensively for a very long time. Therefore, they are usually used in production.
For personal use, household modifications are used. And keeping professional versions is unprofitable.
The level of work and its types are determined by the frame of this tool.
Required materials and tools
Before you begin manufacturing the structure, you need to familiarize yourself with the list of necessary tools and materials:
- wooden blanks: boards, plywood, laminate;
- wooden bars with a thickness of 10 cm;
- self-tapping screws, screws, bolts or nuts;
- drill with drills;
- screwdrivers or screwdriver.
Additional Information! The above tools must be prepared in advance so that they are at hand while creating the guide.
About the elements of the frame
The attachments for a circular saw are different. The main one is the bed. If the power of the saw is insignificant (no more than 1.2 kW), such a frame is not difficult to build yourself. Its length is affected by the length of the material going for cutting.
A Bosch electric drill is suitable for the drive; its parameter is 0.85 kW. It is mounted under the stove using a special bracket.
The accuracy and evenness of the cut is better when the workpiece rests entirely on the table surface. And if the table has too large parameters, it will fill the entire work area. Here you need an average value. The height is selected according to your height to make it more convenient to work.
Making a table
When you need to assemble accessories for a circular saw with your own hands, the first step is to create a frame. It consists of a base and a table top.
The design of the second element is influenced by the structure of the working disk fastener.
The process of creating a key fixture for a circular saw takes place in several stages. They are outlined below:
- A functional table (table top) is created from a plywood sheet. Work proceeds according to the selected parameters. Markings are made on the sheet using a pencil along a ruler. The sheet is cut with a jigsaw. The edges are processed with a router. The created workpiece is polished.
- Marks for the saw are indicated on the bottom plane of the tabletop. The completed workpiece is turned over. A saw without a blade is placed on the intended area. The parameters of the sole are indicated.
- Using a router, an 8-10 mm opening is created in this material according to the designations of the landing area.
- Trying on a saw. If necessary, the parameters are adjusted. Then the areas of its fasteners and the slot for its disk are designated. If the material will be cut at different angles, this must be taken into account when marking the slot. She will receive a section in the shape of a trapezoid. The top will rush down.
- The pencil marks the stiffening ribs. The legs will join them later.
- Work on the stiffeners. To create them, boards 5 x 10 cm are used. They are placed around the perimeter at a distance of 7-10 cm from the extreme side of the table. The board is applied to the tabletop. Circled on both sides. Its main line is marked along the ruler. The positions of the screws are marked on it. They are as follows: 5 cm - from the extreme side of each of the existing ribs. In this case, a distance of 15-20 cm is maintained along the entire length of the rib. Through holes are drilled according to the created markings.
- Longitudinal stiffening ribs are installed. To do this, boards are marked and sawn. They are glued to the tabletop. They are tightened with clamps.
- The side stiffeners are marked. The boards are sawn and glued as in step 7.
- The clamps are held in place. The structure is pulled using self-tapping screws through the created holes, which are pre-drilled from the outside. This way the heads of the screws will be completely sunk into the table top.
- The stiffening ribs are tightened together with two 5 cm self-tapping screws. The tightening occurs from all sides. Clamps are removed. It turns out to be a tabletop.
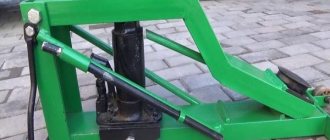
Types of devices for sawing wood with a chainsaw
Anyone can assemble homemade equipment for cutting wood with a chainsaw.
Depending on the principle and direction of the cut, structures for dissolving the forest are divided into:
- equipment for cross-cutting - used in the manufacture of small decorative wood products: pieces of indoor and garden furniture, wooden utensils, figured decorations for house and garden plots;
- structures for longitudinal cutting of timber - most often used by builders and repairmen. The main task of these devices is to produce smooth boards of different lengths and thicknesses.
Both types of devices differ from each other in size and require chainsaws with different capabilities and characteristics for manufacturing. The cross-cut design is small in size and saws with a capacity of 2 to 3.5 liters are suitable for its manufacture. With. Sawing logs into boards with a chainsaw requires a more powerful and durable gas-powered tool. The saw must have a solid reserve of traction and an effective cooling system - otherwise the risk of overheating and serious damage will increase. This design most often has quite large dimensions, so it is difficult to transport between sites.
Creating legs
Assembling a full-fledged device for a circular saw is not limited to these stages.
For the legs you will need a board 5 x 10 cm. Their height is 1-1.2 m.
The board is cut along the longitudinal vector. In this case, a slight angle is maintained on one side.
The legs are fitted to the tabletop. During installation they should be slightly apart.
They are attached outside the stiffeners. Fastening method: bolted. To increase their stability, you will need ties. They require a 5 x 5 cm block.
The hand saw is placed in the previously created groove from the lower area of the tabletop. The sole is fixed with bolts. The disc is placed in the slot.
The table is varnished in 3-4 layers. This is a measure against moisture.
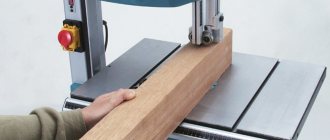
Guide bar - what is it?
Before you create such a design yourself, you need to familiarize yourself with its main features.
A guide bar is a special rail that is responsible for sliding the saw forward and backward. At the same time, it limits the movement of the tool and therefore it cannot be directed to the left or right.
This device is used not only to ensure an even cut. It also helps reduce the number of chips in places where the saw came into contact with the wood being cut.
Additional Information! Sometimes guides are included with circular saws from Bosch and Interskol.
Trimming issue
The miter saw attachment is especially useful when you need quality cross cuts.
Such a device can be made independently using the proposed technology:
- The base is being assembled. Two parallel strips of 2.5 x 5 cm are glued to the upper zone of plywood with parameters 1.8 x 30 x 122 cm. They are attached with screws.
- Corners are attached to them (their material is aluminum). Fastening method: countersunk screws. The mounting angle is 90 degrees. The fastening occurs parallel at a distance identical to the width of the saw base.
- The tool is adjusted to cut the planks to a shallow depth at the base.
- The device is fixed with clamps. A workpiece is placed under the corners. The cut is made.
If the saw does not work well, this area can be coated with paraffin, but with a thin layer.
Question about long cuts
Creating an attachment for a hand-held circular saw that will help make long cuts is important for many home craftsmen. It greatly simplifies the work.
It's easy to do. Fiberboard is taken. A sample is cut from this material. It is identical to the distance from the outer side of the tool base to the outermost part of the disk from the inside.
When cutting, you need to rely on the length of the tool base.
The edge of the sample is aligned with the cut mark on the workpiece. A straight piece is applied to the second side. This is the guide. It is fixed with a clamp.
On the second marking, this operation is duplicated, but on the opposite side of the workpiece.
To create a template, it is optimal to use a router or jigsaw.
Guide rail functions
There are several main functions that these structures perform:
- increased accuracy when sawing large materials;
- improved quality when creating a curved cut;
- simplifying the creation of parts in accordance with a certain standard;
- the ability to manufacture several parts using one template;
- increasing safety when using circular saws.
Also, with the help of guides, it will be possible to make cuttings with high accuracy.
Solving the problem with chips
If the disc chips while working, you cannot do without the following device for a hand-held circular saw, assembled with your own hands.
Technology:
- The hardboard element is cut out. Its density is 6 mm. When cutting, you need to focus on the width of the tool base.
- The disk is retracted. The protective cover rises. The result of step 1 is attached to the base with double-sided tape. After this, the saw starts. The disc fits smoothly into the hardboard. This results in zero gap in operation.
Sawing should be done with little impact on the created base.
Advantages of a homemade guide bar
The guide allows you to make straight cuts.
Many people think that homemade splints have no advantages. However, in fact they have a number of advantages:
- ease of use;
- repeated use;
- durability;
- versatility.
Homemade designs also have their drawbacks. The main disadvantage is that they are not easy to make. Therefore, to avoid problems, you need to figure out in advance how to make guides for a circular saw with your own hands.
Tenoning device
A tenon-cutting device for a circular saw increases the efficiency and accuracy of the production of tenon and groove joints. They are involved in the assembly of various carpentry products: furniture, doors, frames, frames, etc.
Thanks to this device:
- The workpieces are positioned without distortion.
- Operations are repeated scrupulously.
- The final result is of high quality.
You can purchase such a device or make it yourself. Experts recommend the first option. This is a full guarantee of achieving excellent results.
The following models are often purchased: Felisatti FTJ and Festool VS 600 GE.
This is a reliable and proven technique.
Sharpening question
The circular saw needs to be sharpened when the following symptoms appear:
- It becomes harder to work with her.
- It leaves black marks on the material.
- There is a nasty smell and smoke.
Ideally, it should be sharpened on a professional machine. If you don't have one, you'll need a tool for sharpening circular saws.
Required set for work:
- Vise.
- File with flat functional side.
- Beam.
You should work with gloves.
Sharpening stages:
- Rigid fixation of the disc. It is removed from the saw and secured in a vice. In this case, wooden dies are used. You can leave it in the saw, but stick a block between its teeth. The block rests on some surface.
- The initial tooth is marked.
- The back of the tooth is processed with a file. They need to swipe it several times. The effort is small. Each tooth is sharpened in turn. The movements are uniform, the number of strokes with the file is the same.
- The front parts of the teeth are processed. The principle is the same.
The tips of the teeth should be perpendicular to the surface of the disc.
All teeth are then inspected for defects. The edges should not be shiny. If so, they are smoothly filed with a file.
After this, the disk is checked in action. It fits into the saw. It turns on. A test block is used. If the saw is light, smooth and quiet, then the sharpening is of high quality.
Otherwise, you need to check the height of the teeth. To align them, you need to bring the marker to the working edge. Then the disk must go through the entire revolution in the other direction from the rotation. A mark remains on all teeth. You can use it to adjust their height. The highest teeth are carefully processed with a file.
How to adjust correctly
Before you start working, you need to properly adjust the structure. You will have to independently choose the optimal location and point for further fixation.
It is necessary to position the device so that its edge lies flat against the cut line and without distortion. After this, you need to adjust the placement of the saw blade. It must be torn off from the casing and aligned perpendicularly to the cutting line.
When the disk and guides are adjusted, the structure is fixed with clamps. This is done to minimize vibrations that may occur while the saw is running.
Important! To cut wood at an angle of 45 degrees, you will need to adjust the saw blade or adjust the angle on the bar itself. This must be done very carefully to avoid mistakes when adjusting the tilt.