How to make homemade accessories for a circular saw?
Materials and tools you will need:
- Textolite or plywood.
- Screws with countersunk heads.
- Support bars.
- Clamps.
- Double-sided tape.
- Hardboard.
- Silicone spray.
- Aluminum corners.
- Paraffin.
- Fiberboard.
Making a guide
A plywood sheet that has factory edges that are even in length can be used to make a guide bar. To do this, you need to cut a strip from the sheet with a width equal to the maximum possible width of the circular saw. You need to add 20 cm to the resulting value. The length of this sheet should be slightly greater than the maximum length of the material.
First of all, you need to retreat 6-7 cm from the factory edge on the prepared piece of plywood and cut off the strip. This strip will be the ruler along which the bed of a saw of this type will move. The part of the cut sheet of plywood that remains will serve as the base on which the ruler will be fixed. The saw moves along the ruler during the cutting process.
It is important to ensure that the height of the ruler is equal to the thickness of the saw bed.
Circular saw assembly diagram.
Next you will need to install the ruler on the base. It is fixed at a distance of 10 cm from the edge. The distance may be smaller, but it should be sufficient to use clamps.
The factory edge must be directed in the direction where cutting will be done. The guide is glued to the base and additionally secured with screws.
Finally, you need to remove the excess part of the base. This can be done by using a circular saw. The finished edge on the base will be the same length as the edge of the plywood sheet on the ruler.
This guide is very easy to work with. The base with a ruler is fixed on a workpiece, for example, on chipboard. You can secure using several options. In the first method, the part of the sheet to be cut will be located on the side of the saw blade, in the second method - under the base on which the guide ruler is fixed.
Along the length of the sheet, 2 marks are made on the side that corresponds to the specified cutting methods, at the distance where the cut is located. The distance between marks should be maximum. In this case, it is important to take into account the thickness of the disk. The base of the ruler is installed using two marks and secured with clamps. The depth of the clamp jaws should ensure their installation so that at the end of the cut the saw can freely extend beyond the sheet.
If the guide ruler is long, then making a transverse cut is not very convenient. Therefore, it is advisable to make a structure that will have a shorter length. For example, for cabinets that are 60 cm wide, you will need to make a guide 1 m long.
Such devices are only suitable for working with materials that have a large width and length. It is impossible to cut the board into even beams of this design.
Designs for a circular saw that will help you make precise cuts
If a saw blade of this type leaves torn fibers and chips on the edges of the cut, then you can try to make a structure to obtain a zero gap. You will need to cut a piece of hardboard that is 6 mm thick. Next, you need to remove the disk, lift the protective casing and glue the cut piece to the base. This can be done by using double-sided tape. Next, the saw is turned on and the disc is slowly immersed in hardboard so that it is possible to obtain a cut with zero clearance.
On the resulting base it will be necessary to saw with a small feed.
You can also make a special template. If you make a template, you can make precise cuts anywhere. The design is intended for boards 15 cm wide, but it is not difficult to adjust the device to any size or angle.
https://youtu.be/7sWCaSTCox8
The structure is made with a small allowance, after which the saw is pressed against the stop and the edge of the base is removed to the final length. The distant edge of the structure determines the line along which a saw of this type will make a cut. A mark is placed on the board in the place where it needs to be sawed off. Next, you need to press the lower stop of the product against the edge of the material and align the edge of the base with the cut mark. By passing the tool through the structure, it will be possible to cut boards with high precision.
Device for cutting beams
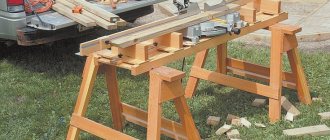
To cut a large number of identical beams, it makes sense to make a device called a saddle. It consists of three parts connected in the form of the letter “P” (back and two sides). The width of the backrest should correspond to the width of the timber being cut. The width of the sidewalls is selected to such a length that they can provide sufficient support for the edge of the circular saw sole until the saw blade enters the workpiece material. It is also necessary to provide grooves or holes in the sidewalls for reliable fastening of the device to the timber being processed using clamps.
Workbench assembly diagram.
Work with this device is carried out as follows:
- the cutting line is marked;
- at a distance equal to the working distance from the cutting line, the device is set and fixed;
- The beam is cut by moving a circular saw along the side surface of the device.
The advantage of this device is that there is no need to reconfigure when cutting timber whose thickness exceeds the reach of the saw blade. To do this, two saw passes are made from opposite sides.
The design of the device for working with bars can be slightly improved by analogy with the modernized guide bar. To do this, bars are attached to one or both sidewalls at a distance equal to the working distance, serving as a stop for the sole of the circular. This way, the edge of the side piece will coincide with the required cutting line.
How to make a simple guide and cutting device with your own hands?
Diagram of the bearing assembly of a circular saw.
It makes sense to make a simple guide. In order to make cuts using a portable circular saw, you can purchase an expensive guide at a hardware store or make several homemade products in a workshop if you need to cut a large number of sheets. However, you should know that there is a simpler solution - to make a device from scraps that are not used.
In order to make a saw guide with your own hands, you need to select the factory edge of a strip of plywood or durable fiberboard 25-30 cm wide. The strip is fixed along the cutting line so that the base of the tool moves along the smooth edge. If a foam backing is used to protect the saw blade, then you need to make cutouts in it for the jaws of the clamps.
You can also make a cutting device for a similar type of saw. A clean and even cross cut can be quite difficult to make using a circular saw in some cases. It is almost impossible to drive the tool perfectly straight, and pieces of materials most often fly off, leaving behind chips and uneven edges. Therefore, it makes sense to try to make a crosscut structure from several pieces of wood and an aluminum angle.
You need to assemble the base, for which to the upper side of a piece of wooden board or plywood measuring 1.8x30x122 cm, glue and tighten with screws several parallel strips measuring 2.5x5 cm. Using countersunk screws, you need to attach aluminum corners to the strips at an angle of 90° . You need to fasten it at a distance that is equal to the width of the base of a similar type of saw. The slab will need to be adjusted so that it can cut through all the planks and make a shallow cut in the base.
The device is secured with clamps on the workbench, the workpiece is inserted under the aluminum guides and a cut is made. It may be that the saw will not slide well along the guides. To solve this problem, you will need to use silicone spray or paraffin.
Materials and tools
Diagram of a homemade workbench (side view).
The material from which the tools for the circular saw are made can be selected from scraps of thick (at least 10 mm) plywood or hard wood (for example, birch) available on hand.
Tools you will need:
- carpenter's square for measuring and marking workpieces;
- electric jigsaw or hand-held circular saw (for cutting workpieces);
- drill (drilling mounting holes for fasteners);
- a screwdriver or screwdriver with a set of bits for installing fasteners.
The process of manufacturing accessories for a circular saw consists of several stages:
- a sketch is developed and details are thought out;
- material is selected;
- marking and cutting of material is carried out;
- assembly and, if necessary, adjustment of devices.
How to make a template for a guide with your own hands?
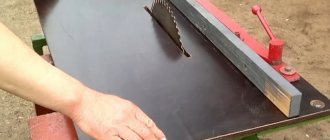
A guide bar for a circular saw - it can be made from available materials by yourself by filing a flat sheet of chipboard.
When you need to make long cuts with a saw like this, you will need to spend quite a lot of time making all the measurements necessary to set the guide in relation to the marking line in exact accordance with the width of the base of the structure.
In order to simplify this procedure, you need to cut out a template from fiberboard, which is equal in width to the distance from the extreme part of the base of the tool to the inner edge of the saw blade. Next, the template is cut to the length of the base of the tool. In order to use the template, you need to align its edge with the cut mark in the product, and attach a straight guide to the other side and secure it with a clamp.
Next, you need to repeat this procedure on the second cut mark from the other edge of the workpiece that is being cut. Such templates can be made for a circular saw or an electric jigsaw.
Breakout protection: device nuances
Diagram of a homemade workbench (top view).
The simplest devices can also include a block fixed at the point where the saw blade exits the workpiece. This will avoid such unpleasant effects as chips and tears. And if these defects do not play a role on the cut boards that will be used to make the frame of a house or formwork, then during carpentry work the cut must be smooth and clean.
To make more complex universal devices, you will already need tools and a certain amount of materials. The time spent on their production will subsequently be more than repaid by the ease of completion of the work, accuracy and ultimately saving the same time.
Other types
If for some reason the plywood rail does not meet your requirements, you can make the guide of a more complex design. Below are a few more examples of guides for a manual circular saw that anyone can make with their own hands.
Aluminum profile tire
This type of tire differs from a simple plywood tire in that a U-shaped aluminum profile is installed in the guide gap. Its advantage is that the rigidity of aluminum slightly increases the cutting accuracy.
For better sliding of the saw along the bar, as limiters, you can attach not thick plywood to the guide groove of the sole, but a pair of cylinders of suitable height made of fluoroplastic or other material with a low coefficient of friction.
Ruler from a building code
There are long aluminum rules that are used by finishers to level walls. To make a guide ruler with your own hands, rules are suitable, the design of which provides a groove for the free movement of the handles.
The main advantage of such a line is the absence of elements protruding above the surface of the workbench. To do this, you need to take two collapsible clamps and slightly modernize them.
The handles are removed from the rule, and their upper parts from the clamps, which are replaced with polypropylene or fluoroplastic inserts. The profile of these inserts must be T-shaped so that they can be installed with the wide part into the rule groove and be held there.
The result is a ruler that is attached to the workbench only at the bottom. This will allow you to move the saw freely in the work area without fear of getting caught on something.
However, such a tool cannot be called a full-fledged tire. This is the ruler that needs to be adjusted before each cut.
Rail miter box
This device is most often used for cross cutting (trimming) of material.
Usually it consists of two parallel metal corners, the ends of which are rigidly fixed to a plywood or metal base.
The saw platform moves freely along the corners, as if on rails.
The corners are secured with bolts or studs, which are also used to adjust the height of the “rails” relative to the base. The height should be such that the material to be cut fits freely under the corners.
To make the saw movement smoother, the corners on the inside can be glued with a material with a high slip coefficient. For even smoother movement, you can install the saw sole on a platform with metal wheels.
External carriage on bearings
A circular saw on an external carriage is more like a stationary format-cutting machine. This design is highly stable and, accordingly, provides high cutting accuracy.
The remote carriage is made of a metal I-beam, which is firmly attached with its lower plane to the workbench. The carriage itself moves along the upper plane - a platform, the lower edges of which are bent inside the I-beam and are equipped with bearings that allow it to slide freely. These same bearings, tightly pressed to the I-beam axis, eliminate lateral play of the carriage.
