Installing a post lift - where to start?
The main task that awaits the owner even before the actual purchase is to determine the optimal location. It is determined based on several factors - the dimensions of the mechanism itself, the required working area (depending on the specifics of the enterprise - for example, more space will be required for trucks and less for cars), as well as the area of the building itself and the availability of free space, not cluttered with anything else. , places.
At the same time, it is important to remember the safety rules, which are specified in detail in the addendum to the technical documentation of the product. For example, installation is allowed only on a flat, stable area, at a distance of at least one meter from walls and other objects. It is not recommended to install the lift under open areas without a canopy, since atmospheric and climatic phenomena can negatively affect its operation.
Thus, the width of the platform on which it is planned to install the lift should be approximately equal to the sum of the distance between its racks and the minimum permissible distance to the wall/walls. The length depends solely on the cars that are planned to be worked with at this enterprise. The standard option – 8-10 meters – is optimal for any passenger cars and many trucks; however, there are no average values in this matter - each decision is unique and depends on certain circumstances.
Site selection, design
When choosing a location, we take measurements, take into account the specifics of the object and the wishes of the customer. We plan placement taking into account the dimensions of the structure and the vehicles being serviced, the distance from the walls to the lift, ceiling height, type of equipment and other factors.
Result:
- free access to the car lift;
- convenient and safe conditions for repairs and maintenance;
- eliminating the possibility of damage to vehicles;
- access to power supplies;
- ergonomic use of space.
Which foundation to choose?
It is important to remember that all these measurements will be useless if you do not first take care of the foundation strength necessary for this very installation. The primary requirements for it are, of course, external integrity, density, the absence of any irregularities or differences, etc.
It is recommended to take this issue as seriously as possible - after all, even if installing a lift on a crooked or cracked foundation is successful, there is no guarantee that everything will not go awry when lifting the first load. So negligence and neglect are almost guaranteed to lead not to additional savings, but, on the contrary, to even greater expenses:
- it is not difficult to avoid this. So, for example, when installing a two-post lift with lower synchronization (in particular, installing a T4 and T4B lift), the optimal foundation thickness is approximately 15-20 cm (or more for working with the largest equipment). The required density is provided by concrete solution M300 and higher;
Foundation for the lift
- however, for devices with top synchronization (S4D, S4D-2), as well as lifts consisting of several individual racks, these measures will be insufficient. In particular, the minimum thickness of the foundation for such mechanisms should be at least 30-35 cm, and the minimum acceptable grade of concrete should be M400. Also, in some cases, it is recommended to additionally strengthen the foundation using metal mounting beams and other reinforcing elements, the required list of which is indicated in the appendix to the technical documentation.
It is prohibited to install lifts (as well as other massive structures) on a recently poured foundation. The optimal time required for compaction and hardening of concrete is about 30 days. To further strengthen and seal microscopic (and other) holes on its surfaces, polymer and paint coatings, silicone, rubber and ceramic tiles are used, which also contribute to less friction and abrasive wear of the floor.
How to make a foundation for a lift?
Correct installation of the lift is one of the main (if not the main) elements contributing to the normal operation of the lifting device, especially if you plan to lift heavy and large loads - for example, cars and building structures.
Foundation for the lift
Compliance with all technological norms and rules almost 100% guarantees the safety of lifting operations, eliminates the possibility of cracks and shifts in the structure, prevents abrasive wear and reduces the likelihood of cracks even under severe impact impacts. Let's look at a few of these rules.
How to properly make a foundation for a lift?
Boris Damchuk
First of all, it is necessary to calculate the required length, width, and most importantly, the depth of the foundation, based on the characteristics of the purchased device, as well as the specific features of the work that will be carried out with his participation.
Next, a pit is dug and the bottom is leveled to accommodate the reinforcing mesh. The presence of any objects, building structural elements, pieces of reinforcement, etc. is not allowed inside the pit.
When the bottom is finally leveled, a dense layer of clay is laid over its entire area (wood shavings, sand and crushed stone can be used for additional compaction). This is done in order to ensure tighter fastening of the reinforcing mesh and to eliminate any shifts that could contribute to compromising the integrity of the entire foundation structure.
Making a foundation for a lift
After the clay has dried, the reinforcing mesh is laid; the area and size of the cells are determined by the dimensions and weight of the lift (taking into account the average value of the planned load). Next, the bottom and walls of the pit are filled with pre-prepared concrete mortar.
A standard foundation for a lift can be made of concrete of a grade not lower than M300 (for the heaviest structures - not lower than M400). The solution may also contain additional sealing additives, as well as chemical solutions that increase its resistance to various influences. The average foundation thickness is about 20 cm; for heavy lifts - about 35 cm.
We recommend purchasing More on the topic: What is an electric lifting table?
Final work
After carrying out the above work and complete hardening of the concrete solution (this process can take 4-5 weeks), the turn of external work begins, the importance of which should in no case be underestimated. First of all, the surface of the concrete layer is thoroughly cleaned using a grinding machine, all irregularities and protrusions are removed, after which it is passed over it several times with a construction vacuum cleaner.
Final work with the foundation
Next, if desired, although neglecting this is not recommended, a protective coating is applied to the foundation, which will help prevent damage and reduce the degree of abrasive wear, thereby increasing its useful life. The cheapest option is construction paints with a sealing structure; the most expensive are polymer and rubber coatings. The foundation can also be covered with tiles.
Installation of the lift. Pouring the concrete base.
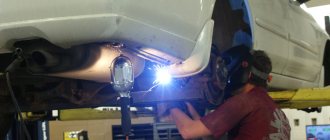
How to safely lift a car?
To service the chassis, body parts and transmission of the car, you need to lift it above the ground or be under the car, placing it on an inspection hole. But it is better to lift the car on a lift and secure it in this position using screw safety supports.
It would seem that everything is simple, but safety precautions when working with a car lift contain many important details. The most important thing is to know how to place the lift supports under the car, otherwise there will be no safe repair. Any service manual for a car or small truck will indicate where special points are located on the body for connecting the lift support pads.
On a relatively new car, the driver's door is equipped with a special sticker with places marked on it where it is recommended to place the lift's support platform at a service station or in a garage. Typically these points comply with SAE - Society of Automotive Engineers JRP-1284. This is the American Society of Automotive Engineers.
Here's how to properly lift a car based on the US standards mentioned:
Simple lift
For several decades now, the most common and durable method of lifting a car has been turning it on its side.
In fact, it is not only the engine that needs repair from time to time, but also other components that can only be reached using a test pit. But not everyone has such a pit, and folk craftsmen have constructed an elementary, if not primitive, system. At least 3 people are required for this lift. This method can hardly be considered ideal, because not a single person wants to tempt fate by scratching a car on a concrete flooring.
However, if there is no other way out, then such a lift can help you out. His system is as simple as possible, and the production method is clear even from photographs.
An alternative to a lift can be an inspection hole (of course, if the garage system makes it possible to dig it). If you make a hole as tall as you are, you can easily examine the bottom of the car. If it is not possible to properly equip the inspection hole, then you can limit yourself to an overpass (but it will require the presence of quite significant ceilings in the room).
Instructions:
- 1. For the base, embed metal corners into the side walls of the room so that the car hood is located just under them. Next, install a centimeter plate on the corner racks and secure it with eight “M8” bolts. It will not merge with the corners, so in the future you will be able to change its placement above the car engine.
- Fix the worm adjuster on the plate. Next, take the key, put it on the electric drive shaft, and secure it. Then make a 2 cm opening in the tile for the chain, then pass the chain through the finished hole and close it into a ring.
- Place another sprocket on the outgoing shaft, smaller this time, and combine them.
- Make 2 more holes of 3 cm in the slab, pass the chain over the key. The 2nd chain must end with a metal hook capable of supporting the weight of the motor.
Installing a lift in the garage with your own hands: dimensions and installation with video
The two-post lift is a popular design for auto repair shops.
The devices are repairable, easy to operate, suitable for diagnostics, maintenance, and tire fitting work on various types of transport (from cars to trucks).
Lifting devices are divided into mobile and stationary. Models differ in lifting height and speed, engine power, types of drives (mechanical, electro-hydraulic), etc.
The best place to place a lift
Before installing a car lift, you need to correctly select the installation location. The equipment must be installed on a concrete surface, the thickness of which is in the range of 25-40 centimeters.
The surface on which the equipment is mounted must not be uneven. This does not apply to lifts with a frame base, which are installed even on uneven floors.
In addition, when choosing a place, keep in mind that when servicing and repairing a machine on a car lift, it should not touch the ceiling surface when fully raised.
All-terrain vehicle GAZ-34039 Irbis (modification - residential module)
When choosing equipment for a garage space, you must consider the following characteristics:
- Maximum permissible weight. A lift designed for a passenger car will not be able to lift a minibus.
- Vehicle lifting speed.
- Dimensions, weight, configuration. Here, take into account the parameters of the garage space.
Varieties
The design of the lifts consists of 2 racks with brackets. Depending on the materials from which the parts are made, the models are designed to lift weights from 2.5 to 6.5 tons. The machines are lifted by jacking platforms.
Two-post lifts for car service differ in the type of synchronization of the posts and are:
Systems are divided into models:
- electrohydraulic type;
- electromechanical.
The devices differ in symmetrical and asymmetrical arrangement of supports. Racks placed symmetrically are more stable and can support heavy vehicles. With an asymmetrical arrangement, the pillars are rotated at a slight angle; the design allows the car doors to be opened during repair work. However, the maximum weight of the machines is up to 3 tons.
With bottom sync
The car lift with lower synchronization is designed for the repair of passenger cars, off-road vehicles, and compact trucks. The design is supplemented with locking mechanisms that prevent the vehicle from falling during repairs.
The lower type of synchronization makes it easy to repair the front door leaves of the car due to the wide opening between the supports. The technical device is fixed with a locking ruler and a latch; the elements help prevent arbitrary rotation of the machine.
The lift can be lowered without electricity. However, it is necessary to take into account the presence of a small threshold between the racks at a slight elevation from the floor covering. The part makes it difficult to remove and install parts.
With top sync
Lifts with top synchronization allow you to perform complex repairs; the car is fixed horizontally above the floor. For safe use when lifting equipment, a sensor is activated that turns off the electric drive when the vehicle reaches the maximum possible level. According to the standards, the upper lintel of the structure is located at a level of no more than 4 m.
The two-post lift with top synchronization provides independent locking of safety locks. It is possible to lower the machine without supplying electric current.
The standard lifting capacity of a two-post lift is 4 tons (models that can withstand up to 5 tons are allowed), the electrical power supply of the system is provided from 220 to 380 V.
The columns are located at a width of more than 2.7 m.
Electrohydraulic
The two-post electro-hydraulic lift has lower energy consumption (compared to mechanical lift). When the electrical power source is turned off, it is still possible to lower the machine from the lift.
Gearbox KPP-152 with divider for KamAZ
The device operates silently, smoothly, and has high speed parameters for lowering and raising the vehicle. The service life of the system is more than 7 years. The device is characterized by low maintenance costs and safe operation.
The dimensions of a two-post lift with an electro-hydraulic drive suggest a lifting height of 1.9 to 2.2 m, the periods of ascent and descent are 31-54 seconds. Models have pick-up heights of 80-133 mm.
Two-post electrohydraulic lifts are divided into models:
- without frame;
- with floor frame.
Models without a floor frame are equipped with a top crossbar, which reduces the load on the supports. The lifts are attached to the base with anchors.
Installing the upper beam allows you to equip the upper part of the car lift with devices for synchronization and hydraulics.
In the absence of a frame on the floor, the vehicle is secured as low as possible during repair work. The device is optimal for cars with low ground clearance.
In frame structures, the car lift supports are attached to the floor frame, this reduces the requirements for the foundation.
The advantage of the model is its low height, which allows the structure to be placed in workshops with low ceilings.
Lifting devices with a floor frame with a permitted machine weight of up to 4 tons can be asymmetrical in design. A slight rotation of the supports allows you to swing open the vehicle doors when repairing the body.
The difference in the height of the front and rear mounts of models with an electro-hydraulic drive allows you to harmoniously distribute the load on the supports when picking up the machine.
The device is distinguished by its large height (up to 4 m), which allows you to change the length of the carriage and move it inside the stand of the auto-lifting device.
The blocking system in hydraulic two-post lifts is combined (automatic and electronic).
Mechanical elements and devices make it possible to stop the movement of supports in the event of malfunctions in the hydraulic system or violations of the synchronization of parts.
The permissible lifting height of the vehicle is limited by a special sensor that turns off the drive when the traumatic level is reached.
A hydraulically driven car lift differs in the number of active cylinders (1-2).
In devices with 1 cylinder, the drive to the 2nd carriage is performed by a chain or cable. The most reliable in operation is a metal chain, which does not require additional maintenance. The synchronization of the movement of the carriages is carried out as accurately as possible.
When the structure is equipped with 2 active cylinders, the synchronization of the carriages is performed with cables. A large working load on the cables is not required; they help stabilize the movement of the carriages.
Electromechanical
The advantages of a two-post electromechanical lift are its affordable cost, ergonomics, and simple design solution. The average time spent lowering and raising a vehicle is from 40 to 50 seconds. The machine is picked up at a level of 85-190 mm.
The system is secured with a screw and nut. For long-term operation of the structure, material for fittings that corresponds to the loads is required. Nuts made of durable polymers and metal are common.
Operational safety is controlled using a special safety nut. The element is mounted with a small gap and does not carry loads during standard operation.
However, experts recommend checking the gap dimensions regularly (every operating day). A decrease in the distance between the safety nut indicates failure of the main nut.
In this case, the load of the structure moves to the safety element. It is necessary to stop operating the mechanism and replace the main nut.
An electromechanical two-post lift requires regular synchronization of supports, which is performed using:
- chains;
- cables;
- electronic sensor.
Synchronization using metal chains is a reliable and safe method. The screw elements are connected by a chain. The links help to equalize the rotation speed of the screw mechanisms; the working loads do not fall on the chain.
Synchronizing supports with cables is a popular and budget-friendly method. Uniform movement of the carriages is ensured using limit switch blocks connected by synchronizing cables.
Electronic synchronization is an advanced method. The speed of movement of the screw elements is set by electronic sensors. When the speed increases, the engine switches off automatically. After adjusting and synchronizing the speed of movement of the carriages, the system restores operation.
Optimal dimensions and height
Not every garage will be able to install a car lift. For example, if you are the owner of a minibus, which almost touches the ceiling when entering the garage, there is no question of any single/two-post lift. The garage space must have appropriate dimensions.
Next, you can familiarize yourself with the minimum garage dimensions required for a certain type of car. Add to the height of the garage the value of the height to which you plan to raise the car. This way you will determine what minimum height the garage ceiling must have to install a car lift.
For passenger cars
The length of the garage should be three meters greater than the length of the car, and the width should be the same. The optimal height is three meters.
For jeep
The length, width, and height of the garage space for a jeep or other SUV should be eight, five, three meters, respectively.
For minibus
If you own a minibus, the garage should be large. The optimal length is seven and a half meters, width is five meters. The minimum garage height for a minibus is three and a half meters.
If you have a Gazelle cargo truck with an extended platform, the length of the garage space should be ten meters. The minimum height here increases to four meters.
The lift assembly process must be carried out in accordance with established rules
Having prepared the base for the lift, installation work begins. Before installation, markings are carried out, places for anchors are marked, which are then drilled. Next, the holes are cleaned and the lift struts are installed, which are secured with anchor bolts. Next, the process of further assembly of the equipment is carried out according to the instructions.
The final stage of installation is the process of connecting the equipment to the electrical network and its further testing, and the lift should initially be checked without load. After making sure that the lift is working without failures, you can begin servicing the car.
Step-by-step installation of a lift with your own hands
Having chosen the right car lift, you do not get a guarantee that it will work properly. For comfortable operation, the device must be installed. The main condition for successful installation is the high reliability of the garage foundation.
Installation of a solid base
The area of the garage in which the car lift will be installed using fastenings must have a thickness of concrete material of at least ten centimeters.
In addition, when pouring concrete, the layer of material is additionally reinforced. Without reinforcement, the foundation may be pushed through.
In such a situation, it will be necessary to dismantle the car lift and re-fill the foundation.
Calculation of the minimum height of paw lowering
When installing the lift, you need to determine the minimum height for lowering the legs. The plane below should be level. The minimum height to which the arms of the equipment can be lowered depends on the specific model of the device.
However, there is a standard: the maximum height is 11 centimeters, the minimum is 9.5.
Assembly of the structure
The equipment must be positioned according to the length of the machine. On average, the bumper of all cars protrudes about two meters from the center of the lift holders.
At the next stage of installing the car lift, it is necessary to install its frame and fix it. Next, the solution is poured. Before pouring, you need to check whether the frame is symmetrical. After the solution has hardened, you need to tighten the bolted connections. This will allow the frame to be securely fastened.
The bolts are installed in the grooves of the risers. The minimum length of bolts is 22 centimeters. After tightening the bolts, tighten the nuts. Attaching the stands to the frame is carried out in accordance with the instructions supplied with the equipment.
Preliminary height adjustment is necessary for screw car lifts. If the lift operates hydraulically, the cable must be pulled. Then all the chains are installed, and the quality of tightening of bolted connections on the frame floors is checked.
If, when tightening bolted connections, the frame is displaced and the symmetry of the racks is disturbed, metal plates are placed under them. Metal plates are usually supplied with the car lift.
Electrical connection
After assembling the structure, electrical cables are connected and emergency switches are installed. To do this, it is advisable to call an experienced electrician who will carry out the procedures according to the wiring diagram. If you know how to build electrical circuits, you can do it all yourself. Whether the lift drives will work properly depends on how correctly the electrics are connected.
Lift operating rules
To make a lift yourself, you need to put in a lot of effort. But in order for this unit to work more efficiently, it is necessary to follow all the rules for its operation:
- Before using the lift, be sure to remove the bolts that hold the engine and vehicle frame together.
- A loop of steel cable is placed under the engine. A lift hook is placed on its end.
- Search the circuit.
- Over time, the movement will transfer to the drive shaft, which will transmit force to the cargo, which will lead to tension in the cables.
- The power unit is lifted slowly and carefully to avoid damage.
- After removing the engine using a lift, it is necessary to stop its operation. The load will now be held by the gearbox.
- The vehicle can be moved away and a sturdy table can be installed in its place to support the load from the engine.
The best place to place a lift
Before installing a car lift, you need to correctly select the installation location. The equipment must be installed on a concrete surface, the thickness of which is in the range of 25-40 centimeters.
The surface on which the equipment is mounted must not be uneven. This does not apply to lifts with a frame base, which are installed even on uneven floors.
In addition, when choosing a place, keep in mind that when servicing and repairing a machine on a car lift, it should not touch the ceiling surface when fully raised.
When choosing equipment for a garage space, you must consider the following characteristics:
- Maximum permissible weight. A lift designed for a passenger car will not be able to lift a minibus.
- Vehicle lifting speed.
- Dimensions, weight, configuration. Here, take into account the parameters of the garage space.
DIY garage lift
For use in the garage, it is possible to make a kit for lifting a car with your own hands. You will need the necessary components, tools and plumbing skills.
A homemade lift is made using the following parts:
- Steel corners measuring 8x8x1 cm, for making a stable structure.
- Worm type gearbox. A new product can be expensive; it is usually selected during disassembly or removed from a non-working mechanism. It is necessary to pay attention to the load capacity, the indicator starts from 350 kg, the transmission force indicator is 60 kg.
- A steel plate with a minimum thickness of 1 cm is removed from old equipment.
- Set of bolts, mounting hook, star-shaped keys.
- Several iron chains with a link diameter of 2 cm or more. Weak chains will not withstand the load, you should pay attention to the quality of the product, some materials can stretch during operation.
- Steel cable, 5 mm thick.
Reliability and safety
In addition to cost, there are two more factors that cast doubt on the feasibility of making a lifting mechanism for a car with your own hands - reliability and safety. The weight of even a small car often exceeds one ton.
A car may fall off a lift for the following reasons:
- the weight of the machine turned out to be more than the drive or actuator can support;
- the locking device turned out to be of incorrect design;
- the locking device could not withstand the load;
- The lift supports are insufficient or incorrectly secured.
To make a lift with your own hands, you have to either take a ready-made diagram, hoping that its author has carefully calculated the strength of all the parts, or carry out these calculations yourself. Only a highly qualified engineer can do this kind of work; an ordinary car enthusiast cannot do it. In addition, it is necessary to calculate how much load the drive and brake mechanism can withstand. If any of these calculations are made incorrectly, the car lift turns into a deadly trap. No less important is the calculation of the basis of this mechanism. It is not enough to simply pour a thick layer of concrete, because it is necessary to provide fastenings located in strictly defined places.
Read also: Voltage stabilizer 220V photo
Search for parts
If you nevertheless decide to build a car lift with your own hands, and you are not afraid of the dangers of this homemade product, then start selecting parts by searching for the drive mechanism and stopper. These parts can be found in the following places:
- stores selling components for special equipment;
- enterprises that have old construction equipment on their balance sheet;
- enterprises that are updating their fleet of woodworking or metalworking machines;
- collection points for ferrous and non-ferrous metals.
For a scissor lift, you will need two hydraulic cylinders of suitable power and length, a compressor for them, and hydraulic hoses. The scissor circuit is the easiest to manufacture, but it is impossible to make a reliable brake in it. Therefore, if a hose bursts or one of the cylinders leaks, trouble cannot be avoided. Shafts and electric motors with gearboxes suitable for platform or fork lifts are easiest to find where old machines are replaced with new ones. This will cost much less than ordering worms from a turner. And the stopper of such mechanisms is not complicated - a helical bar with a lock, made of steel 1-2 cm thick.
Conclusion
If you still decide to take a risk and make a car lift with your own hands, then before choosing any scheme and starting assembly, find those who have already made such a device. See how it works, make sure it is safe. After all, you are not risking your car, but your life. If, when the car falls, one of your family members is under it with you, then you will put his life at risk.
To service a car in a service station, a bunch of special equipment is used, from cheap to very expensive, completely inaccessible to a private technician or simply a vehicle owner who is used to servicing the car with his own hands. There are very highly specialized devices that can be useful to a private owner once or twice a year. And there are those without whom any repair or prevention is simply impossible. Car lifts are just that case.
Simple lift option for turning over
For many years, car enthusiasts have been using a simple lift that turns the car on its side. This design allows you to perform many technical works. The use of a pit is not at all necessary to carry out repair work. You can design a primitive device for turning over a car.
Simple instructions for making:
- The axis is formed using a crowbar, a pry bar or a strong stick.
- The part is mounted in the ground.
- A pipe is attached to the axis, which will function as a drum.
- A cable is attached to a section of the pipe, and a lever is inserted under it.
- The opposite part of the cable is attached to the vehicle.
A minimum of three people are required to operate such a lift. The mechanism is far from perfect, but it can help out if it is necessary to carry out repair work under the car body.
Having considered possible design options for homemade lifts for a private garage, the car enthusiast decides to create such a device. Having the necessary knowledge, skills and materials, you can independently make simple, rack-and-pinion or worm-type lift-tilters.
Various lifting devices are actively used during car repairs, and it will be possible to save money on auto repair shop services.
Share in the comments what type of car lift is installed in your garage.
Strengthening the structure
Pipes of smaller diameter, which are located across the jack, are reinforced on all sides with metal plates. A thick plate is installed on top of a large pipe welded to the jack, and metal corners are installed below.
The structure is welded and ground with a grinder. To learn welding skills on your own, it is recommended that you familiarize yourself with the information in the useful DIY workshop
. Next, the stands are made.
Required materials for stands:
- Thick metal washers;
- Nuts for 20;
- Bolts 20.
Important: Choosing wheels for a walk-behind tractor and replacing them yourself: how to install Zhiguli wheels, video
For the construction of lift stands for the inspection pit
the nuts are welded vertically to smaller pipes that run across the jack. Then the washers and bolts are fastened together.
Next, the resulting structure is screwed onto the nuts. Rubber cups are placed on top of the washers. This is a DIY pit lift
ready for use. Thanks to the jack used, the traverses are raised quite high.
It is necessary to treat the metal with a special anti-corrosion compound, due to which the structure will last longer. To give the lift for the inspection pit
aesthetic appearance, the structure can be painted. The ready-made traverse is easy to use, does not require significant effort in operation and provides good lifting of the car.
Making a tipper
To create a lift-tilter you need to know what parts it consists of:
- front pillar;
- shoe;
- area;
- top, bottom and rear beams;
- connection elements.
- steel sheets 4 mm thick;
- corners;
- bushings;
- fasteners;
- welding tool.
First comes the metal shoe. A metal rod should be welded to secure the jack. The shoe needs to move on the post, so you need to stick to the inside width. Four corners are needed to create the rear beam.
We create squares from the corners, and insert a 26*21 mm metal square rod 35-36 cm long into one of them. Next, sheet metal 3-4 mm thick is used to create a platform. The coverage of the site will be approximately 350*150 mm, and the sides are made in a curved shape.
After this, it is necessary to weld a strip in which holes will be drilled to secure the inserted board. The dimensions between the guides must be observed.
Sheet metal 3-4 mm thick is used to create the rear connecting unit. Two halves are formed from it. The front part is left open, and a jumper is welded to the bottom part. The stand must be made from four 32 mm corners with a length of 1540 mm, as well as four 36 mm corners of the same length.
We use the corners to create a square using welding seams. The length of the seams is 30-40 mm. When connecting the corners, you should step back 31 mm from the edge and drill a hole with a diameter of 26 mm in the lower part. After this, the metal rod is welded inside the entire structure.
Next, holes with a diameter of 13 mm are made. A hole is also required to fully secure the shoe and top beam. A square profile is formed from the corner sections and connected to the drilled square profile. Spacers with a diameter of 36 mm are installed in the profiles. The top beam should fit easily between the square profiles.
By contacting a specialist in this field, you can get a device created for individual dimensions. It makes sense to do this if knowledge and experience are not enough to independently manufacture and install the structure.
Fundamental task for the installation of the lift
To install your lift, you need to prepare a foundation.
There are 2 options for preparing the foundation:
- Filling a whole pillow.
- Pouring individual nickels under each lift post.
The option you choose depends on your gender.
Basic requirements for foundation preparation:
- The floor must be leveled so that the difference in level between any two points (within the installation area) does not exceed 2 mm.
- If nickels are poured under the racks, they should be at the same level horizontally, the size of the nickels is 1000x1000 mm.
- The grade of concrete used is not lower than M350.
- The minimum thickness of the reinforced part of the floor is 200 mm.
- The reinforcing mesh should be made of wire with a diameter of 4-6 mm, welded by electric welding. Cell size – 150 mm.
- Tolerances for the installation of columns are 2 mm, diagonally + 1 mm, along the length / width of the lift. The minimum height of the working area is 5000 mm.
- A 3-phase voltage of 380V, 4-wire cable (3 phases + grounding) must be supplied to the installation site of the control rack. Each core must have a cross-section of 2.5 mm2.
- Electrical requirements: 3 – 400 V 50 Hz. The power consumed by the lift is 2.2 kW.
Important: Leave space at the front and rear of the lift.
Optimal for a passenger car
Now let’s decide what size a garage for a passenger car should be so that you can not only park the car there, but also store spare parts, tools, a bicycle, fuel and lubricants and a spare set of tires. The length of such a building should be 3-3.5 m longer than the length of the car - this will be convenient for taking purchases out of the trunk, looking under the hood, and also a place for tires, a workbench and everything that does not fit on the balcony at home, will remain.
How wide is the garage? The optimal width of the garage should be the same 3 m greater than the width of the car, so that you can open the door comfortably without fear of scratching it. And there will be free space for shelves with things necessary for any motorist.
What height should the garage be? The optimal ceiling height in a garage is three meters; even a fairly tall passenger car can be safely driven under such a ceiling. In addition, such a height of comfort for a person allows you to arrange a mezzanine. If we recall the “Priora” from the previous example, then the optimal house for it will have a length of 7.35, a width of 5-6 and a height of three meters.
In addition, such a room is well suited “for the future”, since a larger car, even an SUV, can fit into it without any problems.
For jeep
By the way, about SUVs, because owners of private houses often prefer such cars - either due to status or out of dire necessity. What can you say about the size of a garage for a jeep? Here, as for a passenger car, you need to take into account the size of the equipment.
SUVs usually add significant length and height, which is why the room for them should be higher and larger. For example, let's take the ToyotaLandCruiserJ200, its length is 4.95 m, its width is 1.97 m, its height is 1.88 m. We take the numbers we know and add them, and as a result we get comfortable garage dimensions with a length-width-height of 8-5-3 meters.
It makes sense to make it 2-3 meters wider and a meter higher for greater comfort. If you are the owner of a particularly large jeep, for example, with a pike body, then the convenient length of the garage can increase to 10 meters.
Stage 3 “Equipment testing”
The next step is to test the mounted and connected car lift. We perform a series of descents and ascents. We check the smoothness and speed of movement. Let's see how the lift works; the installation is considered successful if no failures occur during the diagnostics. In this case, the equipment is considered ready for everyday loads and is put into operation.
The car lift installation service does not include floor preparation, delivery of the lifting device to the installation site and wet cleaning.
Safety and reliability
In addition to price, there are also factors that cast doubt on the independent production of a car lift - safety and reliability. Even a small car can weigh more than a ton. If the lift fails, the car will fall onto the person below. There are many such cases.
The lift may fail for the following reasons:
- The structural supports are poorly secured.
- The locking device broke because it was not designed correctly.
- The weight of the car turned out to be more than permissible, as a result the drive mechanism could not stand it.
To make a lift yourself, they usually take a ready-made design, hoping that its developer has correctly calculated the strength of the parts, or they make these calculations themselves. Such a project can only be completed by a qualified engineer, and an ordinary driver is not able to do it. Also, you need to calculate what load can be applied to the drive and brake mechanism.
If these calculations are not performed correctly, then such a lift becomes a lethal device
It is also important to correctly calculate the base of this structure. Here you need not only to pour the required layer of concrete, but also to make fastenings in specified places
Optimal dimensions and height
Not every garage will be able to install a car lift. For example, if you are the owner of a minibus, which almost touches the ceiling when entering the garage, there is no question of any single/two-post lift. The garage space must have appropriate dimensions.
Next, you can familiarize yourself with the minimum garage dimensions required for a certain type of car. Add to the height of the garage the value of the height to which you plan to raise the car. This way you will determine what minimum height the garage ceiling must have to install a car lift.
For passenger cars
The length of the garage should be three meters greater than the length of the car, and the width should be the same. The optimal height is three meters.
For jeep
The length, width, and height of the garage space for a jeep or other SUV should be eight, five, three meters, respectively.
For minibus
If you own a minibus, the garage should be large. The optimal length is seven and a half meters, width is five meters. The minimum garage height for a minibus is three and a half meters.
If you have a Gazelle cargo truck with an extended platform, the length of the garage space should be ten meters. The minimum height here increases to four meters.
Tips for choosing a garage lift
For an ordinary garage, the best option is to install a one- or two-post electromechanical lift, since such a unit is reliable and has a load capacity sufficient for repairing a passenger car. In addition, this type of equipment is compact (small room height is suitable and there are fewer requirements for the size of the garage box) and does not require special knowledge for maintenance. The small size of this equipment allows it to be installed even in small rooms with a ceiling height of 2 meters.
The lift assembly process must be carried out in accordance with established rules
Having prepared the base for the lift, installation work begins. Before installation, markings are carried out, places for anchors are marked, which are then drilled. Next, the holes are cleaned and the lift struts are installed, which are secured with anchor bolts. Next, the process of further assembly of the equipment is carried out according to the instructions.
The final stage of installation is the process of connecting the equipment to the electrical network and its further testing, and the lift should initially be checked without load. After making sure that the lift is working without failures, you can begin servicing the car.
Base installation
The installation of a lift in a car service center must be carried out by specialists of the appropriate qualification class who have knowledge of construction work and the rules for installing industrial equipment. All work should be planned in detail at the design stage. This will avoid unnecessary costs and prevent the risk of errors. First of all, it is worth remembering that the lift must ensure absolute safety at work, and only then think about the functional and operating parameters.
How to calculate lowering height
This is a mandatory operation that allows you to determine the lower point of lowering of the power paws. Specific modifications of the device have individual parameters. When choosing a lift, you should study the technical specifications in advance and consult with specialists in the field of lifting and transport mechanisms.
There is an unspoken standard: 11 centimeters is the nominal parameter, and 9.5 cm is the minimum.