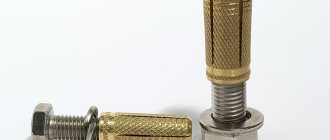
Mounting dowel-nails are used for fastening various materials to hard surfaces (concrete, brick, silicate). There are two types of mounting dowel nails:
- For the mounting gun
- galvanized, with a washer. No pre-drilling required. - For manual driving
- a set of dowels and nails. A dowel is inserted into the drilled hole, after which the supplied nail is driven into it.
Traditionally, builders call dowel-nails for a mounting gun simply dowels (or mounting dowels), and for manual driving - dowel-nails.
Drywall dowels
There are different types of dowels to secure structures:
- Fischer dowel;
- Molly;
- "butterfly";
- Spring;
- Driva plastic or metal dowel;
- Dowel nail;
- KNAUF Hartmut.
To make the right decision, you need to study the catalog of the best dowels:
Driva expansion dowel
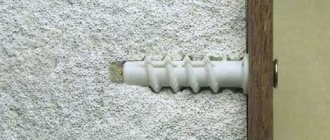
Can be made of metal or plastic. This is a hollow rod with a screw thread. It is used even with a small distance between the sheet and the wall.
It is better if the kit includes a drill, this will simplify installation:
- Use a screwdriver to screw it into the sheet. But in this case, the plastic shank may become deformed;
- It is better to prepare a hole with a 6-8 mm drill;
- A screw is screwed into the cross-shaped slot in the dowel head, which pushes the element apart from the inside and ensures reliable fastening.
Made of metal, they can be from 3.3 to 4.4 cm long, they carry a load of up to 32 kg. Made of plastic - 2.3 cm and holds up to 25 kg. They can be dismantled without breaking the sheet.
Flaws:
Selection of screws
Traditional fastening of shelves, cabinets, cornices, and decorative elements is done using self-tapping screws, which in their design have a head and a thread with sharp edges, which, when screwed, allows you to independently cut threads in the dowels into which they are screwed. They are selected according to the predicted load.
The material is steel - most often carbon, but stainless steel is also found, as well as brass. Carbon steel products have a protective coating. Self-tapping screws differ according to the thread pitch, which can be frequent, universal, rare. The first type is designed for working with iron surfaces. A rare step is suitable for wood, plastic and other soft materials. Universal varieties are used more often.
Dowel Molly
Most often it is made of galvanized steel. This protects the steel from rusting. Due to retractable metal strips, it can withstand one of the heaviest loads. To hang a lamp or chandelier, Molly is sold with a ring or hook. Supports weight up to 35 kg.
- Before installation, you need to make a hole in the sheet equal to the size of the sleeve;
- Drive the dowel closed;
- The screw does not need to be screwed in, it is pulled out with a special tool, and the metal petals open, like an umbrella, and the dowel is securely fixed in the hole.
Flaws:
- Molly cannot be installed if there is a small gap between the wall and the drywall;
- It is unlikely that you will want to buy a special tool to install one or two lamps;
- You can use pliers, but to do this you need to have the skill to carefully pull out the screw;
- The cost is significantly higher than that of plastic dowels.
Butterfly dowel for drywall
The most common method of fastening light structures up to 20 kg. It is similar in design to Molly, but cheaper. Diameter can be 1; 0.8 and 0.4 cm. Length - from 1.2 to 26 cm. “Butterfly” is used when there is enough empty space behind the gypsum board, at least 3.5 cm.
Manufacturers also offer a metal version of this fastener. Of course, its price is higher than the plastic one, but it is the most durable and practical dowel, withstanding a load of up to 70 kg. The metal is treated with anti-corrosion agent.
- Drill a small hole to match the outer diameter of the dowel. It is better to hammer it in, because the fasteners must be installed tightly. In this case, you need to press the side “wing” elements;
- Holding the object to be fixed, screw in the self-tapping screw, making sure that the wings are pressed tightly on the other side of the sheet.
How to hang cabinets on a mounting rail?
1. Preparatory work. The wall must be perfectly flat. The installation of slats should be carried out only after making sure that the plasterboard profiles fit snugly to the base.
2. Fixing the tire for mounting. After measurements and markings, we place the tire at the required height and fix them with self-tapping screws. The length of the screws should be selected according to the thickness of the cladding plus 1.5 - 2 cm for fixing to the base wall. To achieve a perfectly even arrangement of the modules, installers advise using a second rail at the bottom edge of the headset items.
3. Installation of fastening fittings to the modules. Typically, the hanging system is connected according to the “rail to runner” principle. The slats are hung on the wall. We screw another tire to the back wall of the cabinet. Instructions for this type of slats can be found in the video on the Internet.
4. Attaching cabinets and shelves to the bar. The cabinet must be assembled without moving elements. Shelves and doors are attached to a suspended and securely fastened module.
If you are planning a large load (more than 15 kg), it is better to choose a bar across the entire width of the set. This way you will get a more even weight distribution and reliable fastening of the wall cabinets.
The price of fastening rails is higher than traditional fittings.
Mounting to drywall
If you plan to hang heavy-duty kitchen cabinets on a drywall wall, you will need to install reinforced wall cladding. Usually the number of vertical guides is increased. You shouldn’t skimp on the quality of metal profiles either; they must be strong, rigid and reliable. It's also worth shelling out for high-quality metal fittings.
1. Before hanging the cabinet, take measurements using a level. Zero deviations allow the load to be evenly distributed.
2. Do not tighten the bolts too much. Bolts screwed with excessive force can deform the cladding.
3. Lighter wall cabinets can be mounted with hinges and bolts screwed directly into the base. Hanging heavy products involves the use of long self-tapping screws, which are screwed through the thickness of the profile into the base wall.
4. A filled kitchen cabinet weighing more than 20 kg can only be supported by long anchor bolts. Before using the anchor, you should cut a small hole, drill the base wall, and secure the dowel. Then screw in the furniture anchor. When the installation of fasteners is completed, it is worth covering the mounting window with a piece of drywall and carefully strengthening it with mortar.
Knauf-Hartmut
Withstands the heaviest loads on drywall dowels. Allows you to attach massive structures up to 55 kg on two-layer walls, about 35 kg from one layer and up to 6 kg/linear meter when placed on the ceiling.
Installation:
- Prepare a hole with a diameter of 1.3 cm in the gypsum board;
- One of the guide elements must be shifted so that the anchor strip made of galvanized steel profile fits into the hole;
- Align the guide elements so that their ends are at the same level. The anchor bar is in working position;
- Insert the plastic locking sleeve all the way;
- Place the plastic strips to the sides and break off the excess. The anchor strip securely fixes the fastener in the hole;
- Screw the screw into the dowel.
A dowel nail is used when there is no void between the dry plaster and the main wall. Nails are used for through fastening of skirting boards, cornices, and door frames.
Most often it is made of plastic.
- The sizes of these dowels for drywall are from 4 to 14 cm. Diameter is 4-7 mm.
- When it is hammered into a hole, it wedges and does not scroll.
- The hat is made in the form of a mushroom or hidden. Removing the nail is impossible without destroying the dry plaster.
Varieties and sizes
Engineering does not stand still, and during the operation of nylon fastening rods, many types have been developed for various tasks and purposes. Let's look at the main options.
Ordinary. Its main area of use is interior work. It is used when working with brick (regular and ceramic), gypsum and other materials, in general, where the load on it is insignificant.
You can find dowels of the following specific types: facade, for scaffolding, for hollow bricks and many others.
The most common nylon dowels have the following parameters - 6x30, 6x40, 8x60, 8x40, 10x50, 6x60 mm. These sizes are considered standard; there are also extended ones.
Fischer dowel
Made from fiberglass reinforced plastic. This two-component design allows you to carry a structure weighing up to 75 kg. It cannot be reused.
When installing this fastener, it is necessary to have a void margin of approximately 3 cm behind the wall covering.
- As with most dowels, you first need to drill a hole with a diameter of 12 mm;
- Install the dowel into a sheet of dry plaster by hand, turning it parallel to the corrugated strip;
- On the opposite side of the gypsum board, the dowel will automatically fit, providing strength to the fastening unit;
- Slide the white plastic sleeve into this hole so that it is flush with the plane of the sheet;
- Break off unnecessary pieces of strips;
- Screw the screw included in the kit with the dowel into the flexible groove made of metal plates.
Folding spring dowel
This is a screw with two toothed plates that are moved apart by a spring. They are produced in galvanized steel. Reusable.
The set includes a hook for hanging lamps and chandeliers. Installation is very simple:
- A dowel is installed in the finished hole, holding the blades so that they do not open;
- Having opened on the opposite side of the plasterboard, they will grab with two sharp teeth so that the rod does not rotate;
- Now you can tighten the self-tapping screw with a screwdriver.
You can buy any dowels in a store or market. Taking into account all the features of your case, you can choose the most successful option.
Advantages of tire mounting
A fastening system has proven itself, consisting of a rail, which is a perforated strip of metal with a protruding part designed to be held by hooks located on the inside of cabinets.
Such a mount has a number of obvious advantages:
- quick installation, accessible to a beginner;
- cabinets can be hung effortlessly on a prepared rail, without helpers;
- if leveling is necessary, the height is adjustable;
- the fit of the cabinet after hanging it can also be adjusted in depth;
- The tire can be divided into pieces of the required length.
In the store, you should pay attention to the package, since fastenings in the form of tires and canopies may be included in its composition. In this case, you can be sure that the manufacturer has foreseen the possible load and provided reliable fasteners.
When starting to hang kitchen cabinets, you need to secure the awnings to them with self-tapping screws, placing the hooks in the middle position. Another position is allowed, but this is considered the most optimal.
Using a level, the position of the tire is marked on the wall, holes are drilled and the structure is secured with dowels. Once the cabinet is securely installed, a control measurement of its exact position is carried out. If necessary, it is leveled. If several hanging pieces of furniture are placed nearby, they are fastened together using a clamp. It is advisable to lay thin insulating material between the walls to avoid damage.

