Equipment for heat treatment of metals is an expensive pleasure. Not every novice master is ready to shell out a substantial amount of money to purchase it. But there are technologies according to which you can build a gas forge with your own hands without much difficulty and expense.
In the article we presented you will find a detailed description of the assembly of the main attribute of blacksmithing. We will talk about how the forge works and its structural components. We will show you how to achieve the temperature required for melting and forging workpieces.
We offer independent home craftsmen to familiarize themselves with homemade products proven by blacksmith practice. You will learn what materials, ready-made devices and tools are required in the manufacture of a forge. Gain insight into the complex process and valuable advice.
Gas horn
Also, household gas contains particles of silicon, sulfur and phosphorus, which can negatively affect the metal. For example, sulfur will only deteriorate steel upon contact, changing its operational advantages into disadvantages. And this can lead to significant financial losses.
Considering the above, a homemade gas forge for forging can operate on household gas only if it is first purified from sulfur. To do this, the gas must be passed through a container with naphthalene, which will absorb all excess. It is also advisable to forge only decorative elements using blue fuel, and not parts that will be subject to heavy loads in the future.
Coal forges
Furnaces that use coal as fuel are distinguished by their simple design and practicality of use. The design of this type of device consists of the following working parts:
- Roof and walls. For their construction, bricks with fire-resistant properties are used. It can be chamotte or dinas.
- Nest. It is here that the workpieces are heated.
- Umbrella. Consists of curtains, folding type. Its main purpose is to improve the natural traction of the workspace.
- Back wall. Special holes are made in it through which the outgoing air flow is supplied.
- Air valve. By using it, air is supplied to the forge socket.
- Box For its implementation, heat-resistant steel is used. With its help, the inlet and socket are connected.
- Tempered container. It can be made of either brick or steel. Its main purpose is to lower the temperature of workpieces after their heat treatment. Thanks to this, it is possible to eliminate the formation of thermal cracks on them.
- Chimney. Fuel combustion products are removed through it.
Preparing the forge for use should be carried out in the following sequence:
clean the nest from any remaining ash and burnt coals; blow out the chimney and the channels through which air passes using compressed air. You can use a regular vacuum cleaner for this; pour some coal into the bottom of the forge nest
In this case, you should pay attention to the fact that the hole located at the bottom of the box must remain open; To facilitate the ignition process, it is recommended to place a small rag moistened with firelighting fluid on the surface of the coal. Instead of rags, you can use sawdust; when the coal burns well, you can gradually add coal in small portions; now you need to open the air supply valve and set it in the middle position; as soon as the coal begins to burn out, you can increase the intensity of the air flow; When a crust forms on the surface of the coal, you can begin to warm up the workpiece and prepare it for work.
Since the temperature under the crust is higher than on its surface, the workpiece is placed directly under the crust. If the thickness of the crust reaches more than 5-10 mm, it is recommended to destroy it. Otherwise, the level of thermal conductivity becomes lower.
In order for the workpiece to heat evenly over the entire area, it must be turned over periodically.
It is also worth paying attention to the color of the fire. It should be uniform and also have the same color
Forge
Creative people involved in decorative work often show a desire to use handmade metal parts in their decorations. You can make such elements in a forge if you have the necessary skills and materials.
Quite thin sheet metal can be minted, bent, and attempted to be stamped even without heating. However, thick workpieces can only be processed at high temperatures. And only master blacksmiths can make something from carbon steel.
If you have a fireplace in the workshop, as well as an anvil, you can not pay attention to the thickness of the workpiece. When heated to a thousand degrees, such a metal will bend, flatten and forge like plasticine. The most important thing in this work is a properly constructed forge that can heat the metal to the required temperature.
Not everyone will be able to make such a forge with their own hands, but for a person familiar with the structure and operating principle of this device, this should not be difficult. Experienced blacksmiths claim that the simplest forge can be made from 6 bricks.
The nuances of self-production
How can you make a homemade blacksmith's forge? To do this, you will need drawings of a heating device model that suits you and the room where the equipment will be located.
Forges differ in the types of heating chambers.
- Closed heating chambers. They are the most efficient because they minimize fuel consumption while providing excellent heating of workpieces. But the blanks themselves are limited in size, since they depend on the dimensions of the chamber.
- Open heating chambers. This design provides that fuel is poured onto the grate, and air is supplied from below. The metal blank is placed on the fuel. Although fuel consumption is slightly higher, larger workpieces can be used.
How to make a blacksmith's forge in order to be able to forge iron at home? Let's consider each stage of construction of the structure.
Photo of a handmade forge
- Table. The table is the basis of a homemade forge. The drawings show that building this element is quite simple. Typically the table height is up to 80 centimeters, and 5 millimeter thick metal is used for the lid. The working surface can have different sizes. It all depends on what kind of metal workpieces you are going to work with. Another option for building a table is to use angle iron to create a frame. Bricks and a grate are laid inside it. The grill should be positioned in the center.
- The grid is mounted in a hole made in the table. Then the fire brick is closed on all sides. Select the height of the table directly to your height so that the structure is at waist level.
- Blowing For the forge to work effectively, it requires high-quality air supply. Due to oxygen, the temperature rises and the metal begins to melt. Traditional forge designs used a foot-driven blower. But now everyone has the opportunity to use electricity, so the optimal solution is an electric fan or an old vacuum cleaner. The vacuum cleaner supplies air with the required force. If you have a speed controller, you will get a chic homemade horn.
- Now all the structural elements are assembled into a single system - a homemade metalworking forge.
- Pour the required amount of fuel onto the grate. First use wood chips and medium wood, after which comes the turn of coke. Turn on the blower and place your workpiece over the fuel. A small amount of coke may be added on top of the iron. If there is no coke or there are large reserves of wood waste, you can use them.
This is a model of a simple blacksmith's forge. If you have the desire or opportunity, you can significantly improve your own equipment for blacksmithing, bringing it closer to the features of an industrial forge.
What does an industrial forge have?
Professional blacksmiths use industrial forges, which are characterized by increased efficiency and high reliability. It is almost impossible to make an industrial forge yourself. But somehow bringing a homemade model closer to the ideal is quite possible.
What is different about an industrial forge, and what components are included in its design?
- Air supply nozzle. Homemade forges use the hose of an old vacuum cleaner to supply air instead of a nozzle;
- Fire brick. There is a complete analogy between home and industrial devices;
- Grate. Most homemade forges involve the use of a grate. Many people make it from old frying pans with thick walls;
- Solid fuel socket. This slot allows you to conveniently load the required amount of solid fuel. Equipping a homemade forge with such an element will not be a problem;
- Frame bricks. These are already stationary devices that are laid with bricks. For a simple forge, such elements are already superfluous;
- Air supply fan. We looked at an example with a conventional vacuum cleaner, which does a good job of pumping air. If you want, you can use fans or other similar devices;
- Metal carcass. The table is supported on its basis;
- Air chamber. Homemade forges do not have it, but if you need professional equipment, equipping the device with a camera will not be a bad idea;
- Ash pit. If you are going to regularly use your forge at home, we recommend equipping it with an ash pan. This will make it easier to care for the device;
- Forge casing.
Heating the workpiece in a forge
Two main and only properties are required from a forge furnace: to produce a very high temperature, up to 1200 – 1500°C, and the ability to maintain the desired temperature for a certain time. In other words, we need strong and even heat.
At what temperature do metals become forgeable, that is, begin to be ductile? This is different for all metals and alloys. But the visual sign that the metal part has heated up to the required temperature is also common - this is the orange color of the part.
Drawing of a blacksmith's forge.
The only metal that behaves quite meanly and does not change its color when heated is aluminum. It is not the easiest metal to forge and weld in principle; with aluminum you need to know and apply many special requirements.
So, the absence of an orange color while it has already warmed up for forging is a significant factor that makes it difficult to work with this capricious metal and its alloys. After all, you can’t overheat. Underheating is also no good.
How the device works
Before you build a forge, you need to decide on its type. The closed-type forge has a chamber for heating the workpiece. This model is considered the most economical in terms of fuel consumption. But in this case, the blanks are limited in size.
In an open-type forge, fuel is poured from above onto the grate, and an air flow is supplied from below. The heated workpiece is placed on the fuel. This makes it possible to heat large-sized workpieces.
In order to be able to build a homemade forge without losing its quality of work and at the same time saving money, you should understand the principle of its operation. The device is based on a significant increase in temperature due to the chemical method of carbon combustion.
This process gives a high energy yield and has been used for many centuries to smelt various metals. To prevent the cupola from allowing the material to burn, you should supply it with slightly less oxygen than is needed for complete oxidation, otherwise the products will be too fragile and, accordingly, will last only a few years.
Basic design of a homemade forge
The first question is: what kind of forge should I make - open or closed? The answer will depend on your plans - what are you going to do in your blacksmith shop? If this is a hobby in the form of artistic forging in small quantities exclusively for the home and gifts for relatives, then it will be quite enough for you to acquire an open forge.
If you plan to work with metals seriously, for example, to earn money, then we would advise you to build a closed forge with your own hands.
These are the parts that make up a well-assembled forge:
- frame on racks for support, everything must be made of steel;
- under – bottom or lower part of the wall of the hearth;
- slide-type damper with special holes to accelerate metal heating and save fuel;
- fan;
- smoke exhaust pipe
- linings – thermal protection of the stove in the form of fireclay bricks;
- recuperator - a special device for returning the generated heat in the form of furnace gases and, thus, efficient use of resources.
The table plate must be made from a blank with a thickness of at least 5 mm. If you install an open design forge outdoors, you will not need to deal with special ventilation.
Here are the main steps for building a homemade coal-fired forge:
- Build a platform for the foundation with concrete and reinforced rods.
- Fold the bricks into a rectangular base; the table surface can be of any height.
- Make a hole in any wall of the base for the blower.
- Assemble the floor from special refractory bricks onto the base.
- Install a grate with holes, which must also be made of fire-resistant material, for which a cast-iron door from an old stove is perfect.
- After installing the grate, add walls made of the same refractory brick.
- Do not forget to leave a hole in one wall for air supply; it is better to do this immediately when laying bricks.
- Install a fan into the air supply pipe.
- If you are making a closed structure, be sure to build a chimney, which is absolutely necessary for draft.
Such a forge can be made mobile - it all depends on you. An old gas stove can serve as an excellent frame for a solid fuel forge.
Closed model of a gas forge
The main difference from the open variety is that such a forge is framed in a body, usually in the form of a cube, and there is a forced exhaust. The body is usually made of fire bricks with a metal lid that extends into the hood. The dimensions of closed forges are small; for home use it does not exceed 80x100cm. You will need to insert a door into the front panel.
There is a hole in the side wall for mounting a gas burner. An important condition is the installation of forced exhaust (with a 30x30cm channel); for this, engines from an old vacuum cleaner, car heating oven, etc. are often used.
We make a gas forge with our own hands - two design options
One of the necessary equipment for our workshop is a forge. If you do more than just cold forging (we wrote about it here), then you can’t do without it. In principle, it is now possible to buy almost everything, including this product. But when you see the cost (and the price for the cheapest models starts from 48,000 rubles), the thought involuntarily arises: is it possible to make it yourself? The answer is simple - you can, and quite simply.
Traditionally, coal (wood or stone) is used for such a “firebox”. But considering that we have no problems with gas in our country, we will consider just such a design. From a practical point of view, it is much more convenient and easier to manufacture. It is worth noting that in this case there is no difference what kind of gas it will be - main gas or from cylinders.
Advantages of a gas forge
- Ease of construction. If only because there will be no usual grates in such a stove.
- Possibility of adjusting the heating temperature.
- Cheapness and availability of fuel.
- Low manufacturing costs.
- Mobility. Given its light weight, it is easy to carry from place to place.
variant of the forge drawing
It should immediately be noted that there is no single standard for such a forge. It is only necessary to comply with certain requirements for working with gas equipment. The main thing is to understand the principle of operation of the oven and heating of workpieces. And the dimensions and location of the main constituent elements are at the discretion of the user.
Each amateur blacksmith arranges a forge “for himself”, how it is more convenient and expedient to use it. For example, instead of the usual masonry, you can install a thick-walled metal tank under the stove. Some craftsmen even adapt an ordinary bucket for these purposes.
Actually, it all depends on the imagination of the amateur “designer” and his capabilities. What do you need to know? There are 2 types of such stoves, and it is impossible to say unequivocally which “model” is better. Let us briefly consider the design principle of each of them, and the choice is at the discretion of those wishing to engage in hot forging of metals.
All descriptions below are just individual examples of designs.
It is a metal “form” that is installed on a fireproof base. This could be a small concrete area (floor), several fireproof bricks laid nearby. It is advisable to mount a stand, in the lower part of which there is a tray for placing parts to be heated. On the sides there are vertical posts, which are fastening elements for installation on top of the gas burner. Naturally, its nozzle should be directed downward.
With this design, smoke is removed naturally, so there is no need to install a “hood,” which greatly simplifies the design. However, it must be taken into account that such a forge should be placed either in the open air or in a well-ventilated room where there is no risk of smoke.
Requires a separate description. This structural element is an integral part of any forge. For its body (as an option) a stainless steel pipe is taken. One end is either welded tightly or closed with a removable lid.
A metal mesh is mounted at the other end. The diameter of the holes is selected experimentally, depending on what kind of “torch” is required to be obtained. The material is also “stainless steel”, a thickness of 2 mm is sufficient.
On the side, not far from the “plugged” end, a pipe is “welded” through which a mixture of gas and air will be supplied. In turn, another small-diameter pipe is welded to it, through which gas is supplied (air is supplied through the main one). It comes from the compressor, to which the supply (main) pipeline is connected.
How to properly adjust the operation of the burner is a separate big topic that we will discuss later.
It differs primarily in the type of traction. It is carried out forcefully, using a fan. By the way, this option, according to experts, is preferable, as it provides better ventilation of the room.
Features of a household forge
Due to the high cost of melting plants, not every user can buy such special-purpose equipment. For domestic needs, it is not difficult to assemble a gas forge with your own hands, provided that the shape, power and design of the pressurization system are correctly determined. A simple household forge for artistic forging or casting of non-ferrous metal can be assembled from several fireclay bricks and sheet steel.
Making a forge at home for working with ferrous metal is not difficult. You can make the simplest design from a metal container, in the side of which you need to make a hole for a gas burner. The fuel supply system can be assembled from a piece of pipe and coupling; long bolts are suitable for the supporting structure under the container. The lining of a gas fireplace is carried out by filling a solution of alabaster or gypsum, sand and water.
The forge must be equipped with a protective casing, a ceramic tube or a bottle of suitable size. After lining and drilling a hole for the gas supply, the device is installed in a convenient place, but at a distance from flammable materials. The advantages of the design include the ability to move the furnace and regulate the degree of heating of the workpiece, which is especially convenient when working with different forging materials.
Pros and cons of an injection burner
Using a high-quality gas burner for a forge has a number of advantages:
- use of gas energy for air injection;
- good mixing of air and gas;
- the ability to control the gas/air volume ratio when changing the burner temperature;
- ease of use;
- efficiency;
- simplicity of design.
With its advantages, there are also some disadvantages. Single-nozzle burners, taking into account the heat output, are quite long. It is necessary to ensure strict alignment of the axis of the nozzle and the burner. They make a lot of noise during operation.
The power of an injection burner is determined by the volume of gas it consumes per unit of time. This parameter differs significantly for different burners
Significant disadvantages of low-pressure burners are the long flame length, as well as the dependence of the secondary air supply rate on combustion liquefaction.
The following article will introduce you to the types of gas burners for sauna stoves and methods of their installation, which should be read by all owners of suburban areas with their own saunas.
Framing the walls
This forge will be small in size, its internal dimensions are only 12 x 18 x 24 cm. But for my work this is quite enough. Due to the small size, only three bricks were needed for the walls, and all I had to do was weld the metal corners at the corners.
Adjusting the burner operation
Attention! Subsequent work is a fire and explosion hazard, because
are carried out with open fire and flammable gas - propane. They must be carried out in strict compliance with Fire Safety standards and the following requirements:
- carry out all work in a well-ventilated area;
- remove (reliably de-energize) all spark-producing equipment;
- the workplace must be prepared for work: everything unnecessary should be removed not only from the workbench, but also from the floor, ensuring clear passageways in case of force majeure;
- prepare: primary fire extinguishing equipment for flammable gas;
- medical first aid kit.
The burner flame is adjusted in the following sequence:
- open the valve on the fuel source, supply gas to the burner and light it;
- Gradually move the nozzle tube towards blocking the four air intake holes and achieve stable combustion. Additionally, the burner flame should be adjusted by changing the gas supply. Having obtained a flame of the desired intensity and shape, the position of the tube and nozzle should be fixed with a clamp screw (4 in the figure).
Such a burner will operate steadily and produce an even flame sufficient to heat small parts to the required temperature.
This is interesting: Opening a blacksmith shop with manual equipment for artistic forging: short and clear
Making a gas burner from scrap materials in stages
List of materials and tools:
• drill;• grinder;• hammer;• sandpaper;• brass blanks for the divider nozzle;• thin brass tube with a diameter of 15 mm;• wooden blocks;• vice;• silicone seal or FUM tape;• hoses for connection;• valve for adjustment.
How to make a nozzle and handle
First of all, we take a brass tube and attach a handle to it - for example, from an old burner, or from a wooden block, having processed it beforehand. We drill a hole in the block for a brass tube with the appropriate diameter. Having inserted the tube into the timber, we secure it with silicone or epoxy resin.
Next, we proceed to a more labor-intensive and time-consuming stage of work - manufacturing the nozzle. The hole size should preferably be 0.1 mm.
You can use a drill to make a slightly larger hole, and then adjust the edges to 0.1 mm. The hole must have the correct shape so that the flame is even.
After this, we fix the workpiece in a vice, take a hammer and carefully, in a vertical plane with a “pull” towards the middle of the workpiece, strike the future nozzle. We rotate the product evenly to form an ideal hole.
Then we take fine-grit sandpaper and sand the nozzle head. To connect to the tube, a thread is applied to the back of the product; the elements can also be simply soldered - but in the future, repairing the parts will be more difficult.
Now we connect the device to the gas cylinder and set it on fire - the do-it-yourself burner is ready for use. However, here you can see that to regulate the gas flow, you can only open and close the valve of the gas cylinder, and thus it is very difficult to obtain the desired flame. What we can do?
How to improve flame control
For the normal operation of our homemade unit, we will install a divider and a tap on it. It is better to mount the tap near the handle, at a distance of about 2–4 cm, but it can also be attached to the supply pipe. As an option, take a burner tap from an old autogen or another similar tap that is attached with a thread. To seal the connection, take FUM tape.
The divider is installed on a pipe with a nozzle; it is made of brass, diameter 15 mm. The best option is a cylindrical part with a hole for a tube with a nozzle. If there is none, we do this:
1. Take a brass pipe with a diameter of 35 mm and cut a piece of 100–150 mm.2. Take a marker, step back from the end and mark 3-5 points, with an equal distance between them.3. We drill 8–10 mm holes in the pipe, take a grinder and make straight cuts to them.4. We bend everything to the center and weld it to the burner pipe.
Burner hole
Determine the location where the burner will go. Many people like it when the entrance is located at the top and the flame is directed downward. And some people prefer to have multiple burners. I choose an economical approach, and I also love when what I do looks good. That's why I like the single burner at the back of the forge with the flame pointing upward. Place bricks on the bottom and draw a circle where you have chosen the location of the burner. Using a concrete drill, make many holes around the perimeter of the drawn circle. Drill the holes partially at first and, having made a circle, continue again, adding side-to-side movements to punch through the brick and merge adjacent holes. If you take your time, the cutout can turn out relatively smooth. Trace a hole on the metal bottom and cut it out using a gas (plasma) cutter.
Design of the gas supply channel in the burner
The gas supply channel is a copper or brass tube of the following sizes:
- outer diameter 6 mm;
- wall thickness not less than 1 mm.
This tube is equipped with:
- on one side there is a gas valve with a hose that goes to the gas source (main pipeline, cylinder, etc.);
- on the other hand, the nipple from the kerosene stove is mounted. In this case, it is necessary to do the following: sharpen the working part of the nipple to a cone;
- cut an M5 thread inside the pipe and screw the nipple into it (it already has a standard M5 external thread).
Characteristics and types of injection burners
The design of the forge burner determines the degree of waste of the metal when it is heated for forging, the intensity of scale formation on the surface, and the total gas consumption. In closed forges, short-flame burners are used.
Their design guarantees rapid mixing of the combustible mixture, which ensures high efficiency. Combustion products are removed from the furnace working space evenly and as efficiently as possible.
Operating principle of burners
In burners of this type, propane coming from a gas pipeline or cylinder is burned. Here, a mixture of gas and air is formed due to ejection, i.e. the latter being sucked into the burner under the influence of the energy of a gas jet under pressure.
In the area where air is taken in, a vacuum appears, due to which the air itself moves in a given direction. Mixing in the burner body, the working mixture escapes from it under pressure, creating the desired temperature.
The quality of operation of a gas burner depends on the constancy of the ratio of the volume of gas and air. Changes in gas density affect the burner's ability to suck in air.
The fuel combustion device or burner is the main component of the gas furnace. Its operation depends entirely on the correct manufacture of this key element
All changes in combustion temperature must be accompanied by similar changes in the air supply required for combustion.
If the indicators are unbalanced, the injection coefficient must be adjusted to achieve its stability. This is achieved by changing the gas pressure or adjusting the air damper.
Classification of burners according to main characteristics
They are classified according to different criteria. Based on the volume of primary air sucked in, a distinction is made between partial-mix and full-mix burners. The main characteristics of the former are the injection coefficient and the multiplicity.
The injection coefficient is determined by the ratio of the volumes of air injected and those required for 100 percent combustion of gas. The expression “injection ratio” refers to the relationship between the volume of primary air and the gas consumption of the burner.
Combustion of gas mixed with air in an injection burner occurs in a special nozzle - a tunnel made of refractory material
Injection burners used in home forges come in low (up to 5 kPa) gas pressure and medium - from 5 kPa to 0.3 MPa. When the gas in the burner is under a pressure of 20-90 kPa, the power of air suction remains practically unchanged, even when the gas pressure and vacuum in the furnace undergo changes.
When the pressure drops below this level, the injection coefficient increases, the pressure drops, and the vacuum in the forge increases. Depending on the presence of the distribution manifold, there are single- and multi-flame burners.
There is a division according to the number of nozzles: with one nozzle - single-nozzle, with several - multi-nozzle. These elements are placed in the center or scattered. According to this feature, there are burners with a central nozzle and a peripheral one.
Principle of operation
The principle of operation of the forge is based on the chemical reaction of combustion of carbon, which, when reacting with oxygen, forms carbon dioxide with the release of heat. In addition, metal recovery occurs, which is a very important aspect for the formation of homogeneous, high-strength parts.
To maintain an optimal level of combustion and temperature, air ducts and air chambers are installed inside the fuel chamber, which forcefully pump pure oxygen. Due to this, it is possible to obtain temperatures above +1000°C, which are unattainable with conventional combustion of solid fuel (coal or wood).
What does a DIY gas forge look like?
At the same time, using the inflation technology, the volume of air is selected so that there is always a slight lack of oxygen for the oxidation reaction to occur. In other words, it is necessary to select an operating mode to prevent metal combustion.
The time the smelted part remains in the furnace should also be limited, since in an atmosphere of carbon dioxide the metal will begin to react with it and form a high-strength alloy with increased fragility. These negative consequences can be avoided by introducing additional oxygen into the chamber in such an amount that carbon dioxide has time to completely react.
Horn device
A classic production forge is designed as follows, see figure on the right:
Construction of a forge
- forge table made of refractory material;
- firebox (hearth) with grate;
- air chamber;
- air drainage;
- supply air duct;
- air valve;
- chamber (tent) forge;
- window for feeding long workpieces;
- bugle umbrella;
- chimney (gas outlet);
- removable furnace;
- hardening bath (tub, tub);
- gas-air chamber.
How the forge works
In order to make a forge yourself and use it successfully, we’ll figure out how the forge works, what’s what, and what can be made cheaper and easier for home use without compromising the quality of metal processing. The operation of the forge is based on the chemical reaction of carbon combustion 2C + O2 = 2CO2 + 188.1 kcal. Based on its energy output (94.05 kcal/mol, i.e. 12 g of C, completely burned, will give 94.05 kcal of heat) it is clear that carbon is a very strong reducing agent, i.e. greedily combines with oxygen.
This property of carbon has been used since time immemorial in metallurgy for the smelting of iron and other metals: their ores are often the corresponding oxides or their derivative compounds. Carbon unceremoniously robs itself of oxygen, and the deprived metal has no choice but to be released in a free form.
In a forge, the reducing power of carbon is also used partly to prevent oxidation of the workpiece. Simply to prevent the metal from burning. But the high calorific value of carbon is no less important here: by blowing enough air into the fuel mass so that the carbon has enough of it, you can burn it quite quickly, and the large amount of heat released will develop a high temperature.
The blowing into the forge is adjusted so that the fuel is slightly lacking oxygen; this will completely prevent oxidation of the metal. However, if the workpiece is overexposed in the forge, then carburization will occur: the metal, especially steel, will become, as they say, overdried - excessively, disproportionate to the increase in hardness, brittle. An example of completely overdried iron is cast iron. In metallurgy, in order to obtain structural steel from it, molten cast iron is subjected to reprocessing: oxygen is introduced into it in a converter or in some other way, removing excess carbon.
Principle of operation
The principle of operation of the forge is based on the chemical reaction of combustion of carbon, which, when reacting with oxygen, forms carbon dioxide with the release of heat. In addition, metal recovery occurs, which is a very important aspect for the formation of homogeneous, high-strength parts.
To maintain an optimal level of combustion and temperature, air ducts and air chambers are installed inside the fuel chamber, which forcefully pump pure oxygen. Due to this, it is possible to obtain temperatures above +1000°C, which are unattainable with conventional combustion of solid fuel (coal or wood).
At the same time, using the inflation technology, the volume of air is selected so that there is always a slight lack of oxygen for the oxidation reaction to occur. In other words, it is necessary to select an operating mode to prevent metal combustion.
The time the smelted part remains in the furnace should also be limited, since in an atmosphere of carbon dioxide the metal will begin to react with it and form a high-strength alloy with increased fragility. These negative consequences can be avoided by introducing additional oxygen into the chamber in such an amount that carbon dioxide has time to completely react.
Burner classification
The essence of the operation of gas burners is to ensure stable and continuous combustion of fuel in the combustion chamber of the boiler. Equipment classification is based on the four main functions of the device, such as:
- supply of gas and air in proportions that provide the optimal ratio in the mixture;
- direct mixing of gas and oxygen;
- creating stable combustion;
- ensuring uniform combustion and avoiding explosion when ignited.
Modulated equipment is included in a separate class. A distinctive feature of such devices is the ability to automatically adjust to the current needs of the room and the ability to change the combustion power depending on the temperature conditions inside and outside the building. Due to such capabilities, this type of equipment is characterized by increased efficiency.
Useful tips
- Cutting a small hole in the back of the forge will improve ventilation. In addition, this cutout allows you to heat long metal workpieces.
- The forge is placed on a special metal stand or table, which makes working with it more convenient. The height is selected individually by the master.
- If a forge shop works with workpieces of different sizes and shapes, then it is advisable to install several forges of different dimensions at once. They are placed close to each other, and gas and air are supplied using flexible hoses. This design solution allows you to quickly reconnect the burners.
- Each gas pipeline must have a shut-off valve. For this purpose, conventional valves are most often used - they provide smoother adjustment, unlike ball analogues.
The main thing in creating a forge with your own hands is to understand the principle of operation, select the right materials and follow safety precautions. Such equipment is created by craftsmen based on personal preferences, wishes and requirements, which provides wide scope for activity.
Video on the topic
In this article we will look at how to make a gas torch for soldering with your own hands. This device is often in demand both in private households and for commercial purposes - for individual technical creativity and various types of construction tasks. In particular, gas burners are used for soldering, metalsmithing, forging, roofing, jewelry work, and for other purposes they produce flames whose temperature exceeds 1500°C.
In metalworking, using a gas torch, you can heat a metal workpiece so that in the end it turns out to be sufficiently hardened. When carrying out welding work with some metals, the areas of future seams must be heated.
Burner design
A standard homemade burner functions this way. Gas is supplied under pressure through a special hose from the cylinder. Most often, propane is used as such gas. The volume of gas supplied is changed by a regulating operating valve located on the cylinder. Therefore, installation of an additional reduction gearbox is not required.
The shut-off valve is located behind the main valve and is mounted on the gas cylinder. It is used to open or close the gas supply. All other adjustments (length and intensity of the flame) of the burner itself are carried out using the so-called working tap. The gas supply hose through which gas is supplied is connected to a special nozzle. It ends with a nipple. It allows you to set the size (length) and intensity (speed) of the flame. The nipple together with the tube is placed in a special liner (metal cup). It is in it that the creation of a combustible mixture occurs, that is, the enrichment of propane with atmospheric oxygen. The created combustible mixture under pressure flows through the nozzle into the combustion area. To ensure a continuous combustion process, special holes are structurally provided in the nozzle. They perform the function of additional ventilation.
Based on this standard design, you can develop your own design. It will consist of the following elements:
- housing (usually made of metal);
- a reducer, which is attached to the cylinder (use a ready-made device);
- nozzles (made independently);
- fuel supply regulator (optional);
- head (the shape is selected based on the tasks being solved).
The burner body is made in the shape of a glass. The material used is ordinary steel. This shape allows for reliable protection against possible blowing out of the working flame. A handle is attached to the body. It can be made of various materials. The most important thing is that it provides convenience when working. Previous experience shows that the most optimal length of such a handle is in the range from 70 to 80 centimeters.
Gas burner device
A wooden holder is attached to the top. A gas supply hose is placed in its body. This allows you to give the structure a certain strength. The flame length can be adjusted in two ways. Using a reducer located on the gas cylinder and a valve installed on the tube. The gas mixture is ignited using a special nozzle.
Homemade gas burners
The main components in the manufacture of powerful gas burners are industrial valves. They may be new, but for a homemade device it is enough to use used ones if there is no gas leak. They are designed to work in tandem with a 50-liter propane gas cylinder, which has an angle valve and a reducer.
Burner with valve VK-74
The structure of this burner is shown in Fig. 1. The oxygen cylinder valve VK-74 is used as a basis. A fitting-handle machined on a lathe is installed at the outlet end, to the corrugated part of which the hose from the cylinder is connected. A cap with a prepared hole with a thread for the nozzle is screwed onto the part of the valve with a conical thread K3/4˝, with which it was connected to the gas cylinder. You can use a ready-made blowtorch or gas stove.
The nozzle is made from a piece of 1/4˝ steel pipe 100 mm long and welded to the cap on two pieces of ∅5 mm wire. A distance of 15 mm should be left between the cap and the nozzle to allow air to enter the combustion zone. The position of the nozzle is adjusted by bending the wire holders to achieve a central flame position.
Sequence of actions to ignite the burner:
- Open the cylinder valve;
- Place a lit match near the nozzle and slowly open the burner valve;
- Control gas ignition;
- Adjust the flame using the burner valve
A homemade gas burner of this design has one drawback associated with the location of the valve. The gas flow is directed in the opposite direction to the normal position. Stuffing box seals experience constant gas pressure (including when the valve is closed), so it is necessary to constantly monitor the tightness of the seals.
Burner converted from acetylene gas cutter
If you have an acetylene torch with a faulty oxygen supply valve, do not rush to throw it away. It is also suitable for making a burner (Fig. 2). Gas mini burner
Mini gas burners are more suitable for working with small parts. The mini burner is based on a needle for inflating balls. It is necessary to make a cut in it, a little further than the middle of the needle. Some needles already have a similar hole, which significantly speeds up the work process. Next, you need to take the syringe needle and bend it about 45 degrees in the middle.
It is best to sharpen the pointed end of a syringe needle so that it is straight. After this, it needs to be inserted into the ball needle so that one end comes out through the hole, and the other protrudes from the large needle by several mm. The resulting mini structure should be fixed using soldering. After this, droppers must be attached to the bases of the two needles. Clamps - dropper regulators need to be moved as close to the needles as possible. In the resulting burner they will act as gas and air supply regulators. They also need to be fastened together, and this is best done using a heat gun. All that remains is to connect a source of compressed gas to the finished device, the burner is ready for use. This homemade gas burner can heat objects up to 1000 degrees
You should work with it carefully, observing safety precautions
A little about using the forge
I used it for forging and casting. It melts aluminum and other non-ferrous metals in a matter of seconds. We were able to cast some parts using foam molds in sand and clay molds. He melted aluminum cans in a special crucible. Next, the molten metal was cast into sand and plaster molds.
It is well suited for forging knives or some small metal products. We will talk about making knives from files in my next article.
One of the photos shows a heated forging, however, the color rendition is not at all the same. Due to the bright sun, it is impossible to determine the temperature of the workpiece by color. That’s why the forges used to be in twilight. Here is a video of the forge in action.
Closed forges
The designs of closed forge gas forges differ, as we have already said, primarily in the type of traction. It is carried out forcibly through an umbrella installed above the mountain using a fan. Any suitable design is used as a fan: from components of automobile “stoves” to old household vacuum cleaners. On the latter, however, you also have to install a damper to regulate the intensity of the air flow. By the way, this option, according to some experts, is preferable, as it provides better ventilation of the room.
We bring to your attention several design options for gas forges that you can build with your own hands.
DIY FRIEND
Dear visitors to the “Homemade Friend” website, today we will look at detailed step-by-step instructions for creating a portable forge running on propane with your own hands. A forge using propane as fuel is much more efficient than a coal forge, and the undeniable advantage is that it can be moved to any place in your garage or workshop, and also does not require additional air supply.
In this case, the GAS HORN is a metal structure made of angle, corrugated pipe and 2 mm sheet metal. The hearth chamber is lined with refractory brick, which gives it the ability to withstand maximum temperature loads, and at the same time, fireclay brick has low thermal conductivity, which further increases the efficiency of the hearth.
Having a small blacksmith's forge in your workshop, you can forge all kinds of products: knives, axes, chisels, cores and much more. If you are a creative person... then you can do artistic forging.
So, let's look at the step-by-step process of assembling the forge.
Materials
- corner
- professional pipe
- sheet metal 2 mm
- fire brick
- gas-burner
- gas cylinder (PROPANE)
Tools
- welding inverter
- drill
- Angle grinder (grinder)
- ruler and marker
- hammer
- clamp or pliers
Step-by-step instructions for assembling a forge gas forge with your own hands.
First of all, we make the base of the chamber from a 50x50 corner; at the bends, you need to cut out the corner.
We bend it.
The result was a base for laying refractory bricks.
We weld the lower part with 2 mm sheet metal.
Lay out fire bricks.
We weld the legs from the pro-pipe.
Then you need to make a hole in the base to install the gas burner nozzle.
Drill holes in the brick.
You also need to burn a hole in the metal.
Install the burner.
Then we weld the corners in the corners and make walls with a roof.
The upper part of the rut should be covered with 2 mm metal.
We screw the handle of the gas burner and fix it to the base of the forge legs.
Next, all that remains is to connect a gas cylinder through a flexible rubber hose and start working with metal, for example, forging a knife from a piece of iron.
Thank you for your attention. Tweet
Tweet
18 shared
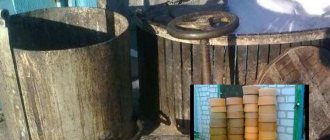
Solid fuel horn
If you need to use the forge once, you can build a fireplace directly on the ground, having first dug a shallow hole, the walls of which are lined with refractory bricks. This brick is perfect for heating metal using solid fuel. An alternative material can be a thick steel plate (at least 5 mm). In such a forge you will also need to install a grate of grates (the material will be steel or cast iron). Instead of a grille, you can install a steel pipe for air supply:
- The end of the pipe must be welded tightly.
- In the combustion zone, use a grinder to cut slotted grooves (through them the air will disperse the heat).
- Place the pipe in the center of the finished structure.
To make the forge mobile and simple, it is necessary to weld a metal frame and a steel tabletop. An interesting solution would be to use an old gas stove that has served its purpose as such a countertop. The oven in it will serve to accommodate a source of air, and the lower section is convenient for placing tools and accessories in it.
Operating principle and design specifics
A forge is necessary to carry out a number of operations to prepare metal for subsequent processing. The workpiece heated in it is given the designed shape. With its help, the now popular forged jewelry, household parts, utensils, furnishings, etc. are made.
The forge is used in all areas of heat treatment. It can be very miniature, installed literally on a table, or stationary, reminiscent of a traditional brick stove. Regardless of size, all models operate on the same principle.
Image gallery
Photo from
Equipment for a private forge
Tabletop version of a homemade blacksmith's forge
A simplified version of the forge
Factory-made forging unit
How does a blacksmith's forge work?
To prepare the metal for subsequent forging, it needs to be heated and literally “softened” under temperature conditions of up to 1100-1200ºС. The conditions are achieved thanks to specific design features that ensure the supply of fuel and oxygen to the combustion zone in the proportions required for the process.
Inside a gas or solid fuel forge, a characteristic chemical reaction occurs: the hydrocarbon is processed. Carbon, produced by the combustion of both gaseous and solid hydrocarbons, catches and appropriates oxygen from the heated metal. The result is steel without oxidizing impurities.
A blacksmith's forge built with your own hands, of course, will not allow you to forge damask blades and openwork grilles for an exquisite balustrade, but for the manufacture of simple household items and original jewelry it is quite suitable
The features of the forge allow you to partially use the reduction potential of carbon. All oxygen is not burned out of the heated workpiece. Thanks to partial reduction, the metal does not burn out completely and does not become brittle, as happens with cast iron.
To set up a miniature home forge, no special materials are needed. Almost every owner has everything necessary. Surely he has bricks and scraps of rolled metal, steel pipes, anchors, clamps
By the way, cast iron products in industry are saturated with oxygen after heat treatment in order to get rid of this disadvantage or at least minimize it.
In an industrially produced forge equipped with a control system, the air required for combustion is pumped so that it is slightly lacking. It is difficult to equip a homemade product with such a device, unless, of course, you install a ready-made gas burner with automation on it.
Regardless of the design and type of operation of the forge, the carbon released from the hydrocarbon is processed in its working area. It attracts oxides to itself, ridding the metal of them
Due to the impossibility of a controlled supply of air, or rather the oxygen contained in it, hand-made forged products are often burned out. This happens in the first stages. However, with experience comes the ability of the master to feel when to stop heating, as well as knowledge of what needs to be done to avoid complete loss of oxygen.
Device and working components
There are a great many options for making homemade models, tested by blacksmiths in practice. We will present only a small part of them. Before deciding which gas forge is best to make with your own hands, let’s look at the typical features of the device.
In technical essence, any forge is a kind of furnace with characteristic accessories: a firebox, a grate, an air chamber, called a blower in Russian heating units. Unlike a conventional stove, the air chamber is equipped with drainage to regulate the air supply and a pipe with a valve.
The grate is strengthened so that it is able to resist considerable thermomechanical effects. A regular grill made of metal rods or corner scraps will not work. You need a reinforced device. Ideally, it would be better to have a thick metal panel built into the desktop with evenly drilled holes.
In the design of a forge, each structural part performs certain functions, due to which the removal of metal from impurities and heating for forging is carried out in an optimal manner
The combination of the listed components is called a tuyere. Industrial furnaces are equipped with several of them, so that they can be changed depending on the required conditions for performing a certain operation and on the size of the workpiece being heated.
The lance is most often not installed in a closed housing, but mounted on a table. It needs to be sufficiently stable and protected from thermal effects, for which a lining is used. In a number of designs, a grate is built into the table or a metal perforated panel is installed instead.
The lining of the table for a stationary furnace, which is going to be actively used, uses refractory quartz brick. Homemade products for one-time work are lined with fireclay bricks. It’s easier to find it on sale, and the price is lower.
The combustion chamber of the forge is strengthened by lining, which is made with refractory or fireclay bricks that can resist high temperatures
For complete collection and removal of flue gases, a tent or umbrella is placed above a table with a perforated panel or above a tuyere. They are connected to a smoke channel, which is constructed according to the principle of a chimney for a gas boiler. It must work flawlessly, because... The gases released when metal is heated are extremely toxic.
In addition to the main structural components, there are also additional devices. Usually, blacksmiths place a hardening bath next to the forge so that the finished product can be immediately dipped into a cooling and hardening environment. This is the case if thermal shock hardening is required.
When setting up your own forge, you need to think not only about the manufacture of equipment for heating metal, but also about related equipment: an anvil, hardening bath, gas-air chamber, chimney and exhaust hood
Craftsmen also use a gas-air chamber on a production scale. In it, the products are dried from condensation and additives are added to the composition, which can only be added in a gaseous state. Air is dried there to obtain certain technological conditions.
To increase the area of extremely high temperature, a crucible is used - a cap that expands towards the base. It is needed mainly when working with non-ferrous and precious metals. Handicraftsmen often do not need any of the additions, except perhaps a bath, for which any metal container of sufficient volume can be adapted.
Choosing blue fuel for work
It is believed that both mainline and bottled liquefied gas are suitable for operating a forge. We will disappoint you: it is not advisable to use an unrefined natural option.
There are two good reasons for abandoning natural fuels:
- From the pipe we receive blue fuel, which is a kind of mixture of gaseous hydrocarbons. Their calorific value and oxygen retention abilities vary. Therefore, it is virtually impossible to tune in to the optimal air supply.
- The gas mixture for domestic use always contains, albeit insignificant, the content of impurities that affects the result. The presence of phosphorus and silicon may not be noticed, but sulfur will definitely render the result of labor efforts unusable. Only remelting can save.
In addition, household gas is odorized - giving it a characteristic odor so that a leak can be detected immediately. These substances will also negatively affect quality.
Household gas is not suitable for the operation of a forge, since it contains impurities that interfere with the processing of metals. Before supplying gaseous fuel to the combustion zone, it is necessary to clean it or use cylinders with industrial monogas
Industrial liquefied gases would be perfect: propane or butane supplied in cylinders. But only if they are monogases without any accompanying impurities at all.
If it is not possible to buy purified blue fuel, you can carry out the purification yourself. To get rid of sulfur-containing compounds, a container with naphthalene will help, through which you must pass the gas before feeding it into the burner.
By the way, if you use a factory-made burner, the process of constructing the forge will be carried out much faster. And you don’t have to worry about the result; everything will work flawlessly and safely. In addition, in the burner, air and gas can be mixed in advance in the proportions required for operation.
Custom design
Stationary models of the forge should be made taking into account the anthropometric data of the master. This is necessary to ensure maximum comfort during forging, because a red-hot piece of iron weighing several kilograms poses a serious danger to both the master and those around him. The most important thing in the process of work is to ensure maximum safety and comfort.
To correctly determine the size of the workplace, the help of a second person is necessary. So, the height is measured from the floor to the elbow of the master, whose arm is in a relaxed position and whose legs are shoulder-width apart. To the resulting figure you need to add another 5 cm, which will become the optimal height for the workplace.
The shape of the table is best square for the work of one master; for work with an assistant, you can make it rectangular. In the case of a square shape, the length of the side is determined by determining the diagonal. To do this, the assistant needs to measure the length from the master's abdomen to the end of the largest pliers in an outstretched hand. Another 10 cm is added to the resulting number and half the diagonal is obtained. Next, if you wish, you can simply multiply the result by 1.414 or determine the length of the entire diagonal and solve the equation from the school curriculum C2 = a2 + a2, where C is the resulting diagonal, and is the side of the table.
Main parts
The mechanism of operation of the forge is quite simple. The design of the forge resembles an oven with three partitions and one open side. Its main function is to maintain the highest possible temperature inside.
The design of a self-assembled forge differs little from production equipment.
The classic design should have:
- fireproof table;
- hearth with grate;
- device camera;
- umbrella;
- air chamber, valve and drainage;
- chimney;
- hardening bath;
- hole for feeding workpieces;
- air duct for oxygen supply;
- gas-air chamber;
- the furnace is removable.
Conclusions and useful video on the topic
The injection burner developed by Alexander Kuznetsov is especially popular. In this video, he explains what the structure consists of and how to assemble it:
Example of an injection burner operation:
Properly designed and made with your own hands exactly according to the requirements, the injection burner will become a reliable assistant for a long time. This device will replace expensive factory-made tools. With its help, you can solve many everyday problems without resorting to the help of professionals.
Would you like to tell us about how you assembled an injection torch for blacksmithing with your own hands? Do you have useful information on the topic of the article? Please leave comments in the block form below, ask questions, post photographs.
Types of gas burners
There are several design types of propane burner:
Vortex
Air flows are mixed by guide spiral plates. Mixing takes place entirely in the wellhead area, providing excellent control with minimal pressure loss. But manufacturing such a burner is labor-intensive due to the complexity of the design.
Injection gas burner
Its features: independent gas tightening, simplicity of design and low efficiency (the ratio of components is adjusted in a small range of values). Made with your own hands, it will require work when there is a lack of air.
Tangential type
The gas flow occurs along the axis, the air flow occurs tangentially relative to the mixer body. Characterized by intense mixing and high pressure loss due to turbulence. The air in the furnace is supplied unevenly; there is more air in the area of contact of the heated workpiece with the furnace bottom. This leads to increased waste and scale formation. These burners are good for their simplicity and reliability.
The combination of tangential and direct supply provides the best controllability of the combustible mixture: the length of the torch varies depending on the amount of air supplied between the internal and external channels. This makes it possible to control the heating time of parts for forging. It is characterized by its large size, which is not suitable for use in small forges, and the technical complexity of its manufacture.