DIY vacuum chamber for degassing
Quite often the master does not have enough tools to bring some idea to life.
This happened to me when I had to deal with the need to work with a vacuum. At first I used low-power household canning systems, but very soon I needed molds larger than a liter, and I decided to make a vacuum chamber with my own hands. On the small-scale industrial market, their choice is small, and the prices are more than high. Why are vacuum chambers needed in handmade and small industry? They are used to degas various molding compounds, which ensures the creation of a high-quality mold. Vacuum degassing chambers help remove air bubbles from injection molded polyurethanes, also ensuring high product quality. Degassing is necessary for soap makers, because after preparing soap, especially transparent soap with graphic elements, the presence of air bubbles that spoil the product is unacceptable. So, how can you make a vacuum chamber for degassing yourself without much expense?
Exploitation
It is most convenient to place a homemade vacuum pump under the table, so that only the suction and discharge tubes from it lie on the table.
With this placement, it is advisable to integrate a pedal into the electrical circuit of the unit, pressing which will turn it on. It is also better to place the vacuum pressure gauge on the table.
Since, if the vacuum pump is placed under a table due to lack of light, it is not very convenient to use an oil level gauge, you can additionally equip the device with backlighting.
Using a homemade vacuum pump, you can not only pump out air from food storage containers, but also make various products from two-component silicone rubber by vacuuming. However, it should be taken into account that this unit will not cope with too thick material, for example, Viksint.
A dirty water pump is a very useful unit that is used not only for pumping waste water, but also for irrigation, pumping wells and other needs. Submersible pump for dirty water - main characteristics and popular models.
Why the pumping station often turns on and how to fix this type of breakdown, you will learn in this topic.
Making a vacuum chamber for degassing with your own hands
We will only make a vacuum chamber; we will still have to buy a pump. It is almost impossible to make at home. I bought a vacuum pump that gives 15 liters of vacuum per minute, I don’t need more.
We turn a freon bottle into a vacuum chamber. To do this, cut off the top of the cylinder, just straight. To do this, mark the same distance from the middle of the top point of the cylinder with a tape measure, make several marks in a circle, and then use a marker to close them into a line in a circle. We take a grinder and cut it off. What you get is a stripped-down cylinder and a plate cut off from it.
Next, turn the cut plate over and insert it into place. Now you will need the services of a gas welder. We need to weld the plate upside down, and then cut a hole in it of the diameter we need. I made sure that a liter jar would fit freely. Such simple work can be done for you at any car service or household. yard for almost nothing.
The next step is to create a gasket that will seal the cylinder while pumping out air. To do this, we glue a side around the perimeter of the plasticine cutout at a height above the general cut horizon. Pour silicone into the resulting groove. I used Elastoform, as it is not expensive, but reliable. You can, in principle, use ordinary plumbing, but it will take a very long time to harden, since it does not contain a catalyst.
To pump air out of the chamber, it needs a lid. Ideally, you should use a piece of plexiglass for this. This way you can see what process is happening in the chamber. However, I came across ceramic floor tiles, which I cut to a diameter half a centimeter smaller than the outside of the silicone gasket. This way the lid will fit well and hold the vacuum.
The camera is almost ready. All freon cylinders have carrying handles and a tap. Now, turning the cylinder upside down, we will place it on the handles, like on supports.
We put one end of the oxygen hose on the faucet and clamp it with a clamp. After pumping out the air, you can close the tap and the vacuum will remain in the chamber. In order to let air into the chamber, you need to remove the hose from the fitting of the pump or chamber and open the tap.
You can complicate the design, put a tee with a threaded valve in the hose, make a receiver for permanent vacuum storage, but such a chamber is enough to do the simplest work.
Source: https://www.diy.ru/post/6736/
Refrigerator repair: draining the freon path
A list of methods is proposed to remove moisture from the freon circuit when repairing a refrigerator. The liquid freezes at the outlet of the capillary tube, forming an ice plug, the compressor roars strained, but the temperature does not reach the set temperature. Symptoms – no frost, plus two additional signs.
- The strained roar of the engine has already been mentioned; by the way, a compressor works in a similar way in a vacuum. Manufacturers do not recommend turning on the product when repairing refrigerators if the air from the freon circuit has been pumped out. This is necessary to get rid of moisture; the liquid actively dissolves in the compressor oil. Inside the housing, the lubricant constantly circulates in a circle, lubricating the parts and injecting itself into the housing. This is noticeable in the video available on YouTube, where the compressor is adapted to inflate the wheels. The fountain shoots out from the outlet pipe, and the creator of the video installs a special filter to prevent oil from getting into the camera or pneumatic tool. In the latter case, special channel devices are often installed to lubricate the units. In our case, when the compressor is actively operating, old freon and moisture will begin to release and come out.
- When moisture gets into the freon circuit, an ice plug forms. It melts if the device is turned off. The process accelerates when the capillary tube on the evaporator side is heated. Or you will need to place pots of hot water in the freezer and refrigerator. Please note that during the repair period, the internal temperature above 40 ºС is unacceptable. Upon reaching 65 ºС, harmful substances from polymers may be released; at 80, plastic is already capable of floating. As a result, the refrigerator will become completely unusable. After the measures taken, the unit will begin to freeze again, but not for long. Soon the ice plug will grow again and cooling will stop.
Vacuum chamber from a refrigerator compressor
The author used a compressor from a refrigerator as the main working body; it allows you to obtain a fairly low vacuum. The container, in our case a pan, is covered with a sheet of acrylic, which allows you to observe what is happening inside. So, let's take a closer look at how to assemble such a homemade product!
Materials and tools used by the author:
List of materials:
- vacuum gauge (like a pressure gauge, it only measures vacuum); — two plumbing tees and parts for connecting them; — two taps and fittings; - fum tape; — compressor from the refrigerator; - hose (for high pressure, it should not be compressed during vacuum); - a sheet of plexiglass; — metal clamps; - switch and wire; - pot; - a piece of rubber hose or similar (to make a seal); - plywood or board (as a base).
List of tools:
- hacksaw for metal; - screwdrivers; - spanners and vices; - drill with drill bits.
Vacuum chamber manufacturing process:
Step one. Connect the hose to the compressor
First of all, let's deal with the compressor; for this we need to find the tube through which air is sucked in. We take a hacksaw and cut off the excess from it. Next, we need to put a piece of hose on this tube. We install a steel clamp to keep everything tight. The hose should be multi-layered and should not compress under the influence of low pressure inside.
Step three. Assembling the working unit
At the top of the device, the entire working unit of the device is placed on an acrylic sheet. There are two taps here, one supplies air inside if necessary, and with the help of the second tap you can turn off or open the air suction. We also have a vacuum gauge here to monitor the degree of vacuum.
This unit is assembled from two tees for plumbing and some fittings. All threaded connections are carefully insulated using fum tape. Finally, connect the hose from the compressor and secure it with a metal clamp.
Step four. Assembling a vacuum chamber
For the vacuum chamber, the author used a stainless steel pan; we need to install a seal on it, which will prevent air from passing between the acrylic sheet. For these purposes, a piece of rubber hose of small diameter that can be cut lengthwise may be suitable. We put on the seal, and in the end we will have one or even several joints. It is important to seal these parts. For this task we use glue or even silicone sealant.
That's all, you can turn on the compressor and see if a “vacuum” will form inside. In this case, the acrylic sheet will bend inward.
Step six. Basis for the device
The homemade product is almost ready, we just need to make a reliable base for it. Here you will need either plywood, or a board, or something similar. First make the feet out of rubber to reduce vibrations from the compressor.
Well, then we attach the compressor itself, using self-tapping screws or other fasteners at your discretion. And also make stops for the pan so that it does not move on the base when using the machine.
That's all. You can test it. As a test, the author installed a glass of water inside the machine. Under the influence of low pressure, all the air was immediately removed from the water, this is an excellent example of degassing of liquids. And if you make the vacuum even lower, the water can boil even at room temperature or so. This is a great way to dry fruits, vegetables and so on. True, in this mode the piston compressor system will not last long. In general, show your imagination how you can use such a device.
The project ended successfully, good luck and creative inspiration if you decide to repeat it. Don't forget to share your DIYs with us!
Source: https://usamodelkina.ru/11661-vakuumnaja-kamera-iz-kompressora-holodilnika.html
Materials and tools
- hacksaw for metal;
- pliers;
- soldering iron;
- welding machine.
In addition to the compressor from the refrigerator, you will need to get:
- oil-resistant tubes (can be bought at the car market);
- brass foil;
- a piece of linoleum.
You will also need a steel corner 25x25 mm.
A lot of time has passed since the creation of the first pumps and now there are many types of units for all kinds of needs. Why do you need a screw pump and what is the principle of its operation? Read on.
We will look at the technology for tapping under pressure into a water supply system here.
An automatic water pumping system from the basement is the most convenient option for keeping the basement dry. Here https://aquacomm.ru/cancliz/zagorodnyie-doma/avtonomnaya/drenazh/drenazhnyie-nasosy/nasos-dlya-otkachki-vody-iz-podvala.html we will look in more detail at how to organize such a system.
Making a vacuum chamber at home
One of our clients, Boris, decided to share his experience of making a vacuum chamber at home. And we post instructions on our website for you, dear customers.
Making a vacuum chamber at home.
In the process of solving the problems of manufacturing parts from transparent resin by casting into a silicone mold, the moment came when we realized that in order to obtain high-quality parts, it is necessary to vacuum the silicone for the molds and the resin from which the parts are cast.
An internet search came up with three results:
- buy a professional camera - the price ranges from 40 thousand rubles to infinity;
- buy a simple camera for amateur purposes (for example this
- make it yourself (for example this
Do-it-yourself refrigerator repair
The described approach takes a lot of time, but if carried out using the conveyor method, the result is excellent. Of course, this is only possible in a large workshop, which not every repairman can do. It’s easy to see by simple calculation that repairing Atlant refrigerators will take up to 2 hours. Not including delivery and delivery to the client. Not always profitable. When it comes to repairing high-cost Electrolux refrigerators, the price justifies the time spent. But the quality of the work performed will ensure good reputation for the performing company. Repairing a refrigerator yourself when refilling with freon is unprofitable. To do this, you will need to spend thousands of rubles on equipment, which exceeds the price of workshops.
It’s no secret that some craftsmen do a bad job and have to redo it: they are too lazy to change filter-driers, and they don’t do vacuuming well enough. Do not waste extra freon on low pressure runs. The result is the same - the ice plug returns. Monthly repairs of Westfrost refrigerators will cost a pretty penny. As a result, a new device is purchased, and the popularity of ordering the services of a specialist decreases. Profits are falling. If you work on products in parallel, create a technological map for performing work, debug testing methods, business goes well.
For repairs of Ariston refrigerators they now charge from 1000 rubles. Repair of Stinol refrigerators is simplified by the presence of error codes. If the temperature sensor is faulty, it will be known. Consequently, the time to find an error is reduced. This requires a thorough study of the problem.
The simplest DIY vacuum chamber
Very often during the restoration process it becomes necessary to use a vacuum chamber to impregnate any objects with various compounds. Of course, you can simply apply the same tannin solution to the object being restored with a brush, or immerse the object in a container with the solution, but in this case the tannin will not get into the pores and microcracks, and corrosion may subsequently develop in them. And so in almost all cases. But if you look at the prices for professional vacuum equipment, the question involuntarily arises - why would an amateur spend THAT kind of money? Especially when there are few of them... In this case, a simple homemade vacuum chamber will help. With its help, of course, it is impossible to achieve brilliant results, but, as they say, without fish...
To build a simple vacuum chamber at home, we will need the following:
Foot car pump. You can buy it, you can find it in the garage. 200 rubles.
Glass jar with a screw cap. Suitable for any canned food, the main thing is that the lid fits. For free.
Vacuum gauge. Can be converted from any pressure gauge or purchased. 300 rubles
Hose. Any hose with an internal diameter of 5-6 mm will do. You can find it, you can buy it. 35 rubles per meter.
Fitting with ½ inch nut. 50 rubles.
Tee for hose. 30 rubles.
Check valve. There are several options: plumbing, with 2 fittings - 150-200 rubles, from an aquarium - 15 rubles, from auto parts - 25-300 rubles.
Silicone sealant. 100 rubles.
The total cost of our vacuum chamber will be approximately 750 rubles, and this is assuming that you need to buy everything. The camera assembled for this lesson cost us 50 rubles - only the fitting was purchased.
Do-it-yourself refrigerator repair
More often than not, the refrigerator does not freeze. The opposite situation rarely happens; it is mainly explained by a breakdown of the thermostat, which does not send a command to the compressor to stop working in time. An indirect scheme is possible, when the processor collects sensor readings, and one is faulty. For example, a simple thermistor is installed in Liebherr. If it fails, ice builds up on the back wall of the refrigerator compartment in a layer of several centimeters. Much more often, self-repair of a refrigerator looms on the horizon when there is a freon leak. It is important to know a number of rules that apply in such cases.
How to make a vacuum chamber with your own hands
I planned to use a compressor from an old refrigerator as a vacuum pump - cheap and cheerful. Since the compressor turned out to be from a fairly ancient refrigerator, I decided to change the oil in it. On one website I found an article about the correct oil change and, following the recommendations, filled in new 10W40 instead of the old organic one. The tube through which the oil needs to be changed can be seen in the photo; initially it was closed; it had to be sawed off, and after changing the oil the hole was soldered. By the way, it is iron, unlike the inlet and outlet tubes, which are copper.
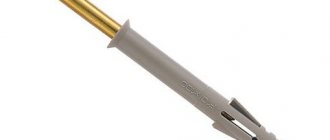
I also think it makes sense to describe the watering can a little. In the articles that I found, they were filled with either syringes or something else, which seemed not very convenient to me. I decided to make a homemade watering can. As a tube that is inserted into the compressor tube, I used a piece from a radio antenna of a suitable diameter. I drilled the required hole in the cork of a plastic bottle and fixed the tube on both sides of the cork with hot glue.
I poured in about 300 grams of oil, a little more than I poured out.
The pressure gauge used the one that was available, at 2.5 kgf/cm2, converting it to vacuum:
The taps and adapters are standard for gas, purchased on the market. The chamber itself is a 5 liter stainless steel bucket. The lid is two standing 5 mm plexiglass glued together (I’ll make a reservation right away that the lid is the weakest link of this device, since when negative pressure appears, it begins to bend inward, and in the near future it will be replaced with something more solid).
The round lids were made with a milling cutter on a drilling machine, the speeds are medium, at high speeds the plexiglass begins to melt.
The second part of the lid was made using a similar method, but the diameter corresponded to the inner diameter of the bucket; I adjusted the dimensions by placing the workpiece on a drill and grinding it with sandpaper, at the same time creating the desired angle.
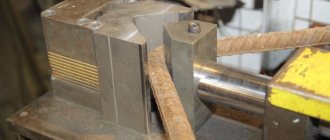
Next, a silicone seal was cast. It was done like this: a bucket was placed on the plexiglass circles glued together, and it just fit tightly onto the circle of a smaller diameter. A temporary edge made of thin, about 0.5 mm fiberglass, was glued around the bucket with hot glue, then the bucket was removed, and silicone was poured into the groove, poured carefully with a syringe.
Then, when the silicone hardened (after a couple of hours), I tore off the hot-melt adhesive along with the PCB, and I got an excellent silicone gasket.
Yes, a few words about holes in plexiglass. I drilled out the central hole with a drill to match the diameter of the “poke” (I’m a radio technician, not a gas engineer) of my pressure gauge, at a speed of 200 rpm. At high speeds, when drilling, plexiglass begins to crack, so it is better to do this at minimum speed. I first drilled large holes with the largest drill available, and then bored them out using a grover.
First, use nozzle “1” then “2”.
Photo of the finished vacuum chamber:
The frame for mounting the compressor is made of chipboard - whatever was at hand, in order to save space in the room, it will also serve as a shelf or shelving unit. The compressor is fixed to the pipes using two pieces of bicycle tubes. I thought for a long time about how to secure them, and as a result this idea was born:
The copper tube is soldered to the brass adapter after the tap,
and it is attached to the compressor using a rubber band from the printer shaft, the rubber is durable and thick-walled, so far it’s ok even without ties, but I’ll install it later.
This way you can make an excellent homemade vacuum chamber at home and at minimal cost. a troll with you .
Source: https://x-shoker.ru/news/samodelnaja_vakuumnaja_kamera/2013-07-30-232
How to refill freon correctly when repairing a refrigerator
Before vacuuming, it is recommended to fill the air inside to search for leaks. Performed when the pressure in the system has dropped. indicating a seal failure. However, a similar sign is also observed when a plug forms. The service pipe is located at the compressor inlet. Freon is pumped to the outlet, resulting in a vacuum. Before repairing the refrigerator, it is recommended to wait until the circuit warms up and the plug is knocked towards the evaporator; a characteristic pop is heard (when the refrigerator is turned off).
The air emanating from the cracks, mixed with freon residues, will help localize the leaks. Refrigerator repair begins with vacuuming. We have already described in detail how a gas station with a manifold equipped with a pressure gauge is used, now we are only presenting the sequence of operations to get rid of moisture. We bleed the air through the needle gripper installed on the filter drier. We are replacing it. The filter drier must be installed new. We begin to pump out the remaining air.
Even a powerful vacuum pump runs for a quarter of an hour to achieve optimal effect.
At the final stage of evacuation, we start the refrigerator compressor for a few minutes, no more. Practice shows that there are no negative consequences over a short period of time.
While the engine is running in a vacuum, old freon and moisture are actively removed from the oil. The stream is sprayed over the body, the contact area increases. This promotes the cleansing process. Then it is necessary to fill the system with freon to half the atmospheric pressure (control by pressure gauge). We start the compressor again. Now the remaining moisture will be carried away by the flow and absorbed in the new filter drier. To be sure, place pots of hot water in the freezer and refrigerator. Do not forget to maintain the temperature, as written at the beginning of the review. Due to this mode, the evaporator will not be able to cool, and the condenser will warm up slightly. Moisture will evaporate more actively and be absorbed by the filter-drier. An ice plug will not form, even if there is water in the system.
Then vacuuming is carried out again, removing wet freon, and refilling begins. The full volume is not supplied immediately. First, a technological dose of freon is pumped in, for example, half of the required mass. The camera mode is set to maximum, the pots of water are removed. When the refrigerator begins to freeze, it is carefully monitored to see if the ice jam effect appears again. Only in the absence of deviations does the freon mass reach its full value. During this event, the gas station is connected. Only after a test run in combat mode and reaching the set temperature is it permissible to clamp the service pipe, unsolder the Schrader valve and patch the inlet with a burner.
How to make a simple briquette press at home
Opening a small furniture manufacturing enterprise begins with the acquisition of the necessary equipment.
It’s good if you have the opportunity to purchase branded factory-made machines.
But what if the starting capital is very limited?
There is only one way out - to assemble some of the units yourself. You can, for example, make a vacuum press with your own hands.
Application
When making furniture, parts made from particle boards, for example MDF, are covered with PVC film. It is also used to cover door trims. Such cladding has an attractive appearance at a low cost. But covering wood with film is not at all as simple a task as, for example, gluing wallpaper. A special device called a vacuum press is required.
This machine consists of the following components:
- The bed is the base on which all the elements are assembled.
- Vacuum chamber. A durable box with an open top into which the workpieces are placed. Then it is covered with PVC film.
- A heating element (thermal module), through which the film is heated to the required temperature.
- Vacuum system – pump with additional equipment. These components are designed to pump air out of the vacuum chamber.
- A cabinet in which the electrical circuit of the machine is assembled.
When the air is pumped out, the heated film fits around the parts coated with glue in a vacuum chamber, after which the coating can only be dried and trimmed here and there.
How to get rid of belly fat - the first stage
Most people who set themselves the goal of looking good, and not setting strength records, will first want to get rid of fat deposits around the waist. Everything is simple here - no matter how much twisting you do, you will have to create a calorie deficit. Even an hour of exercise on the floor cannot be compared with simply giving up sugar in tea and coffee and replacing it with some kind of non-calorie sweetener.
Fortunately, you don’t need belly fat diets and other legacies of fitness folklore. For a simple person with normal or overweight who eats haphazardly, that is, does not count calories, proteins, fats and carbohydrates, it is enough to start eating rationally. This means counting all these indicators and balancing the diet, as well as creating a small calorie deficit so that the body begins to burn fat to replenish it.
Tools
The basic set of tools is the same as for the manufacture of any other products from a steel profile:
- inverter-type welding machine with a welding current of up to 130 A;
- electrodes with a diameter of 2 – 2.5 mm;
- grinder with a working part diameter of 150 mm and a cutting wheel for it;
- electric drill with metal drills with a diameter of 10 mm and a metal brush;
- metal scribe;
- metal scissors;
- exhaust riveter;
- roulette.
Source: https://svarka-44.ru/kak-sdelat-vakuumnuyu-kameru-svoimi-rukami/