Appendix G to the Instructions for visual and measuring control (recommended)
_________________________ (organization) ACT No. _____ from ____________ visual and measuring control 1. In accordance with the work order (application) _______ completed _________ number indicate the type of ______________________________________________________________________ control ___________________________________ control _______________________________ (visual, measuring) name and dimensions of the controlled object, _______________________________________________________________________ code of documentation, specifications, drawing, melting ( batch), number of the control object The control was carried out in accordance with _________________________________________________ name and/or code of the technical documentation 2. The following defects were identified during the control ___________________________ characteristics of the defects (shape, _______________________________________________________________________ dimensions, location and/or orientation for specific objects) _______________________________________________________________________ _______________________________________________________________________ _______________________________________________________________________ 3. Conclusion on the results visual and measuring control ______________________________________________________________________________ ______________________________________________________________________ ______________________________________________________________________ Control completed _______________________________________________________________ Qualification level, Last name, initials, signature No. qualification certificate Supervisor of visual and measurement control ____________________________________________ Last name, initials, signature
Explanations for the registration of the “Act of visual and/or measurement control”
1. Clause 1 indicates the type of control - visual, measuring or visual-measuring, as well as the name of the inspected object: semi-finished product, workpiece, part, structure, preparation of the edge of a part for welding, joint assembled for welding, finished welded joint, sampling of a defective area in the material and/or welded joint, the product, as well as the name and/or codes of the production control document (Incoming control program, Card or control scheme, Technological control card, Card or operational control scheme) and the regulatory document regulating the requirements for quality assessment controlled object during visual and measuring control.
When inspecting materials (semi-finished products, blanks, forgings), point 1 indicates the grade of material, dimensions (diameter, thickness) and batch number.
When inspecting parts and assembly units, paragraph 1 indicates the drawing number, dimensions, grade of material (only for parts), its code according to the drawing (standard).
When inspecting the preparation of the edges of parts, assembling joints for welding and finished welded joints, point 1 indicates the numbers of joints according to the welding form or the layout of welded joints, as well as the dimensions of the joint parts (diameter, thickness), grade of material and welding method (for finished welded joints). connections).
When inspecting samples of defective areas, the name, grade of material and dimensions of the object (diameter, thickness), as well as the location of the sample are indicated.
2. When filling out clause 2 of the Act, it indicates all deviations from the norms of RD that were identified during the inspection of specific objects (sections, connections, etc.) in connection with their numbers according to the welding form, layout diagram or control diagram.
In cases where the object of control meets the requirements of the RD, the act states. In this case, the numbers of specific objects are indicated in accordance with the documents given above.
Note. It is allowed to issue one Certificate for a batch of the same type of semi-finished products, blanks, parts, and structures.
______________________ (organization)
Control of welds is a necessary part of the approval of various structures before operation. The methods and results of verification actions are reflected in a special act.
FILES
How to check welds
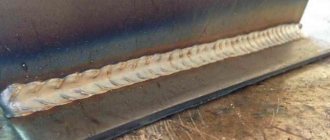
In fact, a variety of methods can be used to examine welds, for example, ultrasonic, magnetic, chemical, capillary and other high-tech methods. However, the classic one, which is still relevant and in demand today, is a simple visual inspection. Its purpose: to make sure that the seam is of high quality, well welded, and has no undercuts, sagging, burns, excessive scaliness or other flaws. The advantages of this type of research are quite obvious: it does not require large expenses, it is accessible and quite informative, but along with this there are also disadvantages: the subjectivity of the examination, low reliability, the ability to examine only the visible part of the seam.
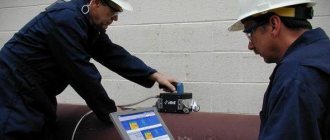
Visual inspection can be carried out both with the naked eye (usually, if we are talking about large, clearly visible seams), and with the help of various devices, such as lenses, microscopes, endoscopes, flaw detectors, etc.
They are used to identify the smallest hidden defects that are difficult to detect by simply examining the outside of the weld (for example, microscopic cracks, nicks, delamination, fractures, etc.). At the same time, there are devices that are intended only for use in laboratories and those that can be used “in the field.” The latter are able to withstand any temperature and weather conditions (including those that have an increased coefficient of radiation, chemical, bacteriological, etc. danger to humans).
Capabilities of the method for identifying defects
The following welds are subjected to visual inspection:
- when performing surfacing work at the “acceptance-handover” stage, a visual inspection certificate must be drawn up;
- when inspecting a multilayer welded joint (layer-by-layer inspection);
- during the final inspection of the places where the welding arc touches the surface of the base material.
- when assembling parts from assembly units under;
- in the automatic production of welded parts and technical assessment of the quality of the material according to the technical process;
- upon expiration of the specified service life of the welds.
Visual inspection of welds requires mandatory measurement and exclusion of the following defects:
- surface cracks;
- visible gross defects;
- poor quality of metal stripping in welding zones (especially technological fastenings),
as well as control and confirmation of availability:
- branding (marking) of the seam and the accuracy of its production;
- width and height of the seam, convexity and concavity of the seam;
- correct sizes of fillet weld legs.
Defects that can be identified
When examining welds with the naked eye, you can assess:
- uneven height and width of seams;
- excessive scaliness;
- influx;
- undercuts;
- excessive strengthening or weakening of seams;
- unfilled craters;
- burns;
- parameters of fillet weld legs.
Magnifiers and microscopes allow you to detect: – a mandatory stage of working with metal.
Turning of metal sheets and parts is used using special equipment. Read more about this.
Do you need to cut metal efficiently and quickly? An effective method is described in the link.
Why is weld inspection necessary?
The purpose of such an in-depth examination is quite obvious: as a rule, any structures that use welding are designed to withstand a certain, fairly serious load (this is especially true for building structures). And any deviation from technical standards that occurs during their manufacture threatens that the structure will not withstand and will break, which in turn can lead not only to financial losses, but also to a threat to the life and health of people.
Often, welds are checked not only after the structure is manufactured, but also during its operation - this is due to the fact that they may be subject to corrosion and other adverse effects. Also, regular checks are necessary when surfacing several layers on a worn-out structure, while each completed layer is monitored, the length of the weld, the thickness of the base metal are measured, and these data are compared with the established standard for this area, taking into account its load.
The frequency of inspections is determined by legal norms, as well as internal regulations of the company.
Timely and high-quality visual inspections make it possible to detect seam failure as early as possible, as well as understand the causes and find a way to eliminate them.
Registration and storage of the act
Information about the act must be entered in a special accounting journal, in which it is enough to make a note about its number and date of creation. The storage period for the finished act is determined by the administration of the enterprise individually, based on the norms established by law, as well as the internal needs of the company.
The act must be stored in a separate folder either in the structural unit in which it was generated, or in the archive of the organization.
If you need to draw up a weld inspection report that you have never done before, use the sample below and read the comments to it - they will help you draw up the required document without errors and ambiguities.
- First of all, enter the name of the enterprise into the act, then assign a number to the document, indicate the date and place of its creation.
- Next, enter into the report the positions and full names of the workers who inspected the weld (if these are representatives of different enterprises, indicate the names of each of them).
- After this, proceed to the main part: include information about the performer of the work: position, full name, then enter here data about the welds that were examined: their number, steel grade and other identification values.
- Indicate the instruments and devices that were used during the inspection, all the methods used, their results, and also give recommendations on additional examination methods.
- At the end, be sure to summarize the current control and sign.
The need for high-quality visual inspection and control of the welded joint is explained by the fact that, for the most part, any mechanisms and structures in which welding is used are designed to withstand heavy loads.
Welding machines are widely used in construction and in the manufacture of durable metal structures, so the slightest deviation from technical standards that occurs during their creation can carry significant risks. If the welds fail to cope with the load and break, there will be not only inevitable financial losses, but also casualties both during the construction phase and when the structure is put into operation.
Often, welded joints are checked during the construction process. This need is due to the fact that the seams, depending on operating conditions, may be subject to corrosion and other adverse effects.
Timely inspections are especially required when old worn-out structures or structures are overlaid with layers. In this situation, each applied layer is inspected and checked, the thickness and length of the connecting seam are measured, and all data obtained is compared with the established standard for a given area, taking into account its load.
Regular and high-quality visual inspections help to detect seam damage in a timely manner, eliminate defects as soon as possible, as well as understand the cause of the destruction, and find ways to eliminate and further prevent damage.
On the organization of independent technical examination of vehicles 2022
Car owners have to restore their car, spend money on repairs, and deal with insurers, who often try to reduce the amount of monetary compensation for damage caused.
We will find out how the examination is carried out and whether it is necessary to notify the culprit of the accident about its conduct.
About the organization of an independent technical examination of vehicles 2022 As soon as an accident occurs, the motorist must call the traffic police officers if the collision cannot be processed according to the European Protocol.
At the scene of an accident you should: If the nature of the damage to the vehicle cannot be assessed at the scene of the accident, an inspection must be carried out at the insurer's service station.
But where is it better to contact after an accident, insurance or independent expertise? It is preferable to choose the second option.
RSA strongly recommends turning to an independent examination of vehicle damage, where specialists do not represent either party in the accident.
Where can I get an independent examination of a car after an accident if there is no one to recommend a good organization? Object of independent technical expertise; In general, the organization of work to conduct an independent technical examination provides for the following actions on the organization of an independent technical examination of vehicles in 2018; When inspecting a vehicle, the body number and mileage of the vehicle are documented; The independent expert has no financial interest in preparing a report with incorrect data.
Vehicle damage assessments are carried out by certain companies that do not work with insurance companies. You can ask the expert for examples of his expertise and court decisions that were made based on the results of his activities. You can also find out what kind of work experience he has, whether he has taken professional training courses, or whether he has passed a commission from the Ministry of Transport.
Independent expertise must be trusted to high-class specialists. The culprit with MTPL insurance must independently restore his vehicle, and the victim will be paid monetary compensation from the culprit's insurer. But it is quite rare to receive full compensation for damage. Insurance companies have many different schemes that allow them to save money on their clients.
Sometimes it is quite difficult to determine the guilt of the parties, especially when the testimony of the drivers does not match. Independent examination on the organization of an independent technical examination of vehicles 2022 to restore the picture of the accident, study the whole range of factors, and draw a conclusion about who is really to blame.
An independent expert examines the technical condition of the vehicle, describes the damage, compares the facts, for example, finds out the initial speed of all vehicles, the position of the vehicles after the impact, issues an official document reflecting the amount of damage, and helps find answers to other important questions.
The main thing today If necessary, an expert can calculate the market value of the car.
Is it worth contacting independent organizations? Why is this so important? The deformed parts of vehicles with which they came into contact make it possible to roughly judge the relative position and mechanism of interaction of vehicles.
The total amount of the penalty and the financial sanction that must be paid to the injured individual cannot exceed the amount of the insurance amount for the type of harm caused, established by the Federal Law “On Compulsory Insurance of Civil Liability of Vehicle Owners.”
Check the availability and serviceability of additional equipment and a set of tools for emergency repairs.
New MTPL insurance rules 2018
The cost of repairs to eliminate damage to the victim’s vehicle due to the organization of an independent technical examination of vehicles in the 2022 case.
In case of early termination or upon expiration of the compulsory insurance contract, the insurer provides the insured, the person whose liability risk was insured under such compulsory insurance contract, with information about insurance in the form specified in Appendix 4 to these Regulations.
Payment for the cost of the contractor's services, as well as reimbursement of other expenses incurred in connection with the independent technical examination, is made at the expense of the customer in accordance with the concluded agreement. The body and tail of a passenger car include the following main elements.
The results of the inspection are reflected in the inspection report, which makes a conclusion about the possibility or impossibility of eliminating deficiencies in the restoration of the vehicle by carrying out repeated repairs, or about the absence of deficiencies.
Insurance companies are advised by different companies to assess damage, which usually work closely with insurers. Therefore, quite often the true cost of damage is underestimated.
If an expert from such a company examined a vehicle involved in an accident, but his conclusions raised even more questions, you need to look for an independent expert.
Refusal of claims under the Arbitration Procedure Code of the Russian Federation Usually an independent examination on the organization of an independent technical examination of vehicles 2022 is a victim who wants to achieve justice and high-quality car repairs from the insurer.
The participant in an accident must sign an agreement with the appropriate company immediately after the accident or after the damage has been assessed by representatives of the insurance company.
When is the best time to do an examination? After an accident, you should not rush to make repairs until the issue of the required amount of payments is finally resolved.
If the car owner agrees with the expert’s conclusion from the insurer and takes the car to a car service center, a repeat inspection will not make sense, since all the defining defects will be eliminated. The independent expert has no financial interest in preparing a report with incorrect data.
It will provide a more objective and adequate assessment of the damage. The difference in the amount of damage between an organization from an insurer and an independent company can be large. It is better to save all documents and receipts.
The examination is carried out on the basis of: The person at fault for the accident and a representative of the insurer must be invited to the inspection. A telegram is sent to the insurance company 5 working days before the date of the independent examination.
The report, which is drawn up by an employee of the organization, must reflect the following factors: The report is received by a representative of the insurer. The pages are bound, numbered, and sealed with the signature of the appraiser.
If the car has hidden damage, but for some reason the expert did not find it, the client must inform him about this; Chairman of the Government of the Russian Federation M; Registration of documents regarding a traffic accident without the participation of authorized police officers is not carried out in the following cases;; At the request of the policyholder who has concluded a compulsory insurance contract in the form of an electronic document, he is issued an insurance policy drawn up on a strict reporting form at the insurer’s office free of charge, immediately after the appropriate request; The name of the damaged elements of the vehicle must correspond to the full Russian name of the part indicated in the catalog of the manufacturer of the given model brand or modification of the vehicle.
One copy is given to the customer.
Conducting an independent examination to assess damage to a car after an accident
According to the document, the insurance company must pay damages to the victim. If the insurer does not agree, the case will be heard in court.
Deviations of the technical condition from the indicators established by the listed documents are classified as a malfunction or failure.
During an external inspection of the body, attention should be paid to damage, cracks and violation of welds in the sub-engine frame and side members of the body base.
Runs on diesel fuel. Third parties also conduct other types of audits. Types and main sizes. It is recommended to conduct a steering control study in the following sequence.
Additional issues requiring resolution taking into account the results of the examination.
The cost of materials necessary to eliminate the i-th damage to a vehicle caused by an insured event is determined by the formula.
A reassessment of the damage may then be necessary.
How much does an independent examination of a car after an accident cost? For mild damage, the price in Moscow starts from 3,500 rubles for up to 5 damaged parts; for complex damage, it starts from 7,000 rubles for over 20 damaged parts.
But if the victim sues the insurance company, which underestimated the amount of damage, and the court rules in favor of the victim, the insurer must cover the costs.
Therefore, documents issued by an expert from an insurance company, as well as documents and checks from an independent expert, must be kept.
They will be needed for the trial.
Terms and definitions 3; If there are prices for several analogues of an object of independent technical expertise belonging to a specific type of vehicle, it is recommended to finally select as an analogue a vehicle belonging to the same family of vehicles as the object of expertise, and having the closest values for other structural, functional and operational characteristics; Disassemble the cardan joints, conduct a visual inspection of the joint parts, paying attention to the presence or absence of lubricant, and any damage to the parts.
The examination determines not only the damage caused to the vehicle.
MTPL rules current edition
Third-party organizations also conduct other types of inspections: Experts and experienced car owners recommend not delaying calling employees of independent organizations. This should be done immediately after an accident, which will save effort and time.
If the insurer refuses to review the documents or pay compensation, you can go to court. An independent expert conducts an examination in the presence of the victim, a representative of the insurance company and the culprit. Useful material on the topic: Petition for the court to request documents from the defendant But if the driver responsible for the accident does not want to make contact, problems may arise.
Let's find out whether the culprit of an accident should always attend an independent examination. An independent examination helps the victim seek justice on the issue of compensation. How to draw up an accident diagram yourself? How to file a complaint with the RSA against an insurance company?
Add a comment Cancel reply Your e-mail will not be published. Get new comments by email.
You can subscribe without commenting. How to conduct an independent examination of a car after an accident?
Sample telegram to the culprit of an accident for an independent examination. Sample telegram to the insurance company about conducting an independent examination. Your nickname Email Comment Receive new comments by email.
By whom and how a visual inspection is carried out, and a report is drawn up
After the work is completed, the initial quality check of the seam is carried out by the person who made the connection. After the initial inspection, control is carried out by other technical specialists: for example, a site foreman, an engineer, etc.
It is very important that the specialists carrying out the welding have the necessary knowledge of the technique of visual inspection of welded joints. Workers must have the necessary tools and equipment at their disposal. In addition, they must know how to correctly draw up a visual inspection report of welded joints, and draw it up in accordance with the regulations.
Thus, visual inspection is carried out in accordance with the following algorithm:
- Visual control
. Preliminary check of the connection for corrosion and possible defects with simple measurements: width, thickness of the seam, etc. - Inspection of welded joints
. Quality control is carried out in order to obtain accurate parameters of external defects (after concluding a preliminary inspection report); the size of damage to welds is measured as a percentage deviation from the acceptable standard. - Detailed (instrumental) examination of seams and recording of results
. At this stage, deep defects are checked and ultrasonic testing of welded joints is used.
Specialists who carry out visual inspection of welded joints use several types of devices and tools.
A simple optical method for confirming the quality of metal welding
Control of any welding joint begins to be carried out even when the weld is directly created. Visual inspection is part of the welder’s work, and he periodically conducts an external inspection (for lack of penetration, undercutting and leg fidelity) several times until the entire scope of work is completed. This is also the oldest method of monitoring the final work and its essence has not changed significantly, but the implementation methodology has improved in recent years. Weld check
Theoretical definition and tools for implementation
Visual-measurement control (VIM) of welds is an external inspection of fairly large welded structures, both with the naked eye and with the help of various technical devices to identify smaller defects that are not amenable to initial visualization, as well as using converters of visual information into telemetric information. VIC refers to organoleptic (carried out by the senses) control methods and is carried out in the visible spectrum of radiation. A visual inspection in search of theoretical defects is carried out from the outside of the weld, where, if they are detected, minimal measurements can be taken using optical instruments and tools, and a visual inspection report can be concluded.
Inspectors use several types of tools when performing visual inspection of welded joints.
- Survey, telescopic, floor magnifiers;
- lenses;
- microscopes;
- endoscopes, etc.
To carry out monitoring under various operating conditions:
- Instruments for workshop purposes. Operating temperature range from +5 °C to +20 °C, conditions of complete rest, normal atmospheric pressure, moderate humidity.
- Field use devices. Operating temperature range from -55 °C to +60 °C, conditions of moderate shaking, vibration, precipitation.
The use of these devices allows for a more accurate search for defects and visual-optical quality control of welds on any objects.
Visual-optical control is the second stage of visual control with a wider, increased range of examination due to the use of optical instruments. Depending on the application, the method is intended for three main groups:
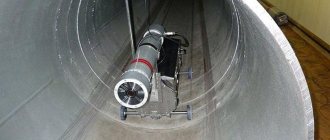
- To search and analyze hidden objects. The following devices are used: endoscopes, borescopes, video systems, periscope flaw detectors.
- To carry out inspection of objects remote from the flaw detector’s workplace. Range of application – a distance of no more than 250 mm from the controller’s eye. Equipment used: telescopic magnifying glasses, binoculars, spotting scopes.
- For examining small nearby objects. The range of application from the specialist's eye is at a distance equal to or less than 250 mm. Equipment used: magnifying glasses, microscopes.
Visual inspection of welds is also required in conditions where the human senses are unsuitable for work. In areas such as: elevated temperatures, dangerous background radiation, external chemically active environment and others. And also in conditions where the configuration of the object under study and its design do not allow a full analysis of the quality and measurement of defects in welds (for example, due to the large height of the object or its underground location). Then, in addition to optical instruments, the following are used to search and analyze hidden objects:
- remote control platforms;
- thermal imaging installations;
- lighting devices;
- automatic transport systems;
- controlled robots.
Thus, visual information converters make it possible to control the welding seams of a bath of hot metal during the remelting process.
Measurement control is an important component of VIC, which is carried out in accordance with strict control rules and regulatory documents governing quality. It consists of assigning a category or type to a defect according to one of the characteristics in the form of a specific physical quantity obtained through practical measurement. Measuring instruments and their metrological indicators are specified in regulatory documents. Measuring tool
During measurement control, the following tools are used, which may be included in the mandatory set of a technical supervision inspector or supplement it:
- measuring magnifiers;
- checking squares 90 0 pattern;
- protractors with vernier;
- calipers, calipers and calipers;
- probes;
- micrometers;
- pipe wall meters and indicator thickness gauges;
- micrometers;
- calibers;
- metal length meter (tape tapes, steel measuring rulers);
- micrometric and indicator bore gauges;
- templates: special, radius, threaded, etc.;
- UShS-2, UShS-3 (templates for geometric parameters of seams);
- surface plates;
- a set of special accessories.
This control method, VIC, refers to methods that are feasible with a minimum set of tools. It consists of collecting information and is based on the qualifications of a specialist, the human factor, but allows you to draw up a visual inspection report of welds, which is considered an objective document.
The essence of external control
The quality of the formation of welds on the surface can be easily assessed during professional inspection. The characteristic of a “high-quality” or “poor-quality” seam is quite arbitrary, since this is a comparative value.
Quality control of welds and inspection of structures, pipelines, and buildings are carried out in three interrelated stages.
Step-by-step procedure for conducting the VIC
- Visual (measuring) control. Preliminary inspection of the seam for corrosion and possible defects with primitive measurements: width, thickness, leg.
- Quality control of welded joints. Quality control is carried out to clarify the parameters of visible defects (after concluding a preliminary inspection report), the size of defects and distortions of welds (percentage deviation from the permissible standard).
- Detailed (instrumental) research and recording of results. More precise methods are used:
- eddy current method for determining the degree of weld wear and metal bending fatigue;
- ultrasonic testing of welded joints to detect serious deep defects;
- penetrant flaw detection for surface and through defects and so on.
Timely and high-quality inspections make it possible to identify the destruction of a seam or weldability defect in the early stages and then clarify the causes of the defect using any non-destructive flaw detection method.
Advantages and disadvantages of this technique
Advantages of the VIC method:
- A simple and accessible method.
- When collecting information about the quality of a design, it allows you to obtain up to 50% of the total volume.
- It is not labor-intensive and does not require expensive equipment.
- Easily tested and re-tested.
Disadvantages of VIC:
- The human factor, which influences 100% of the results.
- Low reliability of the results obtained, subjectivity.
- Used only to search for large defects (at least 0.1 - 0.2 mm) and suspected possible ones.
- Limitation of the study to only the visible part of the structure.
- The technical competence of employees is important; they must correctly select the measurement method, comparative template or standards and give an accurate assessment of the measurement results.
In terms of the method and quality of diagnostics, even imperfect visual inspection of seams is a necessary method, both at the stage of complex diagnostics and throughout the entire technological process. Universal welder template
Necessary devices
To carry out monitoring under various operating conditions, the following instruments are required:
- Instruments for workshop purposes
. Such instruments can operate at temperatures from +5 °C to +20 °C at normal atmospheric pressure and moderate humidity. - Field use devices
. Such devices can operate in a temperature range from -55 °C to +60 °C and can withstand moderate shaking and precipitation.
When carrying out measurement control, the following tools are used:
- measuring magnifiers
; - calibration squares
; - protractors
; - calipers and depth gauges
; - probes
; - pipe wall meters and thickness gauges
; - micrometers
; - calibers
; - tape measures, rulers
; - special templates
, etc.
How to correctly draw up a visual inspection report for welds
Currently, the visual inspection report is drawn up in any form. It is drawn up on the basis of a template that is developed and approved by the organization carrying out the work.
Registration procedure
The act can be drawn up by hand or printed on a printer; to draw up the act, you can use a form with the organization’s corporate logo and its details; it is also possible to use a simple sheet of paper.
The act must be certified by the signatures of the responsible persons, and it is drawn up in only one original copy and receives a unique number.
All data about the act is registered and a special accounting journal is entered, in which a mark is placed on the document number and the date of its creation. The act must be stored in accordance with the regulations and rules of the organization; it is stored in a separate folder in the company archive.
