Despite the huge assortment of different shoes on store shelves, people are often interested in making their own slippers, shoes or boots. This desire can be explained by many reasons: the opportunity to reduce the cost of the finished product, get a model of a unique design that ideally matches the parameters of the foot, or even simply try your hand at a new area. Be that as it may, in order to make shoes with your own hands, you need to study in detail all stages of production, select suitable raw materials and tools, correctly construct a pattern, and perform many other actions. The process is long and complex, requiring remarkable patience, concentration, and perseverance, but it is quite feasible, interesting and educational.
DIY tire boot sole
Background (who cares about the process, just scroll below)
Back in 2005, my parents and I went on a trip to Nizhny Novgorod. Walking through the streets of this beautiful city, my old Chinese sneakers fell apart, so much so that I needed to immediately buy new ones. The closest store to us was the Adidas branded department, without much trying and choosing, we bought leather Adidas Original Sport sneakers for 3500 rubles, which by those standards was not little, since Chinese leather sneakers cost about 1200 rubles. I had already left the store wearing new shoes, and the old ones were placed in the trash bin closest to the store. In those teenage years, sneakers were everyday shoes for me; I wore them all year round, alternating with classic shoes. Usually my shoes last 3-4 years at most, and then they fall apart, but these sneakers turned out to be very durable. Of course, they gradually began to lose their appearance. The first couple of years I just walked in them and could run at most in physical education, and then I could play football. As we got older, sneakers moved into the category of those worn for walks in the woods and nature, and then they became shoes for carrying out renovations in my parents’ house. As soon as the renovations in the house were completed, my father almost threw them out, but remembered that they were mine and decided to return them to me so that I could dispose of them myself. I looked at them for several months and thought about what to do with them. The top was still able to walk through the forest or ride a bike, but I couldn’t look at the sole without tears. A little about the sole. When we bought the sneakers, the soles were silicone, soft and transparent with transverse notches. Now this silicone has hardened and turned into plastic and in some places has completely fallen off; the porous rubber base was still in good condition.
Article on the topic: Where are Ralph Ringer shoes made?
So I decided to replace this silicone with a tire.
The process of replacing the sole.
To begin with, we needed a tire that was worn almost to zero, but still intact and not old. I didn’t find one right away, either there’s a lot of tread, then the tires are winter, then they’re all cracking, or the wear is uneven. In general, after several days of leisurely searching, Barum Brillance R13 was found.
I cut off the sidewalls from the tire so that they would not interfere, made a transverse cut and began to slowly saw along lengthwise, bending the future sole.
Introduction
Technologies do not stand still and shoe production, in this regard, is also no exception.
But unfortunately, the quality of the material from which most of the shoes on sale are assembled, as well as their assembly itself, do not always please us as buyers of these products.
Frequent breakdowns and defects, even in recently purchased new shoes, no longer surprise anyone.
And often this happens at the wrong time, when sometimes there is no way to take it to a shoe workshop.
Or, which is also, unfortunately, no longer uncommon - you received a poor-quality service in the workshop and you were dissatisfied with the work of the “shoemaker”.
Finding themselves in such unpleasant situations, many involuntarily begin to regret that they cannot fix the breakdown on their own, and, in the literal sense, throw away their money.
Or, even worse, they resort to using universal quick-drying glue (superglue) and thus can render their shoes completely unsuitable for use and restoration.
Modern means of communication with Internet access, laptops, tablets, PCs, allow you to find answers to almost all questions.
The topic of “shoe repair” is no exception; tens of millions of people in their search queries on Google and Yandex look for answers to their questions and find them in various sources, but not always the information that is presented in them can be completely understandable and useful percent.
That’s why I decided to open a shoe repair section on my blog and post my articles in it that will help you cope at home not only with minor repairs to your shoes and thereby save your personal or family budget, but also learn how to do it step by step more complex types of work, including replacing the instep support or replacing the sole.
And in the very first one, which you are reading now, I will talk about the nuances and subtleties of stitching the bottom of shoes, or, as we are all accustomed to calling them, sole stitching, or shoe stitching, which I personally encountered when performing this rather popular operation.
But before we move directly to detailed coverage of the question of how to stitch shoes
from scratch or if the sole firmware has come loose,
Let's take a little look at why you actually need to sew shoes, what tool is suitable for this, what kind of sewing thread needs to be used and some other nuances of this operation...
Handmade shoe companies
Even in an age of maximum automation, handmade shoes are not something outlandish. Classic English productions that are highly valued all over the world:
They produce shoes made of genuine leather and suede, hand-sewn. There are significantly more production stages than in mass automated production. A pair can be made within a month, depending on the type of material and complexity of the shape.
In terms of shapes and designs, the most popular handmade boots are:
They differ in the type of lacing. Oxfords have closed lacing hidden by the front of the shoe. The side parts are sewn in a wedge shape, perforation is possible.
Derbies, on the other hand, have open lacing, and the side parts are sewn over the front part so that when the lacing is untied, the boot opens freely. Derbies can also have perforations and are considered the most versatile shoe for any occasion.
Article on the topic: How to sew leather shoes with your own hands
Materials and tools
Before making shoes with your own hands, it is important to choose the right material and collect the right tools. Adult or children's products are most often made from leather, suede, and textiles. Genuine leather shoes are popular because they are durable, practical, wear-resistant, and there is much less chance of rubbing your feet. These raw materials are used to make: sneakers, shoes, boots, shoes, sneakers, flip-flops.
Suede is a pleasant, soft, elastic material used for both adult and children's shoes. It does not have a front layer, it is labor-intensive to manufacture, and therefore quite expensive. Textiles - used for sewing summer shoes, booties for children, sneakers, as well as house slippers. The material is very delicate, soft, pleasant to the touch. In such shoes, the foot always breathes, receives the necessary ventilation, comfort, and warmth.
The textile is environmentally friendly, so it is most often used to make children's shoes.
Leather
Suede Textile
When making soles with your own hands, use:
- Leather - has increased durability, strength, protects the foot from external damage, allows it to breathe. Making a leather sole with your own hands is no more difficult than making it from any other material.
- Rubber is a wear-resistant material, resistant to frost, temperature changes, and has thermoplasticity. Characterized by strength, practicality, durability. The only drawback is the increased soiling of such soles.
- PVC is a cheap material that has good wear resistance and can be painted. Used to make winter shoes. Disadvantage: Too heavy.
- TEP - made of thermoplastic rubber, characterized by good wear resistance, does not slip on wet roads. Disadvantage - it is impossible to give clear and even outlines.
- Polyurethane - has low thermal conductivity, soft, lightweight, any seasonal models are made from it. Easily repairable. The shoe industry often uses this material. The disadvantage is that it is fragile and wears out quickly.
Leather
Rubber
PVC
TEP
Polyurethane
Sewing shoes will be impossible without the following tools and consumables:
- file;
- tokmach;
- beeswax;
- awl;
- lingering pliers;
- hammer;
- shoe knife;
- polyurethane glue "Desmokol";
- nails;
- insulating tape.
It is worth taking care of the availability of all the necessary materials and tools in advance, only then can you proceed to the manufacturing process.
Design Features
The entire structure of the shoe is divided into upper and lower parts. The upper part consists of the following elements:
- Sock – covers the toes, withstands the greatest mechanical loads when worn.
- Vamp – covers the back of the foot and connects the toe, tongue and boots.
- Boots - cover the ankle joint, they are sewn to the vamp.
- Eyelet - the upper part of a shoe designed for lacing holes or hooks.
- Heel counter – protects the heel and foot, secures the heel, is made of hard leather.
- Tongue – covers the top of the foot, sewn to the vamp.
- Insole – connects the upper and lower parts.
The bottom part of the product contains:
- Sole – sewn along the contour with the upper part, divided into outsoles, shank, welt and filler.
- Heel – raises the heel and is attached to the sole; the top layer can be rubber.
- Heel protects the heel from rubbing.
- Welt is a connecting element between parts.
- Protective inserts – prevent abrasion of the bottom layer of the heel.
- Filler – fills the space under the insole, increases comfort during use.
- An instep support is a wooden or metal part attached between the sole and the insole.
Knowing the design of shoes allows you to make each detail better, in accordance with its purpose.
A selection of crocheted slippers with felt soles with descriptions, diagrams and videos
Crocheted house shoes look somehow especially warm and cozy. And all this because it was made with your own hands, with love, trembling and tenderness. For the cold season, crocheted slippers with felt soles are best.
They are light and warm, have a natural component, are soft, unique and reliably protect against the cold. And knitting itself has a positive effect on a person’s well-being, helps pass long winter evenings, and the result will definitely please you.
Charming slippers with felt soles
This model cannot leave anyone indifferent. The shoes look original, gentle and light, snowy in winter. They can be crocheted in a few hours. The bottom is made of felt sole, and the top is made of knitted motifs, which are connected to each other into a single whole.
Materials
To work, you need to prepare the necessary tools and materials in advance. It is better to use natural yarn with the addition of wool. The amount of yarn is 150 g. The color can be any, but in this example white is used. You need insoles of the right size. A hook, scissors, and a thick needle (or awl) will come in handy.
Description of work
If the yarn is thin, then it must be joined in two or three threads. As you work, it is important to ensure that the knitting is tight, otherwise the finished product will not hold its shape. First you need to crochet the insole.
To begin, make punctures with an awl, retreating 0.5 cm from the edge of the insole; the same distance should be between the punctures. The sole is tied using single crochets (SC), making two stitches in each hole.
Now you can start creating motives.
Knitting individual elements can be done according to any 6-gon pattern. A beautiful pattern is obtained according to the diagram below.
For each slipper you need 3 such elements, for a total of 6 pieces.
Now you can start stitching the individual parts together. They can be connected with a hook or a needle. Baste the parts to the sole or pin them with pins. Connect both parts together. Comfortable and beautiful slippers with felt soles are ready!
Warm shoes with felt soles
Colorful, comfortable, beautiful and original slippers will not only warm you up, but will give you a great mood on a rainy day. They are suitable for women, but will also not leave men indifferent.
Materials
Knitting is done with a crochet number 3.5 from wool yarn with acrylic. Need felt insoles.
Description of work
You can knit such cute slippers quickly, which is their undeniable advantage. You need to start working with the sock. You can use any pattern, which beginner knitters will appreciate. The easiest way to knit is with double crochets. Increase the first rows up to the little finger (4-5 cm). After lifting, you need to tie the part, as shown in the photo.
Then continue knitting in such a way that you get a fabric that looks like the letter P.
Connect the narrow parts of the panel; it is most convenient to do this with a crochet hook. This will be the back seam of the product.
Continue knitting double crochets until the desired height of the top of the sneaker.
Take a felt sole and pin it to the knitting. Take a needle, a stronger thread (preferably to match the shoe) and sew it with a seam “over the edge”. Decorate the finished slippers as you wish.
Slippers with felt soles: MK video
Adorable slippers with felt insole
Soft comfortable slippers will not be superfluous in any home. Thanks to the warm and elastic sole, they will keep their shape and keep your feet warm.
Materials
You will need a felt insole; you can buy it ready-made or cut it from a piece of material. You need an awl and a hook. For the top of the slipper - yarn of medium thickness, approximately 200 g.
Description of work
To begin, use an awl to pierce a hole in the sole at a distance of 1 cm from the edge and 1.5 cm between the punctures. From each hole made, tie 4 stitches. When the insole is completely tied, then cast on SS (connecting post) and 2 VP (will serve as the beginning for the next row).
Now you need to make a side, and its height will be 2 cm. Knit it in half-columns, moving in a circle. Start each new row with 2 ch.
When the side is ready, you can move on to creating the top of the slipper. You need to start from your fingertips. Fasten the thread to the top of the side and knit 9-10 half-columns along the sock. Turn the work and continue making half-columns. Continue this until you get the desired depth of slippers.
The side part also consists of half-columns, crocheted in 4-5 rows. You can join the rows with SS. Make decreases in the last lines, this will ensure a snug fit of the sneaker to the foot. Knitted slippers are ready to decorate or leave as is.
Creating a Layout
Having prepared the last according to the measurements, sew a preliminary layout. To create it, they sew on a ready-made last made of thin genuine leather. Here you should decide what type of model the model will have, how the seams are located, whether there is a pattern or perforation.
Article on the topic: What shoes to wear with a long noodle dress
The nuances of stitching soles made of different materials
You may have to sew shoes that have hard or, on the contrary, soft soles, like house slippers.
What you need to know.
Before you start sewing, make sure that the sole is suitable for stitching: there are no cracks or chips on it; if you find them, then such a sole should absolutely not be stitched in order to avoid its final destruction.
If everything is good, make a puncture with a crochet hook where the stitching starts, thereby you will determine the hardness of the sole, and this is necessary to determine the length of the stitch.
If it is hard, then make the stitch shorter, about 5 - 7 mm.
If it is soft and porous, then make the stitch longer, about 10 - 12 mm.
Sewing on the sole
The sole can be made of different materials - they should be clarified in advance with the customer, telling him the most suitable option for the desired pair. Leather or rubber soles are often made.
The sewn soles are strengthened with small nails - craftsmen use them to ensure the straightness and reliability of the heel. The latter is made from thick leather in several layers.
How to crochet slipper soles | Crochet from Elena Kozhukhar
Author's content! To share the material, use the social network buttons. When citing materials, an active indexed link to the corresponding page of the ellej.org website is required. © Crochet by Ellej.
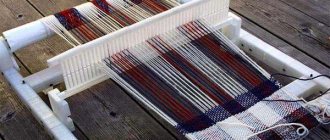
Among the many ways to knit soles for future slippers or boots, everyone chooses the option that suits them.
I also reviewed a lot of information on knitted shoes when I was planning to knit blueberry slippers for my five-year-old daughter, and settled on a sole where I could tell the difference between the left slipper and the right one.
I adjusted the pattern to my yarn, hook and leg size. There is a good rule in knitting a sole: you need to measure the length and width of the leg, subtract the width from the length - this is how we get the length of the initial chain of air loops.
The length of my daughter’s leg is 18 cm, width 7 cm. I gathered the chain so that when slightly stretched it would be exactly 11 cm.
I drew the pattern for the sole by hand, I hope it will be clear even to novice creators of knitted shoes. Knit with joy!
Video master class: How to crochet slipper soles
Knitting pattern for slipper soles
Another sole option. Length - 22 cm.
- Yarn “ELIZA” , 50%, Cotton 50%, Acrylic, 110 m, 100 g, hook No. 6
Photo master class with descriptions: How to crochet slipper soles
Source: https://ellej.org/kak-svyazat-podoshvu-dlya-tapochek/
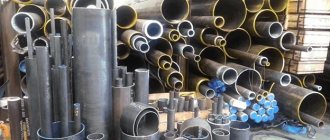
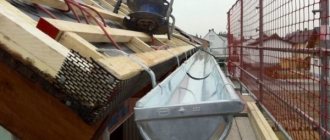
Shoe sole from an old car tire
In today's article, the author will share his experience and show how to make an indestructible sole for shoes - from an old car tire.
By increasing the thickness of the sole, the shoes will, of course, gain a little weight, but there are also advantages: the sole will be very durable and will last much longer.
The first step is to cut off the rubber layer from the car tire (you need to cut it down to the cord).
As a result, we will get a wide strip of rubber, which is quite enough to “change shoes” for several pairs of shoes.
Next, using a metal brush, the master makes notches on the inside of the rubber strip and on the sole of the shoe itself (for better adhesion to each other).
How to stitch shoes
Choosing a tool for stitching shoe soles is a very important point, since the quality of the work done, its reliability and durability ultimately depend on what tool we use.
Special shoe hooks are used for sewing on shoes.
And they must meet the main, in my opinion, requirements for them:
- ensure the sole is sewn to the bottom of the shoe without destroying it;
- do not tear or unravel the thread while working;
- withstand a long service life without breakdown.
Fig.5 Hooks for stitching shoe soles
Almost all shoe hooks that are sold by craftsmen are not suitable for their intended purpose and, when used with them, they damage shoes and quickly break themselves.
This, most likely, is where people’s prejudice towards sewing their shoes lies, as something unsightly and barbaric, while they completely forget the fact that earlier, even before the advent of shoe glue and metal nails, shoes were sewn by master shoemakers exclusively using special needles and awl.
The shoe hook, as a kind of hybrid of a needle and an awl, appeared relatively recently, in the fifties of the last century, and immediately gained popularity among both professionals and ordinary people.
But unlike a thin and sharp needle with a thick eye for thread; the hook is like an inverted needle with a cut, instead of a closed “eye”, like in a needle.
If such a cut in the hook is made correctly, then brought to the required depth with the thread that he will use for sewing, with GOI (State Optical Institute) paste applied to it, then such a hook will be easy to use, will serve for a long time and, most importantly, Do not damage your shoes when using it.
Therefore, I mainly buy hooks for sewing on soles in a special store and then independently adjust them to a specific thread.
Main stages of work
At the next stage, the master applies glue to the prepared rubber surface and to the sole.
Glue the sneakers to the rubber strip and press them with something heavy.
After the glue has dried, all that remains is to trim off the excess rubber with a knife.
Details on how to make a shoe sole from an old car tire can be seen in the author's video.
This article was prepared based on a video from the YouTube channel Ban bekas & kerajinan
.
What threads are used to sew shoes?
Most often, for stitching shoes, the so-called round twisted nylon shoe thread of different thicknesses is used, which differ from each other, respectively, in thickness and marking.
I use nylon thread No. 375 and No. 280, three hundred and seventy-five thicker.
Fig.6 Nylon thread for stitching shoe soles
Shoe thread is sold in small spools weighing 25 grams or large spools, comes in various colors and is additionally impregnated with wax.
In addition to a special round nylon thread for sewing, a flat waxed polyester thread is also used, but working with it requires additional skills, so I will not dwell on it in this article.
How to make shoe soles with your own hands
I want to make slippers with dense and thick soles. I tried to make a sole from 8mm thick travel foam. I even folded it in two layers, but it quickly pressed down to a thickness of 1-2mm. Yes, and it bends very easily.
I would like to do something like this:
to photo hosting →
Does anyone know what this material for the sole might be called? And what else can a sole be made from?
Thank you in advance
Oh, I also found some pictures, but all the descriptions are in hieroglyphs.
Article on the topic: What are the names of fashionable shoes 2015
The material is very similar to the foam from which rugs and seats for hiking are made. Does anyone know what it's called?
This mat is called polyurethane foam. (I may have a spelling mistake). But, its properties are exactly the same as you described, it will be doubtful. In my opinion.
“ Polyurethane foam belongs to the group of gas-filled plastics, 85-90% consisting of an inert gas phase. Thanks to their largely universal properties, polyurethane foams (also widely known as PU foams) have become very widespread worldwide in almost all areas of human activity. Sponges for washing dishes, fillings for bedding and soft children's toys, upholstered furniture and an ordinary car seat - this is all that surrounds each of us and is encountered every day in our usual everyday life.” [quote from Wikipedia article]. There is also information about its application, including in the footwear industry.
The results of my experiments in sewing slippers: - a tourist rug, the backing under the laminate is hard - it quickly wrinkles or breaks - felt - it becomes thinner at the edges, but it lasts for about two to three months - various types of ready-made insoles - they clearly have nothing to do on the outside of the shoes. - bando (like glued calico) in 6-7 layers is not bad, sometimes a type of pressed synthetic padding gives a fairly rigid base - this one begins to sag. — carpet on a hard base is still alive (two years), but is scratched at the edges and is stitched very poorly. - a napkin folded several times for hot meals (5-6 are already quite bearable) + a bandeau for curtains on top - braids (made of fabric or ropes) - bend strongly, so they require some kind of frame, but actually do not wrinkle in height if they are tightly packed weave (perhaps this option is suitable for high soles)
And the most comfortable sole turned out to be fabric from canvas construction mittens with polymer dots. I use it to prevent laminate and parquet floors from slipping in rehearsal rooms.
Article on the topic: Mario berluchi shoes who is the manufacturer
Darling , Oxi_Saharok , thank you very much for the tip! I'll go study in this direction!
Max1981 , thank you so much for such a detailed story. I think I’ll try putting a napkin under hot water in a couple of top layers over the foam and see if this helps reduce creasing. And I like the carpet idea too. Thank you!
desvil I'm afraid that the foam is still not designed for such pressure (experiments have already been carried out). Take something denser.
I also made one pair and wear it myself. After several tests, I settled on the following option - a double sole, with dermantine on the outside (towards the floor), which is used to cover the doors, and fur on the inside.
What if you cut the sole out of linoleum? I want to try it, I’ll knit slippers in the fall, I’ll post later
What if you cut the sole out of linoleum? I want to try it, I’ll knit slippers in the fall, I’ll post later
Interesting idea, I’m going to make homemade boots from fleece. I will also experiment with the sole. I read about different options here Soles for slippers. and here https://www.liveinternet.ru/tags/%EF%EE%E4%EE%F8%E2%E0/ For now I’m leaning towards felt. Has anyone already tried this option? How is he wearing socks?
How to quickly sew slippers - flip-flops
It turns out that you can quickly and easily create slippers with your own hands from scrap materials, and you don’t even need to look for a pattern of the right size.
I’ve been thinking about making new slippers for a long time, but somehow I never got around to it. Therefore, the competition became an incentive for me.
It’s easy to make such slippers with your own hands, I will try to tell you in detail and show you in the photo.
We don't need patterns for slippers in different sizes. We will build patterns ourselves, from which we will cut out parts to fit your leg.
I have the patterns ready, I have been using them for several years. Therefore, I will describe this process briefly.
It’s better to make them on cardboard by tracing the foot - you will get a template for the sole. You will also need a cover for the top of the slippers. Trace the pattern of the sole from the toes to approximately the middle. Measure the rise of your leg and distribute this distance from the middle of the lid equally in both directions. Draw the corners of the lid to the extended mark.
- You can make your own slippers from a wide variety of materials: thick fabric, old jeans, felt, felt, fur, leather, even from an old sweater.
- These materials will go to the top of the slippers and insoles.
- You will also need:
- linoleum or thick leather for the soles
- foam rubber 10 mm thick.
- corrugated cardboard from a box
- awl
- scissors
- pen and marker
- glue
- hook and thread.
On a piece of linoleum I draw a sole according to the pattern. Here you need to position the pattern correctly so that the sole does not end up on one foot.
I also draw the sole on the foam rubber; here the location does not matter. It is better to draw on foam rubber with a marker.
I draw the same sole on cardboard. It is better to place the pattern on the cardboard along or obliquely to the corrugations, but not across. This way the cardboard will not break while working and wearing slippers.
Now you need to make an insole that will cover the foam. Any dense materials are suitable for it, such as drape, soft felt, suit fabrics, denim or leather. I have thick knitwear. From the wrong side of the material I trace the pattern, but so that there is a distance of two centimeters between the patterns.
I start opening the lid. Here you need to select materials so that the lid holds its shape well. I will use the same jersey as for the insoles and use it to make a pattern for the inner part that will be in contact with the foot.
I will make the upper part of the lid from a dermantine base.
I do not place the pattern for the top close to the edge of the material, but leave about 1 centimeter along the edges and trace it.
Having finished drawing, I move on to cutting. I cut out blanks on linoleum, cardboard, foam rubber and the inside of the lid according to the drawn contour.
And I cut out the insole for the sole and the upper part of the lid with an allowance, that is, stepping back from the outline by about a centimeter.
To prevent the blanks from moving apart when piercing, I glue them together. For this purpose I use any available glue, for example “Titanium” or “Moment”.
I glue the foam rubber to the wrong side of the insole, and the bottom blank of the lid to the wrong side of the top.
There is no need to apply much glue, just lightly along the edges and in the middle.
After the lid parts are glued together, I cut off the corners. I do this for convenience when tying.
With an awl you need to pierce holes on all the parts, stepping back from the edge about 1 centimeter, maybe a little less. The distance between the holes is approximately 0.7-0.8mm.
Soles for slippers.
A frequently asked question is what to make the soles of felted slippers from. I have FOUR options: 1. Latex is natural rubber. Apply with a brush to the soles in at least three layers. I use it most often on children's slippers. The sole does not slip. Many people criticize it because of its fragility, like...
I sewed myself slippers with felt soles. They wear quite well and are warm in winter. And where linoleum is laid, they work great. I sewed slippers for my husband, took gacha from old boots for the soles, lined them with synthetic padding to make it warmer, and modeled them like an instep support. They are more convenient.
I want to make slippers with dense and thick soles. I tried to make a sole from 8mm thick travel foam. I even folded it in two layers, but it quickly pressed down to a thickness of 1-2mm. Yes, and it bends very easily.
Article on the topic: What is shoe vulcanization
I would like to do something like this:
to photo hosting →
Does anyone know what this material for the sole might be called? And what else can a sole be made from?
Thank you in advance
I also thought about this option for the sole, but my machine will not take such a thickness, and I need to glue it with shoe glue (Moment glue is not at all for shoes - the sole falls off after 2-3 days) I had to settle on another option, patterns and description here — https://club.osinka.ru/topic-76353?p=11186476&highlight=#11186476
External and hidden methods of sole stitching
Personally, I most often use the external stitching method in my work, albeit slightly modified, which provides it with additional reliability, but I rarely use the hidden method, or what I also call “closed”, as it is less in demand.
Closed or hidden stitching can be done both on the side and bottom of the sole, on which a continuous cut is made in one movement with a sharp shoe knife along the sole to the depth of the thread used for stitching.
With the correct cut when stitching, the thread goes deep inside and becomes almost invisible, which is why sometimes this method is also called internal.
This is a rather responsible operation, in addition it is labor-intensive and slow, and besides, on top of everything else, it is not suitable for all soles and materials.
When external stitching, or stitching along the top of the sole, the seam is placed in even stitches on the side along the entire sole.
Fig.4 External, side seam
Therefore, in this article I will focus only on the external method of sewing on the sole, as it is the most popular and easiest to understand the basic nuances of sewing shoes.
The nuances of repairing shoes with voids
The unique honeycombs can wear off over time, and it is this exposure that often leads to significant damage, moisture on the feet and dust. Before applying a patch or filling the space with pieces of polyurethane, as well as pieces of rubber, the surface must be trimmed with a knife.
Such manipulations will protect the foot from excessive load, as well as bevel to one of the problem sides, and the repaired model, although it will become a little lower, will look more presentable.
Before using one of the solvents, you need to find out the composition of the sole; ignoring such measures, the master, without knowing it, is capable of causing irreparable harm to the product; foam versions are easily burned through with potent reagents.
What shoes don't slip?
In the winter season, especially at the beginning and end of the season, the weather is very changeable. Night frosts give way to daytime thaws, causing roads and sidewalks to become covered with a thin layer of ice. Therefore, when choosing shoes for winter walks, you need to pay attention not so much to the appearance of the model, but to comfort and stability on slippery surfaces.
To prevent shoes from slipping, they must meet the following requirements:
- The sole is made of a material that provides good grip on the road. It can be regular or thermoplastic rubber, rubber.
- The tread has grooves that are not too deep, but randomly located. The more disorder there is in the pattern, the stronger the adhesion.
- It is better to give preference to models with solid soles or low wide heels.
- The height of the platform is no more than 5 cm.
It’s bad when, when walking, the heel leans back and the toe of the boot rises more than 1 cm.
When buying a new pair of boots, you should also check in the store that the soles do not slip. It is better to take shoes made in countries where they know first-hand what winter and ice are like. These are, for example, Russia, Finland, Norway, Germany.
Which sole is the most non-slip?
Shoe soles are made from various natural and synthetic materials, but for winter models, regular or thermoplastic rubber is most suitable.
- The rubber outsole is durable and can withstand temperature changes well. Flexible, elastic material provides a tenacious connection to the icy surface, so walking in boots with a rubber platform is quite safe in winter.
- Thermoplastic rubber (TPR) combines the properties of vulcanized rubber and thermoplastics. Strength and elasticity are the main advantages of this material. Shoes with such a sole are light and comfortable, and do not slip at all on ice. TPE retains its properties when temperatures drop to -45°C.
You should not choose winter boots with a platform made of tunit, genuine leather or polyurethane. These materials harden in the cold and become incredibly slippery.
Making the top
The main stage in shoe production is the preparation of detailed patterns. To do this, wrap a wooden block with paper tape and draw boundaries and measure the volume of the foot.
You can purchase this device in specialized orthopedic shoe departments or from professional shoemakers.
Thanks to this, it is possible to correctly form the silhouette of future shoes or boots.
Next, carefully cut out the resulting parts with a sharp knife. Paper patterns are applied to natural suede and transferred using a simple pencil.
After this, a small allowance is made along the border of the part. This will allow you to adjust the height and width of the shoes during the sewing process.
- How to make antiseptic with your own hands: the best instructions for making antiseptic at home + photo reviews
- DIY medical mask - TOP 100 photos and step-by-step instructions with diagrams of the best ways to create
- How to embroider icons with beads - a review of the best ideas with photos and examples from masters