DIY plasterboard shelves often have an unusual appearance and can accommodate a large number of different items. Thus, even equipment can be installed on a rack with additional metal reinforcement. In order to make a structure with your own hands, you first have to decide on its shape, then purchase all the materials.
Of course, such work requires certain skills, so it is better for beginners to choose the simplest shelf option or turn to specialists. Below we will tell you how to do this work yourself.
DIY plasterboard shelves
Advantages and disadvantages of drywall
Drywall is classified as a universal material that has various purposes - ceilings, niches, and all kinds of shaped structures are made from it. This popularity is due to the following advantages:
- GCR is easy to process; structures of any shape can be cut from it.
- Drywall is a lightweight material. Of course, when transporting solid sheets, they may seem too heavy. However, the finished shelves are weightless. In addition, the profile frame will also not weigh down the structure. It turns out that even a large shelf does not overload the load-bearing wall.
- Upon completion of all work, the plasterboard shelves are finished - at this stage you can give them an unusual design, thanks to which they will look harmonious in any interior.
- Even over time, such structures do not deform and retain their original appearance for a long time.
- The cost of such material is significantly lower compared to natural wood, plastic or furniture panels.
- It is not necessary to use solid sheets to make shelves - pieces of gypsum plasterboard that may have remained after installing the floors will also work.
Plasterboard construction can also be durable
Despite the large number of advantages of this material, some of its disadvantages should be highlighted:
- fragility;
- the appearance of deflections under the influence of a large load;
- poor resistance to moisture.
Types of plasterboard shelves
There are several main parameters by which such designs differ. Before choosing one option or another, you should familiarize yourself with them.
Table No. 1. Types of gypsum plasterboard shelves
| View | Description |
| Open | Such shelves mainly have a decorative appearance; they are placed to display various souvenirs, cups, photographs and other decorations. |
| Closed | These are already more functional shelves, so they are often made deep to accommodate many items. |
Open shelves
Table No. 2. Types of shelves by type of placement
| Accommodation | Description |
| Central | In the center of the room, a large structure consisting of many shelves is most often installed. This option will best fit into the interior of the living room. |
| Angular | Such plasterboard structures will fit perfectly into the interior of a small room. Moreover, they are not only decoration, but also perform a functional task. Quite often, a bookcase is placed in the corner. |
Position of shelves in the corner
In this case, any plasterboard structures can be designed as follows:
- With backlight. Light bulbs are often built into various shelves and niches. Their exact number will depend on the size of the structure. Otherwise, this design allows you to highlight various items on the shelves, which is especially important for dark rooms.
- No backlight. This is a standard design and is quite easy to install.
LED lamps are often used for lighting
Shelves made of gypsum plasterboard are:
- decorative - usually these are very light structures that are not intended for heavy loads;
- functional - such shelves can withstand heavy loads (for example, books can be placed on them in several rows, so this design requires preliminary installation of the frame).
An unusual version of plasterboard shelves
Video - Shelves made of gypsum plasterboard: original ideas
Surface protection
How to protect a plasterboard shelf from water, abrasion and chipped corners?
Here are a few solutions that I have personally tried.
Corner reinforcement
Before filling the external corners, they are reinforced with a perforated plastic or galvanized steel profile secured with self-tapping screws. The putty is applied over the reinforcement in a layer approximately millimeter thick.
Reinforcement of external corners with perforated galvanized profiles
Pasting with a plastic corner
A decorative plastic corner can replace a reinforcing profile. It is glued onto liquid nails or silicone after finishing the finishing of the shelves. The price of a linear meter of an angle approximately corresponds to the cost of a perforated profile of the same length.
Tile
Shelves in a bathtub or toilet are often finished with tiles or porcelain tiles. The coating can be laid using ordinary tile adhesive, sealant or liquid nails. When using a waterproof grout for the joints (epoxy or silicone), this finishing method guarantees unlimited service life of the shelves and their absolute resistance to abrasion and moderate impact.
In the photo - tiled shelves in the toilet
Laminate
Like tiles, laminate can be glued with mounting adhesive or silicone. The edging of the shelf is done with the already familiar plastic corner (outer and inner).
Waterproofing paint
It will not protect the gypsum board from damage, but will prevent its contact with water and swelling. For this purpose I used rubber paint “Rezel” produced in Sevastopol. It is applied in the same way as any other water-based emulsion - in 2-4 layers with intermediate drying, using a brush or roller.
Verified. I recommend
In what rooms are plasterboard shelves installed?
Universal gypsum plasterboard shelves can be installed in any type of room:
- in the living room - most often, shelving is placed along the entire wall, because in such niches it is very convenient to install various equipment;
- in the nursery - plasterboard shelving in the child’s room is often installed in order to zone the space, which will make it possible to better separate the sleeping area from the play area (this idea should be taken into account by parents who need to equip a room for two children);
- in the kitchen - usually in the kitchen such shelves are left open, because this way it will be more convenient to use them for their intended purpose (such a structure should be well strengthened from the inside, because the dishes are quite heavy);
- in the bathroom - in a room of this type there are always not enough shelves, and so that they do not take up extra space, it is recommended to make them hanging;
You can read about how to make hanging shelves with your own hands in our article.
- in the corridor - here it is better to install closed shelves, which are useful for storing various items; if necessary, mezzanines can be made;
- in the bedroom - in such a room you can install shelves of any type, first of all, it will depend on the dimensions of the room.
Plasterboard niches in a children's room
Combined ceilings
One of the most popular types of ceiling combinations is the combination of plasterboard and stretch ceiling. This provides an excellent opportunity to make all the most daring design solutions and childhood dreams come true. For example, curvilinear and rectangular design options, multi-level compositions and the production of stylish tiers using drywall and a special tension form.
The big advantage of combined ceilings for a children's room is that they can combine completely different colors, shapes and textures. Such colorful contrasts and accents will appeal to every child and fill the room with the energy of joy. The design and atmosphere of the room will immediately become inspiring and pleasant for active pastime and peaceful relaxation - what every loving parent strives for.
Making shelves from plasterboard
In the process of creating shelves you will need the following materials:
- Drywall sheets. If you plan to install shelves in a bathroom or any other room with high humidity, then they must be moisture resistant.
- Dowels.
- Suspensions.
- Guide profiles.
- Metallic profile.
In addition, we will need the following tools:
- building level;
- screwdriver;
- knife for cutting metal;
- measuring tape;
- sandpaper;
- pliers.
If you have all the tools, you can get the job done faster
It is worth noting that not all devices and materials may be useful, because if we plan to make a structure for heavy objects, then we will need a metal profile to create the frame. For decorative shelves, a simple rack profile with guides will be sufficient.
Important! In order to make the final finish, you will need putty, paint, a set of brushes, and rollers.
Create a project
First we need to develop a design for the finished shelf. It is recommended to do this in the following ways:
- You can display the design on a sheet of paper. In this case, it is necessary to first calculate the exact dimensions of the structure.
- You can use another, more convenient way to create a project. To do this you will need to install a special program. If necessary, you can create only a rough frame, or display all the small details and their sizes in the diagram - it depends on how you are used to working with projects. It is better to print out the finished diagram so that it is always at hand during the process of making shelves.
Approximate design diagram showing all shelf sizes
Important point! It is advisable to design a universal design that will be not only decoration, but also a functional element of the interior. That is why it is recommended to strengthen it.
Typically the following parameters are displayed on the drawing:
- dimensions of the room on an appropriate scale;
- the location of the niche, including its depth;
- place of fixation of all partitions;
- if you plan to install lighting, then it is also better to mark the mounting locations for the lamps.
Important point! When drawing up a drawing, it is necessary to take into account the thickness of the materials used (gypsum board sheets and metal frame).
Sheets can be of different thicknesses
Regardless of the choice of one option or another, creating a diagram is an important step, thanks to which it will be possible to make a structure of an ideal shape. This way you get the opportunity to evaluate the correct placement of the shelves and avoid various problems during the installation process.
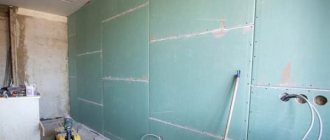
Surface preparation
Before starting installation work on the manufacture of plasterboard shelves, you will need to prepare the walls. Here, any irregularities can become an obstacle to the normal fastening of the frame, causing the structure to turn out crooked.
It is necessary to assess the condition of the surfaces. If there are all kinds of cracks, sagging, and depressions, they should be eliminated. In addition, it is better to treat the walls with several layers of primer so that they do not crumble in the future.
It is necessary to plaster the uneven areas
Important point! In some cases, preliminary floor preparation is required.
Step-by-step instruction
Frame installation
Step 1. Mark the wall. In order for the base for our shelves to be reliable, it is necessary to take the markings with special responsibility. At this stage we will use a building level, mark the location of all heights, and fasten the dowels. To mark the surface, you must use a marker or a simple pencil.
Leaving marks on the wall
Step 2. Calculate the load. Calculating the load on the shelves is not difficult - it is important to know what these shelves are supposed to be used for. For example, if a TV is installed in a niche, it is important to make it durable. For such purposes, it is better to strengthen the frame with metal jumpers.
If you plan to make a small shelf for shoes or other not very heavy objects, then a standard sheathing for drywall will be sufficient. The shelf for various postcards and souvenirs does not have to be strengthened at all.
Calculating the load is of great importance, because the durability of the plasterboard structure will depend on it
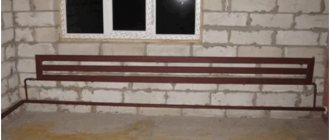
Step 3. Assembling the frame. The basis of the frame is made up of metal profiles that serve as guides. Thanks to the use of such beams, you can make a structure of any shape - for this you will need to make notches on the metal. It turns out that the more different bends there are, the more such notches will need to be left. It is recommended to use metal scissors when working. All parts of the frame are secured to each other with self-tapping screws. It is necessary to carefully tighten the fasteners to ensure a strong base.
You should check the correct location of all parts using a building level
Step 4. Attach the profiles to the wall. It’s not difficult to fix the shelf on the wall, because it already has markings that we set in advance. In any case, even at this stage you can still slightly change the location of the structure.
The frame of the shelves is fixed to vertical posts, which are first fixed to the wall
In the case of assembling built-in structures, it is necessary to secure the racks along the facade. To do this, lay a jumper according to the markings and then attach a jumper. Supports are fixed at its ends:
- if the shelves are located between two walls, then the racks are attached to them;
- if the frame is located only on a certain part of the wall, then it is fixed to the floor or ceiling.
It is worth noting that the more you plan to load the shelf, the more dowels and screws you will need to use to secure the frame. Typically the pitch between fasteners is about 200-250 millimeters.
Installing drywall sheets
Step 1. Mark the gypsum plaster boards. Some craftsmen prefer to calculate the required amount of material at the stage of creating the project. The standard length of sheets ranges from 200 to 450 centimeters, and the width is 120-130 centimeters. Since additional changes are often made during the frame assembly process in order to mark the sheets, it is necessary to measure the frame. In this case, you will need to leave a few centimeters for gaps, because the entire base must be covered with plasterboard panels.
In order to avoid inaccuracies, it is recommended to use a cardboard template for this purpose (boxes from large household appliances will do). These parts can then be attached to the frame and some changes can be made if desired.
These patterns should be transferred to gypsum board sheets - for this we need a marker or a simple pencil
Step 2. Cut out the sheets of drywall. It is best to cut this material on a perfectly flat surface (on a table). Now you need to place the drywall cutting knife on the mark and press firmly. Next you need to move along the intended lines. This should be done very carefully to ensure that the parts are as even as possible.
Cutting drywall
If the project involves the presence of too complex curves, then we will need a knife for cutting plasterboard of a small size - it will be much easier for them to move along such contours.
Step 3. Installation of lighting. It is at the stage of creating the frame that it is necessary to carry out wiring for the lamps. Of course, this step is not mandatory; it is only necessary if lamps are included in the project.
Holes of the appropriate diameter should be made in the plasterboard panels for spot light devices
Important point! There is an easier way to install lighting - using LED strip.
Step 4. Install the parts on the frame. It is important to be especially careful at this stage. The sheets are used either immediately after cutting, or they are additionally given different shapes. If you choose the second option, it will be necessary to carefully process the sheet with a wet roller on all sides, as a result of which it will become very plastic.
This is an example of installing gypsum board panels on a frame
After preparing all materials, it is necessary to begin installation:
- The first step is to attach the top and bottom sheets to the base using special screws. For such purposes, it is better to take self-tapping screws with a diameter of 2.5 centimeters.
Attaching sheets - These screws will need to secure the sides of the structure.
We fix the sides of the structure - When the main frame is ready, you need to move on to installing shelves inside it.
Shelves inside the frame
Here, too, it is necessary to calculate the optimal distance between the screws depending on the purpose of the shelves - it is important to remember that they should be no further than 100 millimeters from each other. However, it is recommended to take a minimal step between them.
Finishing
When the entire structure is securely fastened, you can begin the finishing stage.
Step 1. Prime the surface. In order for the putty to adhere reliably to the plasterboard sheets, they should be pre-treated with a primer (a total of 2 layers will be required). It is better to apply the primer using a roller, this way you can quickly distribute it even over a large structure.
Choose a universal primer
Step 2. Apply putty. Now we have to apply the first layer of putty to the structure. It should be quite thick to hide all fasteners, joints, and irregularities. It is better to use a spatula to apply putty. The result should be a smooth surface.
It is better to take a medium-sized spatula
Step 3. Sand the surface with sandpaper. When the first layer of putty has dried thoroughly, it will need to be sanded using sandpaper - this will allow you to achieve an ideal surface.
For this work, it is recommended to purchase a special sandpaper holder
Next, you will need to putty this structure again. If desired, you can apply decorative plaster because the next step will be painting. The design of the shelves can be different, here everyone can show their imagination.
Video - Making shelves for a children's room
Selection of materials
Not only its design, but also its manufacturing technology depends on the purpose and location of the rack. In addition, the design is significantly influenced by the functional purpose of the product. If the rack is intended for storing toys, books, and household items, then a traditional design can be chosen, the implementation of which will require a minimal set of tools.
If collections, sets of beautiful dishes, and figurines will be placed on the shelves, then additional local lighting may be required, the arrangement of which will lead to the need to perform electrical work.
Depending on the size of the rack and its load (bearing) capacity, the necessary materials and components are selected, which primarily include:
- plasterboard sheets, panels or individual small architectural forms - arches, corners, plinths and cornices;
- metal profile or wooden slats;
- finishing and decorating materials – textured paper, edging, decorative film, coloring enamel;
- fittings and accessories – door hinges; locks, latches, handles, pins for installing shelves;
- fastening elements - self-tapping screws, screws (bolts), washers, nuts, adhesives.
The thickness of the material is selected primarily based on the condition of ensuring guaranteed strength and rigidity of the furniture piece:
- for shelving structures placed in residential premises, plasterboard sheets with a thickness of 12.5 millimeters are quite suitable;
- for furniture intended for the installation of heavy household appliances, material with a thickness of 18.0 millimeters or more may be required;
- for the manufacture of curved surfaces, it is necessary to select a special drywall (GKLA brand) whose thickness is in the range of 6.2...9.5 millimeters.
Common mistakes when working with drywall
In order to make a design in accordance with the project, it is necessary to eliminate mistakes that both beginners and experienced craftsmen make during the work process:
- Using the wrong material. If there are a large number of curved elements in the project, it is recommended to purchase arched plasterboard, because it is a little thinner than the standard one and can more easily take any shape. Thick panels may break under such circumstances.
- Improper storage of gypsum board sheets. With high air humidity, the panels can quickly become damp. If you install them in this form and then finish them, the putty may peel off from the surface.
Drywall storage rules - Use of small parts. Despite the fact that scraps are often used to make shelves, you should not join together too small pieces of material, because such a structure may become covered with cracks after some time.
- No additional reinforcement of seams. When finishing the drywall seams, you will need to strengthen them with reinforced mesh, then cracks will not appear on the structure. This mesh should be pressed into the composition and then puttied again. In addition, the putty must dry thoroughly, and only then can you proceed to painting.
When working with fragile materials, you must follow the instructions to avoid mistakes.
Of course, to make plasterboard structures with your own hands you will have to put in a lot of effort. However, this is a great opportunity to save money and create your own unique product. In addition, you will be able to acquire a very useful skill that will come in handy someday.