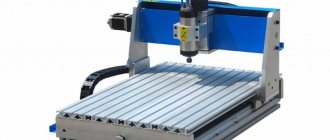
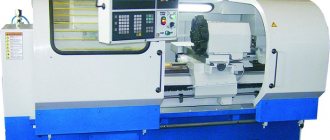
The catalog presents CNC metal profile grinding machines that provide precision, productivity, and over the years maintain their original accuracy and durability in operation. The quality of the products of the Japanese company Okamoto, a world leader in the production of grinding equipment, is beyond doubt and has been recommended at all mechanical engineering enterprises. Are you looking for a profile sanding machine that is priced within your budget? When making a purchase from Pumori-Engineering Invest, you receive a whole range of services: engineering, service, commissioning, training. Create a request on the website - we will select a model based on your wishes.
Advantages of Okamoto metal profile grinding machines
- 1Have a fully automatic processing cycle
- 2High rigidity and processing precision
- 3Built-in interactive programming system
What is metallography?
All metals have a micro- and macrostructure, which requires careful study carried out for different purposes. For example, such activities may be aimed at identifying the physicochemical, mechanical or electrical properties of a material or at determining the size, shape and arrangement of crystals. Using special equipment, you can easily determine the chemical composition of the metal, as well as the presence of various defects and foreign inclusions in it.
The work uses an electron microscope, the use of which implies the presence of samples prepared in advance for research. But there is another way, which consists in studying the fracture of the metal, which is greatly facilitated by the physical properties of the material, for example, opacity. In order to study the macrostructure of the sample in detail, it is necessary to prepare an appropriate thin section. That is, the product or part under study is cut, and this is done using a special machine.
Of course, you can cut metal with a gas torch, but then you will have to additionally process the surface under study, because due to heating by the flame, the structure of the metal changes, and the depth of this layer is approximately 1 cm. It is for this reason that the sample must undergo additional processing, and this requires grinding -polishing machine, which you can buy on the website. In order to determine the structure of the material, it is subject to etching, and from the results of this operation one can find out the structural components of the metal alloy.
Operation of profile grinding machine 395M
Diagram of the optical device of the 395M profile grinding machine
The 395M profile grinding machine with a screen is shown in Fig. 76, a. The workpiece is fixed on a coordinate table 23, which has longitudinal, transverse and vertical movement from precise lead screws. The longitudinal movement of the slide 18 is carried out by the handle 19, the transverse movement of the slide 20 by the handle 21, the vertical movement of the table by the flywheel 22. The part is installed on the work table 17, which is mounted on the upper longitudinal slide of the coordinate table and, together with the table, is located under the lens 13 of the optical device. The optical system projects an enlarged image of the part profile onto screen 14. The part profile drawing, made on a scale of 50:1, is fixed between two screen glasses and illuminated by illuminators 15 and 16.
The grinding head 24 together with the grinding wheel spindle 8 has installation and working movements. The spindle, mounted in a vertical slide 10, makes a reciprocating movement when the lever 11 is turned on. The stroke length of the slide is 0-50 mm. Using screw 12, the grinding wheel is adjusted in height relative to the profile of the workpiece. The movable flange 4 is used to rotate the circle in the horizontal plane, and the circular slides 6 and 7 are used to install it at an angle in the horizontal and vertical planes. The grinding head is mounted on the upper longitudinal slide 3, which moves along the lower transverse slide 1 using handles 2 and 5. The grinding wheel rotates from an electric motor 9. Periodic dressing of the wheel is carried out using a device mounted on the side wall of the circular slide 10.
The machine allows you to grind various profiles of flat and round parts with an accuracy of 0.01-0.02 mm. Processing is done like this. The worker manually moves the grinding head relative to the profile of the part and ensures that the cutting edge of the grinding wheel always exactly coincides with the corresponding point in the enlarged image of this profile, combined with the profile of the drawing on the screen.
The optical device diagram is shown in Fig. 76, b. A ray of light from lamp 1, passing through lenses 2 and 3, prism 4, diaphragm 5, lenses 6-9, projects the outline of the part on the projector screen 14 in the form of a clear shadow. Illuminators 13 additionally illuminate the part through lenses 10-12. Next, the rays pass through a projection lens consisting of lenses 15, 16, 17 and are directed through a prism 18 to a mirror 19, reflecting from which they fall on a mirror 20 and then onto a screen consisting of glasses 21 and 22 with a drawing fixed between them. An on-screen error of 1 mm corresponds to a workpiece profile error of 0.02 mm.
In addition to the described types of machines that operate with a grinding wheel, there are profile grinding machines that operate with a flexible abrasive belt. In such machines, a moving belt with an abrasive applied to it, fitting the shaped profile of the surface being processed, polishes it.
How to choose the right equipment?
The machines for metallographic sample preparation of the sample under study, presented in the online store, are of high quality, have an ergonomic design and are endowed with the best performance characteristics. Grinding and polishing machines can be equipped with one or more discs, therefore, both coarse grinding and soft polishing are available to them. Hardware performance depends not only on the number of disks, but also on:
- The speed of their rotation. In most of the models presented, this is an adjustable parameter, and the choice of rotation speed depends not only on the type of material, but also on its thickness and density. There are models on sale with continuously variable speed control, and they are reliably protected from various types of overloads.
- Disc diameter. A manual grinding and polishing machine has a disk with a diameter of 200 mm, made of stainless steel, and a disk with a diameter of 250 mm is considered universal. To process a large number of samples or if they are large in size, it is appropriate to use three-hundred-millimeter disks.
General view of profile grinding machine 395M
Photo of profile grinding machine 395M
Photo of profile grinding machine 395M
Photo of profile grinding machine 395M
Tasks of grinding and polishing machines
A polishing and grinding machine, the price of which depends on both the manufacturer and its functionality, can perform one or more operations. Naturally, complex-purpose models are most preferable. Due to its small size, basic operations can be carried out not only in laboratory conditions, but also directly on site. An example is the preparation of pipelines for operation.
Smart machines can perform both their main functions and additional ones. Thanks to the grinding and polishing machine, it is possible to determine the resistance of the test sample to abrasion. But still, the main tasks of this equipment are considered to be the removal of metal particles that can distort the research results, as well as giving the sample surface the desired appearance. In order for the machine to cope with its responsibilities and meet the expectations of controllers, it is necessary to choose the most suitable model, a wide range of which is presented on the website.
Workpiece processing technique
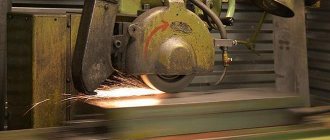
The method of processing workpieces with polishing equipment is based on the circular rotation of a felt (abrasive) disk and the reciprocating motion of the work table with the product installed on it. The processing disk, rotating at a certain pace, cuts off the top layer of the surface being processed in one pass, and the work table constantly moving back and forth ensures uniform processing of the surface.
The thickness of the layer removed from the workpiece, which affects the quality of the processed surface, is achieved in different machines in different ways - usually it is changed by automatic or manual movement of the work table up or down. Sometimes, in new models of equipment, the working part with the polishing tool can change its location along the vertical axis.
Technical characteristics of the machine 395M
| Parameter name | 395m | 395mF10 | 3951VF1 |
| Work piece profile size | |||
| Largest dimensions of the sanded product, mm | 150 x 60 x 78 | 150 x 60 x 78 | 150 x 60 x 78 |
| Maximum profile height of the sanded product, mm | 48 | 78 | 78 |
| Size of direct grinding plane at x50 magnification, mm | 10 x 10 | 10 x 10 | 10 x 10 |
| Direct grinding plane size at x25 magnification, mm | 20 x 20 | 20 x 20 | 20 x 20 |
| Direct grinding plane size at x25 magnification, mm | 50 x 50 | ||
| Grinding plane size using reference tiles, mm | 150 x 60 | ||
| Maximum thickness of the workpiece, mm | 48 | ||
| Basic movements of the grinding head supports | |||
| Rotation of the lower caliper, degrees | ±45° | ±45° | ±45° |
| Movement of the lower support in the transverse direction, mm | 150 | 150 | 160 |
| Rotation of the upper caliper, degrees | ±45° | ±45° | ±45° |
| Movement of the upper support in the longitudinal direction, mm | 130 | 200 | |
| Speed of movement of the grinding head supports, mm/min | 0,2..1,0; 4..20 | ||
| Rotation of the grinding head head around a horizontal axis, deg | ±10° | ±15° | |
| Rotation of the grinding spindle slide around the horizontal axis, deg | +10°..-30° | +5°..-30° | +5°..-30° |
| Stroke length of the grinding slide, mm | 50 | 6..80 | 6..80 |
| Number of double strokes of the grinding slide, stroke/min | 45; 85 | 44; 88 | 44; 88 |
| Basic movements of the product table | |||
| Vertical movement of the table together with the column, mm | 100 | 100 | 100 |
| Longitudinal movement, mm | 60 | 60 | 60 |
| Transverse movement, mm | 150 | 150 | 150 |
| Maximum grinding wheel diameter, mm | 125 | 150 | 150 |
| Rotation speed, rpm | 3500 | 3700; 4500 | 3600; 4500 |
| Magnification of the optical system | 25:1, 50:1 | 25:1, 50:1 | 10:1; 25:1, 50:1 |
| Working area of the screen, mm | 500 x 500 | 500 x 500 | 500 x 500 |
| Optical projector type | IZP-25 | IZP-25 | IZP-25 |
| Drive and electrical equipment of the machine | |||
| Type of digital display device | — | F5291 | F5291 |
| Number of electric motors on the machine | 4 | 9 | |
| Spindle motor, kW | 0,65 | 0,55 | |
| Electric motor for driving the grinding head supports, kW | 0.1 x 2 | 0.12 x 2 | |
| Electric motor for moving the grinding spindle carriage, kW | 0,25/ 075 | ||
| Electric motor of the cylindrical grinding device, kW | 0,12 | ||
| Vacuum cleaner electric motor, kW | 0,65 | 0,75 | |
| Cooling pump electric motor, kW | 0,01 | ||
| Bottom lighting fan, kW | 0,028 | ||
| Total power of electric motors, kW | 2,35 | 2,5 | |
| Overall dimensions and weight of the machine | |||
| Overall dimensions of the machine (length x width x height), mm | 1485 x 1600 x 2000 | 1555 x 1620 x 2000 | 1955 x 1650 x 1960 |
| Weight of the machine with electrical equipment and cooling, kg | 1500 | 1965 | 2400 |
- Optical profile grinding machine 395-m. Passport and manual, 1963
- Alperovich T.A., Konstantinov K.N., Shapiro A.Ya. Design of grinding machines, 1989
- Alperovich T.A., Konstantinov K.N., Shapiro A.Ya. Setup and operation of grinding machines, 1989
- Dibner L.G., Tsofin E.E. Sharpening machines and semi-automatic machines, 1978
- Genis B.M., Doctor L.Sh., Tergan V.S. Grinding on cylindrical grinding machines, 1965
- Kashchuk V.A., Vereshchagin A.B. Grinder's Handbook, 1988
- Kulikov S.I. Honing, 1973
- Lisova A.I. Design, adjustment and operation of metal-cutting machines, 1971
- Loskutov V.V. Grinding machines, 1988
- Lurie G.B. Grinding machines and their adjustment, 1972
- Lurie G.B. Design of grinding machines, 1983
- Menitsky I.D. Universal sharpening machines, 1968
- Mutsyanko V.I. Bratchikov A.Ya. Centerless grinding, 1986
- Naerman M.S., Naerman Ya.M. Guide for training grinders. Textbook for vocational schools, 1989
- Naerman E.S. The Young Grinder's Handbook, 1991.
- Popov S.A. Grinding work, 1987
- Tergan V.S. Grinding on cylindrical grinding machines, 1972
- Shamov B.P. Types and designs of main components of grinding machines, 1965
Bibliography:
Related Links. Additional Information
- Classification and main characteristics of the grinding group
- Repair, restoration and modernization of grinding machines: the American approach
- Cylindrical grinding. Processing on cylindrical grinding machines. Grinding Methods
- Setting up a cylindrical grinding machine when installing parts in centers
- CNC grinding machines
- Marking of grinding wheels
- Testing and checking metal-cutting machines for accuracy
- Grinding machines. Market of grinding machines in Russia
- Manufacturers of grinding machines
- Directory of grinding machines
Home About the company News Articles Price list Contacts Reference information Interesting video KPO woodworking machines Manufacturers
