Today we will make a cone out of paper. Moreover, we will show not just one example of creating a cone, but as many as 5 of the best, working, time-tested options.
The cone can be rolled from office paper, colored paper, watercolor paper, Whatman paper, foamiran, wallpaper, cork sheet, cardboard, etc.
Tools and materials for making a cone
A paper cone can become the basis for all sorts of crafts: from stargazer hats to an amazing New Year tree. To make this item yourself, you will need the following tools:
- a sheet of printing paper or whatman paper;
- compass;
- pencil or ballpoint pen;
- ruler;
- tape, glue or stapler;
- paper clips;
- scissors.
If there is no compass in the house, then a string or thick thread with a pencil can replace it. We measure the required radius of the rope. You can tie a pencil to it, or you can simply press it with your finger. With the finger of your other hand, press down the free end of the thread, using it as the center of the circle. Then, with the help of these simple devices, a circle of the required diameter is drawn.
Frame version of the base
How to make an unusual cone for a Christmas tree? It is made from paper or cardboard in the classical way. We wind yarn or threads and strips of floral mesh over the cardboard cone. This material must be covered with PVA glue on top so that the frame holds tightly after drying, when the inner paper cones need to be removed.
The finished unusual Christmas tree is decorated with a variety of accessories - tinsel, bright buttons, candies. You can attach them with glue or pieces of tape. Creative Christmas trees look especially solemn if you place a garland inside. Festive lighting will give the cone sophistication and New Year's charm.
The same lighting can be done for a classic Christmas tree cone made of cardboard, if you drill random holes of different sizes into it or make a fantasy ornament out of them. Roughness can be smoothed out with fine sandpaper, and the cone can be painted with bronze or gold paint to please the Yellow Earth Pig. You need to place LEDs inside - and the spectacular Christmas tree will be ready.
To decorate Christmas tree cones, New Year's tinsel and satin ribbons, napkins and cotton pads are used. Even a child can glue branches in the form of green paper circles with different shades.
Christmas tree cones are wrapped in decorative paper and fluffy green yarn, and pasta, candies and buttons are glued to them. You can make such outlandish trees for a holiday with children and friends, family and at work, employees.
How to make a cone from a circle
Making a cone out of paper is quite simple. You just need to do everything correctly and carefully, foreshadowing a unique positive result. The step-by-step instructions are as follows:
- Determine why you are making a paper cone. Its size, paper density, color scheme, as well as the presence of any decorative elements will depend on this.
- Take paper of the required size and lay it out on a horizontal surface. A kitchen table, nightstand or coffee table is suitable for this. How convenient for anyone.
- Using a ruler, mark a point in the middle of the sheet.
- The tip of the compass is placed at this point and the contours of the circle are first outlined with a dotted line. At the same time, it is noted whether the stylus does not extend beyond the sheet of paper. If everything is in order, a clear line is drawn.
- A circle is cut out clearly along the line with scissors.
- Next, you need to connect the center of the circle with any point on the circle with a ruler and draw a line with a pencil.
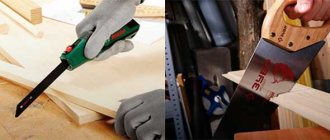
- Using scissors, carefully cut the circle along this line exactly to class=”aligncenter” width=”1356″ height=”763″[/img]
- The cut circle is rolled into a cone to the size you need. The edges are trimmed and secured with a paper clip.
- Glue is applied to the edges of the cut edges on the inside and outside, and the walls are tightly fixed.
- Let's start making the base of the cone. To do this, take another sheet of paper and lay it out on the table.
- The manufactured cone is placed on a ruler. This is how its diameter is determined. 2 millimeters are subtracted from this result and the indicator is divided in half. This is the estimated radius of the cone.
- A circle is drawn with a pencil on a blank sheet of the established radius. It is considered internal.
- Then from the same center we draw a new circle, the diameter of which is 2-3 centimeters larger than the previous one.
- Cut out a circle along the outer contour.
- We connect the gap between the inner and outer circles with notches, which are made using scissors. It is advisable to do this procedure carefully so as not to go beyond the inner circle. The distance between the notches should be about a centimeter.
- The made notches are wrapped in one direction. There should be a slight overlap.
- We cover the outer part of the notches with glue and carefully insert them inside the cone itself.
- We leave the finished product on the table and allow it to dry thoroughly.
How to make a cone from a semicircle
- Take a sheet of paper and place it on a flat horizontal surface. Place a compass in the middle of the edge of either side of the sheet and draw a semicircle over the entire sheet.
- Using scissors, cut out the resulting semicircle from paper.
- Next you need to connect the two corners of the resulting semicircle. To do this, coat the smooth side of the semicircle with glue from the center to the corner. Then the corner not smeared with glue will need to be moved slightly behind the other so that the cone “closes” and its side will need to be glued to the smeared side.
How to make a cone from a triangle
The method of making a cone from a circle is simple, but excess paper is used, which significantly compacts part of the finished product, and this is not always good. But you can create a cone from a triangle. The tools you will need are exactly the same as in the previous version. We take the following steps:
- Using a ruler, draw an isosceles triangle on a sheet of paper laid horizontally. In this case, two of its sides must have the same dimensions, and the third side must exceed the parameters. It is worth keeping in mind that the larger the sides of the triangle, the larger the cone you will get. The main thing is that all dimensions of the geometric figure are correct. Inaccurate parameters can lead to a one-sided cone or one so miniature that it is not possible to glue it together. If you are not confident that you are able to construct the desired figure yourself, you should resort to using a ruler in the form of an isosceles triangle. But you need to check that its two sides are the same, and the third is larger than the previous ones.
- Take one corner and fold it towards the center so that this edge coincides with the center of the triangle. Using the second hand, the second corner is wrapped around the first. Result: the triangle turned into a cone. If you have difficulty folding the corners, this means that the triangle you made is not wide enough.
- The cone needs to be leveled. This is achieved by slightly moving the paper or by turning the corners more tightly. If the result is skewed and the cone looks unnatural, then you should try turning the corners again. If there is excess paper peeking out from the bottom of the cone, this means that the triangle you made was defective. You can carefully trim the excess edges with scissors.
- Excess pieces of paper are wrapped inside the cone so that irregularities are not visible. Moreover, the fold of the cone must be perfectly even, otherwise the product will look sloppy.
- It is best to seal the joint line with tape. This should be done from the inside. The tape is applied along the joint line and carefully smoothed out. This will add strength to the finished product. Scotch tape can also be applied to the rim of the cone, both on the outside and on the inside.
Using Petals
If there are still a lot of petals left after shedding, you can find other useful uses for them. They are perfect for showering the wedding bed and can create a romantic atmosphere.
With the help of petals you can decorate a banquet hall, as well as a wedding procession. One of the best options is to use petals during a photo shoot; any skilled photographer will be able to take successful shots in which the newlyweds will stand surrounded by floating pink petals.
This wonderful tradition creates an amazing festive atmosphere that reigns throughout the day.
How to make a Christmas tree from a cone with your own hands
A wonderful addition to the New Year's holiday is a homemade Christmas tree. To do this, you need to make a cardboard cone using any of the above methods. The main thing is that it is durable and of the correct shape. Then you should start decorating it.
Next steps are as follows:
- The cone is completely covered with tape. You can use cling film for wrapping.
- The thickest (possibly multi-colored) threads are selected and dipped in PVA glue. The glue can be pre-diluted with clean water at a ratio of 1:1.
- The threads are wound around the cone.
- The product is left to dry completely.
- The paper cone with the film is carefully pulled out through the bottom. The frozen threads in the shape of a cone remain unharmed.
- The resulting Christmas tree can be decorated at will with bows, ribbons, beads, sparkles, decorative fruits, and home-made Christmas tree decorations.
How to make a candy bag
To build such beauty, you need to have:
- a large paper cone (to fit a lot of sweets and cookies);
- corrugated paper;
- ribbons;
- scissors;
- double tape or PVA glue;
- all sorts of goodies.
Step-by-step instruction.
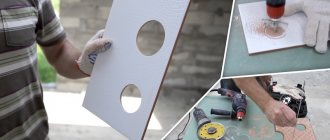
- Draw a circle of large diameter on thick paper and cut off ¼ of it.
- Next we work only with the cut off corner. Apply either glue to the edge of the paper or use double tape.
- We take corrugated paper, cut off a large piece from it and apply it to the cut corner in the part that is treated with glue or where the tape is located. Corrugated paper can be folded for added appeal.
- The corrugated paper is folded back and the paper corner is glued to form a cone. Glue can be replaced with double tape or a stapler.
- The corrugated paper is straightened and all sorts of sweets are placed into the cone. The top of the paper is tied with a beautiful ribbon.
- The cone itself can be decorated by making an applique in the form of flowers, animals, and cartoon characters.
Frame version of the base
How to make an unusual cone for a Christmas tree? It is made from paper or cardboard in the classical way. We wind yarn or threads and strips of floral mesh over the cardboard cone. This material must be covered with PVA glue on top so that the frame holds tightly after drying, when the inner paper cones need to be removed.
The finished unusual Christmas tree is decorated with a variety of accessories - tinsel, bright buttons, candies. You can attach them with glue or pieces of tape. Creative Christmas trees look especially solemn if you place a garland inside. Festive lighting will give the cone sophistication and New Year's charm.
The same lighting can be done for a classic Christmas tree cone made of cardboard, if you drill random holes of different sizes into it or make a fantasy ornament out of them. Roughness can be smoothed out with fine sandpaper, and the cone can be painted with bronze or gold paint to please the Yellow Earth Pig. You need to place LEDs inside - and the spectacular Christmas tree will be ready.
To decorate Christmas tree cones, New Year's tinsel and satin ribbons, napkins and cotton pads are used. Even a child can glue branches in the form of green paper circles with different shades.
Christmas tree cones are wrapped in decorative paper and fluffy green yarn, and pasta, candies and buttons are glued to them. You can make such outlandish trees for a holiday with children and friends, family and at work, employees.
DIY Santa Claus made from a paper cone
It is worth noting that many different crafts can be made using a paper cone. They are more attractive, individual, extraordinary, always delight and lift your spirits. This will not only help make the New Year’s atmosphere fabulous, but will also give many indelible impressions to little children.
To start work you need to have the following devices available:
- white and red paper;
- PVA glue or good quality stationery glue;
- cotton wool;
- pencils;
- compass;
- scissors;
- ruler.
The stages of creating Santa Claus are as follows:
- Take red paper and draw a circle on it with a diameter of 20 centimeters.
- Cut out a circle and fold it in half.
- Cut along the fold.
- From the resulting semicircle we form a cone.
- Carefully glue the edges.
- Take white paper and draw a circle on it with a diameter of 4 centimeters.
- A small circle is cut out and glued to the main cone just below the point. He will serve as the face of Santa Claus. Eyes, nose and mouth are drawn on it.
- From red paper we cut out details for the hands of Santa Claus. They are glued to the sides of a large cone.
- Attach a piece of cotton wool to the tip of the cone - this will be a pompom on the hat. You can do the hair from under the hat in the same way.
- On a small circle of cotton wool (you can also use just paper) draw a mustache and beard.
What you need to create a souvenir
Instructions in pictures.
The Christmas tree craft is made from simple materials.
Stages of making a Christmas tree with candies:
- You need to purchase cardboard of the required size. The width of the piece of cardboard should be equal to the height of the tree, and the length should be two or three times its width. You can immediately purchase colored double-sided cardboard. But you can paint the craft with paints or paste it with colored paper.
- You will also need scissors, glue, double-sided and regular tape, and a stationery knife.
- In addition, you need materials to decorate the cardboard tree. This could be foil, beads, buttons, coffee beans, glitter and even pasta.
Paper cockerel from a cone
This wonderful creation made from colored paper will delight not only kids, but also adults. Even the smallest craftsmen can participate in the making of such crafts; they need a little guidance and help. Making a cockerel is quite simple. To do this you need to have in the house:
| 1 | colored paper |
| 2 | cardboard |
| 3 | pencil |
| 4 | compass |
| 5 | glue |
| 6 | ruler |
| 7 | felt-tip pens |
| 8 | scissors |
A fairy tale cockerel is made in this way:
- Cardboard is taken, laid on a horizontal surface, a circle is drawn on it with a compass, which is subsequently cut out with scissors.
- The workpiece is folded exactly in half and cut.
- The resulting semicircle is folded into a cone.
- The seam is glued and dried well.
- A small piece is cut out of colored paper and a beak is made from it.
- The beak is glued to the base of the figure.
- A cut out thin strip is glued to the top of the workpiece.
- If you glue the same strip in several places, you will get an interesting comb.
- Cut out figures in the form of droplets from colored paper and glue them to the base of the cone below the beak. This will be the cockerel's beard.
- Cut strips of different colors in the amount of 5 pieces.
- Just like the scallop, glue them to the sides of the cone. You will get bird wings.
- Make a ponytail from the same strips, which can be slightly twisted using scissors.
The fairy tale cockerel is ready!
In the same way, you can create other fairy-tale animals, such as a donkey, a cow, a rabbit, a dog, a hippopotamus and many other fairy-tale characters, as long as your imagination and perseverance are sufficient.
We make our own three-dimensional Christmas tree for the New Year
Let's start the step-by-step instructions with the base of the craft. Roll the green cardboard into a cone. It is advisable to use green so that the gaps between the parts that will be glued on top are not so noticeable. If you want to make a large craft, take an A3 sheet, or glue two A4 sheets together.
To give the workpiece a greater resemblance to an evergreen tree, prepare more needle parts. They can come in a variety of shapes and sizes – it’s up to you to decide exactly how to make them. The choice of color is also yours, although green is traditionally chosen. If you make the needles white, as if covered with snow or frost, then it is better to make the base white.
Needles in the form of voluminous half-cones are beautiful and quite simple: fold a rectangular piece of cardboard or paper into a trapezoid and cut off its upper side. Fold the wide edge into a triangle and secure with staples or glue.
Sharp triangular needles can be replaced with circles glued to the base by the top edge. Use different shades of green to create a more interesting look.
Glue the needle blanks to the base of the craft, starting from the bottom edge of the cone. For beauty, reduce the size of the needles every three rows. If at the very bottom there are parts measuring 6.5 cm, then 6 and 5 cm should be glued higher, respectively. Sprinkle the finished craft with glitter or chopped tinsel on top of the smears of transparent glue.
Another option. Christmas tree cone made of paper droplets.
Christmas tree in the shape of a cone made of paper strips.
Horizontally glue wide strips of paper with cut fringes onto the cardboard base. The color of the paper, again, can be anything. Cut the strips into small needles, leaving a little space at the edge. When the glue has hardened, run scissors along the needles, bending them upward. A Christmas tree made from corrugated paper will look even more beautiful.
You will learn more about making cardboard cones from the videos below.