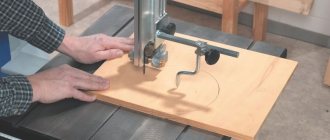
For primary processing of wood, sawmills are used, with the help of which the workpiece is cut into elements of the required size and shape. One of the most common machines for cutting wood is a band saw, which has a number of advantages over other types.
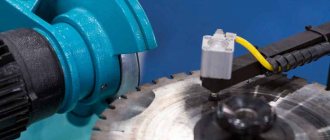
In order for the cutting blade to work as long as possible, it requires periodic maintenance. This includes sharpening and trimming band saw blades. These operations must be carried out without fail, otherwise the blade will become dull very quickly and the productivity of the machine will greatly decrease. Continued use of such tape may lead to its destruction.
Six rules for sawing
1. Tension Your Band Saws Correctly To ensure that your band saw is properly tensioned, perform a vibration test. Hakansson Sawblades band saws are low tension saws, i.e. operate with 35-50% less tension than competing carbon saws. A slight tension of the belts, ensuring sufficient stability, reduces the effect of fatigue during constant bending by 70% or more, therefore, significantly extending their service life. Energy consumption is reduced by 20%. The tension force for Silco saws should be about 100-150 kg/cm2, in particular, saws with a width of 32-51 mm for band saws should be tensioned with a force of about 130-150 kg/cm2. To measure the tension of the band saw, your machine must have some kind of device (dynamometer, pressure gauge, etc.). If you don't have one, use our strain gauge. The tension force used also largely depends on the design of your machine or sawmill. To get the most out of your band saws, whenever possible, always try to follow the guidelines below. A. For machines with mechanical tension. Remove the guide rollers - you cannot perform this test if the band saw blade has limited horizontal movement. Make sure the saw wheel surfaces are in good condition. If equipped with straps, the straps must not be hard, twisted, splintered or broken. On machines with loose V-belt fits, replace them with a smaller size to ensure a tight fit. This will reduce vibrations on your machine or sawmill by more than 80%. Place the blade on the machine and tension it with the tension recommended by other manufacturers for saws made of other steels. Close the cover for safety reasons. Start the machine by setting the switch to high speed cutting mode. Stand in front of the machine, hand on the tension mechanism, eyes on the band saw. Very slowly begin to loosen the canvas without taking your eyes off it. You must reach a position where the canvas begins to vibrate. When you see that the blade begins to vibrate, you have reached the zero position. Now start adding tension by turning the tension screw a quarter turn. Slowly until the saw stops vibrating and starts to function smoothly again. At this point, add another full turn of the tension screw. Your canvas is now properly tensioned. Turn off the machine and put your guides back in place. You are ready to go. Always release the belt tension between jobs. When you loosen the tension, remember that to completely relax the saw, it is enough to turn the screw 8-10 full turns. To tighten it, you just need to turn the screw in the opposite direction the same number of revolutions. If you follow these procedures as above, you will only need to perform the vibration test once. B. For machines with hydraulic tension. Perform the above operations. At the same time, reduce and increase the pressure in steps of 10-12 kg. Once you have eliminated the vibration, add another 25 kg. Note the pressure on the pressure gauge scale. ALWAYS REMOVE THE TENSION ON THE BLADE BETWEEN USE The next time you use the blade again, use the settings you remember so you don't have to repeat the vibration test. B. For machines with pneumatic tension. Perform the above operations. At the same time, reduce and increase the pressure in steps of 5 kg. After you have eliminated the vibration, add another 5 kg. Note the pressure on the pressure gauge scale. ALWAYS REMOVE THE TENSION ON THE BLADE BETWEEN USE The next time you use the blade again, use the settings you remember so you don't have to repeat the vibration test. WARNING: IF YOU DO NOT PERFORM A VIBRATION TEST ON OUR SPECIAL SILICON STEEL SAWSAWS, YOU WILL BE OVERTIGHTENING THEM AND WILL NOT ACHIEVE THE WEAR RESISTANCE AND DURABILITY OF WHICH OUR HIGHLY DUTY STEEL SAWS ARE CAPABLE OF. 2. Selecting the correct lubricant for the band saw blade. Never use water as a lubricant for band saws. Water is not a lubricant and should not be used for many reasons. Not only is water unacceptable as a lubricant, but it also causes the blade to rust, causing corrosion, and inappropriate chip blowing. This prematurely destroys the body of the band, and the grooves between the saw teeth. Water is also wet tires or V-belts. There is no need to lubricate the blade unless the resin sticks to the saw blade. If sticking does occur, we can suggest the following: For proper lubrication, mix high-adhesive chainsaw oil with half and half kerosene or diesel fuel. Apply the mixture using a spray bottle to both sides of the blade every four minutes while the machine is running. After lubrication, sawing noise is reduced by more than 50%. Do not apply lubricant until the noise begins to increase. You should lubricate both sides of the saw. Belt lubrication increases belt life by more than 30%. By using lubricant sparingly, you will be able to saw high-grade wood without getting it dirty; We also believe that this extends the life of the rubber gaskets. 3. Always loosen the band saw tension. When you are finished, release the tension from the saw. As bandsaw blades operate, they always heat up and lengthen, then shorten as they cool down during each cooling period. Therefore, saws left on the pulleys in a tense state overload themselves, and an imprint from the two pulleys forms on them, which causes cracks to appear in the spaces between the teeth. When you leave the belt on the machine under tension, you not only distort the rim and surface of the belts (making them very rough), but you also apply excessive stress to the bearings and shafts. Believe it or not, you can sooner or later damage the geometry of the pulleys and significantly reduce their service life. You also destroy your rubber gaskets and V-belts. 4. Selecting the correct tooth set. The spread is correct if in the space between the saw blade and the wood being processed you have a mixture of 65-70% sawdust and 30-35% air. A sign that you have chosen the right cut is the removal of 80-85% of sawdust from the cut. If your teeth set is too wide for the thickness of the wood available, then you will have too much air and not enough sawdust in the cut. You will have excessive sawdust loss, and this may be accompanied by tooth marks on the surface of the board. If you don't have enough clearance, you won't get a strong enough air flow to remove sawdust from the cut. A sign of this is hot sawdust. This can cause the most devastating damage to the bandsaw: operating intervals will be short and the saw will fail prematurely. The sawdust should be cool to the touch, not warm or hot. And finally, if the cut is insufficient and the sharpening angle is incorrect, the saw will cut a wave on the board. Typical example: If you are sawing a 35 cm log, the sawdust is warm to the touch, the feed speed is normal, long working intervals are maintained, and at least 85% of the wood dust is sucked out - the saw teeth are set correctly. Then you take on a 60-centimeter log. It would be logical for the widow to increase the spread of teeth when the mass of the tree increases by 100%. In fact, in this case you should increase the tooth set by approximately 20%. From our point of view, you cannot work with logs of different diameters, timber and beams using the same tooth set. You must sort the timber. For every 20-25 cm increase in size, you should increase the setting by approximately 18% depending on whether the wood is hard or soft, wet or dry. The only way to achieve the desired layout is to carry out test cuts on a specific log. Increase the setting by 0.05-0.10 mm on each side until tooth marks become visible. This means that you are working with a 50/50 mixture of air and sawdust. After this, reduce the tooth set by 0.75 mm on each side and you will achieve the desired result. VERY IMPORTANT: YOU MUST ONLY BREAK THE UPPER THIRD OF THE TOOTH, NOT THE MIDDLE OR LOWER. YOU DO NOT WANT THE GAP BETWEEN THE TEETH TO BE COMPLETELY FILLED WHEN YOU SAW. When you work with softwood, whether wet or dry, the chips expand in volume to 4-7 times their cellular state. Hard wood, wet or dry, increases in size only 0.5-3 times when freed from its cellular structure. This means that if you are sawing 45cm pine logs, you will need to set the teeth 20% further apart than when cutting the same oak logs. Always spread the teeth before sharpening. It is necessary that the end of the tooth is perpendicular to the tape. Set the teeth 0.02-0.03 mm more than required, and after sharpening the set will be what you need. It is important to know that there is a real formula for correct tooth set. For sawing logs on Avangard-LP band sawmills, we offer a series of “Silco” saws with a width of 31, 38, and 51 mm and a tooth pitch of 19, 22, 25 mm, respectively. The thickness of the canvas is 1.07 mm. The saw teeth are hardened and set by the company with an accuracy of 0.04 mm. There are four types of wiring (on both sides): - for dry hardwood (oak, beech, ...) - 2.03 mm; — for wet hardwoods -2.18 mm; — for dry coniferous and soft-leaved species -2.29 mm; — for wet coniferous and soft-leaved species -2.53 mm. Saw 32 mm, pitch 19 mm Soft wood Soft wood with a lot of knots Medium Hard wood Hard wood Very hard, frozen wood Recommended sharpening angle 10° 8° 10° 10° 8° Cutting width, mm Set to side, mm Set to side , mm 0-150 0.53 0.48 150-300 0.60 0.53 300-560 0.74 0.60 560-760 0.86 0.74 more than 760 0.96 0.86 Saw 38 mm, pitch 22 mm Soft wood Soft wood with a lot of knots Medium T hard wood hard wood very hard, frozen wood Recommended sharpening angle 10° 8° 10° 10° 8° Cutting width, mm Setting per side, mm Setting per side, mm 0-150 0.48 0.43 150-300 0.53 0.48 300-560 0.60 0.53 560-760 0.68 0.60 more than 7 60 0.78 0.68 Saw 51 mm, pitch 25 mm Soft wood Soft wood with a lot of knots Medium Hard wood Hard wood Very hard, frozen wood Recommended sharpening angle 10° 8° 10° 10° 8° Cutting width, mm Set to side, mm Set per side, mm 0-150 0.48 0.43 300-560 0.53 0.48 560-760 0.60 0.53 more than 760 0.68 0.60 5. Sharpening procedure There is only one way to sharpen band saws. The stone should travel down the surface of the tooth, around the base of the cavity between the teeth, and up along the back of the tooth in one continuous motion. There is no need to touch the cavity itself. The space between the teeth (gallette) is not a sawdust bin. In fact, it is the second hardest part of the saw. A good gallet is like an upside-down airplane wing. The power flow of air, cooling of steel and removal of sawdust depend on it. If you have the correct tooth set, air is forced along the log at the same speed as the saw, causing sawdust to be sucked into the gullet. The sawdust cools it significantly as it passes around the inside and outside of the next tooth. You need to ensure that the space between the teeth is filled to 40%, which will provide the desired degree of cooling and increase the operating time of the saw. If you only sharpen the front and back of the tooth, you will compromise the integrity of the tooth, which will cause the saw to break. So, you have checked your indicator and the accuracy of the teeth set, which are actually set 0.02-0.03 more than what you need. You've double-checked the angle of the sharpening device and it's exactly what you want. Now you can start sharpening your saw. 6. Correct sharpening angle. Thanks to deep gallets, we can use reduced sharpening angles, which transfer less heat to the tip of the tooth. The Silco series of tapes use a 10 degree tooth angle that is capable of penetrating most medium hard to medium soft wood surfaces. If you are working with very hard wood (such as oak, walnut, ash, or frozen wood), the saw may lift as it cuts. This is called repulsion. The tooth angle must be reduced again to 8°. You will notice that as the angle goes from 10° to 8°, the tooth becomes more perpendicular, thus increasing the penetration factor. If the tip angle increases from 10° to 12°, this results in decreased penetration into hard rock. If you use an 8° bevel angle on soft wood, the saw may vibrate from overexertion if the wood is not knotty. If there are hard knots, the angle of inclination should be 8°. On the other hand, when working with very hard wood, if the angle of inclination is 12°, the tooth will break off the hard surface because the end of the tooth is pointing too far forward. The 12° hook angle causes a pushing effect, which causes the saw to lift upward. The saw band is clamped in its movement, cuts straight across and lowers at the end of the process. This also leads to overheating of the tape and its overvoltage. By making sure that you have set the correct angle of inclination of the tooth, and the gallet mathematically exactly matches this inclination, you will achieve a straight cut. You must understand that tooth set and tooth angle are interconnected, they work together. We produce band saws with four types of tooth set with a tooth angle of 10°. Whatever you cut, 70% of the time this bevel angle is perfect for the job. Caution: You trust the templates and gauges on your sharpening machine. But they are hardly accurate. Cars wear out. The pins and guides that run the back of the belt on the sharpening machine wear out. The belt begins to slide at an angle, just an angle of a few degrees, and you are not able to notice it, but you feel that something is wrong as soon as you start working on the sharpened belt. To get an idea of the wear and tear on your sharpening machine, consider the following. A saw blade with a length of 4000 mm will pass along the sharpening device at least twice during each sharpening. Six sawing rules. Tooth angleYou have sharpened 50 bands. In total, this will be 400 m of length of the tapes, which rub their back side against the alignment pins, loosening them. How do you know if the tooth angle is set correctly? Using a protractor. Without it, you can assume that the inclination angle is set correctly. We have analyzed over 4,000 saws since 1992. And more than half of all problems stemmed from the incorrect assumption that the sharpening angle was set correctly.
Rules of use and safety precautions
After manufacturing and setting up, you can use the sawmill for work, observing certain rules and safety precautions.
It must be remembered that the canvas can tear, burst or come off. Therefore, if you have doubts about the reliability of the fastening, it is better to stay at some distance from the equipment.
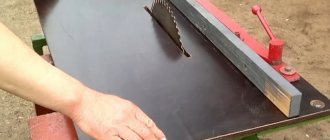
There are the following rules for operating an electric saw:
- The size of the saw teeth is directly dependent on the workpiece. The larger the part, the larger the teeth of the blade.
- It is most practical to use universal tapes. Then, when changing the material being processed, there will be no need to change the blade frequently.
- You need to select the installation location of the device in advance. There must be an outlet nearby and the place itself must be well ventilated.
- Before work, check the tension of the cutting belt.
- It is not recommended to turn on saws for more than two hours at a time. After such intensive work, the tape is removed from the pulley and left to “rest” for twenty-four hours.
- The machine needs regular lubrication.
- The teeth on the saw must be set correctly.
As a result of proper assembly, the tool you need on the farm will appear, assembled according to the drawings of a band sawmill with your own hands. With a little skill, working with it is convenient and easy. The original cutting material is transported by trolley. Saw material is placed on the bed, fixed, and the log or other material is processed using a saw.
A homemade band saw needs care and regular checks. If fasteners fail or become loose, it is better to stop work and correct any deficiencies noticed. When operating the device, you must be careful and careful.
Device for setting teeth
To cut teeth with a pitch of 0.5 mm, the ratchet wheel is replaced. The replaceable matrix 11 is attached to the body 1 with screws 12 and installed using a stop 13. When installing a new tape, the upper roller is moved away from the lower one using a special lever. With 116 strokes/min of the slider and a tooth pitch of 6 mm, the device cuts teeth on a 41.76 m long strip in 1 hour. Correct tooth spacing is of great importance for the productive operation of band saws. To set the teeth of band saws, a device is used, the operating diagram of which is presented in Fig. 14 [8]. The device is driven by the rotation of the flywheel 1, mounted on the crankshaft 2. On the latter, ring-bearings are freely located, in which curved levers 3 and 4 are attached to the threads. When the flywheel rotates, they receive a reciprocating motion. At the end of lever 3 there is a square with a freely hanging pawl 5. When lever 3 moves to the right, the pawl rests on the tooth of the saw blade 6. With one turn of the flywheel, the saw moves two teeth. The pawl and the square are hinged, so when the lever moves back, the pawl rises and slides along the teeth of the saw. Levers 4 are elements of the gear setting mechanism (the second lever is located on the back side of the housing). Levers 4 are pivotally connected to the crank axis of the cam 7. The levers return to their original position by springs 8. When the flywheel rotates, the levers 4 rotate the cams 7, which push the punches 9 towards each other. Two adjacent saw teeth bend in different directions (move apart). Springs 8 return cams 7 and punches 9 to their original position. The angle of the teeth is adjusted with nuts 10 and by deepening the threaded end of the levers into the rings on the crankshaft. The tooth set angle is 15° in both directions. The amount of feed of the pawl 5 is adjusted by nut 11. The mechanism for installing and securing the band saw has two plates that make up the body of the device, and a wedge 12 located between them. The wedge moves in the body, and the teeth of the set saw always protrude above the body by a certain amount. At the Volgograd Tractor Plant they use a device for setting the teeth of band saws. The device operates by hand drive and consists of two disks with shoulders on which a band saw is mounted. One of the disks is movable to tension the saw. The adjustment is carried out by two cams using a pawl, a lever with a roller, copiers, a handle and levers. An automatic machine is used for cutting and setting the teeth of band saws [54]. Teeth cutting is done on a steel strip of any length, which is then cut into measuring tapes. When refurbishment of band saws, the teeth are cut again. The machine can be installed on a separate frame, table or workbench; its overall dimensions are 380x320x250 mm, weight 16 kg; it is equipped with an electric motor with a power of 0.37 kW, with a shaft rotation speed of 1400 rpm. On the plate 1 of the machine (15) two brackets 2 and a support bar 3 are installed. Supports 4 are attached to one bracket, in which a worm 5 carrying ball bearings and a driven flywheel pulley 6 are installed. On the other bracket is mounted the eccentric 7 of the pusher 8 of the feed mechanism and gear wheel 9. The feeding mechanism consists of three supports 10-12, on which are placed a worm pair 13 and 14, a drive roller 15 for feeding the tape blank, a pressure roller 16, a pressure roller lever 17 and a screw 18 that regulates the degree of pressing of the pressure roller. To move the workpiece per saw step, a replaceable ratchet 19 is mounted on the worm 5. A drive gear 21 is installed on the shaft 20, which meshes with the eccentric gear of the feed mechanism pusher, cam disks 22-25, intermediate bushings 26 and 27, and a worm wheel 28. A combination stamp (16) is installed on the support bar 3; one of the stamps is used for cutting out teeth, and the other for setting teeth; the stamps are mounted on plate 1 between two posts 2 and 3. On the base of plate 1, together with the die-cutting die matrix, two strips 4 and 5 are installed. Between the die-cutting die matrix and the guide strip 6 there is a clamping device strip 7. The device is kinematically connected to the punch of the cutting die using two rollers 8 and 9 of guide bars 10 and 11, between which a spring 12 and a pushing head are inserted. A rubber ring 14 and a metal ring 15 are put on the bar 11, with which the tape is pressed while cutting the teeth. For lateral clamping of the tape, a clamping device is mounted in the hole of the strip 4. It consists of a retainer 16, a clamping bar 17 and a spring 18. The pushing head serves as a guide sleeve into which the spring 19 is inserted. The tape is secured with a nut 13. The nut 20 of the pushing head rests on the metal ring 15 of the rubber ring 14. To release the tape after cutting and moving It is placed on the new section by spring 12, which returns the clamping device to its original position. During operation, the pushing head of the punch slides along a bronze bushing 21, pressed into the bar of posts 2 and 3. Depending on the clamping force of the tape, it protrudes above the bar by one or another amount. The die for setting the teeth does not have a clamping device. Punch 22 is inserted at one end into the pushing head 23, and at the other into the bar 24. Its position is adjusted by a nut 25. A spring 27 is installed between the nut 25 and the guide sleeve 26. The pushing head of the punch slides along the guide sleeve 28, pressed into the bar 29. Combined die installed on the stove and covered with a casing. To thicken the teeth of band saws, the DIXA device (PNR) is used. The distance between the teeth undergoing thickening is 17 mm, the minimum tooth height is 9 mm, the maximum saw thickness is 3 mm. For lateral profiling, leveling and grinding of flattened teeth of band saws, the DHCA-20 machine (PNR) is used.
Common errors and fixes
The table below shows the most common operational difficulties and how to resolve them. Mistakes when cutting logs at a sawmill
| Error occurred | Reason for error |
| During operation, the saw rises. The output is a curved board | The tooth sharpening angle is too high. You need to reduce it by 4-5° |
| Dives appear in the operation of the saw | Small tooth sharpening angle |
| A large amount of waste in the form of sawdust during cutting | Saw setting level is higher than normal |
| When cutting, a wavy cut is obtained | The setting is too small, or the teeth are poorly sharpened |
| Cracking of the trailing edge of the sawmill blade | It is necessary to adjust the distance between the rear rollers |
| Rolling sawdust onto the sawmill blade | The tooth set should be increased |
| Rolling of sawdust onto the tooth surface | Poorly sharpened teeth |
Sawing on a band sawmill is one of the important stages of logging. The quality of the resulting product directly depends on the chosen scheme, organization of work and preparation of equipment.
Proper cutting and sharpening of the band saw is half the success!
The most important factor in the success of a lumber business is the type of saws used in production. The size of the saw, the material from which it is made, and the technology used to produce it all matter. But even using optimally sized saws manufactured to the latest standards will not allow you to make the profit you expect if those saws are not sharpened and set correctly. Improper cutting and sharpening of the saw lead to the appearance of defects on the lumber, which means its value drops significantly. Proper sharpening and cutting of saws is especially important when working on a band sawmill. Unfortunately, in practice, many people even confuse the sequence of these procedures: first they cut the saw, then they sharpen it. As a result, the spread of the saw tooth “goes away”, and the saw needs to be set again, or, if this is not done, the quality of the finished product will leave much to be desired. If we talk about the machines on which saws are sharpened and set, then every detail is truly important here. contributed to the development of high-quality adjusting and sharpening devices. Sharpening machineThe production sharpening machine is distinguished by fine adjustments, which allows you to adjust the feed size with an accuracy of 0.1 mm. Almost all sharpening machines on the market today sharpen one specific pitch of the band saw blade. The machine allows you to sharpen 19, 22, 25 steps, which is its significant advantage. Another distinctive feature of the machine is that it does not harden the tip of the saw tooth, because otherwise the tip of the tooth will fall off when entering the log, resulting in a wave appearing on the board. The machine allows you to sharpen saws up to 7 m. In case of failure of any electric motors, mechanisms, buttons, components can easily be purchased at a car store. Modern band saws are durable and yet flexible. Despite these undoubted advantages, the importance of correct saw setting is difficult to overestimate, because the quality of the saw tooth setting directly affects the quality of the resulting lumber. The adjusting machine has the correct geometry: when installing the saw in the adjusting machine, the tooth root is located between the cheeks that clamp the saw. In many other machines, including from a number of well-known manufacturers, this condition is not met. Therefore, when a tooth is bent, both the tooth and the saw body are deflected. Technically, correct saw alignment means something else: the pusher rests on 1/3 of the tooth and bends only its tip. When making an adjusting machine, two clamping stops are used, which, when lightly pressing on the handle, press the tooth against the indicator head. The pusher, not reaching the tip of the tooth, shows the actual groove on the band saw. If it is insufficient, the operator presses the tooth until it is moved apart to the required size. We consider it very important to pay attention to one point: the tooth of a band saw has such a property as metal memory. Because of this, under the influence of inertia, the tooth tends to return to its original position. Therefore, for correct alignment, it is not enough to apply one pressure on each tooth: it is necessary to act on the tooth several times so that it remembers its position. If someone tells you that it is enough to press once on each tooth, know that you are being misled. Two clamping stops with powerful springs used in the machine show the actual saw tooth set, which is very convenient: you don’t need to endlessly unscrew and reconnect the pusher to find out how the saw tooth is actually set. Adjusting machine Another strong point of the adjusting machine produced by the company is the ease and safety of the operator’s work: the tooth is adjusted not by pressing the pusher forward by the operator, as in a number of analogues, but by the operator’s own weight and with the help of an eccentric. As a result, the operator does not experience sprains in his hands. So, high-quality adjustable and sharpening machines are something that, undoubtedly, should be in the arsenal of every sawmill owner. But by themselves they do not guarantee the quality of lumber and will not allow the saw to serve for a long time if sawmills with serious technical shortcomings are used in production. For example, if the rollers are made with a cone, or they became conical because the saw sharpened them, then even with proper sharpening and setting, the saw begins to look for its place in the log. This will happen because the rollers are at an angle. If the pulleys on the sawmill are spread apart and are not in the same plane, then the saw does not flare clearly in the middle, but from the sides, and then the tension goes to the edge of the band blade. This also reduces the life of the saw. So the role of correct saw setting and sharpening is, of course, great, but these factors do not determine 90% of high-quality sawing, as is commonly believed. It’s just that the saw itself will not be able to cut perfectly smoothly and not break down for a long time if, for example, a rigid tension is used at the sawmill. https://www.ecotmn.ru/rekomendacii/shest-pravil-pilenija https://www.bibliotekar.ru/spravochnik-182-razrezka/23.htm https://www.pilorama54.ru/pokupatelyam/lentochnye- pily/pravilniy_razvod_i_zatochka/
Choosing the type of sawmill and their features
Now on the Russian market there are band, disk, and frame sawmills. In order to compare the efficiency of their work, we will use such a parameter as the percentage of finished lumber yield. The maximum indicator in this comparison is for band sawmills, which give 82-88%. For comparison: for a frame sawmill – only 61%.
The second very important indicator: what types of wood does this or that sawmill work best with? For band sawmills, this is fine-grain and medium-sized wood; disc sawmills cut large wood well, but face big problems when sawing fine-grain wood; and a frame sawmill cannot cut logs larger than 480 mm. in diameter. Next is the cost of repairs and replacement of saws. Here, band sawmills with short saw lengths have no competition.
It should be taken into account that the vast majority of trees cut down in Siberia for sawing are thin-sized and medium-diameter timber. What a band sawmill cannot cut is only 0.01% of the total mass.
Setting up a band sawmill
When purchasing band saw equipment (band sawmill), owners, especially beginners, often do not have a very good idea of what setting up a band sawmill is and how it is done. This directly affects the quality of sawing, the time it takes to set up the machine, the emergence of unjustified claims against the manufacturer of band saws, etc.
Below we describe the setup of a band sawmill, which our company’s specialists have applied to both hundreds of machines of our own production and to machines from other manufacturers.
The band saw setup sequence is reliable and not very difficult, although it does require some skill. Setup consists of the following four main steps:
Stage 1. Aligning the pulleys of the band sawmill in one vertical plane
The alignment of the pulleys of the band sawmill in one vertical plane is carried out using a plumb line and adjusting bolts of the wheels, with the help of which the plane of the wheels is ensured to be parallel to the plumb line (see Fig. 1).
Stage 1 Position of the wheels relative to the plumb line(s).
Stage 2. Aligning the band sawmill pulleys in the same plane horizontally
The alignment of the pulleys in the same plane horizontally is carried out with the band saw installed and tensioned, using a cord (thread) stretched along the machine. By adjusting the saw wheels (pulleys), the wheels are positioned in such a way that their planes are parallel to the horizontally stretched thread (see Fig. 2).
After setting the plane of the wheels in the horizontal plane, the drive wheel is fixed, in the result obtained as a result of adjustment according to paragraphs. 1,2 position, and is not used in further settings.
Rice. 2
Stage 2 Position of the wheels relative to the horizontally stretched thread.
Stage 3. Setting the gap between the intertooth cavity of the saw blade and the front edge of the driven pulley of the band sawmill
Setting the gap between the intertooth cavity of the saw blade and the front edge of the driven pulley is carried out with the belt installed and tensioned, by swinging the driven wheel in a horizontal plane (see Fig. 3).
Rice. 3
Stage 3 Setting the gap between the inter-tooth cavity of the saw blade and the front edge of the driven pulley by swinging the driven wheel in a horizontal plane.
Stage 4. Setting the gap between the intertooth cavity of the saw blade and the front edge of the drive pulley of the band sawmill
Setting the gap between the intertooth cavity of the saw blade and the leading edge of the drive pulley is carried out with the belt installed and tensioned by swinging the driven wheel in a vertical plane (see Fig. 4).
Rice. 4
Stage 4 Setting the gap between the saw blade intertooth cavity and the leading edge of the drive pulley by swinging the driven wheel in a vertical plane.
Adviсe
How to properly sharpen a blade?
According to statistics, more than 80% of device failures occur due to improper sharpening. The need for sharpening is revealed visually - by the appearance of the teeth themselves or by the state of the cut (increased unevenness of the plane).
Stones for sharpening band saw blades are selected based on the hardness of the teeth. Corundum stones are used to sharpen products made of carbon and alloy steel. Bimetal blades require borazone (CBN) or diamond blades. The cutting blade configuration should be determined based on the characteristics of the tool. It can be in the form of a plate, flat, cup, profile.
Before starting work, it is recommended to leave the canvas hanging unscrewed for 10-12 hours.
Conditions for sharpening blades with your own hands:
- Avoid putting excessive pressure on the disc (this can cause annealing);
- the indispensable presence of liquid for cooling;
- checking for clogging;
- ensure the integrity of the height and shape of the tooth section;
- ensure systematic removal of metal according to the cross-sectional shape of the tooth.
In general, despite the abundance of rules and conditions, these devices are quite undemanding in terms of sharpening. They can be operated either using a special sharpener for band blades or manually. In addition, mugs of various configurations and substances can be used for processing.
Before sharpening the blade, it is advisable to familiarize yourself with the basic methods of performing this procedure.
Full profile sharpening
This method is considered to be of particularly high quality and is performed on automatic equipment. The Elborov disc (Borazon), ideally adapted to the configuration, processes the entire interdental cavity along with the corresponding planes of adjacent teeth in one pass. In this case, it is impossible to obtain an incorrect configuration at the base of the teeth.
Do you need a band sawmill? Here are recommendations for choosing a band sawmill.
First of all, you need to choose a competent, conscientious manufacturer. Today in Russia, band sawmills are produced in almost every city, so it is very difficult to make the right choice. It is best to contact someone who has been working on band sawing equipment for many years, you can find out about all the positive and negative aspects of this equipment and directly about the manufacturer itself. Otherwise, you will have to do some analysis yourself. First of all, you need to find out how long this company has been producing band sawmills, how powerful the production base is (not a garage), what kind of guarantee the manufacturer gives for sawmills of its own production and inquire about the availability of a certificate. It is useful to get from the manufacturer the telephone numbers or addresses of those who have been working with this equipment for a long time, and in the process of communicating with users of tape equipment, you can draw some conclusions. Don’t chase low prices, most often this is a sign of handicraft production and most likely there will be difficulties with warranty repairs, or it will even be impossible to find a manufacturer.
When buying a band sawmill, as a rule, they expect to quickly set up a sawmill for a relatively small amount, organize a sawmill and immediately start earning money. But, due to the lack of experience in working with band saw equipment, the first days of work comes with disappointment from the lack of the desired result. Saws break, there is a “wave” on the board, and it is impossible to achieve high productivity. What to do? All these problems are easily solvable, you just need to use our practical advice.
Instructions for operating a band saw in the event of an accident
- If you notice or feel smoke or fire, you should stop working immediately. Disconnect the machine from the power supply. Then: - call the fire department; — inform your superiors about the fire; - evacuate.
- If you receive any injury, you should stop working on the machine and disconnect it from the power supply. Then: - provide yourself (if able) first aid; - inform management; - Call emergency medical assistance.
- If there is a feeling of electric current on the machine (vibration, humming, heating), you must stop working immediately. Report the breakdown to your superiors and wait for further action on their part. It is prohibited to start work without permission.
- If a nearby worker comes into contact with current (injury), then you need to help him and turn off the machine. If it is impossible to quickly disconnect the equipment from the power supply, you should strictly use dielectric gloves and try to free the person. Be careful not to come under electrical voltage yourself. After the person has been freed, you should immediately call an ambulance and provide first aid to the victim yourself.
Manual
In such models, the saw frame is a console. Its lowering is carried out either by the weight of the structure itself or by the efforts of the operator. In the first case, we are talking about gravity frames. To regulate the feed rate, lifting and fixing at the starting point, a special hydraulic cylinder with a bypass valve is used. It is commonly called hydraulic unloading. The operator marks and holds the workpiece. It also sets the lowering speed of the saw structure.
Manual machines have found their use in small industries. Among the key advantages of such devices:
- affordable cost and ease of operation and further maintenance;
- possibility of precise cutting at any angle;
Among the disadvantages of manual designs, the following should be highlighted:
- The appearance of vibrations during the processing of structures, which negatively affects the service life of the equipment;
- Lack of possibility of visual control over the degree of web tension. Also, such models do not provide for cleaning mechanisms;
- The need to regularly check and adjust the pulleys that drive the cutting element;
- Lack of ability to control and regulate the movement that turns out to be the cutting blade on the part. The hydraulic cylinder in such a mechanism has a small range of changes in the lowering speed;
Manual machines are truly indispensable in small enterprises, where sometimes it is necessary to cut workpieces made of tool or stainless steels and non-ferrous metals with different cross-section profiles.
Working belt
You can always see a spring on a belt grinder, which is necessary to ensure automatic tension of the sanding belt. If you use such a spring, then changing the tape will be very convenient, and its tension will be adjusted automatically. It should be said right away that it will be necessary to change the tape several times even when processing one product. When processing any metal part, you must start with a belt with a larger abrasive, gradually changing it to a finer one.
Very important attention should be paid to gluing the tape. There are options for proper gluing on the Internet, and you can also watch this process on video. To make it, you need to use sandpaper on a fabric basis.
The seam on the tape is made only end-to-end and it must be reinforced, for which a strip of dense fabric is used, placed on the back side of the area to be glued. To glue tape sandpaper, you must use only elastic glue, and it must be of very high quality
To make it, you need to use sandpaper on a fabric basis. The seam on the tape is made only end-to-end and it must be reinforced, for which a strip of dense fabric is used, placed on the back side of the area to be glued. To glue tape sandpaper, you must use only elastic glue, and it must be of very high quality.
To ensure high-quality and reliable gluing of the sanding tape, you will need to properly prepare it. You can glue the tape using a glue stick for a hot-melt gun: this method can be clearly studied in the video above. For heating, you can use a regular technical hair dryer.
If you wish, you can make your homemade grinding machine even more versatile; to do this, it should be equipped with an additional table placed on the side of the largest pulley. This will allow you to process parts on a belt grinder, pressing them against the sanding belt from the side of the largest pulley. If you decide to make such a table, you will need to provide for the possibility of changing the direction of movement of the sanding belt, which should always move towards the work table, and not away from it.
A simpler design of the grinder can be seen in the video below:
Introduction (start)
Beginning • Installing the saw • Lubrication and cooling • Setting the saw • Sharpening the saw • Tooth shape • Problems and their solutions Remember
, no matter what perfect sawing machine you purchase, it will remain a device for “running” the saw blade through the wood. 90% of the result depends on saw maintenance and only 10% on the overall setup of the machine!
We hope that the recommendations from STF Slavyansky Dvor LLC, given in this publication, on the use of band saws will be useful to the reader and will contribute to even more efficient operation of sawmill frames.
Band saw blade steel is strong enough to allow flattening and setting without cracking or breaking, and is also suitable for welding cutting inserts. The steel for band saw blades must be highly resistant to wear, which in turn will extend the life of the teeth.
The optimal ratio between strength and hardness is very important if the teeth are to be set or flattened in the future. Since band saw blades, especially the teeth, are subject to high impact stresses during use, the steel must have high impact resistance
Blades must withstand impacts from nails, bullets or stones without serious damage
Since band saw blades, especially the teeth, are subject to high impact stresses during use, the steel must have high impact resistance. Blades must withstand impacts from nails, bullets or stones without serious damage.
The steel must have very high fatigue strength. This is to ensure that the blade can withstand repeated bending around the pulleys. High fatigue strength will ensure that the risk of cracking in the grooves between the teeth is minimized.
Band saw steel must maintain straightness and flatness despite exposure to relatively high temperatures and temperature changes in the saw itself. To withstand all these changes, steel must have good elasticity and elasticity. Let's touch on some of the most common types of steel used in the manufacture of band saws:
Steel CR 300
— Carbon steel, hardened and ductile, hardness 41-45 HRC. Requires strict adherence to maintenance and operation rules, as well as non-forced cutting modes. The average resource is 25-30 m3 of roundwood. It has a design with a hardened tooth, which increases the service life by 20%.
Steel CR 400
— Carbon steel, hardened and ductile, hardness 43-47 HRC. Combines the optimal ratio of hardness and ductility. The saws are made from alloy tool steel D6A, which is a complete analogue of domestic steel 45KhGNMFA.
It has the following chemical composition:
| WITH | Si | Mn | Pmax | Smax | Cr | Ni | V | Mo |
| 0,44-0,51 | 0,15-0,3 | 0,6-0,9 | 0,014 | 0,015 | 0,9-1,2 | 0,4-0,7 | 0,08-0,15 | 0,9-1,1 |
The use of alloy steel for band saws can significantly increase their resistance to cyclic alternating loads.
The microstructure of the material is tempered martensite. The surface of the saw is polished. The trailing edge is rounded to a radius. The profile is obtained by cold cutting - stamping. Due to its flexibility, the saw can not tear for a long time; the tooth can be sharpened many times without compromising the durability of the tooth. The good flexibility of the saw body allows it to be used in sawmills with small diameter pulleys. Saws can be delivered with just a cut tooth or fully ready to work with a heat-treated tooth. More unpretentious in preparation for work and more durable in operation. The average resource is 30 - 45 m3 of roundwood.
Steel CR 200
— An analogue of CR 300 steel, alloyed with 2% Ni, which gives this material special ductility, reducing the risk of cracks and increasing service life by 30%.
CR -100 Schwedisch (Uddeholm)
— Extra-class carbon steel. Combines unsurpassed stability of chemical composition and geometry. The hardness is 44 HRC. If the rules of maintenance and operation are observed, the resource reaches 55 m3 of round wood. It has a design with a hardened tooth, which increases the service life by 20%. When using tape with a thickness of 1.2 mm or more, the steel is alloyed with 2% Ni.
| Steel CR 300 (Germany) | Steel CR 400 (Germany) | Steel CR 200 (Germany) | Steel Uddeholm (Sweden) | |
| Joiner's bandsaws for vertical machines up to 27 mm wide | + | — | — | + |
| Band saws for mobile horizontal sawmills with a width of 32 - 50 mm | + | + | — | + |
| Wide band saw blades for professional band sawmills, over 80 mm wide | + | — | + | + |