Types of end edges for furniture
When making furniture from laminated chipboard (chipboard), the edges of the parts without treatment have an unsightly appearance. To put them in order, furniture edges and profiles are used. It’s more convenient to work with them using special equipment, but you can also achieve good results with your own hands at home.
Types of furniture edges
One of the most popular materials for making furniture is chipboard. Its disadvantage is the unsightly edges that remain when cutting the part. These edges are masked by the furniture edge. It is made from different materials, and accordingly, it has different properties and prices.
You can also get this edge yourself
Paper or melamine edges
The cheapest option is melamine-impregnated paper edges. The paper is taken of high density, impregnated with melamine to increase strength and glued to papyrus paper. Papyrus can be single-layer (cheaper) or double-layer.
To prevent the melamine coating from wearing off, everything is covered with a layer of varnish. To make it more convenient to edge the parts, an adhesive composition is applied to the back side of the melamine furniture edge. When working, you just need to slightly warm up this composition and press it well against the end.
Paper or melamine edge is the cheapest, but also the most short-lived option for finishing the ends of furniture
The thickness of paper edge tapes is small - 0.2 mm and 0.4 mm are the most common. There is no point in making it thicker, and it will be expensive.
This type of edges is distinguished by the fact that it bends very well and does not break when bent. But its mechanical strength is very low - the edge quickly wears out. Therefore, if it is used, it is only on those surfaces that are not subject to load. For example, on the back of shelves, table tops, etc.
PVC
Polyvinyl chloride, which has recently become widespread, is also used in the production of edges for furniture. A ribbon of a certain width and thickness is formed from a mass painted in a certain color. Its front surface can be smooth, monochromatic, or it can be textured - with imitation of wood fibers. The number of colors is large, so it’s easy to choose the right one.
PVC furniture edging is the most popular material used by both home craftsmen and professionals. This is due to the relatively low price and good performance properties:
- High mechanical resistance.
- Withstands exposure to chemicals (household chemicals, for example).
- Waterproof material protects the ends of the product from moisture.
- PVC is an elastic material, which allows you to process curved surfaces.
- It is well processed using simple tools, which allows you to get a good result even at home. Different edge thicknesses look different
PVC furniture edging is available in different thicknesses and widths. Thickness - from 0.4 mm to 4 mm, width from 19 mm to 54 mm.
The thickness is chosen depending on the expected mechanical load or external appearance, and the width is slightly larger (at least 2-3 mm) than the thickness of the workpiece.
There is a furniture PVC edge with an adhesive applied, and there is one without. Both can be glued at home (more on that below).
This type of edge material also has disadvantages: not a very wide temperature range: from -5°C to +45°C. For this reason, furniture cannot be left outside in winter, and when pasting with heat, you must be careful so as not to melt the polymer.
Made from ABS plastic
This polymer does not contain heavy metals and is characterized by high strength and durability. The disadvantage can be considered the high price, therefore it is used extremely rarely, although it has excellent properties:
- It is resistant to high and low temperatures, so when gluing you can use glue with any melting point. Small shrinkage when heated - about 0.3%.
- High mechanical stability. Several options for edge tape made of ABS plastic
This type of edge can be matte, glossy or semi-gloss. There are also options that imitate various types of wood. In general, this material is more convenient to use and more durable to use.
Veneer edge
Veneer is a thin section of wood, colored and shaped into a strip. This furniture edge is used in production for gluing sections of veneered products. Working with this material requires certain skills, and the material is expensive.
Veneer is not the most popular material for edging
Acrylic edge or 3D
Made from transparent acrylic. A design is applied to the reverse side of the strip. The layer of polymer on top gives it volume, which is why it is called a 3D edge. Used in the production of unusual furniture.
Acrylic gives the picture volume
Profiles for processing furniture edges
You can trim the edge of furniture not only with edge tape. There are also furniture profiles that are attached mechanically. They are available in two sections - T-shaped or U-shaped (also called C-shaped).
For T-shaped furniture profiles, a groove is milled in the edge being processed. The profile is hammered into it with a furniture (rubber) mallet. The edges are cut at 45° to make the angle look attractive. It is brought to perfect condition with fine sandpaper. This type of profiles is produced from PVC and aluminum; with the same installation method, they look very different, and the differences are significant.
T-shaped furniture profile for processing furniture edges
In width they are available for laminated chipboards of 16 mm and 18 mm. There are also wide ones, but they are much less common, since they work less with such material.
C- or U-shaped profiles are most often mounted with glue. They coat the edge with it, then put on a plastic profile, press it well and fix it. These PVC profiles are soft and hard. Hard ones are harder to bend and it’s difficult to paste them over curved edges. But they have great strength.
Gluing C-shaped furniture profiles does not cause problems
If you still need to “fit” a rigid C-shaped furniture profile onto a bend, it is heated with a hair dryer, then given the desired shape and secured with masking tape until the glue dries.
We glue furniture edges with our own hands
There are two technologies for gluing furniture edge tape. The first is for those that have glue applied to the back. In this case, an iron or a hair dryer is needed.
The second is for gluing tapes without glue.
In this case, you need a good universal glue that can glue plastics and wood products and a furniture roller, a piece of felt or a soft rag so that you can press the edge well against the cut.
It’s possible to get such an edge at home
A little about what thickness of edge to glue on which parts. Those edges that are not visible, according to GOST, do not need to be glued at all, but basically they try to treat them so that less moisture is absorbed into the chipboard, and also to reduce the evaporation of formaldehyde. Melamine tape or 0.4 mm PVC is glued to these edges. The edges of the drawers (not the fronts) are also processed.
It is better to use 2 mm PVC on the front ends of the facade and drawers, and 1 mm PVC on the visible sections of the shelves. The color is chosen either to match the main surface or “in contrast”.
How to glue edging yourself with glue
The adhesive composition is applied to the melamine edge; it can be applied to PVC. If you choose PVC, it’s easier to start with thin ones - they are easier to process, any melamine is easy to glue.
We take an iron and a fluoroplastic nozzle on it. If there is no nozzle, thick cotton fabric will do - so as not to overheat the tape, but to melt the glue. A hair dryer is also suitable for this purpose. We set the iron to about “two”, while it is heating up we cut off a piece of tape. The length is a couple of centimeters longer than the workpiece.
Place the edge tape on the part
We apply the edge to the part, level it, smooth it out. There should be small pieces hanging off both sides. We take an iron and, using a nozzle or a rag, iron the edge, heating it until the glue melts. It is necessary to heat evenly over the entire surface. After the entire edge is glued, let it cool. Then we start processing the edges.
Warm up with an iron
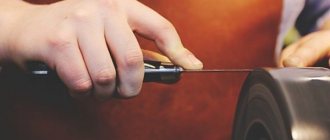
The edge can be cut with a knife, both with the sharp and blunt sides. Some people use a regular metal ruler, while others find it more convenient to use a stainless steel spatula.
So, take the tool you have chosen and cut off the hanging edges of the edge. They are cut close to the material. Then cut off the excess along the part. Melamine and thin plastic are easily cut with a knife.
If the PVC edge is thicker - 0.5-0.6 mm or more, difficulties may arise. Such edges can be processed with a hand router, if you have one. This guarantees good results in a short time.
The processing will take longer if you use sandpaper, but the result may not be worse.
You can even use a spatula with a hard blade
One important point: when gluing thin edges, the cut of the part must be smooth, without protrusions and depressions. The material is plastic, which is why all defects are visible. Therefore, first go over the cuts with sandpaper, then thoroughly remove dust and degrease. Only after this can you glue.
Edging with PVC tape (no glue on the back side)
With this method of gluing PVC edges yourself, you need universal glue and a piece of felt or rag. We read the instructions for the glue and carry out all the steps as recommended. For example, for Moment glue, you need to apply the composition to the surface and distribute it, wait 15 minutes, and firmly press the surfaces to be glued.
Apply glue and wait - no problem. To press the edge tightly to the cut, you can use a wooden block wrapped in felt. Instead of a block, you can take a construction float and also attach felt to its sole. As a last resort, you can roll up thick fabric in several layers and press the tape to the surface.
Press firmly, leaning with all your weight
The selected tool is pressed against the laid edge, pressed with all its weight, pressing it to the surface of the chipboard. The movements are stroking. This is how they iron the entire edge, achieving a very tight fit. The part is left in this form for some time - so that the glue “seizes.” Then you can start processing the edges.
WEGOMA edge trimming tools
Edging is a basic step in the process of manufacturing cabinet furniture from slab materials. In the article about melamine edging, the simplest method of edging was shown - manually, using ordinary household tools. There are highly specialized tools designed for cutting edges that can make the work of a furniture maker much easier and faster.
Edge trimming tool WEGOMA KG94
The tool allows you to quickly and accurately cut the end of melamine, PVC or ABS edges up to 1.2 mm thick and up to 54 mm wide with one click.
KG94 is made of durable plastic, equipped with two removable knives that work on the principle of scissors. If necessary, the lower parts can be replaced with new ones or sharpened. The fixed knife is adjustable in terms of reach and installation angle, this allows you to set a minimum, uniform gap between the cutting edges of the knives to obtain a high-quality cut.
Photo of the KG94 trimmer from different sides.
Operation of the lever and knives.
The KG94 trimmer is installed on the part. To perform trimming, you need to press the lever.
Pruner KG94 in the process of trimming. The lever is partially pressed.
The edge was cut with a KG94 tool. In the photo, the yellow one is melamine edge, “Wenge” is ABS.
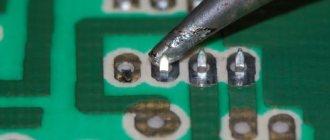
If the adjacent end of the part had a glued edge, after trimming sometimes a small amount of glue remains, which can be easily removed with a solvent or mechanically.
Longitudinal edge trimming tool WEGOMA AU93
The tool is designed for double-sided longitudinal cutting of edges up to 0.5 mm thick and up to 40 mm wide. For each edge overhang, two knives work: the main knife cuts off the overhang (excess) of the edge flush with the face of the part, the other one removes an angular chamfer from the edge edge and/or cleans up possible flaws in the work of the first knife.
Structurally, AU93 consists of two mirror-like identical plastic elements - half-bodies, connected to each other through two guide bushings with springs inside.
Each half-body has three removable, adjustable knives, which allows you to work with the tool on either side, or adjust the sides to work with edge materials of different thicknesses.
The main double knife has an adjustment for contact with the face. Additional two chamfering knives are adjustable for reach.
Photo of the AU93 trimmer from different sides.
Disassembled longitudinal trimmer. The smaller the edge width, the more the springs have to be compressed. When working with laminated chipboards up to 18 mm thick, it makes sense to use weaker springs or remove them altogether.
Half body. The main knife adjustment screw is visible.
Adjustment screw of one of the additional knives.
Set of new knives for AU93. A similar kit can be purchased for the KG94 end trimmer.
The minimum possible thickness of the workpiece is 14 mm.
WEGOMA AU93 at work. The edge is melamine (yellow) and ABS (Wenge).
Melamine and ABS edges are cut to length.
Conclusions and recommendations
Based on the results of using these WEGOMA tools in the production of cabinet furniture from laminated chipboards, the following conclusions can be drawn.
The WEGOMA KG94 end trimmer is a universal, useful and necessary tool. It can be safely recommended to any furniture maker who still uses a knife.
The edger works equally well with melamine, PVC and ABS edges, as well as with HPL plastic used for edging kitchen worktops.
With sharp and adjusted knives, the cut is perfect or close to perfect, requiring only light sanding with an emery block.
The WEGOMA AU93 longitudinal edge trimmer does not always demonstrate excellent results in practice. When working with melamine edges, the tool often leaves an unnoticeable but tactile step that must be sanded down. Adjusting the main cutter knives did not lead to the desired result.
On an ABS edge, the step problem is virtually non-existent. Additional knives do not justify themselves at all; they work with varying success, depending on the force of pressing the half-shells to the material and the point of application of this force.
An important advantage of the AU93 longitudinal trimmer is that it allows you to comfortably work with long, large parts in any spatial position.
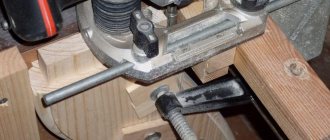
Homemade edge trimmer.
Making a homemade edge trimmer yourself may not be the brightest idea that came into my head, after all, the item is quite simple and, as a result, not expensive... But getting to the store and purchasing it was beyond my strength, so I made it myself. I decided to share partly so that I wouldn’t forget the dimensions later and not invent something new.
So. I made several bars from oak and MDF. Several, because I did a couple of trimmings at once. One trimmer consists of two halves, between which the razor blade is subsequently clamped. Oak blocks 25x25mm. cross-section, length 150mm. In general, the dimensions can change - it’s more convenient for someone to work. The material Oak was chosen by chance - any wood will do, the main thing is that it is not MDF - it is a block through which the screws will be screwed, and MDF periodically cracks.
The second block is made 50x25 from MDF or any other material. I made a 3mm thick cut along the second block. and approximately 8-10mm deep.
Placing one block on the second, I drilled four holes with a 2mm drill. then he removed the block and duplicated the holes on the wooden block with a 3mm drill. Then I countersinked the holes to approximately the depth of the recessed screw head. Between the bars I put a razor from a domestic manufacturer. Unfortunately, razors with imported names are a little inferior to ours; they are usually a little thinner and I found it less convenient to use them when veneering or cutting off edge overhangs. Please note that the distances are 25 mm. It's hard enough to place the blade. I didn’t want to make the design bulky - it’s more convenient for me... Place the razor so that it does not protrude on the outside, otherwise you can cut your hand. After placing the razor blade, fold the halves and tighten them with screws or self-tapping screws.
If desired, you can trim the edges of our trimmer with a file or coarse abrasive, forming chamfers. This way the device will be more convenient to use, and it will also look a little more pretentious.
OK it's all over Now. Our edge trimmer is ready. The edge is trimmed very well with a razor, but the razor gets dull pretty quickly. Every 40-45 linear meters of cutting, I usually turn the razor blade over to the new side. Otherwise, a dull razor will knead and tear the edge overhangs and the result will hardly please you.
I repeat. The device is not tricky and should not be at all expensive, but if you, like me, are a lazy or busy person, you don’t have the opportunity to get to the store - make a similar device - in a workshop where edges are glued at least occasionally, a very useful item.
And if you have questions about the veneering process itself, then a detailed description in the article - Veneering (Working with veneer)