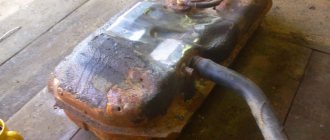
A plastic tank is a practical container in which it is convenient to store water supplies. The material is not afraid of corrosion, but can easily crack or deform under mechanical stress. Due to technical features, it is difficult to seal the polymer hermetically. There are 5 ways to repair a leaky barrel, which I will discuss below.
Characteristics of plastic
Durable material is very demanding in terms of operating conditions. Installation errors or an uneven installation surface can lead to changes in the geometry of the tank. Impacts and careless use cause deformation, which leads to damage.
A small crack on the bottom or side gets larger under water pressure. If you don’t know how to seal a plastic tank, the tank will fall apart. Small containers are easier to buy. I can’t always find voluminous, oversized or exclusive models on sale, so I prefer to repair them.
Source greenera.com.ua
Before sealing the tank, I advise you to understand the type of plastic. Tanks made of low-density polyethylene can be identified by the “PE-HD” marking. Very hard raw materials are resistant to inorganic and organic matter. Due to the preservation of characteristics in the temperature range from -50 to +80 C, it can be used both at home and outdoors.
Water storage containers can be made of polypropylene (PP-H). The strong material does not break down under the influence of household chemicals and is highly resistant to tearing. Due to its resistance to UV rays, the liquid inside does not deteriorate, which allows you to store moisture for a long time.
Source polipro.kz
Tanks made of polyvinyl chloride are easily recognized by the “PVC-U” marking. The tanks operate in a temperature range from 0 to +60 C, so I do not recommend leaving the tanks outside in cold weather. The raw materials have high resistance to aggressive and oxidizing environments, which preserves the hardness of the containers.
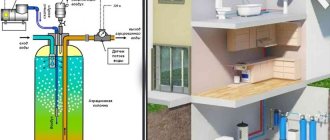
Installation and connection principles
Installation Features:
- The liquid container must be freely accessible.
- The tank must be connected to the water supply pipeline using quick-release fittings (American). With their help, you can quickly install and dismantle the container.
- If a pump will be connected to the liquid tank, no other devices should be installed between it and the tank. Otherwise, the network resistance will increase.
- The container must be grounded. Without grounding, the metal case will quickly collapse from electrocorrosion processes.
- The connected pipe from the water supply pipeline must be equal to or larger in diameter than the inlet pipe of the liquid container.
If the installation is performed incorrectly, the autonomous water supply system will be disrupted.
Bitumen tape
I advise you to seal small cracks and shallow damage with bitumen-polymer tape. The single-sided consumable material consists of reinforced polyethylene film and a thin layer of aluminum. Elastic raw materials perfectly follow the shape of the tank, and the astringent coating ensures strong adhesion to the plastic.
Source nasha-stroyka.com.ua
I use a patch made of bitumen-polymer tape to eliminate leaks in PVC containers. I degrease the surface of the tank and wipe it with a dry cloth. The patch should protrude 2-3 cm above the damage. Using scissors, I cut out the required size, remove the protective film and, with a gentle movement, seal the crack from the outside.
Operating rules
Features of using a metal water tank:
- If the container is used in a sauna, it should be hung on the chimney or the side wall of the stove.
- Before using the oven equipment, you need to fill the tank with water. It is important to control the liquid level so that it is at least 2/3 of the total volume.
- A thermometer must be installed on the heating tank so that the water heating temperature can be monitored.
- Before use, the heated liquid must be diluted with cold water.
When the bath procedures are completed, you need to rinse the inside of the container. To do this, you can use warm water diluted with neutral detergents.
Epoxy adhesive
The resin-based product quickly hardens under the influence of hardeners, forming a dense polymer layer on the surface. If a plastic tank is sealed with epoxy, the raw material will provide good adhesion to the smooth wall. The inert composition of the chemical is resistant to aggressive environments and will not collapse under the influence of moisture.
Source sdelai-lestnicu.ru
Before sealing the plastic tank, I degrease the damaged area. For restoration, I cut off a piece of glue, which I knead in my hands until smooth. In terms of plasticity, the material resembles clay or plasticine. I make a small cone out of the mass, fix it in the hole and leave it to dry for 1-2 hours.
If you need to seal a plastic tank without draining the water, I recommend using two-component Contact glue. The product hardens upon contact with liquid and quickly restores the altered shape of the tank. The plastic mass is ready for use in 3 minutes, and polymerization takes place within half an hour.
Source hobbirukodelie.ru
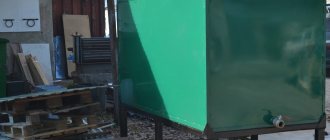
DIY making
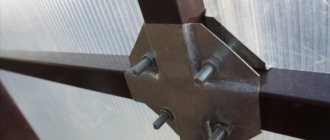
If you want to save money and install a container of a non-standard shape, you can make a metal tank with your own hands. For assembly, you need to use thin-sheet stainless steel with high rates of weldability and ductility. Additionally, you will need a metal brush, a welding machine, an angle grinder, and a tap for draining water.
Build process:
- Apply markings to metal sheets.
- Trim the sheets with a grinder.
- Weld the parts using a welding machine.
- Make a hole for the drain valve and install shut-off valves.
- Make a hole for water supply.
All that remains is to clean the welding seams with a metal brush and coat them with an anti-corrosion compound.
Glue BF
I advise you to seal polyethylene containers with BF-4 or BF-2. The products dissolve the top layer of plastic, thereby improving adhesion to patches. Before restoration, I carefully remove any remaining damage, leaving smooth edges without creases. Degreasing ensures maximum adhesion of the adhesive to the polymer.
Source dnepravtokraz.com.ua
As patches, I take pieces of fiberglass that are 3-4 cm larger than the crack. I fill the flaps with liquid BF. I slightly warm up the area of the breakdown using a blowtorch or a hair dryer, apply the polymer to the hole and seal the tank. After 4-6 hours you can add water.
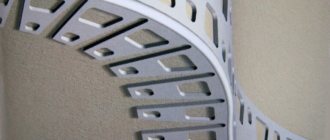
Extrusion
The technology is suitable for repairing containers with thick walls. Extrusion welding is based on combining raw materials using filler material. As a result, I get a strong, durable seam, almost invisible to the naked eye.
When exposed to high temperatures, even the most resistant plastic melts and deforms. Reinforcement will prevent the appearance of new holes and eliminate damage. As a filler material I use a mesh of:
- stainless steel;
- aluminum;
- copper
Metals should not oxidize when they come into contact with water, so I take options with anti-corrosion properties. Using scissors, I cut out thin strips, 1-2 cm wide. I clean out the cracks in the tank and degrease them. I apply the patch to the edge of the damaged area and seal the tank.
Source cheb.my-teplo.ru
To heat the plastic, you can use either a hair dryer or a household soldering iron. The power of the former must be at least 1.6 kW, of the latter - 100 W. It is more convenient to use a tool with hot blowing, the intensity of which is regulated and there are several types of attachments. When working with tinning equipment, I advise you to take models with a wooden handle.
I use a soldering iron or a hair dryer to burn a piece, pressing the mesh to the plastic and sealing the tank. The material must be completely immersed in the polymer. I fix the tape with a screwdriver or the edge of a knife. Cold metal acts as a heat exchanger, cooling the walls. In order for the mesh to better penetrate the molten raw material, the tool must be guided following the hot blowing.
Source kraska.guru
The melted edges are smoothed using a soldering iron. After the patch sticks, move on to the next section. The work is slow, painstaking and requires attentiveness and accuracy from the performer. A few unsealed millimeters will leak. I recommend carrying out reinforcement on the external and internal sides of the tank, preventing possible rupture.
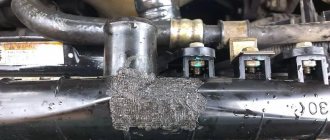
Welding
The principle of the technology is similar to extrusion, but instead of mesh I use plastic rods. To seal the tank, I cut patches from an old water container. Instead of a soldering iron, it is more convenient to work with a professional hot-melt gun. Equipment with a narrow nozzle must support manual temperature adjustment.
I clean the edges of the damage and degrease it. Using a drill, I carefully drill small grooves on the back and inside of the tank. The depth of the ditches is 75% of the thickness of the walls. The holes should be longer than the crack. Then I change the drill to a rusty attachment and make cone-shaped indentations.
I place thin and thick plastic patches in the grooves. In order for the contact to be better, it is necessary to give the elements a cross-section in the shape of a ditch, sharpening the ends. I install the tank at an even angle. On the heat gun I select the range 290-330 C, after heating I start soldering.
Source kraska.guru
When working with the tool, I heat the ends of the rods and carefully guide them along the crack. In order for the patch to accurately fall into the ditch, you need to apply slight pressure while moving. Under the influence of high temperature, a drop of plastic will appear at the contact area, which will begin to flow into the damage and solder the edges. The top layer of material will reliably close the hole.
Welding is a painstaking process, the quality of which depends on the accuracy of the performer. When heating the plastic, you should not rush, otherwise the polymer will not soften easily. On average, one rod takes 3-4 minutes. After the first layer, I use pliers to bite off the excess and move on to the next tier.
The number of patches per crack depends on the size of the damage. I recommend melting 3 more units than will fit in each ditch. The sealed seam will stick out above the surface of the tank. After the weld has hardened, the walls should be treated with a grinding wheel.