A water tank is useful in every household, private home or country house. Storage containers can be used for irrigation and reserve supplies for household needs. Containers are made from different materials - plastic, polypropylene. But for many years, a metal container has been considered the most durable and reliable. It can be round or rectangular, with or without a lid.
Buying a water tank for the dacha is not a problem, but with amateur welding skills, each owner can make a metal container for the dacha or home on their own. It is important to note that very often finished products are made of thin steel, and therefore do not last long.
If you make it yourself, you can choose thicker sheets of material and then the tank for watering your garden is guaranteed to last for many years.
general information
Why are water containers made of metal or any other material needed? The answer to this question is obvious, but for some it remains open. The fact is that everyone uses storage tanks differently. Their purpose is to collect and store water for later use. How and in what form you will do this is up to you to decide.
The tank can have different shapes, depending on its purpose. A regular rectangular large tank can be used to collect rainwater. For a summer shower, you can use a flat, low tank that can be easily mounted on top of a metal frame. It all depends on the purpose of use.
Often, ordinary metal barrels are used as such a storage tank. This is a practical and inexpensive option, but not always convenient. Especially because of its open top, through which insects enter the water, and plants and rust form on the walls of the tank. It can also be used to collect rainwater only if you have drains and it is possible to lead the pipe directly to the barrel.
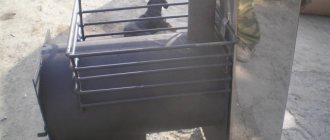
In order not to have to worry about barrels, craftsmen make homemade metal tanks. They have a simple design and low cost. Below you can see one of the possible drawings of a storage tank. This container is small in size, but quite spacious and holds up to 200 liters of water.
Application options
Storage tanks are relevant in places where there are interruptions in water supply. Indoors, water tanks are most often installed in a horizontal position.
The tanks are used to store rainwater and tap water. With their help, you can organize an outdoor shower or keep them for fire safety purposes so that you can extinguish the fire.
They can store water for watering plants, gardens and vegetable gardens. Often round tanks are installed in a bathhouse to store water. There are many designs that can be round, rectangular or other shapes.
It is important to understand what the tank is for. If it is used inactively, the water in it promotes the growth of algae and microorganisms. Moreover, if the container is constantly located in an open area under the sun's rays.
Therefore, choosing the volume of the tank is one of the main tasks before starting its manufacture. Ferrous metal tanks must be primed and painted to prevent them from rusting.
Homemade water tank
Preparatory stage
First of all, you must have a drawing according to which you need to cut out the necessary blanks from metal in advance. The Internet is full of drawings, you can use any of them, or the one listed above.
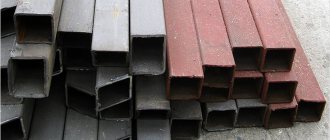
It is better to make a tank for the home and a tank for the bath from stainless steel. Stainless steel is resistant to corrosion and the formation of plants on the walls, which is important when the container is not used regularly (for example, only in summer). The material you can use is metal with a wall thickness of about 2 millimeters, this will be enough.
The container must have an expansion tank into which excess liquid will be drained. Otherwise, the storage container may become deformed due to excess pressure. The expansion tank can be made from the same materials.
If finances do not allow you to use stainless steel, you can purchase steel (technical or food grade). It's cheaper. But it copes with corrosion much worse. Keep this in mind.
Tank welding
Let's move on to the question of how to properly brew a tank.
It is better to work with a partner. One will cook, and the other will hold the workpiece at the desired angle. We also recommend placing bricks or boards under the future bottom so that the surface is level.
It is not easy to cook stainless steel; you need to have at least minimal experience. Then the work can turn out to be more or less high quality. Use argon welding with tungsten electrodes or stainless steel wire.
This will make the seams better and more reliable. In theory, a tank can be welded using a conventional inverter paired with consumable electrodes, but in this case you need to be not just an amateur, but at least a practicing welder.
Join the bottom and one of the walls, make tacks. In general, the entire structure can be assembled using tacks, and then go through again and make normal seams. It’s easier and faster than immediately welding a high-quality seam at home.
Welding can be done both inside and outside. External seams are easier to sand. Make sure that the metal pieces are tightly joined. Avoid undercooking. And be prepared that when welding a large tank, the work can take a whole day.
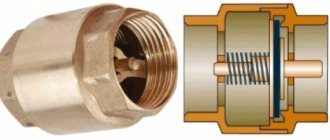
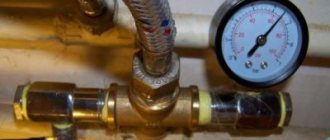
To strengthen the structure, you can use metal corners inside or outside the tank. To drain water at the bottom of the tank, you need to weld a metal pipe of the required diameter and install a tap.
Before full use of the tank, we recommend checking its tightness. Prepare a soap solution and apply it to the external joints of the workpieces. On the other side of the seams, you need to apply kerosene and wait. If after a while stains appear on the surface of the seam where the chalk solution is applied, then the connection is not airtight.
And water can flow into any, even the smallest hole, and over time destroy the structure. Therefore, we recommend re-welding the seams. They won't be as good as if you made them the first time, but re-welding will save the tank from premature destruction.
Mounted models from canisters
If a do-it-yourself summer washbasin at the dacha made from bottles does not meet the needs of the family even with temporary use, you can install a larger model made from a plastic or metal canister, or even a bucket. To do this, cut or knock out a hole in the container into which the tap is installed.
If necessary, for better tightness, first install a squeegee into the hole knocked out in the canister, providing it with rubber gaskets on both sides. The position of the squeegee is fixed with nuts on the outer and inner sides of the canister. A crane is installed on the drain.
During installation, it is important to ensure the tightness of the joints
. If you choose a canister model, you should take into account that the drainage volume will be larger, which means you should think about drainage.
The following options are possible:
- a container for collecting liquid installed under the washbasin,
- drainage ditch,
- drainage channel to, etc.
If the site has permeable soil into which water drains easily, you can allow the liquid to soak into the soil. In this case, it is recommended to fill the space under the washbasin with gravel, crushed stone or expanded clay for better drainage.
Recommendations from the experts
We've collected some tips from professional welders. They will be useful for beginners and garden craftsmen.
It is better to use stainless steel grade 8-12Х18Н10 or AISI 430 08Х17 as a material. These brands are best suited for storing water, including long-term storage. However, it is still better to drain the water before winter.
Before welding a stainless steel water tank, you need to decide on its volume and make a drawing based on this. For a bathhouse, a tank of up to 60 liters will be enough for two or three people. On average, about 20-30 liters of water are needed per person.
If you are cooking a tank for household needs, it is better to stock up on a volume of 100 liters or more. 200 liters is just right for watering gardens and collecting rainwater. As for the wall thickness, it is better to use sheets no thicker than 2 mm. In factories, tanks are made of metal 1 mm thick, but at home it is more difficult to weld such thin metal well. The wall thickness does not depend on the shape and size of the tank.
It is better to abandon the idea of welding a water tank from aluminum. It is not easy to make high-quality sealed seams at home. Stainless steel is also not easy to cook, but this task is quite doable. But to work with aluminum you will need experience and a good welding machine.
Depending on the size of the tank and your experience, the entire process can take anywhere from a couple of hours to several days. If you have never cooked before, it is better to practice on unnecessary pieces of metal. After all, stainless steel is far from a cheap material. And you are unlikely to be happy if, out of ignorance, you weld a tank with defective seams, and it turns out to be unusable.
Heated washbasin
A washbasin that will have not only cold, but also hot water is a real luxury for a summer house. Such structures, as a rule, are installed permanently, since they require connection to the electrical network. By design, such a metal washbasin for a dacha can be a “moidodyr” or a model on a counter.
To heat the liquid in the tank, you can use a regular boiler, but experienced craftsmen recommend purchasing a special heating element with a thermostat
. Please note that the power of the heating element must be selected in accordance with the volume of the tank. If the power is insufficient, you will have to wait a long time for the water to heat up, and if the power is too high, there is a high probability that the water will overheat. In addition, you should choose the optimal design and heating mode. If there is only one tank and is not divided into chambers, the water will need to be heated to a temperature of about 40 °C; with a divided tank (one section for cold water, and the other, with a heating element, for hot water), the heating temperature should be higher. In this case, the tank is equipped not with an ordinary tap, but with a mixer.
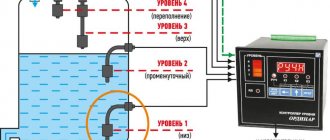
When making an electric washbasin for a heated cottage with your own hands, to ensure safety, it is important to take care of the insulation of the current supply wire, and also to equip the structure with a float level indicator or its more complex analogue, as well as, in the absence of a thermostat, a thermometer to control water heating.
Another option on how to make a washstand in the country is demonstrated in the video.
A convenient and functional outdoor washbasin for a summer residence is an indispensable attribute of comfortable country living. If necessary, it is quite possible to make a high-quality country washbasin at low cost and with your own hands, but most consumers prefer to use ready-made purchased models.
How to make a washbasin for your dacha with your own hands (video)
When installing such an outdoor washbasin, it is very important to remember that the main requirement for operation is installation under a roof or a special canopy, which will protect the device from precipitation. It is strictly prohibited to use so-called “temporary structures” for connection.
The quality of a country holiday directly depends on the availability of basic plumbing fixtures, which include outdoor washbasins. With the right choice of such a device and its proper installation, you can make your stay as comfortable and convenient as possible.
Painting the container
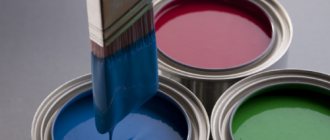
To paint metal tanks that will be exposed to high temperatures and high levels of humidity, different painting compositions can be used:
- Cetra. Paint that can withstand extreme heat and moisture. Suitable for painting containers and pipelines outside and inside. Protects metal surfaces from rust formation.
- Ethyl silicate paints with zinc powder. Before use, the paint must be mixed thoroughly.
- Lead iron-containing dyes. The compositions are resistant to prolonged exposure to moisture and heating up to 300 °C. Protect metal surfaces from rust formation.
- Anti-corrosion enamels with zinc filler. After they are applied and dried, a durable film is formed that can withstand intense mechanical stress.
- Heat-resistant water-dispersion coloring compositions. Withstands heating up to 120 °C. Suitable for painting the inside of water containers.
- Epoxy enamels. Withstands temperature changes within the range of -50–+120 °C. Do not collapse under the influence of moisture.
Stages of painting metal surfaces:
- Use a stiff metal brush to clean the surfaces of the tank from dirt and deposits.
- Remove dirt with a rag and degrease metal sheets.
- Coat surfaces with primer.
- Apply paint.
To reliably protect the metal surfaces of the tank from rust, they should be coated with special compounds before priming. The most effective are considered:
- insulating agents that form a durable film;
- passivating compounds that slow down the rusting process;
- protectors with metal particles;
- special formulations with orthophosphoric acid.
Paint for metal (Photo: Instagram / sunny_stroy)
Welding stages
At the initial stage of welding, boards must be placed under the corners of the sheet, which will serve as the bottom. It is important that the thickness of the substrate is the same. This will give an even plane along the entire length and in the corners of the structure.
During the welding process, it is necessary to constantly check that the sides do not extend beyond the base. You can immediately grab all sides together, then weld them to the base.
The sheets should fit tightly to each other. The next stage is the final welding of the seams. Welding can be done inside the tank or outside.
There should be no lack of penetration. Self-welding takes about 7-8 working hours.
It is recommended to make the structure rigid. To do this, use squares inside the tank and on the outside. To drain the water, a pipe with a control valve is welded into the lower part.
You definitely need to put aside your laziness and check the structure for leaks . After completing the work, you should prepare a chalk solution and apply it to the seams from the inside.
When it dries, use a cloth soaked in kerosene to go along the seams of the tank from the outside. Purpose: identifying “lack of penetration” clogged with slag. It only takes a few minutes to control.
If the liquid does not appear, then everything is fine. If stains appear, the problem area should be boiled again. It is best to check and re-weld immediately before painting.
Installation can be done on pre-laid bricks, but it is better to use a stand. Next, fill the tank with water and observe for several days: no liquid appears on the walls of the structure.