Raising geese on your own backyard is a profitable activity. It allows you to provide your family with environmentally friendly and very tasty meat, using not only purchased feed, but also pasture. However, it is not enough to go out and fatten the bird. It is also important to properly prepare the carcass for consumption or storage. Therefore, the question of how to pluck a goose at home quickly and efficiently is of concern to many rural residents. We will try to talk about all the important nuances of this case.
When raising waterfowl, owners rely on meat, eggs, as well as valuable down and feather products
Plucking methods
At first glance, the work seems simple. It seems quite easy - just take it and tear it up. But this is a mistaken opinion. There are many nuances in such a process. Therefore, there are different ways.
- Mechanical. Its essence is in the use of various devices: attachments with hammer fingers;
- feather removal machines.
- Dry. The goose is plucked dry immediately after slaughter.
- place on a wire rack and hold over steam;
How to collect feathers from a living bird?
Keeping a domestic goose is a waste-free production. Collecting feathers while the birds are growing allows you to earn extra income. To do this, they combine plucking and natural molting, which occurs after the geese lay eggs. This happens only twice - at the beginning of June and July.
By molting, the goose's regrown feathers are replaced by new ones. This makes it much easier for birds to remove feathers. It is recommended to start with geese that are already undergoing a natural process of feather renewal. To ensure the purity of the raw materials, it is necessary to allow the birds to swim in the pond.
The whole process goes like this:
- Before plucking the bird, carefully tie its legs.
- Place the goose with its back on your lap and pluck it, starting from the breastbone.
- Do not take a large amount of feathers in one procedure, otherwise you may expose the skin of the goose.
- Pluck using your index finger and thumb, gradually moving to the back of the bird.
- Never remove the feather from the shoulders, hips, tail, wings and neck.
When living in a warm region, it is permissible to collect feathers two more times in the autumn, at the beginning of September and October. If drops of blood appear during the plucking process, it is necessary to stop immediately, since this process must take place without harm to the health of the bird.
The procedure for plucking a goose is not as complicated as it might seem at first glance. It is enough to follow simple rules and as a result you can get a clean feather and perfect goose meat.
0
0
Copy link
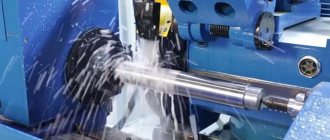
Mechanical method
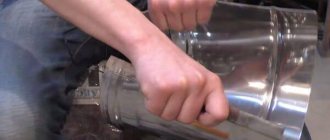
Plucking a goose is a labor-intensive process. Therefore, craftsmen come up with different devices. Here's one of them.
Device for plucking feathers and down
Its design is simple and obvious - take a drill and attach an attachment with hammer fingers to it. It is expected that the process of freeing the carcass from the feather will take no more than ten minutes.
In addition to attachments, there are special machines for plucking birds on sale. One of these is shown in the photograph.
Automatic goose plucking machine
Many feather strippers have been developed. The striking fingers are located differently in them, there is a difference in size and power. You can read about the design of these machines, materials and prices in the article.
The sequence of plucking a goose mechanically is as follows:
- Moisten the feathers by dipping the carcass into a vat of lukewarm water. This is necessary because the feathers of waterfowl are poorly wetted by water.
- Place the carcass in a container of hot water (75 degrees).
- Keep it there for no more than five minutes. The main thing is not to overdo it.
- Turn on and let the machine idle for a while.
- Place the carcass in the drum.
- Water the goose as needed.
- After cleaning is complete, turn off the device, remove it, inspect it, and rinse the carcass. If there are any unplucked areas, remove the feathers by hand.
Automatic goose pluckers (feather pickers)
The operating principle of such devices is based on the use of rubber parts that are capable of plucking carcasses during rotation.
The main advantage is the ability to process a large number of birds.
A list of common models is presented below:
| Name | Productivity in one day | Time to remove feathers from one bird | Country of manufacture |
| Rotary-950 | 400 units | 20 seconds | Italy |
| Piro | 140-150 units | 40-45 seconds | Italy |
| Farmer's Dream 800N | 60 units | 40 seconds | Ukraine |
Be sure to read:
Kholmogory Geese: characteristics and description of the breed, features of keeping and breeding
There are special drill attachments that allow you to remove feathers from carcasses. The disadvantage of such devices is low productivity.
Ready-made feather removal machine "Sprut-700" for geese
The feather removal machine "Sprut-700" operates on the principle of a centrifuge.
The main parts are the pins made of rubber. It allows you to preserve the integrity of the skin of the bird, is universal (can be used for chickens, turkeys, geese), and has an antibacterial coating.
Convenient for use in small farms.
Product parameters:
- weight – 55 kg;
- the presence of a single-phase motor (options: 220 V, 380 V);
- frame material – metal profile;
- body material – food grade polypropylene (light shade allows you to control the level of contamination).
Up to 70 carcasses are processed per hour. The quality of feather removal is 93-95%.
The cost of the car is from 50 to 60 thousand rubles. The payback period is 2-3 months (with regular operation of the farm). This model has many positive reviews among farmers.
How to make a do-it-yourself plucking machine from a washing machine
The principle of creating the design is to use as many parts of an old car as possible.
Stages of creating a device at home:
- Remove the motor from the washing machine body. Electrical wires also need to be removed.
- Cut off the hose from the washing machine and seal the resulting holes with sealant.
- Make holes in the drum to install the pins.
- Cut plates from hard metal. Place the part above the bottom of the structure and fasten it tightly.
- Install rubber beaters.
- Make motor supports from angle steel.
- Connect the motor to the drum.
- Connect the motor to the electrical network.
- Place a rubber hose onto the shower head (to allow water to flow in when the machine is running).
- Process a test carcass in the created structure.
You can protect the motor from water by making a plastic box.
Manual dry method
This method is used if you want to sort down and feathers. The down of waterfowl is highly valued. It is used to make pillows and sew warm clothes. A pen, especially a small one, is also used for this, but the quality is lower. To use large flight feathers, they must first be prepared. This is done like this: the hairs are peeled off the feather and the spine is thrown away. The work is painstaking, but the goal is worth it.
Dry plucking
With the dry plucking method, they work with a still warm carcass. Then the feathers are easier to remove. The sequence is:
- Prepare your workplace. It could be a table. Secure the bags on the sides in any way. But it will be more convenient if you bend the wire like basketball hoops. Place them on the edge of the tabletop and insert the bags there. Then, as the plucking progresses, the feathers will be sorted. You can take two bags. One is for down and small feathers, the second is for large feathers. Those who are especially diligent can take three bags, that is, put down separately, and small feathers separately.
- Plucking begins from the wings, where the flight feathers are located. They pull out feathers in the direction of growth, towards the tail, grabbing one piece at a time, maybe two. There is no need to force or rush, so as not to damage the skin and leave stumps.
- Then the back is processed.
- Then they move to the abdomen. The down is mainly located on the breast and belly. Therefore, if you need pure fluff, first remove the small feathers. The fluff will open. Then skin him too.
- After cleaning, inspect the carcass. Eliminate deficiencies.
- To get rid of stumps and small hairs, tar it using a gas torch or blowtorch.
- Cut up the carcass.
- If you are going to eat it right away, wash it well and soak it in cold water for 2 hours. Before cooking, let it drain well and wipe with a paper towel.
Possible difficulties during production
Often, if you follow the described recommendations and general safety rules, assembling the pliers does not cause any particular difficulties. However, sometimes the main questions when building a machine arise at the design stages, when it is not possible to find all the necessary materials. Most often, they can be solved using a horizontal-loading washing machine (such as “Aurica” - it can fully provide most of the necessary materials and technical components).
It is also worth mentioning that making a pliers without modern power tools is almost impossible. To create it, you will definitely need a powerful electric drill, as well as an angle grinder (grinder), and this often requires additional investment.
The main mistakes that farmers make when assembling a homemade plucking machine:
- the absence of fingertips in the side walls - this significantly reduces the efficiency of the device;
- the bolts are not fully tightened, which leads to excessive vibration of the installation;
- excessively low belt tension between the engine and the pump causes it to jump off during operation;
- the small weight of the table means that the structure may move or even jump when starting the engine. In this case, the table needs to be additionally weighted.
Read about the benefits and harms of goose meat.
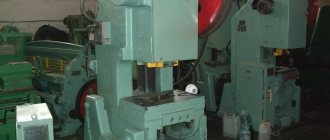
A plucking machine is a necessary device not only for large but also for small farms. Despite the fact that there are a huge number of various factory models of such machines on the market, for small poultry farms they are an unjustified waste. However, you can prepare the unit yourself - this will require a standard set of power tools and spare parts from an old washing machine.
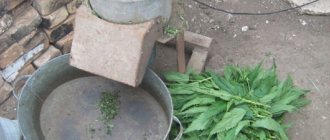
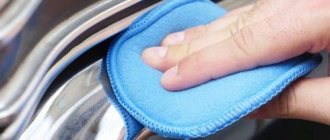
Manual wet method
This method differs from the dry method in that before starting plucking, the goose carcass is dipped in hot water (75 degrees) or filled with it. Keep it in this water for about five minutes, but control the process, do not overexpose it. Otherwise the feather will come off along with the skin.
Wet plucking a goose
If you want to use the paws, cut off the joint and place it with the carcass. They need to be taken out earlier (after about three minutes) and cleaned of the skin. Some people use them and their offal to make kurnik or jellied meat.
Further plucking proceeds in the same way as with the dry method. It’s just that it’s practically impossible to sort feathers and down. Disadvantages also include changes in meat color and reduced shelf life.
General slaughter rules
In order for the carcass to be easily and well plucked, you need to choose the right time for slaughter . It depends on the early maturity of the breed. Geese breeds are divided into the following categories according to maturation:
- early ripening, 150-160 days;
- mid-season, 160-180 days;
- late ripening, 180-210 days.
In addition to the characteristics of the breed, the time of readiness for slaughter is influenced by the feeding regime . Therefore, the same geese on different farms are slaughtered at different times. Traditionally, slaughter begins with the end of the molt . Readiness can be determined as follows. The bird's wing is raised and held from the inside with the palm against the direction of feather growth.
If the surface of the skin is smooth and no stumps are felt, then you can begin slaughtering the bird . To quickly prepare geese for slaughter when feeding, be sure to alternate green feed with grain mixtures. On average , readiness occurs at the age of 5 or 6 months.
At the moment, there are also modern technologies for intensive fattening, using complete feed. They reduce this period to 3-4 months .
Preparation for slaughter
Preparation for slaughter is divided into the following stages:
- A week before the planned date of slaughter, the bird is given a bath .
- Then the geese are driven into a dry room with diffuse lighting. This keeps the pen clean.
- 24-12 hours before slaughter, the birds stop feeding. Only water can be given at this time. A small amount of table salt is added to it. For geese, it will be a mild laxative, which will better cleanse the intestines.
Slaughter is carried out in different ways. But the meaning of any of them comes down to complete bleeding. To do this, hang the carcass by its legs for a couple of minutes .
Also during this time, subcutaneous fat hardens, which makes plucking easier and eliminates unnecessary damage to the skin. There are the following methods for removing feather cover.
Steam method
This method has many advantages. When steaming a pen
- it stays dry
- becomes clean
- disinfected,
- easy to sort.
You can steam the feather using an iron or a steam generator. The second method is preferable. In both of these cases, and in general before plucking, it is good to inflate the goose using a pump. Then all the unevenness of the body will be straightened out, and it will be easier to work with the iron.
The pump tube is inserted between the skin and throat. When air is pumped in, the carcass begins to inflate and its wings expand. After inflating, the throat is tied with twine. But moderation is also important here. There is no need to pump, otherwise the skin will tear. The result of air injection can be seen in the photograph.
Goose with pumped air
It shows that the throat is already tied with a rope. There is a pump with a blue tube nearby. On the other hand, the steam generator is ready for use.
If you use an iron, wet the cotton cloth before steaming. Wrap it around the goose carcass. Iron the fabric. Just don’t overdo it, or you’ll steam the goose skin. She will come off along with the feather.
It is better to use a steam generator. Then there is no need to wet the fabric. This will increase your productivity. It usually takes more than an hour to pluck and dress one goose. Using a steam generator, during this time it will be possible to process two.