Ball joints are consumables that are difficult to dismantle without special equipment.
The landing unit is constantly under force pressure, as a result of which the metal parts literally stick to each other. Universal pullers are not always suitable; the design of suspensions on different cars differs from each other.
Even in the same vehicle, different mounting designs may be used on each suspension arm. Buying several sets of equipment is too expensive, so many craftsmen prefer to make a ball joint remover with their own hands.
What are ball joints used for?
The configuration of the car's suspension (especially the front) must ensure a strictly horizontal location of the wheel rotation axis relative to the road. In this case, the hub is a turning unit.
Engineers are faced with a difficult task: the hinge must have freedom of movement of at least 180° in all planes. Ball joints serve precisely to give mobility to the suspension while maintaining strength characteristics.
The unit is a threaded steel shank that is attached to the hub knuckle. At the end of the shank there is a hinge in the form of a ball in a spherical shell.
DIY ball joint remover: instructions and materials
When repairing the chassis of any car, it becomes necessary to remove steering rods or ball joints.
In both cases, their tip has a conical shape, which ensures optimal fit of the products in the socket.
During operation, they become very compact, and if moisture gets between them, then corrosion forms at their joints. It makes it even more difficult to separate these parts.
To make repair work easier, a do-it-yourself ball joint remover would be an excellent option, which will greatly simplify the repair and help remove the tip with little effort.
Puller design
In order to press the hinge out of the suspension, serious effort is required. Some car owners simply knock out the shank with a sledgehammer, which risks damaging the threads.
To facilitate dismantling, a ball joint remover has been invented, with which you can create force without shock load. To understand how to make a device with your own hands, consider various options:
The illustration shows a screw-type ball joint remover.
- The hinge pin (1) is tightly installed in the steering knuckle housing (2).
- The puller bracket (3) is placed on the fist.
- Using the screw stop (4), the necessary pressure is created on the finger.
The advantage of the design is that the puller’s uniform and directed pressure on the ball joint avoids distortions and damage to the unit. Disadvantage - the tool can only be used if there is free space above the fastening nut.
Despite the complexity of the design, such a ball joint remover can be made with your own hands. You will need:
- steel sheet with a thickness of at least 4 mm;
- bolt with a strength class of 9.8 and higher;
- a nut, or a threaded bushing turned on a lathe;
- welding machine, grinder.
The design and dimensions of the puller are developed for a specific ball joint; the device is not universal.
If the installation location of the ball joints is quite compact, you can make a puller from a piece of pipe by welding plugs with holes at the ends. A thrust nut is welded to one of them.
Ball joint puller - tool functions and use +
Just as a person’s joints wear out over time, ball joints in a car, made on the principle of these same organic joints, wear out. Naturally, it is our duty to intervene. What can a puller help us with?
When and how to change supports?
Replacing a worn metal joint in a car is akin to an operation to put in order a living “hinge” that has been worn out during a long life of “operation”. However, the presence of a surgeon is not at all necessary here; replacing a ball joint on a personal car is available to any owner, although this is not a very pleasant procedure.
The first trouble is that the ball joint does not simply break.
Usually such a vile incident occurs at the most inopportune moment, for example, when the driver, and even his entire family, are transporting a refrigerator on the roof of a Zhiguli, and while turning or going around some obstacle, the car suddenly “sags” to one side with a crash. That is, the first condition for failure is an excessive load on the hinges. To prevent the occurrence of such cases, periodic diagnostics of the chassis are needed.
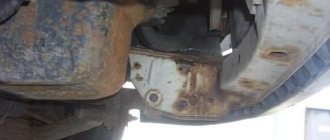
Broken ball joint
If there is the slightest suspicion that the ball joints are faulty, the check can be carried out in three main ways.
- After jacking up the “suspicious” wheel, grab it by the upper and lower parts and shake it significantly. If there is play, it's time to change the support.
- If there is a repair pit or overpass, take a pry bar and, positioned under the bottom of the car, place it between the edge of the ball joint and the lower steering control arm. Try pressing up. There should be no backlash here either.
- The most accurate way (albeit the most labor-intensive) is to remove the support, hold it in a vice and try to move the ball pin in different directions with your hand. If you can do this easily, the part has become unusable and requires urgent replacement.
This is precisely the third method that will be discussed, since, having established the fact of the need for replacement, a special puller is required, with the help of which it will be necessary to unpress the ball pin.
How can a puller help us?
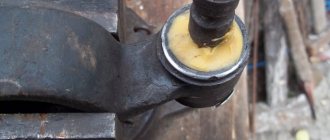
Why is the puller given such attention when replacing a ball joint? The fact is that the service life of this part is quite long, and its components “stick” to each other as a result of heating, friction and corrosion.
In particular, a fairly common occurrence is “welding” of the cone and socket. Simple tools that are found in a regular car repair kit may not include a puller. Some craftsmen very simply cut this “Gordian knot” using a sledgehammer and a gas torch.
But such a decision may threaten that the steering rods will also have to be changed.
In order not to resort to barbaric methods, you should take care in advance of purchasing a ball joint remover. Fortunately, their cost is adequate, there are a great many options for devices, and therefore there are no problems. But not everyone is ready to spend money on a tool that, although useful, can be useful only once during the entire period of car ownership.
The principle that underlies any tool designed to remove a ball pin from a pressed socket is the ability to overcome a fairly significant force that prevents it.
Over the years of its existence, humanity has not invented anything better than a lever and a screw, which are the basis of any puller. In addition to these textbook devices, the instrument must have a wedge.
If anyone has seen a nail puller, they will understand what we are talking about.
Tool for removing ball pin from pressed socket
It’s just inconvenient to use such a device, helping it with a hammer to “crawl” into the space between the head of the “ball” and the socket. With almost 100% probability the rubber boot will be torn. That is why other engineering solutions come to the rescue, helping to remove the finger neatly and beautifully.
A hybrid of a nail puller and a small clamp can be considered a tool that carefully removes a ball pin from its socket without damaging anything around it. Using the first, metal “legs” are brought under the “ball”. The second device, integral with the first, is designed to accurately separate the part from the socket.
This is achieved by gradually tightening the knob, pressing on the finger itself and gradually separating it from the body. By the way, sometimes homemade devices cope with their task much better than purchased ones, and anyone who has at least some plumbing skills will certainly be able to make it with their own hands.
On price tags in stores you can also see the word “universal” in relation to the puller.
There are few special features here; the structure allows it to be used not only for pressing out ball joints, but also for working with steering ends.
Making such a device with your own hands is much more difficult; here it is better to resort to mass-produced products or take a universal tool from friends.
Ball joint replacement process
If your hand is full, replacing the ball joint with your own hands is not a difficult task. At first, of course, you will have to tinker quite a bit. First, the car should be placed on a level surface, which is always done when working with a jack.
Install the lifting device, but do not immediately lift the body from the desired side, but first loosen the bolts securing the wheel. After hanging the desired side on the jack, unscrew the bolts completely. With the wheel removed, disconnect the ball stud nut and the fasteners that hold the steering knuckle in place.
Using a puller, uncompress the supports.
DIY ball joint replacement
Now you'll need some help: someone needs to use a pry bar to press down the lower arm so you can slowly and carefully remove the worn ball pin.
After removing the old support, a new one is inserted into the socket, and the assistant slowly releases the lever under your strict guidance. You need to direct the pull so that your finger fits neatly into the eyelet.
When all the parts are in place, you need to tighten the bolts and nuts. Afterwards, you need to lubricate the finger and rubbing parts with grease or other thick lubricant, and then tighten the fasteners.
That's all the wisdom. It is difficult to say anything definite about which ball joint remover is better in your case - homemade or purchased. As you understand from the description, the device itself is not that complicated, but to make it with your own hands you still need to have at least some skills. If there are none, get ready to go to a car store, where the cheapest of them, in the form of a fork, costs from 600 to 1000 rubles.
If you purchase a modification with a “collar,” you can shell out from 2,500 to 8,000 rubles. A hydraulic set can cost 12–15 thousand rubles.
At the same time, for one-time work, it is quite possible to get by with either a device borrowed from a neighbor in the garage, or order its production at any auto repair shop.
There is hardly any point in such a purchase if you are not a professional car mechanic, and replacing ball joints is not one of your immediate responsibilities.
- Michael
Wedge type puller (or fork)
The illustration shows the factory version.
Working with such a puller requires physical effort. The longer the lever, the easier it is to dismantle the hinge.
The principle of operation is simple: a wedge is driven between the ball body and the suspension arm, then the lever is used to tear off the shank from the seat.
A serious drawback of the device is the possibility of damage to the suspension arm. The ball joint boot also breaks, so it cannot be reused.
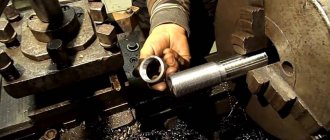
Such a puller can be made from a 12-16 mm steel circle. You will need a welding machine and the work of a blacksmith. It is better to give the wedge-shaped “fork” using forging: if you simply grind off the metal, the strength will be lost.
After final processing of a homemade puller, it must be hardened. The steel is heated to a crimson color and immersed in water or oil.
Screw expansion
- In order to make it, you need a rod with four or six edges, which fits a nineteen - seventeen key
- Using a drilling machine, we drill a special hole inside the rod and cut a thread that will fit an M eight bolt
- We take the bolt and insert it into the hole that we prepared specifically for it, and now the special tool is ready
Let's look at how it works, and as an example we will take the upper ball joint out.
- Without removing the lock nut, unscrew it
- We take the puller we made and insert it between the pins of the supports so that the head of the bolt rests against the pin that needs to be pressed out
- Then, using two keys, one holding the puller body, and the second unscrewing the bolt, unscrew it until it is pressed out of the seat.
If it is necessary to remove the lower ball, then the puller should be turned over and the same steps should be performed.
Lever puller
Unlike a screw, the fixture uses both the force of the thread and the lever.
The operating principle is visible in the illustration:
The lever arm relative to the hinge axis increases the force on the thread at least twice. The ball pin breaks off more evenly. Thanks to the offset hexagon, the suspension elements will not interfere with the wrench handle when tightening the bolt.
You can make a lever puller for ball joints yourself, but this will require more materials. The simplest option is two thick steel plates held together with a bolt.
A sleeve is placed in the middle: as a spacer axis of rotation (by analogy with a clothespin). With some care, the device works normally.
If you have a welding machine, it is better to make a design similar to an industrial design. The dimensions are selected in accordance with the design of your pendant.
An old open-end wrench can be useful as a donor (20-30 years ago they didn’t skimp on the quality of the metal for the tool).
Homemade ball joint remover, drawing with dimensions - video
How to make a ball joint remover with your own hands - Metals, equipment, instructions
When repairing the steering and chassis, almost every car owner is faced with the problem of removing ball joints (steering rod ends), which is quite problematic to solve without a special tool.
The reason is the design features of the named elements: their fingers have a cone-shaped shape, with which they enter the mounting sockets; over time, the place of this entry becomes dirty, oily, rusty, making the connection of the surfaces too dense, almost uniform, that is, one that cannot be separated by simple physical force . You need an assistant - a ball joint remover - a tool that greatly simplifies pressing out.
It is not difficult to become its owner: to do this, you need to go to the nearest auto store and purchase it there, or make a ball joint remover with your own hands using any of the methods presented below, which we have grouped depending on how the force is created in them.
I recommend reading:
Do-it-yourself ball joint remover - save on tools
Ball joints are consumables that are difficult to dismantle without special equipment. The landing unit is constantly under force pressure, as a result of which the metal parts literally stick to each other.
How often should the ball joint be replaced?
The frequency of replacement of joints is determined in the maintenance instructions for any vehicle. However, taking into account the “quality” of roads, supports fail much more often than the established period of 40-60 thousand km.
In addition, if the rubber boot is damaged, moisture and dirt get inside the hinge. If you don’t notice the gust in time, the unit will fail after a few hundred kilometers.
Wear is diagnosed by the presence of play and the characteristic knock of the suspension. It is recommended to regularly check the condition of the joints, especially after driving on broken asphalt or in off-road conditions.
Tem. It is known who repairs a car on their own in a garage. that many types of work can hardly be done without devices, in particular without pullers. In stores they can usually be purchased by pre-order, the fulfillment of which sometimes takes quite a long time. The price of this mechanism is also considerable.
With the help of homemade devices offered to the attention of readers, you can remove the pins of ball joints from the conical holes of the levers and rods without damaging the parts. Moreover, the pullers are almost universal and are suitable for repairing the corresponding (and other) components of most cars. and not only cars.
The material for making pullers can be selected and purchased at any collection point for ferrous scrap metal.
What does a puller look like?
There are three types of pullers :
- lever;
- ball;
- wedge (fork together with hammer).
They differ in appearance, but their operating principle is the same. The finger is twisted out of its seat using a hammer or by turning the nut . The puller is designed in such a way that it fills the space between the connected parts and after turning it you can hear a click, indicating that the connection has loosened and you can remove the ball joint from its seat.
The puller helps even a novice in auto repair work to dismantle it.
Screw puller for removing ball pins
The main parts of the puller are made of steel strip with a cross-section of 18×3 mm and a total length of 460 mm. A round rod with a diameter of 18 mm is also suitable, but it needs to be modified: parallel edges with a distance of 13 mm between them should be milled or filed on opposite sides. To make a puller, you will need, in addition to the usual tools (a hacksaw, files, pliers, etc.), a grinder and a welding machine.
The design of the puller is simple and clear from the drawing and photographs.
The bar (upper part) is welded from two strips with a cross-section of 18×13 mm (although you can choose one of the same dimensions). The length of each strip is 95 mm. In the strip, almost in the center, there is a threaded through hole M12, and at the end there is a groove cut out 20 mm long, 13 mm wide and 2 mm deep for a fixing screw M12x55 (so that the strips do not rotate relative to each other). The wedge fork (lower part) is welded from three strips: two strips 95 mm long at the edges, in the middle there is a strip 55 mm long. On the workpieces at the welding points, we first remove a 3x45° chamfer along the entire length. Welds should be tapped and cleaned.
Make or buy?
Ball joint end pullers for domestic cars cost no more than 1000 rubles. You can purchase the device at any store. This means that the instrument is easier and easier to acquire. To make even the simplest tool, you need blanks, special nuts and bolts with a large thread pitch.
It is easier to purchase a ready-made tool because it saves time. You won't have to do unnecessary things. Perhaps purchasing a device will cost a little more, but then there is no need to waste time and effort on making the tool.
Good day to all!
In this article I would like to share with you a very good homemade product, namely a ball joint and steering wheel end remover. I don’t know if it will fit on other cars, but it will definitely fit on a VAZ!
Not long ago I changed the ball joint using the “old-fashioned” method using a hammer, I’ll tell you it’s not very convenient and fast. After looking on the Internet, I found how to make a puller easily and without cost; on the Internet I looked at prices from 500 rubles and above! This homemade product will take about 30-60 minutes if you have everything you need.
And we need:
- A pipe with an internal diameter of 45-50mm, and a thickness of at least 2 mm, more is possible!
- Two thick washers to fit the diameter of the pipe, or you can cut them out of thick metal.
- Bolt and nut, I used a 24mm wrench bolt, maybe smaller.
Fork puller
For those who don’t have money, machines, or even good metalworking skills, I suggest making a very simple and reliable puller yourself.
Material: steel rod with a diameter of 18 mm. The puller is welded from three parts in the form of a fork. For manufacturing you will need a grinder (although you can get by with a hand hacksaw for metal and a large bastard file) and a welding machine (if you don’t have one, you can turn to a welder even of low qualifications).
The operating principle of the puller is very simple. First, unscrew the nut from the ball pin. We insert the puller fork between the lever and the rod as far as possible (all the way) and hit the pin with a hammer. If necessary, repeat the blow until the rod of the ball pin comes out of the conical socket of the lever.
Homemade ball joint remover: 19 photos of step-by-step DIY production.
We bring to your attention a homemade device - a puller for ball joints made by craftsman Alexander Pankov.
Step-by-step manufacturing instructions
The device for removing ball joints is quite complicated, but if you follow the step-by-step instructions, you can do it yourself:
- using a vice and a hammer, you need to bend the rod or bolt so that one arm is about half as long as the other (one side is 5 cm, the other 10-12 cm);
- cut a thread on the long part of the rod using a die;
- cut a hole on the metal plate that will be specifically for the support pin;
- bend the part into a wedge so that it can be put on it;
- the finished wedge on the rod and tighten the nut on top , but so that it can move along the bolt.
The finished device is suitable for emergency and planned replacement of ball joints on Zhiguli and Lanos, as well as some brands of foreign manufacturers.
The manufactured puller is not universal and cannot be used for different components, but if you succeeded in doing it the first time, then subsequent versions will be much easier.