The corrugated sheeting must be secured with self-tapping screws (to metal surfaces or a wooden frame) and rivets (sheet to sheet).
To install a profiled sheet, in most cases a frame is made. The structure is made from a metal profiled pipe (square, rectangle), wooden slats, a plasterboard profile, and an ordinary corner. Sometimes they make wall cladding by mounting the sheets directly to the brick or stone.
How and with what in each specific case to fix the corrugated sheet?
Self-tapping screws (self-tapping) for metal with a metal washer and rubber seal
A self-tapping screw (commonly a self-tapping screw) is made in the form of a rod with a tip resembling a drill, a triangular thread and a head for a wrench or a screwdriver. In addition to screws with a drill tip, screws with a sharp tip are produced. To fasten the corrugated sheet, complete with a screw, use a press washer and a rubber sealing gasket.
We apply:
- for attaching corrugated sheets to metal surfaces;
- with steel thickness up to 12.5 mm;
- without pre-drilling holes;
- for installation of corrugated sheets on roofs, for cladding facades, pediments, making gates, wickets, etc.
We do not use:
- for fastening sheets to tool and high-carbon steels;
- for binding metal profiled sheets together;
- for fastening to wooden structures;
- for fastening to metal less than 1 mm thick.
How do we determine quality?
When purchasing, we require a quality certificate that reflects the characteristics according to the DIN standard, including:
- material – steel S1022;
- zinc coating with a thickness of 12-12.5 microns for premium self-tapping screws (letter M on the screw head) and 7.7-8.2 in the standard version (letters MC);
- a layer of coloring polymer protection is applied to the head on top of the zinc;
For fastening to a frame with a thickness of 2.32 mm, we use products for drill No. 1, with a diameter of 4.8 mm, pitch 2.12. For metal, 5.5 mm drill No. 3, 8.5 mm - No. 4, 12.5 mm - No. 5. Thread pitch 1.8. Self-tapping screws of large diameters must be coated with zinc with a thickness of at least 12 microns.
We select the length of the self-tapping screws depending on the purpose. To attach the profiled sheet to the lower wave, choose a size larger than the materials being joined by 3mm. When screwed into the upper wave, for example, to attach skates, the length increases by the height of the profile.
The industry produces 3 types of self-tapping screws according to the shape of the head:
- hexagonal;
- cruciform;
- anti-vandal.
For normal installation, it is easier to work with a hexagonal head shape. We use anti-vandal screws for fences and cladding, the removal of which from the outside will provide free access to the room or territory. Installation of products is done with a special tool.
Important nuances when attaching corrugated sheets with self-tapping screws:
- We tighten the screws with a washer and a rubber gasket strictly perpendicular to the plane of the sheet.
- According to the characteristics, the screws are suggested to be screwed in at 2500 rpm, but it is difficult to calculate the force by touch. Tighten the screws so as not to squeeze the rubber washer. A flattened seal will crack over time and will not create a tight seal.
- We do not use rubber seals where monolithic fastening is required.
- In places where unauthorized access to fasteners is possible, we use anti-vandal screws or use self-tapping screws with a notch that prevents arbitrary unscrewing.
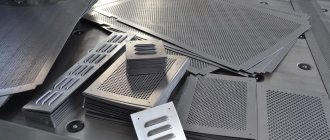
What is corrugated sheeting and what types of it exist?
First, let's explain what corrugated sheeting is and what subtypes it is divided into. This material is rolled steel sheets with a wavy profile, the width and height of the projections of which are regulated by standards. Thanks to this shape, the profiled sheet has significant rigidity with a small metal thickness.
Profiled sheets
To protect against corrosion, corrugated sheets are coated on the outside with protective materials - galvanized or polymer film. The latter gives the material a certain color.
Features of various corrugated sheet coatings
There are three main types of profiled sheets, each of which is suitable for creating certain structural elements of a building. Let's get acquainted with this classification of material using the table below.
Table. Main brands of profiled sheets.
| C – wall profiled sheet | Thin sheets with low height profiled parts. They are used in the construction of fences, simple canopies and walls that do not bear a significant load. It is not advisable to use it for roof cladding - the material is not strong enough and in winter it can bend under the thickness of snow and ice. |
| NS – load-bearing-wall profiled sheet, also called universal | Steel sheets with average strength characteristics can be simultaneously used both as wall and load-bearing corrugated sheeting, but in the latter case there is a limitation on permissible loads. It can be used as a material for roof cladding, but only if the amount of snow falling in the area where the house is located is not too large. |
| N – load-bearing profiled sheet | Profiled sheets with great thickness and high profile. They are more expensive, but at the same time have increased strength. Used to create load-bearing structures. Recommended for roof cladding. |
The quality of the purchased material is one of the most important components of the strength and reliability of the roof. Therefore, here are a few simple rules that will help you choose good corrugated sheeting.
- Know the manufacturer of the material you plan to use - study the reviews, find out if any of your friends or neighbors have used this corrugated sheet.
- Be sure to check the main dimensions of the profiled sheets - length, width and height of the corrugation.
- Ensure that the material has been stored under appropriate conditions and is free of dents, scratches and other defects that could compromise the protective coating of the steel sheets.
- Check the quality and integrity of the packaging for the corrugated sheet.
- If you have any doubts about the quality of the profiled sheet, ask for certificates and other documents confirming the quality of the material and compliance with standards.
How to attach profiled sheets to a wooden frame?
For roofs mounted on wooden sheathing, there is no alternative to traditional metal screws. Select screws with the largest thread pitch. The larger this parameter, the more reliable the mount.
Vertically located profiled sheets that do not require a hermetic fastening, in order to save money, are fastened with galvanized self-tapping screws with a monolithic press washer. In everyday life it is an ordinary self-tapping screw with a wide head. For screwing, a Phillips screwdriver is inserted into the screwdriver.
If the sheathing is made of DVL, chipboard, etc., we use screws with double-threaded threads. For the roof, we make a set of washers and cuffs ourselves, selecting the diameter of the screw.
We do not recommend:
- Use standard wood screws, including those intended for fastening plasterboard sheets. This fastener has a countersunk head and, when screwed in, will damage the surface of the corrugated sheet.
- Use screws with a drill tip. Wood does not require drilling, a sharp self-tapping screw is screwed in more securely, and the passage through corrugated sheets makes it acceptable for a large amount of work.
Advice from professionals
- Installing corrugated sheets is actually not very difficult. However, in practice, beginners may have difficulties. And they are mainly related to the intricacies of fastening profiled sheets.
- The screws are screwed in strictly at an angle of 90˚ without any distortions, while the gasket must be level.
- Experienced craftsmen never completely screw the first sheet of metal profile until several more have been laid. The fact is that, if necessary, it will be much easier to deploy or promote an entire block.
- When attaching metal profiles to metal purlins, self-tapping screws can be replaced with combined rivets.
- The corrugated sheet is attached to the upper and lower lathing in each of the waves, while the intermediate ones can be attached through the wave.
- As for longitudinal joints, the distance between fasteners in this case should not exceed half a meter.
- When calculating the required number of self-tapping screws, it is assumed that 5–8 pieces are consumed per 1 m2.
- The joints of corrugated sheets are fraught with the potential danger of leaks, so they need to be pressed as best as possible. To do this, fasteners in the corrugations, which are closest to the joint, are made with an offset: on the top sheet, the center of the fastener is shifted by 5 mm towards the joint, and on the bottom, on the contrary, away from the joint.
- Self-tapping screws are usually screwed in with a screwdriver, but if you decide to do it manually, you need to follow the rule:
- The screw cannot be overtightened, as this will damage the insulation.
- It is impossible not to tighten it, otherwise the roof will leak in this place.
- Profiled sheets should absolutely not be cut with a grinder, since the abrasive wheel during the cutting process can destroy the protective layers of the material. The best tool for this is electric scissors, a jigsaw or a hacksaw.
- The cut edge is protected from corrosion by a layer of enamel for the polymer surface.
Use only high-quality fasteners in your work. The rubber gasket on cheap self-tapping screws very quickly cracks and deforms, resulting in a leaky roof. A branded self-tapping screw can be distinguished by the identification mark on the head.
A month or two after completion of installation, it is advisable to re-tighten the screws to prevent possible loosening of the fasteners.
It is quite possible to cover the roof with corrugated sheets yourself, but only if you strictly follow the instructions.
Is it possible to attach corrugated sheeting to shell rock (limestone, brick)?
We mount the sheets directly to the wall made of stone or brick using dowels and anchors. To install, pre-drill holes in the metal. We select fastener heads with a monolithic wide washer. The shape of a plastic insert with a shimmer that serves as a seal. We make the hole in the corrugated sheet 0.5 mm larger than the diameter of the insert.
We recommend:
- For quick installation, use dowels with impact screws. They differ from traditional screws and screws in the shape of the thread. Disadvantage: if struck, the surface of the sheet can be damaged.
- Do not attach sheets to surfaces with protrusions or uneven surfaces.
Features of metal corrugated sheets
Steel sheets are galvanized to ensure proper cathodic protection of the entire surface and give it anti-corrosion properties. Nowadays, corrugated sheeting is a multi-layer structure, which is created to maximum resist various natural surprises.
Synthetic plastics with resins are organic polymers that are used during the production of polymer coatings. To give profiled sheets a more decorative appearance, they are supplemented with various additives and pigments that perform important protective functions.
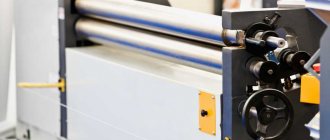
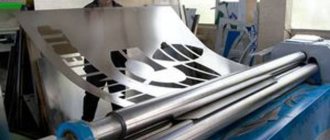
To obtain a wavy or trapezoidal configuration of the finished sheet, you need to use a specialized device called a sheet bender. It provides the opportunity to select the desired width or height of the waves, the main purpose of which is to add durability to the entire roof.
It is known that a roof made of such a profile has many advantages, because this material is:
When planning to do most roofing work with your own hands, you should pay attention to this material, because once you understand the main nuances, it will be very easy to install
How to connect sheets of profiled metal to each other?
The standard thickness of profiled iron is 0.4 mm. It is unreliable to connect two sheets using self-tapping screws, for example at an overlap, since the fastening is fragile and depends on the thread pitch.
To solve the problem we use rivets. The fastener consists of two parts, which are made of aluminum. Rivets are installed in pre-prepared holes and do not require access to the reverse side. For installation we use a rivet device. In places where hidden installation of rivets is required, we use a hole punch (special pliers holders that pierce the corrugated sheet from the end of the wave).
Rivets can be used as fasteners for installing roofing, fence cladding, etc. The disadvantage is labor intensity. A through hole must be drilled for each rivet.
When installing the roof, we do not recommend using sealant in overlap areas. The material changes geometry with temperature changes and the seal will eventually cease to perform its intended function.
Installing a roof on a roof
Before covering the roof with a metal profile, it is necessary to raise it using logs. It is necessary that three people participate in this process. The rise to the top is carried out one module at a time.
In windy weather, installation work should be stopped due to the large “windage” of the profile!
Installation of metal profiles on the roof begins from the end of the roof. If a metal profile is being laid on a roof with a drainage groove, then it is necessary that the next profile sheet to be laid overlaps the groove of the previous one.
The profile sheets are mounted perpendicular to the cornice. The first sheet deserves special attention - the accuracy of the location of the entire roof as a whole depends on its correct installation.
On gable roofs, installation begins from the right or left end, on hip roofs - installation is carried out from the middle of the hip. To control the horizontality of the roof slopes, a cord is pulled along the eaves, with the help of which the lower edges of the metal profile sheets are aligned.
Instructions for installing a metal profile may conditionally consist of the following operations:
- the first sheet is temporarily attached with a self-tapping screw in the center at the ridge girder of the roof;
- the next profile is laid and aligned at the eaves overhang with the previous sheet and temporarily attached, similarly to the first sheet;
- metal profile sheets are fastened together with 4.8×19 mm self-tapping screws at the top of the wave at a distance of 500 mm;
- after installing three or four sheets, they are aligned along the roof eaves line, after which the final fastening occurs.
Metal profile sheets at the ridge and overhang are attached to the sheathing through the bottom of the wave with 4.8x38 mm self-tapping screws in every second wave, at the end edges into each sheath along the bottom of the sheet. In the middle, fastening occurs in a checkerboard pattern at the rate of 4-8 screws per 1 square meter.
For long roof slopes, multi-row installation of modules is used. Fastening between the sheets occurs at each bottom of the profile along with simultaneous fixation to the sheathing. There are two versions:
- First, the first sheet of the first row is laid. Then the first sheet of metal profile of the second row is placed and fastened. Next, install and attach the second sheet of the first row and the second sheet of the second row. The result is a “picture” of four sheets. Then a second “picture” is made and laid with a side overlap of the first “picture”. The method is used for metal profiles with a drainage groove.
- A block consisting of three sheets of metal profile is mounted. The two sheets of the first row are laid and connected to each other, then the first sheet in the second row is joined and attached to them. The resulting structure is aligned with the cornice and secured. Then the second block is attached to it in a similar way. This technique is applicable to sheets without drainage grooves, because the sheets of the first row are covered with sheets of the second row.
Other methods of installing corrugated sheets
Screw and bolt connection
The corrugated sheet is attached to metal surfaces using screws, for example, when used as casings on machines, for fastening to special steels. We drill holes in the sheet and the base on which installation is taking place, cut the threads and install.
A bolted connection is used in a similar way, but fastening requires drilling through holes both in the sheet and in the material to which the installation is taking place. Bolts are used to connect corrugated sheets to metal and wooden frames, preventing vandalism and unauthorized access.
How to install a metal profile for drywall to walls and ceilings
To fasten the metal frame strips to the wall, direct hangers are used, which are screwed through special holes with self-tapping screws. The hangers are attached to the concrete wall with anchors or dowels, the holes for which are made with a hammer drill. The frequency of installation of hangers is 600 mm. When performing installation, you should control the line of their attachment.
In exceptional cases, as an alternative, you can use sections of 60x27 mm profile, bending them in the shape of the letter “L”. Some experts argue that this method is even better - it fixes the bar more rigidly.
Sometimes, when installing a frame made of a metal profile for plasterboard, it is necessary to lower it to a much greater distance than standard hangers allow. What to do in this case?
For these purposes, a system of sliding suspensions is used, which consists of three elements:
- two knitting needles;
- bracket;
- elastic holder.
One spoke is attached to the ceiling, and the second is adjusted to the desired height. The bracket is inserted directly into the profile and fixed.
Types of glue for metal products
Of the many types of glue designed to glue metal to metal, several groups can be distinguished:
- Double-sided tape. It is produced in the form of a synthetic tape of various thicknesses with an adhesive composition applied to both sides. The width of the tape is selected based on the desired width of the adhesive joint. It has a high degree of convenience for gluing metal parts. The thickness of the tape allows you to obtain a sealed glued seam in the event of a loose fitting of the parts. The disadvantages of double-sided tape include the low strength of the glued seam and low durability.
- One-component mixtures. Presented in the form of a variety of adhesives based on rubber or silicone. The composition that makes it possible to glue parts together polymerizes in air or under the influence of moisture in the air. The hardened composition resembles dense rubber. The most versatile in use, they allow you to glue not only metal, but also products made from other materials. Among the disadvantages, it is worth noting the low strength of the adhesive seam and the need for careful preparation of the surfaces to be bonded.
- Two-component adhesive. Polyurethane or epoxy resin is used as a base. Special hardeners are used for polymerization. They can be either liquid (for example, “moment” glue) or in the form of a paste (cold welding). It has excellent adhesive properties, the seam is strong and durable. Allows you to connect workpieces made of different materials. Two-component compounds form the strongest and most durable seam, which sets much faster than a one-component one.
Double sided adhesive
One-component mixture
Two-component adhesive
As you can see, in order to glue metal, there is a large assortment of adhesive mixtures presented by different manufacturers. Therefore, when answering the question of how you can glue metal to metal, you should consider in more detail all possible methods and options for implementing a connection using glue, and after that it will be possible to make an unambiguous conclusion about which glue is best suited in a particular case.
Sheet metal welding methods
Metal sheets of medium thickness are welded in a stepwise manner. The entire welding strip is conventionally divided into sections of 10-20 cm, after which these sections are welded alternately. Each subsequent seam overlaps the previous seam by 1 cm. This technology allows you to avoid temperature deformations of the metal.
Welding of thin sheets of metal is usually done end-to-end, with flanged edges. Butt joints on a lining, without flanging, are also allowed. There is welding of cylindrical products. For example, welding to a flanged bottom of a cylindrical body or welding to a flanged bottom body.
Welding thick metal (more than 4 mm) is performed in several passes. This is the so-called multilayer welding. The weld seam is filled several times. Before applying each subsequent layer, the previous layer is cleaned of scale. Multilayer welding is more reliable, but leads to an increase in consumables.
Deformation bonding of metals
Expansion joints are used if the structure to be glued experiences various types of deformation or vibration. The gluing is quite plastic and can stretch a little. The compositions used for such gluing are most often based on polyurethanes or epoxy resins with plasticizers. We can recommend gluing agents such as PURAFLEX 9140 or VK-20. They are indispensable when assembling structures subject to vibrations. Most often they are used in the assembly of doors, cabins, and elevators.
Sheet metal welding technology
Welding of rolled metal can be carried out end-to-end or with an overlap. It is recommended to make vertical seams butt, and circular waist joints are best made with an overlap. The first step is to weld the transverse seams, and only then work on the longitudinal seams.
The gaps between the connected products should be about 1 mm. This is necessary to prevent product deformation. It is recommended to weld sheet metal from the middle, gradually moving towards the edges.
Welding is performed at an angle of 70-90 degrees. In this position, maximum weld penetration occurs.
By welding any sheet metal according to the recommendations, you obtain high-quality welded products of proper strength.