In terms of popularity, laminate has far surpassed all existing coatings.
This is understandable, because it was created relatively recently and combines all the best qualities of other, older types of floor coverings.
In addition to its performance qualities, the material has the best installation technology, which is simple and accessible to anyone.
Installing laminate flooring requires the technician not so much to have skills, but rather to be careful and have basic knowledge of installation rules.
There are no complex or highly skilled devices or tools required for installation, but, nevertheless, the list of necessary things is quite extensive.
Do-it-yourself metal bracket for laying laminate flooring
Laying laminate flooring is not a difficult task. The manufacturers took care of this. They thoroughly thought through the design of the lamellas and how to connect them to each other, so installation of the flooring is quite affordable
A little about the material itself
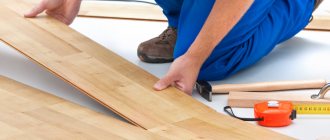
As mentioned above, the structure of the laminated board is designed in such a way that it does not require fastening to the base or gluing the seams. Laminate parquet floors are laid in a floating manner.
This means that the individual elements of the covering are firmly fastened together with special locks cut along the perimeter of the board.
The connection takes place according to the tenon-groove principle, only the tenon and groove have a complex profile, which increases the reliability of the connection.
The entire floor plane, assembled from individual elements, slides freely along the substrate on the base. “Glides freely” is, of course, a strong word.
Who will give him such an opportunity: they will put heavy furniture on top of the floor. But nevertheless, some backlash is still present.
Therefore, it is necessary to leave a damping joint of 10-15 mm around the perimeter of the floor covering. This gap will subsequently be covered with a plinth.
The usual way of laying laminate flooring - the most common - is "deck". They start with a whole board, join the next one to it, and so on until the wall. The last board, if necessary, is cut to the required size.
The remaining trim, if it is more than 200 mm, is used as the start of the next row. If a whole number of boards are laid along the length of the room, without trimming, or if the trim remains too short, before starting the next row, cut a whole board and start with half.
With this method, the transverse seams are shifted - they turn out “in a running start”.
What you need
From the described installation technology it is clear that the set of tools for working on installing a laminate flooring is not large. When installing laminate flooring with your own hands, the following kit will be sufficient:
- pencil for marking;
- measuring instruments - tape measure and square;
- fine-tooth hacksaw or electric jigsaw;
- knife or scissors for cutting the substrate;
- a hammer, preferably with a rubber head, but if the laminate has a Click type lock, then you won’t need to hit the boards with a hammer; they snap into one another;
What about special kits for laying laminate flooring? Let's see what the manufacturer put in this set. Kits from different manufacturers are available for sale: FIT, Quick-Step, FLINST-001, and others. Their composition is the same. The set includes:
- mounting wedges;
- driving block;
- metal bracket;
As intended by the manufacturer, wedges are used to create a damper joint between the covering and the wall. The boards are tapped using a hammer block. It is necessary so as not to damage the lock tenon on the board when struck with a hammer. The driving block has the same groove as the lamella. The block is put on the protruding part of the lock, the blow is made on the block.
Well, a metal bracket for laying laminate will be needed (attention!) only once: to install the last, finishing board. There will be a wall there that will interfere with installing the last board. The photo shows what this thing looks like.
There are no words: the devices are very necessary and convenient. But are they really needed to purchase them for almost fifty rubles, and even more so, to find out how to make a laminate bracket with your own hands, and what’s the funniest thing: having learned the dimensions of this device, try to make it with your own hands.
Where does such skepticism come from, you ask?
Why then do they sell mounting kits and a separate metal bracket? Firstly, a terrible bourgeois secret: most things are sold not so that the consumer is comfortable, but so that the consumer buys, and therefore brings profit to the manufacturer and seller. Secondly: for a professional flooring installer who lays hundreds of square meters of flooring every month, making the production process easier and faster is essential.
Some of them actually use a mounting bracket. Only this tool is not exactly the metal squiggle that is sold in sets. By the way, many professionals can do without wedges, blocks and metal brackets. Now I'll tell you how.
How to do without a metal bracket
If you plan to do the work of laying flooring from laminated panels with your own hands, then the bracket for laying the laminate, as well as the wedges and block for driving in, can easily be replaced with improvised means. Let's look at the stages of work:
- Damper seam. The required technological gap is made within 10-15 mm. And surgical precision is not necessary in this process. Tolerances “by eye” are quite acceptable, the main thing is that the gap is not larger than the baseboard can cover. If you are a neat person in life, and measuring by eye is not suitable for you, use scraps of laminate as wedges - its thickness is quite enough to create the required distance between the covering and the wall.
- Knocking the board. Let us remind you: a Click type lock does not require the use of force: the board is slanted into the groove with a tenon, and then lowered into a horizontal plane. The lock latches itself, without much effort. If the lamellas have a different type of lock or you think that it wouldn’t hurt to knock the board up a little, use a piece of the same laminate to prevent the tenon or groove from breaking. Place the piece on the spike and give it a good whack – the lock will remain intact.
- Finish board. To install the last board, use a wooden wedge: cut any scrap wood into a right triangle. Install it so that one of the legs looks up, the second rests on the wall, and the hypotenuse rests against the edge of the board. Carefully drive the wedge in - it will push the board into the groove. Just remember to protect the wall. For example, a metal ruler or other similar object. By the way, you will have to protect the wall even if you use a bracket. In this case, you will need to place a lining under the bracket so that it does not damage the floor.
- About making the bracket yourself. If a bracket for laying laminate flooring with your own hands gives you no rest, and you are determined to make it yourself, you will need a metal strip. It must be made of steel. The thickness is such that it can be bent, but sufficient so that it does not bend from the force applied during work. Its size is not important. The strip needs to be bent in the shape of the letter Z. The tool looks like a mounting tool. If necessary, it is with the mounting tool that you can replace the metal mounting bracket.
Let's sum it up
Modern laminate flooring can be installed by any home craftsman, and its installation does not require any professional skills. The minimum set of tools for this process is not very expensive, which allows the owner of the premises to save a lot by refusing the services of professional builders. You just have to take into account the fact that not every laminate is made in ideal quality, and when purchasing the material itself, you need to pay attention to customer reviews. Otherwise, during the installation process, problems may arise with violation of the geometry of the coating or the complexity of fitting parts into the lock.
Do-it-yourself bracket for laying laminate flooring – Metalist’s Handbook
Laminate is a practical and beautiful floor covering that is affordable and easy to install. The interior of the entire living space depends on how carefully the material is laid.
To achieve an ideal laminate floor, you need to take care of the necessary tools in advance: prepare a laminate installation kit, choose what to cut the panels with, prepare additional accessories, decide on the use of electric and manual tools.
Each tool has its own characteristics, technical capabilities and operating techniques, which we will discuss in this article. Therefore, after reading to the end, you will understand what tools are needed for laying laminate flooring in order to avoid mistakes and not waste a lot of effort.
Household and professional tools
The floating connection system for laminate flooring allows installation of flooring to be carried out much simpler and easier compared to parquet or porcelain stoneware. Before starting work, you should decide what tools you need to lay laminate flooring yourself, prepare them or, if necessary, buy them.
When selecting devices for laying laminate flooring, first of all, the skill and professionalism of the performer, as well as the volume of work to be done, are taken into account. Taking into account such criteria, the classification of instruments can be presented in two categories:
- household tools;
- professional tool.
The difference between the second and the first is the higher intensity of use and improved ergonomics of the design. To withstand increased loads, manufacturers of professional tools use higher quality materials in their construction, which naturally increases their price.
Advice: If you want to lay a laminate floor in an apartment or house with your own hands on an area of up to 100 square meters, then you should not overpay for professional tools.
It is enough to buy a household one. And if you are planning to install the floor in a cottage with an area of more than 100 square meters. m., it is better to purchase a professional tool.
This will allow you to get the job done faster and you will be less tired.
DIY tools for laying laminate flooring include:
- roulette;
- pencil or marker;
- construction square or metal ruler;
- plastic or wooden block;
- mallet or hammer;
- spacer wedges;
- mounting bracket for laying the last laminate panels;
- any cutting tool for wood or chipboard.
Most of the listed items are probably available in every home owner. Let's take a closer look at each separately.
Roulette
A tape measure is a measuring tool that almost everyone has in their home. With its help, it is more convenient than a metal ruler to measure the lamellas before cutting.
It is recommended to use a product that has an ergonomic shape and clearly marked markings. This will ensure correct measurements and long service life.
To ensure that the tape measure fits well in your hand, use a product with a rubberized body from trusted manufacturers.
Pencil
A pencil is required to mark the sheet.
It is most convenient to use construction pencils that have a thick lead and a shell with an oval or rectangular cross-section, which prevents it from rolling off the surface.
But if you are not going to install laminate flooring with an area of more than 100 square meters. m., then it is quite possible to use a simple clerical pencil.
When marking laminate flooring, you can use a marker, but it is better not to do this. If you make a mistake and mark in the wrong place or on the wrong side, it will be very difficult to remove traces of the marker.
Square
The construction square is a tool for carpentry work. It is necessary for checking planes and mutual perpendicularity between parts.
For household use, the tool is presented in the form of two rulers (one thicker than the other), connected at an angle of 90°. In a professional square, you can additionally measure angles and mark radii.
When laying laminate flooring, it is very convenient to use a square to mark perpendicular lines for cutting off the excess piece of panel.
Hammer or mallet
Each laminate lamella must be pressed tightly against the previous one so that the coating looks as seamless as possible without gaps and cracks.
For these purposes, the board is tapped using a hammer or mallet. It is not always possible to accurately execute a strike and calculate the force.
Therefore, in order not to damage the delicate locks of the laminate, an impact block is additionally used. Sometimes it is called a tamper block.
A medium-sized hammer or mallet should be used to ensure good control over the impact force.
Hammer block
An impact block made of wood or plastic is used to tap the lamellas during installation. It is made of impact-resistant plastic or ash, beech, and walnut wood.
The block is installed on the opposite side from the panel fastening and a mallet or hammer is used to knock the panel to the already installed ones.
Its task is to distribute the load from the impact over a large area and prevent damage to the locking element of the bar.
Spacer wedges
Spacer wedges are designed to install expansion gaps along the edges of laminate flooring. They are pegs of different thicknesses with a slope from one edge to the other.
Plastic or hardwood is used for manufacturing. To carry out repairs in a small area, as an alternative, you can use pieces of laminate or drywall.
Professional parts have a special profile for connecting 2 or more elements in different directions.
Mounting bracket
The mounting bracket for laying laminate is a metal piece for tackling the last lamellas to be laid towards you (as opposed to the block).
It can be sold separately or as a set with a block and wedges.
For household use, the bracket has a simple design, but for professionals, it has a larger area and felt lining.
Set of tools for laying laminate flooring
Almost everything necessary for installation (tape measure, pencil, hammer, hacksaw, corner) is available to every home craftsman. Manufacturers have combined the missing tools into a set for laying laminate and parquet boards, which contains:
- spacer wedges made of wood or plastic (usually in a set of 30 to 50 pieces);
- wooden or plastic impact block for tamping panels;
- mounting bracket for laying the last laminate lamellas.
This set of tools for laying laminate flooring can be purchased in stores specializing in the sale of laminate flooring. Prices for devices are affordable. The effectiveness of using auxiliary devices fully justifies the cost of their acquisition.
Sample
Experienced flooring installers always have a template in their arsenal to measure curves.
It allows for precise adjustment of planks in hard-to-reach places, near protrusions or around utility lines. Using a template, you can easily and quickly draw a cutting line with minimal error.
The use of such a tool will help to lay the laminated flooring more efficiently.
Cutting tool
Laying laminate flooring is not complete without adjusting the panels to the required dimensions. It is not possible to install using only solid laminate sheets. Panels of material have to be cut to size when installing each row.
For these purposes, you can use any wood cutting tool, since the composition of the laminate is very similar in structure to wood. The simplest option is a handsaw or hacksaw, which a thrifty owner has in every home.
Tip : before you start cutting, you should stick masking tape on this place, which will prevent chips from forming at the cut site. It is recommended to lay the board face up.
If you want to speed up the process and reduce physical costs, it is advisable to use an electric tool: a jigsaw, grinder or circular saw.
Read more about laminate cutting tools in the article “Tools for cutting laminate.”
There is an opinion among craftsmen that in order to lay laminate flooring, it is enough to have a minimum set of tools, including a tape measure, a construction pencil, a square, a hammer, a jigsaw or a hacksaw, and the most valuable thing is skill. You can get by with such a minimal set if you have to lay laminate flooring in a small area, with clear, even surfaces without protrusions or partitions.
Desirable accessories for floor renovation include:
- masking tape to protect the decorative layer when sawing off unnecessary parts of the laminate planks;
- a screwdriver or drill equipped with a crown attachment for cutting holes for pipes and communications;
- a construction or stationery knife for opening packages of material;
- hydro or laser level to check the horizontalness of the base;
- personal protective equipment: gloves, goggles, respirator, etc.
Important! Do not neglect the use of PPE. Gloves will protect the master's hands from accidental scratches, light blows and splinters.
When cutting laminate flooring, a lot of sawdust and fine wood dust is formed.
Glasses will prevent shavings and sawdust from getting into your eyes, and a respirator will protect your lungs from fine wood dust, which can be saturated with resins containing formaldehyde.
Professional tools for laying laminate, as a rule, have an expanded range of components.
A professional needs to quickly make decisions in the most unforeseen and non-standard situations, which requires the presence of various non-standard devices and devices for installation: a mounting clamp, various templates, a professional square, a protractor, a metal bracket, multi-level finishers and much more.
A professional tool is always of high quality. The use of such a tool is designed for long term and intense use.
Therefore, it is characterized by the best ergonomic solutions and competent engineering elaboration of individual parts. To produce such products, materials with a high level of strength and quality are used.
Where does such skepticism come from, you ask?
Why then do they sell mounting kits and a separate metal bracket? Firstly, a terrible bourgeois secret: most things are sold not so that the consumer is comfortable, but so that the consumer buys, and therefore brings profit to the manufacturer and seller. Secondly: for a professional flooring installer who lays hundreds of square meters of flooring every month, making the production process easier and faster is essential.
Some of them actually use a mounting bracket. Only this tool is not exactly the metal squiggle that is sold in sets. By the way, many professionals can do without wedges, blocks and metal brackets. Now I'll tell you how.
Tool for laying laminate flooring at home
Laminate is a practical and beautiful floor covering that is affordable and easy to install. The interior of the entire living space depends on how carefully the material is laid.
To achieve an ideal laminate floor, you need to take care of the necessary tools in advance: prepare a laminate installation kit, choose what to cut the panels with, prepare additional accessories, decide on the use of electric and manual tools.
Each tool has its own characteristics, technical capabilities and operating techniques, which we will discuss in this article. Therefore, after reading to the end, you will understand what tools are needed for laying laminate flooring in order to avoid mistakes and not waste a lot of effort.
conclusions
When preparing to install a laminate floor with your own hands, think in advance about what you will use to cut the laminate (hacksaw, grinder or jigsaw) and prepare the necessary tools for installation (tape measure, pencil, square, hammer and other accessories). The impact block, wedges and mounting bracket can be purchased as a set for laying laminate flooring in specialized stores.
If you are laying floors in your apartment and do not regularly repair floor coverings, then there is no need to overpay for professional tools. The benefits of purchasing them will only appear with intensive use.
Pros and cons of laminate as a covering
Laminate has many advantages, and it is thanks to them that the material gained its popularity. Advantages of laminate:
- ease of installation;
- beautiful appearance;
- ease of cleaning and maintenance;
- relative environmental safety;
- certain resistance to mechanical loads.
Laminate has many advantages
However, this material also has disadvantages that must be taken into account before deciding to purchase just such a coating. Disadvantages of laminate:
- the material is afraid of water and moisture. In case of flooding of the apartment or excessively intensive wet cleaning, it will deteriorate, begin to swell and peel;
- high-quality laminate is not cheap;
- It is important to choose a laminate marked E1 or E0 - this is an environmentally friendly material. If the number in the designation is larger, then the laminate cannot be used in a room where there are other products that emit formaldehyde. Otherwise, the concentration of this dangerous substance in the air will exceed permissible standards.
Laminate
Tool for laying laminate flooring at home. Bracket for laying laminate
Although the laminated coating is scratch-resistant, it can be damaged. The appearance of flaws does not mean that the panel is damaged. It can be restored.
- Cover minor defects with a wax pencil
. - A touch-up furniture marker
and
wood sealant - Repair serious damage using a mixture of plaster
and
sawdust
.
All materials are sold in large construction stores and have a long shelf life. Always keep something from this list at home to fix a scratch in time.
What tools are needed to lay laminated flooring with an adhesive layer?
Vinyl adhesive laminate is not yet very popular. It is often used even over old worn laminate flooring. Its installation is simple and does not require special tools. To glue flexible laminate you will need:
- Pencil.
- Roulette.
- Square.
- A utility knife for cutting slats and adjusting them to the size of the room.
- A rigid pressure roller to tightly join the panels.
If you have vinyl laminate flooring without an adhesive base, additionally purchase glue and a fine-toothed spatula.
Description and characteristics of tools
Many users hire professional builders to install laminate flooring in their apartments, but such operations can be done with your own hands. First, you need to calculate the building material and purchase it. After this, they lay out the panels on the floor and prepare the necessary tools.
https://www.youtube.com/watch?v=nYKMW_PxZosu0026t=12s
From measuring instruments we will need:
- A construction tape is used to measure the length and width of a room, determine the length of finishing materials before trimming;
- A medium-sized metal or wooden square of at least 25 centimeters is used to determine precise right angles on parts;
- The protractor is used to determine angles and is used to mark laminate panels when laying in complex ways, for example, “diagonally” or “herringbone”.
- A simple pencil or black marker is needed to draw marking lines on parts before cutting.
Next, let's get acquainted with the set of tools for carrying out basic work:
- A stationery knife with sharp, replaceable blades will be needed to cut the laminate backing. This tool is easy to use, very sharp and effective. When the blade becomes dull, it is enough to break it off or insert a new cutting part into the holder.
- A jigsaw is considered one of the most important tools; it is used for cutting laminated panels along pre-applied marking lines. To carry out installation work, it is recommended to purchase an inexpensive device with a minimum power of about 500 watts. You should not buy the cheapest models of power tools; they have limited power and can quickly break under heavy load. In addition to the jigsaw, you need to purchase an additional set of files, because the blade may break. The tool is used not only for cutting sheets in a straight line, it is convenient for making holes in planks in places where utility lines pass.
- A fine-toothed hacksaw can be used instead of a jigsaw.
- Many users do not know how to line laminated panels during installation. Locking connections have minimal gaps; when joining them manually, the user may encounter certain difficulties. For high-quality connection of products, a small rubber hammer is used. If such a tool is not at hand to adjust the panels, you can use a regular metal hammer, but in this case it is necessary to use an additional wooden beam so as not to damage the joints of the elements.
We learned what basic tools are needed to carry out work on laying laminated panels. In addition, you can use additional devices to simplify installation.
Professional tool
In addition to the previously mentioned tools, several more devices may be needed for laying laminate flooring. Let's take a look at their purpose and main characteristics in more detail.
Tools for installing laminate slats
The complexity of installation depends, first of all, on the quality of the material. Ideally, the boards should be assembled without using the “impact” technique - inserted at the desired angle, lowered, pressed down. If everything is done correctly, installation of even inexpensive samples requires almost no hammer.
However, it is worth preparing the whole set:
- plastic wedges,
- clamp for laying laminate flooring,
- mounting bracket,
- hammer (mallet),
- impact block.
Restrictive wedges
Needed to lay planks near the walls. With their help, it will be easy to provide a gap of 8-12 millimeters. This distance is necessary when the floor covering tiles expand as a result of changes in temperature and air humidity in the off-season. The created gap gives the slats some freedom, as a result of which the floor covering will not warp.
The laminate wedges are removed after installation is completed. By the way, the gaps on the finished floor are not visible; they will be covered with baseboards.
Clamp for laying laminate
Clamps in this case are devices designed to seal panel joints. They come in different forms, but two popular modifications are those with suction cups and those with belts. The first option is used by “gluing” suction cups to the second or third row from the wall, inserting a stop into the gap and tightening the rows.
Clamp for laying laminate flooring.
A clamp with straps resembles a regular winch. There are stops at both ends of the belt, and between them there is a tightening mechanism. By installing several of these devices, you can firmly compact the entire laid coating. Thus, cracks in the joints will be practically eliminated.
Clamp with straps for laying laminate flooring.
Metal bracket or tie
The tool is a plate curved on both sides in the shape of the letter “G”. The bends are located in different directions. With one bend you hook the panel, with the other you hit it with a hammer, and the board fits closely to the adjacent one. The bracket is designed specifically for fixing the covering around the perimeter, where it is impossible to grasp the lamella with your fingers.
Laminate installation tools can be purchased individually, but we recommend purchasing a set
. It has all the special accessories for self-assembly.
Tamping block
As the name implies, its main function is to tamp each die. It helps to clearly join the boards together. Thanks to its use, all lock connections remain intact and undamaged.
The tamping block for laminate flooring is made not only from wood, but also from plastic. In order for it to last for a long time, when purchasing it you should pay attention to the cost of the product and quality.
The block should weigh approximately 1.5 kilograms. When tamping, you need to ensure that the edge applied to the board is even.
In the event that the surface of the bar is even slightly damaged, it must be replaced.
If you do not have a tamping block available, you should not use a laminate hammer. You can solve the problem by using an unnecessary piece from the plank. It is necessary to connect the locks and carefully tap the die. The effect of using a segment will be similar to that of a block.
Steel bracket for laying laminate flooring
It can also be purchased as a kit for laying laminate flooring. An iron bracket or poker is needed to fit the panels closer together if there is not enough free space to use a tamping beam. These are places near the wall partitions, under the battery.
Its requirement is especially evident when constructing the last row. It is not difficult to use, but you must be careful not to break the edge with the hard iron bend. And under the base at the heel it is better to place a piece of backing or cardboard.
The establishment of the panel occurs as follows. The wide side of the poker is lowered into the gap between the edge of the laminate and the wall. Press the bracket of the cut part of the panel and, using a hammer on the heel, knock the pieces of iron in your direction, pulling the panels towards each other.
Instead of a steel bracket, it is difficult to use other devices. Somehow it is possible to use a chisel as a lever. Insert the chisel vertically or diagonally between the board and the partition and pull it towards you. Some types of laminate locks are easy to assemble and thus will attract the laminate.
Materials and tools needed at the preparatory stage
We have compiled a list of what you will need before laying laminate flooring. This will help you navigate upcoming expenses and fully assess the volume of purchases.
- If there are pronounced - more than 2 mm - lifts or cracks on the concrete floor, you need leveling mixture.
You can use a cement-sand mixture, but this will increase the drying time of the floor by up to a month.
- Minor unevenness in the floor will be eliminated sealant
for concrete or for wood, if you are placing laminate on a wooden base.
- If you have leveled the floor, builders recommend laying water vapor barrier film
. No matter how much time has passed since the solution dries, there is a high risk that moisture still remains in it. It has a detrimental effect on the structure of wood fibers of laminated panels.
If you have a secondary home, where the concrete floor has “survived” a single heating season, and you have not used a screed, you can do without film. Factory waterproofing of the boards is sufficient.
- Substrate
needed to eliminate minor irregularities, create sound and noise insulation and additional insulation.
- The substrate should not be overlapped; the joints should be as close and even as possible. To prevent them from spreading during installation, use regular transparent or aluminum tape
. The latter is used for additional waterproofing so that water molecules do not penetrate between the joints.
Restrictive wedges
Needed to lay planks near the walls. With their help, it will be easy to provide a gap of 8-12 millimeters. This distance is necessary when the floor covering tiles expand as a result of changes in temperature and air humidity in the off-season. The created gap gives the slats some freedom, as a result of which the floor covering will not warp.
The laminate wedges are removed after installation is completed. By the way, the gaps on the finished floor are not visible; they will be covered with baseboards.
What needs to be prepared
Before you get started, make sure you have everything you need at hand. A vacuum cleaner will not be superfluous to clean the floor. A tape measure, square, and pencil will be useful for taking measurements and markings.
For cutting laminate panels, it is best to use an electronic jigsaw, but you can also get by with a hacksaw. To lay the lamellas and join them you need:
- Spacer wedges, which are inserted between the walls and the floor covering to create the gap required by the installation technology. It is needed to compensate for the thermal expansion of the lamellas and prevent swelling of the coating. You can use purchased wedges or replace them with scraps of the substrate or other material.
- A tamping block made of wood or plastic is placed between the board and the hammer to avoid damaging the lock. For these purposes, you can use any block of suitable size. But, the special one has a groove with suitable parameters, which is preferable.
- The mounting bracket (clamp) is a specially curved iron plate. It is used when it is necessary to lay laminate panels in inaccessible places where a block and a hammer do not fit: against walls, in corners, under central heating radiators. This bracket greatly simplifies the work.
- A wooden or rubber mallet is better suited for the job than a hammer. Its implementation will help avoid accidental damage to the slats.
- A plastic or rubber spatula must be used if joint sealant is applied during installation. It is used in rooms where there is a high risk of water getting on the floor.
- To drill large holes for pipes, you will need feather drills.
Advice! If you want to save money, you can create devices from scrap materials. But buying a ready-made installation kit will not only simplify the work, it will also help reduce the time for laying the flooring.
How to choose a laminate installation kit
There are different sets on sale, which differ in price and set of items. Some laminate manufacturers provide their products, which are perfectly suitable for the laminate brand of the particular brand given to us. The most expensive options are usually the most durable. It makes sense to get them for professional craftsmen or for laying a larger surface area with your own hands.
For a small room there will be a fairly cheap set. Typically there are 40 spacer wedges per package. If the floor has a complex shape or a huge area, this may not be enough. In this case, additional wedges must be purchased separately.
For cutting lamellas, in addition to the tools outlined above, you can purchase a special guillotine. It allows you to quickly and accurately cut laminate boards at different angles. This may be useful with the diagonal method of laying the coating, when it is necessary to maintain uniform cutting angles.
And even with the usual method, such a device can significantly speed up the work. Experts will also need an automatic angle meter, which will make it easier to trim corner pieces to the required specifications.
Feather drills
They are used for precise and accurate drilling in the manufacture of holes in laminate intended for heating drains or laying other utilities, including water supply. The holes need to be made 4-6 millimeters larger than the cross-section of the laid pipes.
Thus, almost all the auxiliary tools necessary for installing the laminate can be easily replaced with a more convenient and less expensive analogue that does not affect the quality of the assembly work.
