Laminate is one of the most popular materials for installing clean floors in apartments, offices, educational or medical institutions. In addition to the relatively low price, it has many positive qualities, one of which is the absence of the need to process it and fix the elements together with liquid adhesives.
This means that every home craftsman can lay laminate flooring with his own hands. But, upon closer examination of this task, in reality everything may turn out to be somewhat more complicated, since a special tool is needed to install a laminated coating.
Rice. 1. Laying laminate
Main categories of tools for laying laminate
A set of tools for laying standard laminate does not involve the use of any sophisticated electrical devices. The glue-free system for connecting floor elements into a single whole allows you to install the flooring for a medium-sized room within 1 working day.
The installation of a laminate is divided into three main stages, each of which will require certain auxiliary devices, namely:
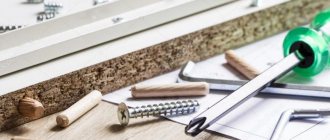
- Determining the coverage area and marking the material before installation. For this work you will need standard measuring instruments - tape measure, ruler, corner, pencil.
- After marking, some elements of the laminate must be trimmed for further installation near wall protrusions, in corners and partitions. To ensure an even cut, you need to have an electric jigsaw or a circular saw on hand, and, as a last resort, a fine-toothed wood saw.
- The last stage of work is the installation of a clean floor. Since the edges of the parts have special locks, based on the tongue-and-groove connection principle, you will need a rubber or wooden hammer to join them.
- Each laminate covering should not touch the walls, forming a temperature expansion joint. To form it, you need to stock up on wooden or plastic wedges, or special spacers. After installing the entire floor surface, these elements can be easily removed from the resulting gaps.
- Since, most often, immediately after the floors, the master begins installing the skirting boards, he will need a drill with a thin drill and a screwdriver.
Rice. 2. Trimming floor elements
When purchasing a high-quality laminate, it often comes with a special impact tool - a block with a cut-out groove for easy snapping of elements without deforming or breaking the lamellas. If such a tool is not provided, you should make it yourself from a small piece of wood or purchase a kit for installing laminate flooring at a hardware store.
Stationery or construction knife
A stationery knife is considered a universal type of tool for flooring, as it is suitable for cutting various materials:
- Usually it is used to cut the substrate and remove excess.
- It is convenient for them to open packages containing building materials.
- Sometimes a construction knife is used to cut the laminate, ensuring precise cutting several times along the marking line.
It is acceptable to leave a few millimeters of thickness, carefully breaking the lamella.
Measuring and marking tool
An old proverb says: “Measure twice, cut once.” This applies to any type of construction work, and laying a finished floor is no exception. So, before starting to install laminate or parquet boards, the master must be sure how many boards he will need, how many whole elements and what needs to be trimmed. For these purposes, an elementary universal tool is used.
Rice. 3. Marking laminated boards
Roulette
This measuring device is sold in every hardware store, has a basic structure, and differs only in the quality of the body and the length of the steel tape. For ease of measurement, the length of the tape measure should be greater than the longest dimension of the room. In this case, the master can measure the length of the floor in one pass, which eliminates errors.
Rice. 4. Working with a tape measure
Professionals often use laser tape measures, which are much more expensive than regular tape measures, but at the same time convenient to use, and the built-in calculator allows you to store the results obtained as a result of measurements and calculate the coverage area.
Construction pencil or marker
In order to prepare the laminate for installation, it is necessary to mark it before further trimming. The most convenient tool for this is a construction pencil with a soft oval lead or a permanent marker. With the help of these simple office supplies, 2 tasks are solved at once:
- The starting point for positioning the first floor element is in accordance with the mark fixed on the substrate.
- Trimming laminate flooring where necessary.
Rice. 5. Construction pencil
It is worth remembering that permanent marker is very difficult to remove from the surface, and it is best to apply markings on boards from the back side.
Square
A faithful companion for an apartment renovation specialist, because with the help of this simple tool you can perform the following manipulations:
- Draw a perpendicular, straight line for trimming any element.
- Check all the corners in the room and the correct installation of the laminate after installing several planks.
Rice. 6. Working with a professional square
It is better to purchase a square in a construction store rather than a stationery store, since a professional tool has a high degree of accuracy and is made of high-quality steel for reliable and long-term operation.
Steel ruler
The last tool. Necessary for marking the floor. In many cases, a tape measure can replace this, but using a durable, high-quality metal ruler, 30 to 100 mm long, is best suited for preparing floor elements for installation, for example, when longitudinal trimming is required.
Rice. 7. Steel ruler 1000 mm
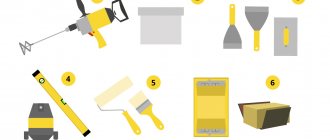
Features of preparatory work
Before you begin laying the substrate and the laminate itself, a number of preparatory work still needs to be done. This is very important for the coating to serve for many years without problems. If you neglect the preparatory stage, then soon the laminate will begin to sag under your feet, creak and deform.
Changes and depressions in the subfloor are the main cause of floor squeaks.
Expert opinion
Afanasyev E.V.
Chief editor of the pol-exp.com project Engineer.
The main requirements for the surface of the subfloor are dryness, evenness, hardness, and cleanliness. All cracks on the concrete base must be sealed and its levelness checked. Using a long (at least 1 m) building level, floor unevenness is monitored. The entire foundation is subject to such scrutiny.
Attention! The permissible curvature of the floor for every 2 m of the base is a maximum of 2 mm.
Pre-filling the floor with a self-leveling mixture will help eliminate large unevenness on the concrete base.
Pouring self-leveling floor
Attention! Laminate flooring should be laid on concrete no earlier than 1 month after pouring the concrete screed, if such work has been carried out.
However, if the floor is wooden, then first of all it is checked for strength. The coating should not creak, sag, or have serious defects or irregularities. Additionally, sheets of plywood laid on it and secured with self-tapping screws will help level the wooden floor. Also, the base prepared for laminate must be washed and dried. There should be no debris or dirt on it.
Leveling the floor
Laminate cutting tool
After the subfloor and laminate elements are marked, it is necessary to trim each element. This can be done immediately if the master is confident in the accuracy of his measurements, but professionals advise first laying solid boards, and if there are obstacles, cut them in place, individually for each part. In order to ensure an even cut line, you will need a certain set of tools.
Electric jigsaw
A universal power tool with a thin working blade, it allows you to easily cut thin wood, chipboard, plastic and laminated panels anywhere along an arbitrary trajectory. It is practically indispensable when laying laminate flooring, as it significantly speeds up any work.
Rice. 8. Trimming lamellas with a jigsaw
To use a jigsaw correctly, you need to draw a straight line on the back side of the floor element in accordance with the markings, place the board on a stool or other elevation so that the cut point hangs freely above the floor. Next, you need to secure the material with a clamp or simply press it with your knee to the work surface and make a clear cut.
Hand circular saw
Another useful tool that can quickly cut laminated boards. Unlike a jigsaw, a circular saw has the following important features:
- The cutting organ of the saw cannot describe a curved path and carries out only longitudinal or transverse cuts.
- The vast majority of circular saws have a built-in floating guide, changing the position of which you can cut the board without the slightest deviation from a straight line.
Rice. 9. Professional circular saw
It should be remembered that laminate is a very delicate material, and a circular saw with large teeth will ruin it - burrs will form on the edge and damage the decorative surface. To prevent this from happening, it is necessary to use a wood disc with fine teeth.
Guillotine for laminate
This tool can hardly be called universal, since it has a specific purpose - cutting laminate. The manual guillotine belongs to a number of semi-professional tools and will provide a perfect cut of the element, strictly according to the markings.
It is not cheap, and it is worth purchasing it only if the master is engaged in professional flooring or the coverage area in all rooms of the house exceeds 150 - 200 m2.
Rice. 10. Trimming laminate using a guillotine
Hand saw
For those home craftsmen who want to install the floors in their apartment themselves without spending extra money, a standard fine-tooth wood hand saw comes to the rescue.
When choosing a tool, be sure to check with the seller how suitable the tool is for cutting laminate flooring, because the plastic base of the wood flooring is too delicate, and not every blade will provide an ideal cut. Also, the most correct choice would be a hacksaw with a rubberized handle.
Rice. 11. Working with a hacksaw
Square
Another laminate tool to ensure the panels are cut correctly is a square. When filing lamellas, it is necessary to accurately apply the markings. The cutting line should be perpendicular to the border. The square makes it possible to draw it strictly at a right angle.
A tool with a length of 25 to 35 cm is optimally suited for work. It is advisable to choose a product with a special stop, as it increases the convenience of work. It is recommended to purchase the option with the ability to change the angle if you need to get an accurate measurement of the adjacent walls and transfer it to the panel.
Tapping laminate flooring against a wall using special tools
Laminate installation tool
When all the markings have been made and the main elements of the floor have been trimmed, you can begin laying the laminate. Of course, this is not at all difficult, since all the parts are connected to each other like a children's construction set or a puzzle. However, when installing the floor, it is extremely important to ensure that all the planks are tightly adjacent to each other in order to obtain a single, flat and uniform surface.
Any gaps in the finished floor will not only spoil its appearance, but also allow moisture to penetrate between the floor elements, followed by swelling, deformation and rotting of the material. To avoid this, any master will need a set of special tools.
Impact load transfer bar
A very simple product made from rigid PVC materials or hardwood. It has a flat surface designed to be struck with a mallet or a soft hammer, and a groove for application to the finished edge of the board without damaging it when fixing the floor.
The tool works on the principle of a chisel - it serves to transfer the impact load from the hammer to the laminated panel. As a result of this effect, the elements snap tightly into the lock.
Rice. 12. Impact block
Rubber head hammer or mallet
Standard assistant for laminate flooring. A soft and elastic impact working body is installed on a wooden or plastic handle. It can be made of either hard rubber or wood. The product is easy to find in every hardware store.
Rice. 13. Installation of lamellas with a mallet
Spacer wedges
Due to temperature changes and the resulting expansion and contraction of the finished floor surface, it cannot be installed strictly from wall to wall and must have a “floating” design.
In order to achieve this effect, the master, as a rule, creates a gap of 5 - 7 mm from the wall to the nearest edge of the laminate. However, during the process of using a mallet, this gap may be broken, and special spacer wedges made of plastic or wood come to the rescue. The material is carefully hammered into the gap and helps ensure slight movement of all the elements assembled together.
Rice. 14. Arrangement of wedges
Mounting brackets
The last tool that a craftsman may need for high-quality installation of laminate flooring is a mounting bracket. It is intended for the installation of the last row of lamellas, when the impact bar can no longer be applied to their edges.
The tool has a special grip and a small striking plane on the opposite side.
Rice. 15. Mounting bracket for floor elements
All tools for laying laminate flooring in accordance with installation technology have been listed and described above. Next, the craftsman will need to fasten the plinth elements to the wall, and he will need additional tools - a miter box for even cutting at an angle of 90 or 45 degrees, the same hacksaw, a drill for making holes in the wall for dowels and a screwdriver for conveniently tightening hardware. However, these tools no longer apply to the installation of floors made of laminated elements.
Popular substrate materials
| Photo | Name | Rating | Price | |
| #1 | Foamed polyethylene | ⭐ 93 / 100 | More details | |
| #2 | Extruded polystyrene | ⭐ 94 / 100 | More details | |
| #3 | Cork material | ⭐ 92 / 100 | More details |
Foamed polyethylene
This is one of the most commonly used types of substrate. The basis of the foamed substrate is a polyethylene mass treated with hydrocarbon gas or a foaming agent to form a large number of tiny bubbles.
Foamed polyethylene
pros
- Low cost .
- Excellent moisture resistance .
- Pathogenic microorganisms do not live in the material and for rodents it is of no value in terms of food, and they will not spoil it.
Minuses
- Easily deformed .
- Has low density .
polyethylene foam backing
Extruded polystyrene
The peculiarity of the material lies in evenly spaced closed cells, which ensures the moisture resistance of the material. The material is produced using a molding machine, where polystyrene along with a foaming agent is fed through a narrow nozzle under high pressure and high temperatures.
Extruded polystyrene backing
pros
The advantages include the following:
- High strength and durability of the material.
- High thermal insulation properties.
- The material is not afraid of low temperatures.
- The material is lightweight and convenient in size , which makes it easy to transport and install.
- The material is not subject to rotting , it is environmentally friendly and safe for humans and the environment.
Minuses
- The thin thickness of the substrate, due to which the material has low leveling ability.
- Another disadvantage is that the material is not sold in parts. If the room is small, you will still have to buy the entire package.
extruded polystyrene backing
Cork material
The main component of a natural cork substrate is the covering (secondary) wood fabric or cork. It is characterized by its low weight, resistance to deformation and point load.
Cork sheet backing
pros
The advantages of cork backing include the following:
- Long service life if all requirements are met.
- Resistant to deformation.
- Excellent sound insulation properties.
- Excellent thermal insulation properties, which allows it to be used for insulating various surfaces.
- Eco-friendly material.
Minuses
- The main disadvantage of cork material is its high cost .
- Another disadvantage is low moisture resistance.
- Cork substrate is not recommended for use in a “warm floor” system, regardless of the coolant used - water, infrared or electric cable. Due to the dense structure of the substrate, thermal energy will not be able to fully reach the surface of the laminate.
cork backing
Average cost of tools for laying laminate flooring as of January 2022
Of course, a home craftsman can save significant money by refusing the services of professional builders. But, at the same time, all the tools listed above must be purchased by spending a certain amount, namely:
- Standard tape measure (5 – 10 meters) – 200 – 500 rubles.
- Laser tape measure – 2,500 – 4,000 rubles.
- Construction pencil or marker – 15 – 30 rubles. (it’s better to buy 2 – 3 pieces at once). Marker – 100 – 250 rub. (one product is enough).
- Construction square – 350 – 650 rubles.
- Professional metal ruler, 1000 mm – 500 – 1000 rub.
- Non-professional jigsaw – 2,500 – 4,500 rubles.
- Circular – 3,000 – 7,000 rubles.
- Guillotine for laminate 4,500 – 8,000 rub.
- Wood saw with fine teeth – 200 – 1,000 rubles.
- Impact block – 100 – 300 rub.
- Hammer or mallet – 50 – 200 rubles.
- Spacer wedges – 120 – 300 rub. (for a set of 40 pcs. The total quantity depends on the length of the gap between the laminate and the wall).
- Mounting bracket – 150 – 300 rub.
Rice. 16. Tool store
If a master does not want to spend a lot of money and is going to purchase the simplest tool, then a complete set will cost him 2,000 - 3,500 rubles. However, with a serious approach and the purchase of a professional power tool, this amount can increase to 20,000 rubles or more.
Scotch
When talking about what tools are needed for laminate flooring, we must not forget about such an absolutely necessary thing as adhesive tape. Separate sheets of backing are glued together using tape.
As a result, there is no slipping during installation, which can lead to deterioration in the quality of the coating. It is recommended to choose thick tape with a good adhesive composition.
If it turns out to be excessively hard, then various rustling sounds may occur when walking on the floor in the future, so this point must be checked in advance.
Let's sum it up
Modern laminate flooring can be installed by any home craftsman, and its installation does not require any professional skills. The minimum set of tools for this process is not very expensive, which allows the owner of the premises to save a lot by refusing the services of professional builders. You just have to take into account the fact that not every laminate is made in ideal quality, and when purchasing the material itself, you need to pay attention to customer reviews. Otherwise, during the installation process, problems may arise with violation of the geometry of the coating or the complexity of fitting parts into the lock.
Feather drills
They are used for precise and accurate drilling in the manufacture of holes in laminate intended for heating drains or laying other utilities, including water supply. The holes need to be made 4-6 millimeters larger than the cross-section of the laid pipes.
Thus, almost all the auxiliary tools necessary for installing the laminate can be easily replaced with a more convenient and less expensive analogue that does not affect the quality of the assembly work.
Recommendations
Novice repairmen are not immune to many mistakes. To avoid loss of repair quality and self-confidence, special recommendations are given below:
- Surface preparation requires special attention. It is better to clean the dust and dirt again than to re-lay the floor again.
- Do not neglect the size of the gaps between the wall and the panels ; the laminate may swell and become unusable.
- The base must be level and smooth , this is a necessary condition for maintaining the locks.
- Laminate floors cannot be laid immediately after delivery of building materials. Laminate is a moisture-absorbing material; at least 48 hours must pass for it to swell.
- Without a backing, the floor will creak. It is better to trust the opinion of most professionals and use a layer of underlay; you should not skimp on the quality and durability of the floor covering.
Laying a laminate floor with your own hands and without special skills is possible, you just need to strictly follow the instructions and use the advice of experienced craftsmen.
Drill
Using a drill, holes are formed for self-tapping screws in a situation where the base is planned to be formed from plywood sheets. This tool will come in handy when installing skirting boards and thresholds.
When laying and replacing flooring with your own hands, a drill is often used to form neat holes for pipe structures and communications. It is optimal to use feather drills and a crown attachment.
It must be remembered that the hole formed for the pipe should be 4-7 mm larger than the diameter of the element.
Jigsaw
Equipment for installing and replacing laminate must include a jigsaw or hacksaw. Using a jigsaw, panels are cut, holes are cut and various bends are formed.
Working with such a tool is simple and convenient, as it allows you to create neat and straight cuts.
It is optimal to choose a tool with a power of 500 W, giving preference to the middle price segment. A cheap option can quickly break due to the load. You definitely need to purchase a set of files.