If there is a need to reproduce the soldering (welding) process at home, then a gasoline torch will help you with small metal parts. This type of metalworking equipment is sometimes sold in specialized stores. Due to the simplicity of the design, interchangeability and accessibility of individual components of the unit, modifications of burners made by hand are successfully used in everyday life.
The material in this article will tell you about torches for soldering and welding metals and the possibility of their production at home.
DIY gas burner from a refrigerator compressor
Home page » Do-it-yourself gasoline-air burner from a refrigerator compressor
An active heating device, in particular, a gasoline-air burner, is a tool that is clearly in demand in private households. If there is a surplus in the family budget, it is easy to buy a gas-air burner, given the richness of the market range. Meanwhile, it is quite possible to make such a tool with your own hands from available components. All you need is a working compressor from an old refrigerator and a used blowtorch. Let's consider the process of making an original heating apparatus with our own hands, already tested in practice.
My homemade gasoline burner
Hello, friends. So I got the idea to review my homemade gasoline burner for melting precious metals and copper alloys. I would like to note that this project did not incur any special financial expenses, all you need is desire, inspiration and three free evenings after work. Let me start with the fact that its device is not very complicated, it runs on a gasoline-air mixture and is connected to a 220 V network.
Consists of an old but working refrigerator compressor
A regular switch and start relay (from the same refrigerator). When disassembling the refrigerator, I sketched out the connection diagram, where which wire goes, etc., which made the installation much easier for me, since I am not an electrician.
The compressor outlet tube is connected by a flexible tube to the container where the gasoline-air mixture is prepared
The design of this container is simple: gasoline is poured into the container 1/3 full, the air supply tube is located below the level of the surface of the gasoline and, when turned on, begins to gurgle, as a result of which the air is enriched with gasoline vapor and is supplied to the burner itself through the outlet tube in the lid of the container. I made the container itself from an old diesel fuel filter, welding a kerosene stove tank to it at the bottom.
Here's the burner itself:
I made it from a used CO2 canister.
Inside there is a brass plate with holes. in the middle of which is the main fuel jet (copper tube)
Tap for adjusting the amount of mixture supplied to the nozzle. The faucet is an ordinary water tap, I removed it from the old batteries when I changed them, it was intended to bleed air from the heating system.
I didn’t bother too much with the handle, I just wrapped it in insulated tape.
The whole thing was soldered with ordinary solder, I only welded the head itself with the nozzle (although it was also possible to solder it, the temperature when working there is low). Connected to the container with a regular dropper tube.
I use an ordinary red brick as a container for melting, cut off the required piece from it with a grinder and use a grindstone to create a small cavity in the middle so that the molten metal does not leak out.
Additional tools needed: crooked pliers, an old file and a lighter.
And also a special powder, similar to angel dust, without which all the work will go to waste
You also need to think about safety precautions: Work outside or in a clean, well-ventilated, fireproof room, a metal screen and a fireproof base (brick) that can be safely heated (burner flame temperature is about 1500 degrees). And you can work. Yesterday I worked with silver for the first time, it melts perfectly, this is the ring I came up with
Here I want to show how the device itself works. I melt brass rods.
As you can see, the burner does its job well. My passion is not limited to rings; I want to learn a lot more with its help: flask casting, soldering, glass melting and much more. Ingot after melting.
From raw materials to finished product
As can be seen from the above, making such a device is not difficult or expensive. Nothing is impossible. Go towards your goal, bring it to life, don’t stop at anything and you will succeed, friends. Bye everyone. Be useful to society!
Possible duplicates found
the electrical tape is not blue - it will break quickly
I'll go and change it urgently!
no one has ever gone crazy, it’s enough to know the elementary laws of physics not to think like that
No, it’s a joke, like the Orcs in WH40 - it works from the consciousness “it works”))))
Everything is fine, but at the compressor inlet you still need a cheap car filter; it will have a good effect on the life of the compressor. I also use the compressor from the refrigerator for air.
Design features and operating principle
The design of a gasoline soldering torch includes two main elements - a fuel tank and a burner device called an ejector. It serves to create the required speed of movement of the gas-air environment due to the generation of thrust during combustion of the mixture.
To operate the BG, the permissible level of fuel is poured into the tank and closed with a lid with a special seal that protects the container from gasoline leakage during storage or operation. The BG tank is equipped with a pump for pumping air and creating excess pressure, ensuring fast and high-quality transportation of the mixture to the nozzle of the burner device.
The fuel poured into the BG tank must be of quality in accordance with the manufacturer’s requirements. Low-quality gasoline will create a smoky flame and clog the injector. In addition, uncertified fuel increases the level of explosion hazard of the burner.
Gasoline blowtorch device
When purchasing BG, the following characteristics are controlled:
- Fuel tank volume.
- Maximum filling level with gasoline.
- Maximum operating pressure.
- Hourly gasoline consumption.
- Outlet nozzle diameter.
- Empty weight.
- Factory warranty.
- Burner service life.
These indicators are directly related to the popularity of models among users. The most popular ones are with a volume of 2 liters, with a maximum filling of 1.8 liters, with a maximum pressure of 0.3 MPa and a fuel consumption of up to 1.2 l/hour. Manufacturers give the device a one-year warranty period and promise 5 years of trouble-free operation.
Gasoline blowtorch
How to choose?
There are several factors to consider when purchasing such a stove.
- Weight. The differences in weight are huge, as is clear from the information above. In general, there are two large groups: backpack portable stoves and those that require a car for transportation. If you plan to transport equipment, then weight is not so important; it is better to focus on the characteristics and price.
- Pipe diameter. The diameter of this part of the structure can vary significantly. If there is already a chimney built into the tent, then you will have to select a stove according to size. The diameter is usually equivalent to the combustion power - the larger, the higher the indicator.
- Accessories. Some brands provide a long list of accessories for their stoves, but the cost of such models is much higher.
Do-it-yourself gas-air burner
The new acquisition of such equipment involves the purchase of individual working parts and their further independent assembly into a single unit. However, the design of the burner is quite simple, and if desired, it is possible to build it yourself, saving a certain amount of money.
Gasoline burner production
When making a gasoline burner with your own hands, the drawing contains further assembly elements: body, handle, bushing, hook, stop, tube, rubber ring, heating pad and filler.
The composite body of the gas burner is made from any type of steel using a lathe. One side of the part is open, and the other is covered with a special plug with a hole. The diameter of which is 0.1 mm larger than the outer diameter of the tube, this allows you to move the device body along the tube, while maintaining the tightness of the structure. A ring made of iron mesh and slag wool is placed inside, and a bushing with a hook and stop is made from sheet steel.
Nozzle with a hole of 0.2 mm. located at the end of the tube passed inside the body. To produce it, the tube is sealed with PMTs-54 hard solder and a hole with the required diameter is made.
The gasoline torch for DIY soldering is ready for use.
Copper-zinc solder
Making homemade copper-zinc solder for soldering does not incur large physical and financial costs. Copper is obtained from cut calcined copper wire. A zinc cap from an ordinary galvanic battery is calcined over a fire and placed in cold water and a weakly concentrated solution of hydrochloric acid. At the end of the heat treatment, the finished zinc is finely cut with scissors.
Keeping the proportions, pieces of zinc and copper are covered with borax and placed in a crucible. The joining of metals into solder is carried out in the torch. The resulting workpiece is cooled and leveled in a vice with a file, the chips are picked up and mixed with borax again.
Step-by-step manufacturing process
The following is the sequence of operations for manufacturing a gas-air burner:
- The body is made on a lathe or milling machine; on one side it must be open, on the other it must be closed with a plug.
- A hole is drilled in the plug. Its diameter should exceed the outer diameter of the nozzle by fractions of a millimeter. It should fit tightly.
- A ring of fine wire mesh is placed inside the housing.
- A limiter and a bushing with a hook are cut out of a sheet of metal.
- The handle is made from dense wood.
- The tube is passed through a hole in the housing so that its end becomes the burner nozzle.
- The end of the tube is sealed with refractory solder.
- a 0.2 mm hole is drilled in the solder. You can solder a ready-made jet of suitable diameter into the end of the tube.
Do-it-yourself gasoline burner assembly
You can make refractory solder yourself from finely chopped pieces of copper and zinc. Zinc is taken from the battery glass, crushed and poured with weak hydrochloric acid. Then copper and borax are added. The resulting mixture is calcined in a crucible.
Gasoline-air burner from a refrigerator compressor
Hello dear DIYers! If some household appliance is broken, I would not recommend getting rid of it right away, because in most cases some parts from this appliance can be given a second life! Let me give you a specific example: let’s say you have an old refrigerator that doesn’t freeze or something else. There is most likely no point in repairing it or pumping freon into it. But this refrigerator has a compressor, from which you can make so many interesting things, and most importantly - useful! This can be a device for inflating tires, an airbrush application device, or a spray gun! You never know how you can use this part of an unnecessary refrigerator.
So the author of the YouTube channel TEXaS TV, using a compressor, made such an interesting homemade product for his needs - an air-gasoline burner!
In this article we will look at how, following the example of the author, we can make the same device ourselves.
For work, the author uses: - profile pipes, - welding machine, - drill, - lathe, - thread cutting tool, - angle grinder, - bolts, washers, nuts, - pressure gauge, - rubber hoses, - screwdriver, - refrigerator compressor ,-capacity from a blowtorch.
In this homemade product, the main part is an old, but still working refrigeration compressor. The second, important detail is the blowtorch reservoir. It has one advantage over all other containers: one of the fittings goes down to the very bottom of the container. You need to make another hole in the tank for a pressure gauge to monitor the pressure inside.
After the author has made the hole, he turns the fitting on a lathe. It has a thread cut for an M12 nut. Now you need to fix the fitting. Initially, the author did this using a nut, which he managed to screw onto the fitting from the inside. Throwing it there, using the shaking method, makes sure that it fits onto the thread of the part being screwed. Then installs a pressure gauge and checks the connections for air leaks. It turned out that the air from under this connection is good for poisoning. In my opinion, this connection is not very appropriate in this design, since there is no normal way to tighten the parts tightly. Therefore, the author welds the nut. After checking for leaks, use paste to eliminate air leakage from under the fitting. The air pumped into the container does not escape, as evidenced by the readings of the device - the pressure gauge needle remains in place.
The next step is to make a platform for the tank and compressor. Markings are made on the profile pipe and the corrugated pipe is cut into pieces along it. It turns out 6 blanks. Two of them are equal to 40 cm, and the remaining 4 are 16 cm. All received parts are laid out in the order they should be finished. We weld them into a single structure. All welds are carefully cleaned with a grinder.
For ease of movement around the workshop, the author screws wheels into the corners of the base, which are secured with metal screws. The base is completely ready! Markings are made on it for fastening parts. The tank from the blowtorch will be attached to the frame using corners welded to it. All parts are painted.
This is what can come out of seemingly unnecessary parts of household appliances that have served their time.
This concludes the review and wishes everyone creative success in all their endeavors!
Is it possible to make a blowtorch work during mining?
The principle of operation of a conventional blowtorch is to ignite gasoline vapors, which are pushed out under the action of compressed air. This effect is achieved by forcing air into the burner fuel tank. What happens if you pour used oil into a blowtorch?
Oil itself, even under pressure, does not evaporate well - it needs to be heated. Due to poor atomization, the flame will be uneven and it will be difficult to ignite the burner. The oil burns with the formation of a large amount of soot and soot, so the jet will quickly coke, its cross-section will decrease, and the lamp will fail. Increasing the cross-section of the nozzle will also not give the expected effect - the oil will be sprayed in large drops, which will not allow obtaining a uniform flame of the torch.
In addition, used oil often contains impurities: diesel fuel, gasoline, antifreeze and even water, which can lead to flashes inside the lamp. To use waste as fuel for a blowtorch, you will have to install a filtration system, which will further complicate the task.
Considering all the difficulties, using a gasoline blowtorch as a burner during mining is difficult and unsafe. Therefore, it is necessary to modify or completely change its design.
Gasoline torches for soldering and everything connected with them
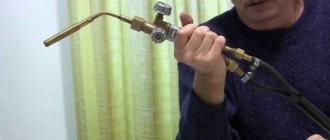
The gasoline soldering (smelting) apparatus is designed to form a gasoline-air combustible mixture. A gasoline torch for soldering and melting metal runs on a gasoline mixture. These burners offer convenient flame adjustment using a rotary tap located on the handle.
Advantages of the device
Advantages:
- The device is portable;
- Low weight of the device;
- Ease of use;
- High-quality result upon completion of soldering (melting).
Gas burner device
Components:
- Gasoline tank;
- Air compressor;
- Gasoline hoses;
- Burner.
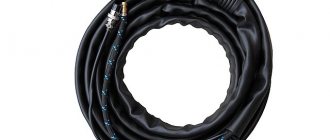
Please note that torches and hoses, as a rule, are not included in the kit for gasoline soldering. In this regard, the purchase of these elements is made separately
Do-it-yourself gasoline torch for soldering
Purchasing a ready-made gas burner is not always possible (for various reasons). In this case, it will be useful to know that you can make a gasoline torch for soldering yourself. Note that homemade gasoline devices are no worse than purchased ones. A DIY device is just as effective.
If you bring a lit match to the spout of a gasoline burner, you will be able to see a fire instantly flare up. Steady combustion of gasoline will continue for five minutes (+/-2 minutes). The flame temperature at its tip will reach more than 1000° C.
Note that with such a burner you can easily melt hard solders, heat treat small tools, melt various metals, solders, and even soften glass.
There is no need to make many parts of a homemade gas burner, since they can be borrowed from other things. For example, homemade parts such as a rubber bulb can be made from a spray bottle.
The homemade burner device contains:
- Frame;
- Sleeve with hook;
- A tube;
- Emphasis;
- Pen;
- Rubber ring;
- Balloon;
- Pen;
- Rubber bulb;
- Filler.
Manufacturing:
The burner body can be turned on a lathe
Steel of any grade can be used as a material for the manufacture of this important part. It is worth paying attention to the fact that the body of the part is composite (one end is open and the other is closed with a plug). There is a hole in the plug, the diameter of which is 0.1 millimeters larger than the outer diameter of the tube. Using this quality, the body can move along the tube quite tightly, while maintaining tightness. Inside the housing it is necessary to install a ring made of metal mesh and slag wool
Next you need to make a sleeve with a hook and a stop
A ring made of metal mesh and slag wool must be installed inside the housing. Next you need to make a sleeve with a hook and a stop
You can use a steel sheet for this. The burner handle, which is essential for a gasoline device, is carved from beech or oak. The holes for the tubes (2 pcs.) are drilled very carefully. Thus, the axes of the holes should be strictly parallel. The finished handle is sanded and then coated with several layers of colorless varnish. Next, it is necessary that the end of the tube, which is passed inside the body, forms a nozzle. If you have PMTs-54 hard solder (adheres well to steel), try to solder the end of the tube with it, and then drill a 0.2 millimeter (diameter) hole along the axis of the tube. You can make your own solder. It must be said that solder consists of copper and zinc. In order to get zinc, you can use cups from an old electric battery. You need to empty the glass of its contents and then heat it over the fire. Next, you need to lower it into cold water, and then into a weak solution of hydrochloric acid. A clean glass is cut into pieces with scissors. Thus, we obtain zinc. Now it's up to copper. To do this, do the following: take copper wire; anneal it on fire; Finely cut the wire using scissors. Now you can pour pieces of copper and zinc into the crucible, maintaining equal proportions, after which you need to sprinkle with borax. Metals can be fused using a burner. After this, you will need to cool the resulting block and secure it in a vice. Then use a hog file to file it on all sides. The resulting sawdust must be mixed with borax.
Homemade gasoline burners like these will work great if done correctly.
Please note: if you do not have enough experience working with flammable materials, it is advisable to use commercial gasoline burners
Making a gas burner from scrap materials: step by step
List of materials and tools:
• drill;• grinder;• hammer;• sandpaper;• brass blanks for the divider nozzle;• thin brass tube with a diameter of 15 mm;• wooden blocks;• vice;• silicone seal or FUM tape;• hoses for connection;• valve for adjustment.
How to make a nozzle and handle
First of all, we take a brass tube and attach a handle to it - for example, from an old burner, or from a wooden block, having processed it beforehand. We drill a hole in the block for a brass tube with the appropriate diameter. Having inserted the tube into the timber, we secure it with silicone or epoxy resin.
Next, we proceed to a more labor-intensive and time-consuming stage of work - manufacturing the nozzle. The hole size should preferably be 0.1 mm.
You can use a drill to make a slightly larger hole, and then adjust the edges to 0.1 mm. The hole must have the correct shape so that the flame is even.
After this, we fix the workpiece in a vice, take a hammer and carefully, in a vertical plane with a “pull” towards the middle of the workpiece, strike the future nozzle. We rotate the product evenly to form an ideal hole.
Then we take fine-grit sandpaper and sand the nozzle head. To connect to the tube, a thread is applied to the back of the product; the elements can also be simply soldered - but in the future, repairing the parts will be more difficult.
Now we connect the device to the gas cylinder and set it on fire - the do-it-yourself burner is ready for use. However, here you can see that to regulate the gas flow, you can only open and close the valve of the gas cylinder, and thus it is very difficult to obtain the desired flame. What we can do?
How to improve flame control
For the normal operation of our homemade unit, we will install a divider and a tap on it. It is better to mount the tap near the handle, at a distance of about 2–4 cm, but it can also be attached to the supply pipe. As an option, take a burner tap from an old autogen or another similar tap that is attached with a thread. To seal the connection, take FUM tape.
The divider is installed on a pipe with a nozzle; it is made of brass, diameter 15 mm. The best option is a cylindrical part with a hole for a tube with a nozzle. If there is none, we do this:
1. Take a brass pipe with a diameter of 35 mm and cut a piece of 100–150 mm.2. Take a marker, step back from the end and mark 3-5 points, with an equal distance between them.3. We drill 8–10 mm holes in the pipe, take a grinder and make straight cuts to them.4. We bend everything to the center and weld it to the burner pipe.
DIY instructions
Next, we will talk about several options for homemade propane burners that you can make with your own hands. In order to build a simple burner, you won’t need a lot of effort and skill, but creating the other two options will require you to work harder.
Option 1 - the simplest burner made from a piece of pipe
Building such a burner will require very little time and effort. But the process of creating a homemade product must be approached with all responsibility, because you will have to work with an explosive substance and any error in the design of the device can lead to dire consequences.
Using such a device, you can heat metal blanks for forging or warm them up before welding, and you can also repair bitumen roofing. The owner of a private house will definitely not find such a homemade product superfluous.
A properly made propane burner will last a long time. With its help you can perform many household tasks without using a number of expensive tools.
To make a homemade gas burner you will need the following tools and materials:
- two pieces of pipe of different diameters;
- union;
- gas hose;
- gearbox;
- propane tank;
- welding machine;
- Bulgarian.
Having prepared all the tools and materials, you can begin assembling the propane burner. But before that, we recommend that you familiarize yourself with the rules for safe work with an angle grinder.
As you can see, there is nothing complicated about assembling a gas burner yourself. Having studied the instructions and having the necessary set of tools and materials at hand, assembling the device will take no more than an hour.
Option 2 - powerful gas burner
We also suggest trying to assemble a more structurally complex, but also more powerful burner.
To build this option, you will need a little more tools and materials, but the result will not disappoint you.
Such a propane burner can be used, for example, for melting metal in a forge, for burning weeds in your own area, as well as for other purposes
So, to build a propane burner you will need to prepare the following materials:
- connecting couplings – 1/2” and 1/4”;
- threaded barrel – 1/2” and 1/8”;
- plug with internal thread – 1/8”;
- foot – 1/4”*1/8”;
- nipple – 1/2”;
- quick connector for low pressure gas equipment;
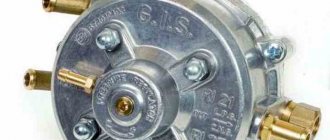
- propane supply regulator – 0.068-0.34 atmospheres;
- thread sealant;
- a metal sheet;
- self-tapping screws;
- drills – 6.4 mm and 0.8 mm.
It is better to give preference to brass products. In addition, to construct a homemade product you will need the following set of tools: an adjustable wrench, a drill, a punch, solder and flux, a blowtorch.
Having prepared everything you need, you can begin assembling the device.
During work, do not forget that propane is an explosive gas, and any failure to comply with safety regulations can lead to irreversible consequences.
Therefore, before testing the device, it is necessary to check all connections for leaks. And only after making sure that there is no leak, you can start working with your homemade product.
Option 3 - miniature burner model
Let's look at another option for a gas burner that runs on propane. This miniature gas burner is often called a Bunsen burner.
The peculiarity of this device is that you can hold it freely in your hands without fear of getting burned. Let's try to assemble it with our own hands.
To work you will need:
- Old gas burner.
- Thin copper tube 10 meters.
- Copper wire.
- Needle from a medical syringe.
- Bolt No. 8.
Having prepared all the necessary materials, you can begin to create our homemade product.
To do this, we will use the following instructions:
Now you know how to build a gas burner with your own hands and what you will need for this. As you can see, there is nothing complicated about this; it is enough to follow the rules for the safe operation of equipment, which we will discuss a little below.
DIY burner for jewelry work
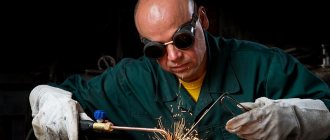
Among the most useful and functional devices for the home workshop, a gasoline soldering torch occupies one of the leading places.
Such a device is capable of qualitatively connecting all kinds of metal structures using liquid metal technology.
The device operates on the basis of a gasoline-air combustible mixture, which is formed in the burner, and allows further smelting work to be carried out.
The rotary tap located on the handle acts as a regulator of the direction and power of the flame, which significantly simplifies the combustion process.
Today, metal smelting is carried out using two types of solders:
- Low-melting.
- Refractory.
If when working with low-melting metals almost all existing types of soldering irons are used, then in the case of refractory metals it is necessary to create maximum temperature indicators.
In this case, you simply cannot do without using a burner.
Currently, there are several varieties of such a universal device that can operate on the basis of different fuel mixtures, but at the same time heat the structure to the required temperature.
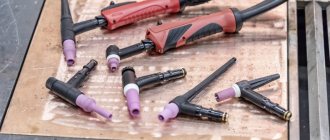
Among the most common and convenient torches are models for soldering and welding, which operate on gas or a gas-air mixture. You can purchase them at the appropriate store or try to create them yourself.
Preventing clogging
During use, the channels or nozzles for supplying the combustible mixture may become clogged.
To prevent this from happening, it is important to follow these recommendations:
- Use gasoline with the lowest octane number.
- Each use of the burner must be completed by thoroughly cleaning the device.
- Once a month, add high-quality injector additives to gasoline.
- Systematically clean the system with carburetor cleaner. Such products fight very well against various deposits in fuel channels and jets.
DIY burner for jewelry work - Metals, equipment, instructions
Among the most useful and functional devices for the home workshop, a gasoline soldering torch occupies one of the leading places.
Such a device is capable of qualitatively connecting all kinds of metal structures using liquid metal technology.
The device operates on the basis of a gasoline-air combustible mixture, which is formed in the burner, and allows further smelting work to be carried out.
The rotary tap located on the handle acts as a regulator of the direction and power of the flame, which significantly simplifies the combustion process.
Today, metal smelting is carried out using two types of solders:
- Low-melting.
- Refractory.
If when working with low-melting metals almost all existing types of soldering irons are used, then in the case of refractory metals it is necessary to create maximum temperature indicators.
In this case, you simply cannot do without using a burner.
Currently, there are several varieties of such a universal device that can operate on the basis of different fuel mixtures, but at the same time heat the structure to the required temperature.
Among the most common and convenient torches are models for soldering and welding, which operate on gas or a gas-air mixture. You can purchase them at the appropriate store or try to create them yourself.
Homemade burner: description and characteristics of the device
If we talk about the burner design, it includes the following components and elements:
- The burner itself.
- Nozzle.
- Conductive tip with electrode wire.
- Welding arc.
- Welding pool.
- Weld.
- Base metal.
- Drops of electrode metal.
- Gas protection.
A simplified version includes a gasoline tank or fuel tank, an air compressor, gasoline hoses and the burner itself, which, in turn, consists of individual parts.
Models that are used for soldering metals have the following structural elements:
- Body.
- Metal sleeve with hook.
- With a pipe.
- In a bunch.
- With emphasis.
- Filler.
- A control ball (designed to change the air flow).
- Rubber sealing ring.
If you are going to purchase a torch for soldering and welding, do not forget to pay attention to the presence of gas-resistant hoses. In most cases, they are not included in the basic kit, so there is a need for additional purchase of such parts
The design of gasoline and gas burners is very simple, so you can make the design at home using improvised materials. However, despite the ease of assembly and the absence of complications in the configuration of the device, the gasoline burner remains a very valuable tool, which is characterized by many undeniable advantages.
- Firstly, such a solution is lightweight and compact in size, which makes it very convenient for further use.
- Secondly, the creation of a gasoline-air mixture allows you to create and maintain a high temperature regime, which is necessary to achieve maximum quality of the final result.
Making a gasoline burner with your own hands
Not everyone can purchase a new burner that runs on gas or a fuel-air mixture, which is due to the relative high cost of the device. And the purchased model does not always cope with the assigned tasks, especially if it has already been used. This may be due to the presence of hidden defects or breakdowns.
To avoid becoming a victim of such an unwise purchase, many men prefer homemade solutions, which are particularly affordable and easy to assemble. As mentioned earlier, even the most inexperienced welder can easily install such a device using improvised means, saving himself from high costs.
If a homemade gasoline burner is made taking into account the basic rules and recommendations, it should produce fire immediately after a lit match is brought to it. In this case, stable and steady combustion of the fuel-air mixture will be noticeable for another 3-7 minutes.
Buy or make a burner yourself
Buying a gasoline burner in a store is the easiest option. Understanding which model is best for you is quite a difficult task, because everything depends on the design features.
Factory-made burners are extremely expensive, and for their stable operation you need to buy only high-quality fuel.
- Creating a BG yourself has certain advantages.
- Firstly, you can refuel such burners with the most affordable fuel, and secondly, you can create a drawing of a gasoline burner and make exactly the device you wanted.
- And thirdly, you can install accessible consumables that you can quickly change while using the burners.
We are confident that this article will help you create a homemade gasoline burner. We wish you good luck!