Drilling is one of the important stages of furniture manufacturing, requiring accuracy and utmost care. In production, to facilitate the marking process, they use additive machines and special furniture templates (gearboxes). At home, you will have to be content with a tape measure, a square and a marker to mark the locations of future holes for a certain type of fastener. Each type of fastener requires specific drills for furniture making . In some cases, you can limit yourself to the minimum set. For example, if your goal is to make a simple shelving rack with your own hands, then you can get by with a set of two ordinary drills with a diameter of 5 mm and 8 mm, which any “home” craftsman will probably have - in combination they completely replace a specific drill for confirmations. But if the goal is to implement a larger-scale project, you will need other drills for making furniture.
Drills for confirmation (euroscrew)
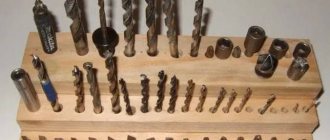
The specific shape of the confirmat drill, with a characteristic expansion from a diameter of 5 mm to a diameter of 8 mm, allows you to make two holes at once in one go, for the narrow and wide part of the Euroscrew with a countersink for the head. “work” with this type of drill with both frontal and horizontal parts, drilling the end of furniture panels and front parts. It is important not to confuse the “face” with the “wrong side” during the process - otherwise, it will be difficult to hide untidy chips instead of a neat countersink into which the confirmation cap will “sink.”
Features and advantages of the fastener
This screw has several names: furniture euro screw, euro screw, euro screw. It is also called confirmat by analogy with the German trademark of the same name. It would be more correct to use the term “single-element screed,” but it is inconvenient and rarely used.
What are furniture confirmations, advantages and disadvantages
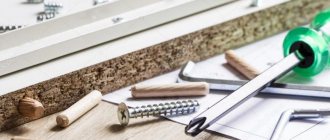
A confirmat is a screw that has a head with slots for a tetrahedron, hexagon or figured screwdriver . The conical shape of the rod and sharp serrations on the end make it possible to easily cut threads in prepared holes. A smooth surface is provided under the head.
Furniture euroscrews have a number of advantages:
- high speed of parts fastening;
- reliability of connection of various materials;
- low cost;
- the ability to disassemble assembled furniture without damaging the holes;
- ease of assembly without the use of special tools.
There are minor disadvantages:
- the need to hide the heads using plugs or overlays;
- impossibility of assembling and disassembling a piece of furniture more than 3-4 times.
Euroscrews are often compared to ordinary self-tapping screws. This is not entirely correct, since there are certain differences in working with them. Drilling preliminary holes for Euroscrews takes a lot of time, but this small drawback is more than compensated for by the durable clamping of the parts. Self-tapping screws tighten faster.
The design of the confirmat ensures reliable fastening even of porous materials.
Scope of application
The use of Euroscrew is directly related to the manufacture and assembly of furniture and carpentry. Simplicity, reliability and high speed when working using familiar tools made this confirmation a leader among analogues . It is necessary to distinguish several areas of work where this fastening element is widely used:
- production of furniture in production;
- repair;
- making cabinet interior items with your own hands;
- assembly of finished products.
The design features of the European furniture screw allow it to be used with materials of different compositions:
- wooden sheets and boards;
- chipboard;
- laminated chipboard;
- Fiberboard;
- plywood.
Before starting furniture manufacturing or assembly, the craftsman should take care of purchasing plugs. They completely cover the caps and give the product a finished look. There are two types of plugs: self-adhesive and plastic. Both can be matched to the color of the furniture. Due to convenience, self-adhesive options are more used. The cost of the plugs is almost the same.
laminated chipboard
Tree
Fiberboard
Repair
Industrial furniture assembly
Manufacturing of cabinet objects
Making furniture yourself
Wood style plugs
Dimensions and materials of manufacture
When determining the size of euroscrews for furniture, two main parameters are taken into account: the width of the hardware along the edge of the thread, the length. They are indicated by corresponding numbers. The most popular sizes include the following:
- 5 x 40;
- 5 x 50;
- 6 x 50;
- 6.3 x 40;
- 6.3 x 50;
- 7 x 40;
- 7 x 50;
- 7 x 70.
Types of cabinet fittings, the best manufacturers
The range of hardware is not limited to this list. There are even such unusual sizes as 6.3 x 13, 4 x 13. The choice of products depends on the parameters of the workpieces and the material from which they are made. More often than others, Euroscrews with a length of 50 to 70 mm and a thread diameter of 7 mm are used. The dimensions of the screw are critical in determining its cost.
Using euroscrews without taking their parameters into account inevitably leads to problems. You can easily ruin a large part by choosing the wrong hardware. Taking into account the thread diameter is especially important. Thick fasteners tear soft materials, this often happens when working with chipboard. The length should ensure reliable fastening of the end part.
Purpose of furniture legs, classification of fittings
Furniture euroscrew is made from high quality carbon steel. Thanks to this, it does not break under heavy loads. To protect the surface from corrosion, brass, nickel are used, and galvanized products are more common.
Popular sizes
Installation nuances
Euroscrews are quite simple and easy to use, but basic skills in furniture assembly are required. Inept actions when drilling can ruin the workpiece. Not everyone can choose the correct drill diameter or determine by eye the perpendicularity of the tool during operation. A slight deviation will cause the hole to come out.
For drilling, nozzles of different diameters are usually used to make three holes: for thread, head and countersunk. The use of several tools is justified only when performing small-scale work. Professional furniture makers use a special drill with a step cutter, which is capable of performing all three operations simultaneously. When removing the tool, minor chips are possible, which are easily covered by the wide cap.
To speed up installation work, high-speed power tools are required. Drilling at high speeds is especially important to keep chips from getting into the holes. Furniture parts are mainly attached at an angle of 90 degrees. First you need to make a hole in the plane of one part, and then in the end of the other. After this, a screwdriver is used, although it is better for beginners to use hand tools at first.
When working, it is important to install the parts perfectly evenly, avoiding displacement.
Incorrectly combined parts spoil the aesthetic perception of a piece of furniture and disrupt the functions of moving elements. To avoid such troubles, you should pay attention to some nuances:
- Having prepared the hole for the euroscrew, you do not need to completely tighten it the first time. It is better to stop at the level of the head entering the part, adjust the workpiece, press firmly and tighten the tie.
- When working with loose or porous materials, it is recommended to apply glue to the threads.
- In pieces of furniture that have drawers, you should not completely tighten the sides without checking the operation of the moving parts.
For a more reliable screed, you need to use the marking method. In production conditions, special machines do this. For an amateur, it is enough to have a few simple things: a marker, a square, a tape measure, an awl. Make marks last so that the drill does not slip on a smooth surface. They are placed approximately 50 mm from the edge.
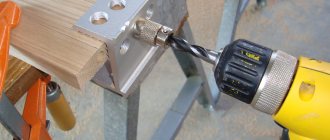
It is convenient to make markings using special templates (conductors) . These are blanks with ready-made holes that are superimposed on the parts so as not to have to measure the same distances again. Templates can be made with your own hands or purchased.
Step-by-step installation work can be shown using the example of assembling a drawer for a closet or bedside table. Four chipboard boards are taken as blanks. Installation proceeds as follows:
- First you need to carefully examine the details of the future box. The ends connecting to the plane of the board should not have a decorative layer. It would be a good idea to check for chips and scratches on the front sides of the workpieces so that the damaged parts do not end up on the outside. Having decided on the correct arrangement of the boards, you need to connect them.
- To achieve perfectly even joints, it is advisable to use special clamps. The fastening of this device should not be rigid, as this may damage the edges. Corners must be clamped and aligned separately.
- The hole for the euroscrew must be made using a drill. It should go through the middle of the end board strictly perpendicularly. The drill at the base is wider in diameter, to accommodate the thicker part of the screw without thread.
- Using a screwdriver with a hexagonal bit, install the confirmat. It is not advisable to tighten the hardware all the way with an electric tool; it is safer to do it manually. The hat should be recessed a little.
Using this fastening method, you can assemble and install furniture yourself. This will save money in the family budget. Russians have always been distinguished by their ingenuity and skill in making products with their own hands. Now that people have the opportunity to use such universal fastening material in their work, there are even more people who like to make their own furniture. Moreover, many companies provide services for the production of blanks to specified sizes. All that remains is to order and assemble the product to your liking.
Euroscrew installation
Marking using a template (jig) It is important to choose the correct diameter of the step drill
Hole drilling pattern
Connecting parts
