The Sergey BUKata channel continues to produce bedside tables. Next up are the drawer fronts. We prepare alder planks from which frames will be made. In the author's video, Sergei Bukata talked about the filler machine, which he made with his own hands.
I processed the blanks in a surface planer and started burring. I sawed off one side at random, and the other according to the established size. When it came time to assemble these frames, the master’s patience ran out! For many years he has been using the Hoffman Swallow fastening system, and each time he builds some kind of device for this purpose. Then they get lost somewhere, and every time the rigmarole is repeated.
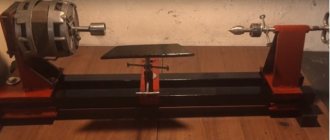
This time I decided not to make temporary devices, but to build a special additive machine. I took the machine as a basis. Buying such a machine is quite expensive, but making it yourself is quite possible. To begin with, I went with an audit of my bottom ends to select, more or less, natural details. In the end, something worked out. Various machines are sold in this Chinese store.
We invite you to see how it was! There is a small warehouse where various components and parts have accumulated over many years, both from machine tools and from other mechanisms. If desired, it is quite possible to select the necessary components there to make a primitive machine. In a short time we managed to select some details. Once upon a time there was a Soviet chain chiseling machine that was used to make sockets for a tenon. Then it burned out, meaning the electric motor, and after that it was no longer restored. But the racks and the platform along which its mechanism moved remained, and I decided to use them to make the machine.
I decided to use a Fiolent router to rotate the cutter. To fix the workpieces, we managed to select a pneumatic cylinder from an edge banding machine. In order to fix the router and the clamp, it was necessary to make two movable platforms, which is what I did. Having selected a pipe of the required diameter, I trimmed it and drilled holes according to the diameter of the “stolnik”. Then I cut the pipe into pieces of the required length. Take a closer look at the grip of the grinder - as it turns out, I have been using this tool incorrectly all my life! From the point of view of many masters, it should be held in reverse. And it’s not even clear whether to relearn it or continue to use it the way I’ve been doing it all my life! I cut out a plate of the required size from three-millimeter metal and welded this plate to the tubes. It turned out to be a moving platform!
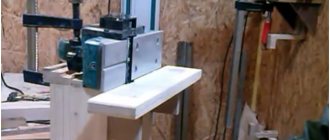
I made markings to drill the hole. I clamped the part in a vice and drilled a hole with a drill with a diameter of 24 mm. Then I marked and made holes for attaching the cutter. Thanks to this method of fastening, I was able to adjust the cutter left and right. This will be needed when setting up the machine. Watch from 5 min. video about a do-it-yourself additive machine, which is successfully used by the author of the idea for making furniture.
Together with the Sergey BUKata channel, we continue to manufacture a machine for conveniently adding keys. To attach the stops, an aluminum C-shaped profile was needed. There was an old Soviet curtain rod in stock. It made two great profiles. I decided to make a table for fixing workpieces from a kitchen countertop, so that the geometry of the mating planes was absolute, and asked to process this slab on a machining center. Considering that future mating parts are processed in mirror images, accuracy is important.
This Chinese store is a haven for woodworkers.
CNC machines are useful not for creating some decorations, but for producing precise parts. Whether there is soul in such details or there is none, it is absolutely the same for the designer. To manufacture the stops, 10 mm thick structural plastic was used. It is good because it has sufficient hardness and inertness to the effects of temperature and humidity. Using a finger cutter with a bearing, I separated the parts from each other. I bought 2 metal meter rulers and cut off sections from 70 to 100mm. I received the two required lengths to install the stop. At the same time, the rulers remained suitable in sizes from 1 to 70 mm.
I applied contact glue to the pre-milled grooves and fixed the ruler pieces on the table. The graduation in millimeters starts from the center of the table. The central stop is seated under two pins that will move in the groove. The task is to make them. Using screws, we attach the pins to the stop and check their functionality. We fix the screw in the center of the groove so that the stop can be fixed.
Next we screw the stops onto the end of the plate. There will be a small space between them for the cutter to pass through. This is how the setup will take place. Using T-bolts, I attached the corner stops to the profile. They are quite easy to fix to a given size. I selected a suitable table to install a machine on it that will eliminate the routine work of adding keys. I screwed 20 mm plywood onto this frame and selected the height for the platform through testing. Then I made compensators of the required thickness. I fixed this entire structure on the platform of the additive machine.
On one of the stands there is a clamp with which the overhang of the cutter is adjusted. We lower the platform with the pneumatic clamp to the required height to ensure sufficient fixation of the workpiece. To prevent the clamp from deforming the workpieces, I screwed a rubber sole underneath. Continuation from 5 minutes in the video about a homemade high-quality machine for practical dowel addition.
Frame facades in exclusive furniture
What does everyone see when entering a room or kitchen where cabinet furniture is installed? The eye first stops at the doors and drawers. Furniture makers call these elements furniture facades.
They are made using different technologies. They use solid wood, MDF boards, as well as special MDF profiles coated with laminating films. When making exclusive furniture, developers like to combine it with façade design.
Using MDF profiles, you can select different wood textures. They are modeled by a film that is hot-glued. Internal filling is performed using different types of fillers:
- Plates made of laminated chipboard with a thickness of 8-10 mm - they are cut to the size formed by the internal contour of the grooves obtained after connecting the frame elements.
- MDF boards covered with films of various types - they also fill the grooves milled inside the profiles.
- Glass – usually reinforced with various types of glass films are used. In addition to transparent films, they are used in different shades and with patterns. Glazed fronts look great in bookcases, wardrobes and kitchen cabinets.
- Mirrors are used to create the effect of expanding space, as well as for practical use to look at yourself.
- Rattan panels decorate any facade; such material gives any furniture a solid look.
This is interesting: Creating cabinet furniture with your own hands, from choosing materials to assembly
Manufacturing stages
Frame
First I assembled the frame from blocks. In fact, there is nothing complicated here - the design is as simple as felt boots. At first, it was used as a stand for unraveling sheets manually using the same circular saw. We also waited for the components to arrive and for free time to assemble.
The frame must be attached to the floor and wall. Otherwise, you can be tormented with its geometry later.
Mechanics
The vertical format machine is convenient because you don’t need to make a lot of effort to hold the saw itself, since the carriage with the saw (which moves up and down) is balanced with a counterweight through a cable.
The carriage with a circular drive rides on solid polished 20 mm shafts
The cable goes through 2 rollers installed in a box above the entire structure. I made the rollers myself from a 20 mm thick polypropylene sheet. The rollers are mounted on a bronze bushing, which rotates on polished 8 mm shafts. Its advantage is that there are no bearing balls, so it is not afraid of sawdust. But if I were assembling it now, I would buy a ready-made roller block. Under load, the roller still creates decent resistance to movement, so you have to apply a little more force to move the carriage.
The cable goes through two homemade polypropylene rollers to the counterweight
The entire structure with the blocks had to be tightly screwed to the wall, because it carries a large load (the weight of the carriage with the circular saw, the effort of the machine operator and the weight of the counterweight).
The counterweight moves along its shafts. It's a small plywood box that looks like a mailbox to me.
Counterweight - a box with a load (metal scraps)
As the counterweights themselves, I used scraps of pieces of iron that were lying idle. These are pieces of shafts of short length that will no longer be used. I wrapped small bundles with stretch and tape. This makes it easier to select the appropriate weight needed for the counterweight.
A weight is a set of bundles made from production scraps
There is no load on the shafts themselves - the shafts essentially simply direct the movement of my counterweight. Therefore, I used fairly thin shafts with a diameter of 10 mm. On the cargo box itself, bushings are made of sheet high-molecular polypropylene (in terms of the coefficient of sliding friction, it is quite close to the caprolon from which bearings are made). Here I also did not use linear bearings with balls, since they easily become clogged with dust and then crunch a lot and do not roll well.
Bushings made of high molecular weight polypropylene with a low coefficient of friction. This is not a bearing - there is nothing to break or become clogged
The 20 mm drive shafts are mounted on plywood stands. I had 20mm scraps. I milled them on a CNC machine. The holes for the shafts are not through - they are just recesses into which the shafts are inserted.
Adjustment right-left and back-and-forth helps align the shafts vertically to the desired plywood thickness
These shaft mounts in the upper and lower parts of the formatter are attached to the bars with M10 bolts and nuts. I made the holes not round so that it would be possible to adjust the distance between the surface for sheets and the carriage. I also made cuts in the bars for adjustment (I don’t have a hand router as it is unnecessary, so I had to bore the holes with a drill on a drilling machine - it didn’t turn out very nicely, but they perform their function).
Using these holes, you can move the upper and lower shaft support to the right or left. This helps to set the cut strictly vertically. As it turned out, this was the right decision, since the first test cuts were not at 90 degrees. A little adjustment helped achieve the perfect saw.
The carriage with the circular is just a sheet of 10 mm plywood. The shafts slide in homemade bushings made of the same high molecular weight polypropylene 20 mm thick.
Sleeve made of high molecular weight polypropylene. Ball bearings are not suitable, otherwise they will clog instantly
There are 4 holes in the base of the circular saw, through which the circular saw is attached to the carriage with M5 screws with hex cylinders. Tightening with a hexagon allows you to tighten the screws much stronger than with a simple screwdriver and does not strip the threads. There are holes made in the carriage into which the busols are screwed (another name is “formattka”) - this is a furniture nut with external and internal threads. The external thread allows the busola to be screwed into wood, while the internal thread allows ordinary screws or bolts to be screwed into it. This way we can quickly screw and unscrew the circular saw if we need it as a hand tool (this has already come in handy more than once).
The circular saw base is screwed to the carriage
The bead nut is screwed with a hexagon into a wooden surface
Busola nuts are driven into the carriage. So the circular can be quickly removed at any time
Everything is tightened with a hexagon, so it holds tightly and does not break the thread
A cut was made in the plywood of the carriage close to the disk. This allows you to avoid chipping when sawing if the material is pressed against the carriage sheet from below.
Electrics
It quickly became clear that using the standard button on the circular saw is very inconvenient - you need to press two buttons at the same time for the saw to turn on. Considering that we turned the saw upside down, it became very unergonomic. Again, as soon as you release one of the buttons, the saw stops.
A relay is hidden in the HDPE pipe above the push-button post
Therefore, we decided to connect a simple push-button post. This is a simple box with two buttons, On and Off, that can be seen on most types of stationary (non-handheld) equipment. The convenience is that once turned on, the engine will not stop until you press the Off button. Yes, it’s elementary simple, but in fact it’s very convenient - your hands remain free.
When connecting, however, it became clear that the post alone was not enough - it needed to be connected to a magnetic switch so that the on position was fixed and turned off when the second button was pressed. A magnetic switch costs more than 1 tr. The toad was crushed by paying so much just for a button. Moreover, the magnet is important on powerful equipment, and here we have only 1 kW. We found another simple solution - connect the post to the relay for 200 rubles. You can search for the connection diagram on the Internet.
Relay for fixing the position of the buttons of the push-button post I brought the voltage to the socket, since I did not want to bite off the fork from the circular saw (as I said, I sometimes need it as a hand tool). I hid the relay and wires in a piece of sewer pipe. I filled the ends with hot glue to prevent a lot of dust from getting in there.
I secured the circular saw button with plastic zip ties.
In order not to hold the two start buttons on the circulars with your hands, they were secured with clamps in the pressed state
Cutting cabinet furniture blanks
As a rule, fiberboard or chipboard sheets are used as the material. To get ready-made designs, for example, for a cabinet or computer desk, you need to cut a blank of a predetermined size and shape. Cutting chipboard sheets is best done on a format cutting machine.
This equipment allows you to make both longitudinal and transverse cuts, and thanks to the presence of two disks - the main cutting disk and the small scoring disk - it is possible to obtain a smooth, jagged edge the first time. You can also make cuts at the required angle and make beveled edges on a sawing machine. When choosing a machine for furniture production, pay attention to the maximum cutting length: for different models it can range from 1400 to 3000 mm or more.
| Recommended machines: | Functional |
| Format saw Minimax S315 Elite SMI04.02.22 | maximum cutting length (3260 mm) |
| Sliding machine HighPoint SS 1500 | high efficiency with small dimensions |
| Slitting machine HighPoint SL 3200DIGIT | the most powerful (8250 W), high processing accuracy |
Types of machines
All types of format-cutting machines are professional woodworking equipment, differing in both production capacity and design features. The accuracy and high quality of their work is ensured by the complex design of the units, the professional adjustment and calibration of which guarantees high profitability.
Classification by production capacity
Different types of formatters differ not only in technical characteristics, but also in production capacity. According to this parameter, the machines can belong to both economy and business class.
Small-sized economy-class format-cutting machines have a minimal set of additional equipment and are characterized by a simple design. They are used where the duration of continuous operation does not exceed 5 hours/day.
Business class formatters are used in workshops where the duration of their daily operation does not exceed 10 hours. Machines in this category are usually equipped with a movable table and are equipped with a minimum functional set.
Almost all format manufacturers also produce top models designed for use in large-scale or mass production. Structurally, they are large-sized automatic centers for batch cutting, equipped with CNC systems with the ability to perform pre-programmed operations.
Constructive classification
According to their layout, format cutting machines are:
- horizontal;
- vertical.
Enterprises produce horizontally oriented machines of two types:
- with movable saw;
- with a moving table.
Machines with a horizontal movable saw are designed for work in small production workshops. They are equipped with a movable carriage with a circular saw, and the horizontally mounted table is fixed permanently.
For formatters with a moving table, the saw is mounted motionless on the bed, and the table with the workpiece attached to it is slid onto the saw. The table moves on special rollers using an electric drive or manually.
The overall dimensions of vertical FRSs are significantly smaller than horizontal ones. This is due to the fact that the processed materials are arranged vertically. In turn, this makes it possible to easily cut large-sized sheet and slab materials, even in cramped conditions of small production areas.
In such machines, the workpiece is fixedly fixed, and the sawing device is moved manually or using an electromechanical drive.
Purpose and types of equipment
The main purpose of an aggregate-type drilling mechanism is the precise placement of holes on the workpiece, on which the quality of the final product depends. The filler machine helps to accurately distribute the holes and maintain their dimensional parameters, since any deviation from the drawing makes assembly of the product impossible. The positive qualities of the device include the ability to simultaneously perform drilling, countersinking and counterbore; the tools are fixed in a fixing head on several spindles.
According to the design features, the furniture additive machine is available in several models:
- Universal.
- Special.
- Specialized.
The design of the universal technical device is intended for the complete processing of a through or blind hole, starting from removing the round “plug” and ending with processing the cut site with a milling cutter or turning knife. The multifunctional device is intended for use in mass production enterprises. Compact versions of universal machines can be used in a private workshop.
Universal device
Universal drilling and adding machines are equipped with an automatic control system, can simultaneously process several points and perform a range of operations. This category is considered a more cost-effective option for special equipment; it does not require moving the processed material manually or along a conveyor to narrow-profile operating units, and does not require an expanded staff of service personnel.
Special mechanisms
Functional mechanisms for special purposes are created for processing workpieces made of a specific material. Types of equipment differ in design features and set of functions of traverses or spindles; the category of devices is determined by the model:
- Semi-automatic.
- Positional.
- CNC.
- Looped.
Making shaped parts and grooves
To process chipboard you may need a milling and copying machine . It is used to make shaped grooves on the surface of workpieces, for example, in the manufacture of cabinet doors. The difference between this equipment and a conventional milling machine is the presence of a synchronized probe and cutter, thanks to which you can transfer the workpiece model to the machine and create a whole series of parts of the same shape and size.
When choosing, pay attention to the maximum spindle speed ; this value can range from 18,000 to 20,000 rpm. (the higher this indicator, the cleaner the cut). Also consider the size of the workbench , because it determines how large workpieces can be placed.
| Recommended machines: | Functional |
| Milling and copying machine HighPoint R 600 | high power (4000 W), high cutter speed |
| Milling and copying machine HighPoint R 600T | tilting work table (600x900 mm), two cutter rotation speeds |
Finishing the edges of workpieces
After cutting the workpieces, you need to process the edges, because no matter how clean the cut is, for a more aesthetic appearance they are covered with a special facing tape (made of wood material or PVC). How long the product will retain its original appearance depends on the quality of the tape.
To glue the tape to the edge, use an edge banding machine: the workpiece is placed on the machine’s work table, the tape is pressed with a special roller and heated by a heat gun, which is built into the machine. Using guides, the tape is pulled out of the roll and fed to the gluing site. In order for it to stick securely, the size of the roller needs to match the width of the edge. Therefore, when choosing equipment for making furniture , take into account the maximum edge width, which can range from 40 to 70 mm for different models.
The following types of machines exist:
- With manual feed - suitable for applying facing tape to curved edges of parts, for example, the Jet JEB-1 708000M machine. The tape is fed manually by the operator. To trim unnecessary material, use an additional machine equipped with cutters for cutting overhangs, for example, HighPoint BT-T.
- With automatic feeding – designed for gluing tape onto workpieces with straight ends. The tape is fed when the operator presses the foot pedal, while both hands are free, which allows him to hold the workpiece for more accurate gluing (RAUTEK WT91ST F0008169). Such machines for furniture production perform one more operation - trimming the overhangs of the tape, therefore reducing the time for processing the part. Of course, price is higher than their manually fed counterparts.
| Recommended machines: | Functional |
| Edge banding machine Jet JEB-1 708000M | combination of simplicity and functionality |
| Edge banding machine HighPoint BT-T | removes excess glued edge |
This is interesting: What modern furniture is made of, an overview of the main materials
Creating a homemade machine
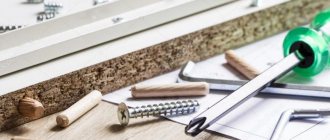
Using the most ordinary drill, today it is even possible to build an additive with your own hands. To do this you will need materials and tools:
- drill stand (it can have any design and be produced by any manufacturer);
- several bolts with wing nuts;
- ordinary self-tapping screws;
- a sheet of plywood of suitable thickness.
The manufacturing process of such a device is carried out in the following order:
- First you need to cut the base of the required size from a prepared sheet of plywood (20x40 cm);
- Now, on the left in the corner, you need to make a hole, there will be a fixing bolt, and on the right you need a groove to install the second hole. Using it, it will be possible to change the height;
- Next, using self-tapping screws, you need to mount a stand for the drill on the base. After this we make a hole for the drill. The device is ready.
It is advisable to install such a unit so that the base is horizontal. This will avoid movement of the workpieces.
It’s worth knowing: the biggest disadvantage of DIY designs is that they allow you to use only one drill, and to create holes you must first apply all the markings yourself.
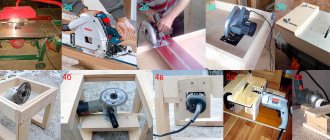
In general, building such a machine yourself is not so difficult. In addition, detailed instructions on the progress of work can be viewed in the video on the Internet and on our website:
See inaccuracies, incomplete or incorrect information? Do you know how to make an article better?
Communities › DIY › Blog › Tools for assembling furniture (personal experience).
In yesterday's topic about building cabinets, a lot of people asked to tell us what tools my friend and I used to assemble the furniture.
I believe that professionals will not be interested in this, and many will even say that they could have made the templates themselves and not spent money. It is possible, but without experience, it is difficult and time-consuming. We took the fast, but costly, route - we bought ready-made ones. However, I am very grateful to everyone who sent me drawings of their templates - it really helped me understand the topic and understand what's what.
In general, as I understand it, two approaches are used to connect chipboard using confirmations: 1) Templates for drilling end and front holes. They can be in the form of rulers (like Cheron) and in the form of drums. They can also consist of entire systems that are attached to a sheet of chipboard. But the general idea is that each sheet is drilled out one at a time. Perhaps you can save time and use another method. 2) Clamps for fixing chipboard sheets at the desired angle (usually 90 degrees) and a confirmatory drill. The advantage of this option is that in one pass we get both holes at once and can immediately tighten the confirmation. It would seem that everything is easy and simple, but now try to combine panels with a length of 2600 and 1200 mm at an angle in an apartment. Hard? running away? yes, and not alone at all (not like in the first option).
Let's summarize the pros and cons of each option. Templates/conductors: + Easy to use. + you can work alone. + no need to worry about the centering of the drill - as a rule, templates/jigs have steel inserts that allow you to drill directly through them. - You will need several pieces to work. - expensive (if you buy). — you need to have either drawings or well-developed spatial thinking, since each part is drilled separately.
Clamps and confirmation drill: + Quick and easy to use. + in one “pass” we get ready-made holes in two parts at once. + inexpensive. — it’s hard to work alone, especially if the parts are large. - problem with drill alignment.
What to choose, everyone decides for themselves. But, most likely, you, like us, will compile both options into one =) For example, a confirmatory drill is very convenient for tackling “in place” large parts that have already been connected.
So, to assemble the furniture, we bought templates from Cheron (they have a website of the same name). Don’t take this as an advertisement, but they were able to competently present their product - they have videos on their website that help you get an idea of how to work with their products. Well, they were recommended during the drive. In the end we decided to buy them. And now I will tell you about them and how to work with them.
Let's start with the simplest thing - a template for furniture handles. I bought MSh-22 (96,128,160,192mm), but you can get something simpler and cheaper (there are 96 and 128 mm). In principle, you can do without it, but I repeat - there were a lot of parts, and assembly was carried out in the evenings. Those who prioritized saving time and facilitating working conditions. Working with this template is simple: mark the middle of the handle, apply MSh-22 and mark the mounting location with the required distance from the edge of the door (I took 40 mm).
The device of a homemade unit
A do-it-yourself machine must include the following components:
- Base (parallelepiped, a movement mechanism, a switch, a socket, a speed controller are attached inside, the body is mainly made of metal plates).
- Switch (allows you to turn the device on and off for operation).
- Drill holder (a metal structure of a certain diameter into which the drill is inserted).
- Move handle.
- Speed control knob (allows you to increase or decrease the speed of drilling holes).
- Stand (rectangle where the entire structure is attached).
- Column (connects the base of the instrument to the stand).
Filler machine diagram
The machine is not difficult to make. To do this, you don’t need to purchase special parts from the store, just an old tool that almost everyone has in their garage.
Design Features
In order to make a cutting machine with your own hands, you need to understand its design features. It should be noted that the standard design is represented by the following components:
- The bed is an element that serves as the basis for the entire structure. The frame is also designed to dampen some of the vibration.
- Working movable and fixed table.
- The saw unit, which consists of 2 saw blades, adjustable with a clamp.
Main equipment components
The movable table has a rather complex structure, which consists of a trolley, a support frame, a ruler, a separator, and a carriage. Almost all components are made of metal.
Saw unit
An important design element can be called the saw unit. A homemade version is often represented by a welded structure, since this method of connecting elements can effectively combat vibration that occurs during sawing. The main problem of the technological process under consideration is the formation of chips on the lining, which reduce the quality of the resulting material. That is why the saw unit has two saw blades, which eliminates the possibility of a problem.
The device of the saw unit
The features of the saw unit include:
- The assembly is solid, often cast from cast iron.
- Some models may have one electric motor, but often two are installed for each saw.
- A belt drive is used to drive the scoring disc. Note that the presence of a belt drive is a prerequisite for ensuring long-term operation of the electric motor, since this method of transmitting force allows you to smooth out the load exerted on the output shaft of the electric motor.
- The diameter of saw blades can reach 120 millimeters. They are made from tool steel, as it is more resistant to abrasion.
- The electric motor, through a belt drive with various pulleys, must provide up to 8000 rpm. Note that the higher the indicator, the better quality the surface can be obtained. However, increasing the frequency leads to a decrease in the feed rate and the emergence of structural problems due to the heavy load on the unit.
It is important to note that a self-made vertical format machine can have a rotating saw unit. It is quite difficult to make, it is necessary for cutting at an angle
Main saw
When developing a format cutting machine at home with your own drawings, you should take into account that the rotation of the main saw should be at a frequency of 4-6 thousand revolutions per minute. If the indicator decreases, there is a possibility of damage to the edge. If you use a modern electric motor when creating a structure, then it is possible to regulate the purity of rotation according to the characteristics of the material being processed. The power of the electric motor should vary from 3 to 5 kW. As the power rating increases, productivity increases significantly, but also costs due to the consumption of more electricity. The adjustment can also be made by selecting the belt drive pulleys, however, such a reconfiguration of the format-cutting machine requires some time and calculations.
In most models, the cutting height and saw position are adjusted by moving the entire saw unit. In this case, such adjustment can be achieved in two main ways:
- along vertical guides;
- due to rolling around a horizontal axis.
Another important parameter is the height to which the saw rises relative to the table, since this indicator determines the maximum thickness of the cut.
In many cases, a roller carriage is used to move the workpiece. The trolley moves along steel guides, for which a separator with balls or rollers is included in the design. Compensators and regulators can look different, it all depends on the accuracy and quality achieved during processing.
Furniture assembly
Usually this operation takes place outside the production workshop, directly at the installation site of the furniture. As practice shows, furniture often has to be assembled in places where it is difficult to connect the tool to the power supply, for example, when the sockets are too far away. To prevent the assembler from getting tangled in wires and extension cords, it is better to purchase a cordless screwdriver for the job, for example, Hitachi DS12DVF3 or Makita 6271DWAE.
| Recommended machines: | Functional |
| Cordless drill/driver Makita 6271DWAE | lightweight and compact tool |
| Hitachi DS12DVF3 cordless screwdriver | 22 torque levels |
Advantages of purchasing from the VseInstrumenty.ru online store
If you don’t yet know where to buy all the necessary equipment for furniture production , you can do it now in our online store. We offer machines from leading manufacturers: JET, PROMA, HighPoint and many others.
In addition, there are several other reasons why many entrepreneurs purchase equipment from us:
- Affordable prices for machines and tools for furniture making.
- A wide range of consumables and personal protective equipment that are always in stock.
- Possibility of purchasing on credit for residents of Moscow and St. Petersburg.
- Carrying out commissioning work by specialists from our Service Center.
- Warranty and post-warranty maintenance of equipment by Service Center specialists.
If you have any questions, call the manager at 8-800-333-83-28 . He will help you choose machines for the production of cabinet furniture , and also advise on issues of payment and delivery of goods. Don’t delay your purchase - order quality equipment right now and let any of your endeavors bring profit!
Chip removal
After the first launches, another unpleasant feature was revealed - when you start cutting the sheet from above, all the shavings fly in a beautiful fountain directly onto the operator’s head. Therefore, they quickly began to solve the issue of chip removal, while the operator had to wear a technical jacket with a hood and glasses.
By that time, it was time for us to purchase a chip extractor in order to extract dust from 2 CNC milling machines, a circular machine, a sanding area with a sander, and from the future format machine. Since there are a lot of devices, we took a Jet 2300 2.2 kW chip ejector with 2 bags for 35 tr (a similar one for 1 bag costs 25 tr).
Chip ejector, without which the worker’s head was constantly covered in sawdust from sawing
In principle, if I had only one format machine, I would attach a vacuum cleaner with a long hose to it. In this option, it makes more sense to choose a circular saw with a connection for the vacuum cleaner hose. It’s better to take a vacuum cleaner with a large bag and a built-in socket for hand tools (connect the formatter through it). Then, when you turn on the formatter, the vacuum cleaner will turn on automatically and also turn off after turning off the saw (I use a Karcher vacuum cleaner with fabric bags, but I would prefer a larger bag). But in my case, the choice in favor of a chip extractor was obvious - you can’t install a vacuum cleaner on every machine (the money will be the same, but it will be very noisy and there will be a large load on the network). I assembled air ducts under the ceiling from sewer pipes, taped them inside with aluminum tape to remove static, and routed them to all the machines.
This is not a sewer under the ceiling))), but air ducts for removing chips to the chip suction
In order not to have to run to the chip ejector every time to turn it on, the power button was taken out and hung from the ceiling in the middle of the room.
To connect it to the formatter, I made a small casing from the same plywood and a small casing from the air duct (bought at a hardware store), which fits over the circular. It fits tightly, so no fastenings were required. You can easily remove it at any time to change the disc. I admit, it looks collective farm, but I had no time for beauty - I needed to resolve the issue as quickly as possible, and there was no time for beauty. As usual, everything temporary becomes permanent. Maybe I'll change it somehow.
The nozzle was made by the collective farm in a hurry, but it was necessary to quickly resolve this issue
The nozzle fits elastically, so there was no need to come up with any fastenings
By the way, regarding changing the disk, my circular saw has a submersible design, that is, the disk can be pulled out completely without removing the circular saw from the machine. This again simplifies operation.
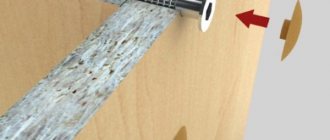
Requirements for drilling holes on a filler machine
- When creating holes on each of the mating surfaces, it is necessary to ensure that the centers coincide in a mirror manner.
- The depth of the holes should be 1-2 times greater than half the length of the dowel.
- The drilling direction must be performed at an angle of 90° with respect to the mating surfaces.
- Each subsequent detail must be completely repeatable.
Based on the presented requirements, a technical specification is created to create a simple machine for adding MDF profiles.
The simplest device for drilling holes in profiles
It is necessary to make a conductor (see drawing above). It has an angle of 45° between the two plates.
For production, strips with a thickness of 3-4 mm are used.
- Two holes are drilled in one of the plates; a drill will subsequently pass through them.
- The plates are welded at an angle of 45°.
- Guide bushings are turned on a lathe.
- The bushings are welded to the plate, positioning them using guides, ensuring an angle of 90°.
- The burrs are ground off, giving the product a finished look.
The best panel saws
Filato FL-3200B
Country of origin: Italy. The model is designed for longitudinal, transverse and angular cutting. It cuts sheet blanks of varying texture densities equally well. The metal frame of the machine is welded from rectangular pipes. It has increased strength and is resistant to deformation.
To dampen equipment vibration during operation, the body of the Filato FL-3200B is reinforced with steel sheets having a thickness of 3-4 mm. The cylindrical type guides are also made of steel. An aluminum carriage moves along them. The machine control buttons are located in the electronic unit, located in a convenient place for access.
Characteristics:
- overall dimensions – 3300x3100x900 mm;
- weight – 1050 kg;
maximum cutting height – 110 mm.
Advantages:
- the presence of an electronic display and an emergency stop button for the machine;
- reliability;
- durability;
- ease of maintenance and operation.
Flaws:
- high price;
- Difficulties in setting up the carriage.
Bosch GTS 10 XC
Country of origin: China. The model is equipped with a braking function, has a starting current limiter and an overload lock. Designed for small furniture production. The work table has retractable elements that allow you to cut large sheets of material of varying densities.
The design has a well-thought-out slab feeding system, which ensures accuracy and ease of cutting the material. Reliability of sheet fixation is ensured by a parallel stop. The maximum tilt angle is 47 degrees. The machine can produce clean and even longitudinal and transverse cuts. The machine can cut plastic and aluminum profiles.
Characteristics:
- overall dimensions – 635x343x768 mm;
- maximum cutting depth – 79 mm;
weight – 35 kg.
Advantages:
- smooth start;
- structural strength;
- reliability in operation;
- capacious corner stop;
- the presence of a dust collector and an adapter for connecting a vacuum cleaner;
- ease of setup and maintenance.
Flaws:
- the possibility of backlash;
- high price.
Holzmann TS 315VF-2000
Country of origin: Austria. The model is considered the best professional machine in its class. Designed for longitudinal and cross cutting of slabs. The design of the machine allows you to cut complex configurations from sheets. It features fast, accurate and neat cutting of material.
The machine is intended for equipping furniture and carpentry shops. Can cut chipboard, MDF, fiberboard, plywood, acrylic, composite and other materials. The aluminum carriage has high adjustment accuracy. The stops and marking rulers are made of the same material. The work table is made of vibration-damping cast iron. The body has a welded structure.
Characteristics:
- overall dimensions – 910x741x104 mm;
- maximum cutting depth – 100 mm;
weight – 263 kg.
Advantages:
- increased security;
- effective cleaning of the working area from dust and chips;
- fine adjustment;
- high quality cut.
Flaws:
- high price;
- Can only saw small slabs.
ZENITECH FR 1800
The country of development is Switzerland, the manufacturer is China. The model is designed for longitudinal, transverse and angular cuts. The machine is professional equipment. Equipped with a powerful three-phase motor. Provides high cutting accuracy. Can cut wood-based materials of various densities, as well as plastic and composite materials.
The desktop has a sliding structure made of cast iron. The frame is made of the same material. Despite the powerful engine, the machine is quiet in operation. The carriage is made of aluminum. The air cooling system prevents equipment from overheating during operation.
Characteristics:
- overall dimensions – 936x756x1040 mm;
- maximum cutting depth – 100 mm;
weight – 300 kg.
Advantages:
- high power;
- cutting accuracy;
- high quality cut.
Flaws:
- high price;
- You can only cut one slab.
Technology of using the device
- On parts with edges cut at an angle of 45°, fixtures are installed on both sides.
- A drill is installed on the drill, and a depth stop is installed using a thread.
- Fixing the profile and pressing the device, drill holes in the parts sequentially.
Using the simplest device, the required result was obtained. The parts are then quite simply connected into a rectangle.
Video: drilling attachment from a drill.
Multi-spindle drilling head
An additive machine of any type certainly contains this element.
The head consists of spindles installed in a row at equal intervals of 3.2 cm. This is a standard for furniture equipment that almost all manufacturers adhere to.
Differences are possible for special devices, for example, those that make holes for façade hinges. Drilling parameters depend on the characteristics of the hinges.
The movement from the electric motor comes through gears located inside the head. The head, depending on the number of spindles, can be equipped with a pair of electric motors. A similar scheme determines the rotation of the spindles in different directions. Therefore, drills with right and left screws can be used as executive bodies. Spindles rotating from the same motor are marked with the same color.
The spindle speed is maintained within 2700 rpm. Most often, multi-spindle heads contain 21 or 27 spindles. The gap between the outer drills in such devices is 64 and 83.2 cm. Drills with a diameter of 5 mm and 10 mm are easily inserted into chucks.
The head feed mechanism consists of a pneumatic drive and guides. You can adjust the drill feed rate along the axis using electronic sensors or stops; it varies from 4 to 9 cm and determines the depth of the holes in the workpiece.
Exploitation
We used the same principle in this design. The saw blade comes close to the carriage plate
The gap between the plywood of the carriage and the disk is minimal - this way we avoid large chips
The back side of the sheet will definitely have a perfect cut, but the front side may chip. The task is simple - the sheet that we will cut must be pressed against the sheet of the formatter carriage. We will cut plywood 4, 6 and 10 mm. Therefore, we set the gap between the plane of the inclined “table” of the formatter and the carriage itself to 20 mm, so that several sheets could be cut simultaneously (5 sheets of 4 mm, three sheets of 6 mm, or 2 sheets of 10 mm).
Therefore, when you need to saw off only one sheet, we place a piece of the required thickness under it.
The material must be pressed against the carriage sheet to prevent chipping. We use linings from scraps
Also on the inclined table I made markings and stops for standard plywood sizes for us.
Now the process of dissolving the plywood has noticeably accelerated, and the cut turned out to be very good
Homemade additive machine
Everything ingenious is simple! It would be even more ingenious to combine two drilling cycles into one pass, by slightly modifying the clamp-feeder of the vertical parts and using a single-pass drill for confirmations. Those. Place a vertical sheet, a horizontal one at the joint, and in one pass form a hole of two diameters and a countersink in the vertical sheet of chipboard + an end hole of the same diameter in the horizontal “colleague”!
Easy to make additive
Discussion
- Can drills be replaced with edge routers? There will be revolutions like an additive machine +/-. The machine turned out to be interesting, well done!
- The device is very good, but I wanted to ask: are the drills clamped normally from the additive, since they have a beveled edge?
- Yes they clamp normally. The beveled part needs to get between the clamping jaws of the drill chuck. There are three legs in the chuck and the beveled part of the drill base must be placed between two adjacent legs. And in the same way, I take a couple of filler drills with me for installation and clamp them into a screwdriver if I need to move the fasteners on site.
- There is a drawing, but it is not detailed. There the emphasis was more on the amount of material and the approximate appearance. And there is no assembly drawing with markings of mounting holes, etc. This was done on the fly.
Manufacturing
A homemade furniture additive machine is made using different elements:
- drill;
- asynchronous motor.
Making with a drill
To make an additive device from a drill, you need to prepare the necessary tools:
- drill stand (any material can be used and can have a different shape);
- bolts with wing nuts in their design;
- self-tapping screws;
- plywood sheet of the required thickness.
After all the elements have been prepared, the manufacture of the filler apparatus can begin:
- Make a base for the device from prepared plywood.
- Basically, a rectangle with sides of 20 and 40 cm is used.
- A hole is made in the left corner for the fixing bolt.
- In the right corner there is a groove for making a second hole, with the help of which you can adjust the height.
- Using self-tapping screws, a stand for the drill is made, then a hole is drilled for the drill itself.
It is better to install a homemade device in a horizontal position, this will prevent the movement of workpieces during operation.
Manufacturing with an asynchronous motor
If the farm does not have a drill, then you can make a drilling and attachment apparatus using any engine that was used in old equipment. The drive from a washing machine is best suited for this purpose. True, construction of this type is more complicated than using a drill, but the productivity will be higher.
The asynchronous motor is much heavier, so you will need to build a more powerful base, while placing it as close to the rack as possible.
It is important to maintain the correct distance, since the location of the drilling tool’s belt drive, with which it will be driven, depends on it.
To mount a drilling and adding machine with your own hands, you should prepare the equipment:
- gear;
- hexagon, a pulley will be put on it in the future;
- bearings;
- tubes, one must have an internal thread;
- clamping ring, it must be made of durable steel.
Bearings for machine
The machine is assembled with your own hands according to the following diagram:
- The hexagon is connected to a metal tube, bearing and clamping ring. The structure must have high strength.
- Creating a mechanism that will feed the tool. To do this, cuts are made on another metal tube and a gear is put on.
- Press the axle with a hexagon into the tube.
The operation of the drilling apparatus is due to the movement of the tube, which is carried out using cuts and the connection of gear teeth.
Radial drilling machine
The radial drilling machine differs from the previous one in that its spindle moves relative to the part.
A vertical drilling machine is characterized by the movement of the part itself along the spindle.
Radial equipment is universal; it can process large parts, products located below floor level, at an angle.
In addition to basic operations, it can be used for boring holes and lapping on valves, which will be highly accurate.
This type of machine can be installed permanently, portable or mobile, with a column designed for processing particularly heavy parts.
If this equipment breaks down, you can easily repair it yourself by purchasing spare parts for it.
What problems might arise and what spare parts can be purchased?
The friction clutch, spindle, feed box, etc. may fail.
It should be noted that the inspection of the device for damage begins with the spindle, after which other spare parts are checked.
Advantages and disadvantages
Homemade furniture machines, like any other tools, have advantages and disadvantages. The benefits include:
- ease of use;
- simple design does not require special skills when working;
- obtaining holes without defects;
- increase in productivity;
- relatively low cost of production;
- The equipment does not require much space to operate; a small area of the desktop is sufficient.
Drilling on a machine
Despite its positive aspects, homemade equipment has disadvantages:
- the ability to use only one type of drill;
- low speed during tool operation;
- there is no possibility of multifunctionality; processing requires the use of additional equipment;
- insufficiently automated device;
- You cannot switch modes.
The disadvantages of drilling devices are not noticeable when making furniture at home, since in this case it is not necessary to produce large volumes. The equipment ensures smooth holes, resulting in high-quality and durable furniture.
Making a furniture unit with your own hands is not difficult; you do not need to have special knowledge and skills. Everything is done from improvised means. The result is drilling equipment, which is indispensable when creating structures for your home yourself.
Related video: Homemade additive machine
Scope of use
You need DIY additives to drill neat and precise holes at specific points. There will be no torn wood fibers or any chips. High-quality equipment samples allow this process to be carried out as quickly as possible and almost completely eliminate the possibility of obtaining low-quality workpieces. When designing furniture, any of its parts are calculated so that they are in a place previously intended for them; any deviations make it difficult to assemble the finished product, and sometimes make it impossible.
The permissible error for this equipment is 0.4 mm at 64 cm.
What is
Several decades ago, wooden furniture elements were fixed to each other using tenon joints. However, during the period of widespread use of board materials, such as chipboard, MDF, there was a need to create a more reliable fastening method. The problem that arose was due to the need to mark a large number of holes to combine the elements. Without the use of a furniture additive machine, it is quite difficult to implement it - the time costs increase many times over. To ensure that all measurements are accurate, an additive card is installed in the device. This is a special drawing on which the points where the holes are supposed to be made are located in appropriate places.
Additive machines operate on an aggregate principle: many tools installed on one or several heads of the device operate simultaneously. The error of the device is about 0.5 millimeters.
Varieties
All furniture machines are divided into several groups in accordance with different characteristics and criteria:
- appointment;
- number of spindles and traverse;
- number of drilling heads.
Each type of device has certain characteristics. The choice of equipment depends on the needs of the master, furniture configuration and production volumes.
By purpose
All devices for furniture production can be divided into two large groups:
- Universal machines. They are used not only for creating holes, but also for their subsequent processing. In mass industry, this type of equipment is used, since it combines many capabilities at the same time. Instances of low productivity and small size are perfect for beginners in this craft.
- Specialized devices. They are mainly used on conveyors, so one machine is capable of processing several parts together. Can be easily customized for different use scenarios. Most of the filler devices fall into this category.
Features of the use of furniture polishes, popular brands
There are also special mechanisms that are used exclusively for processing workpieces of the same type. They cannot be reconfigured for other sizes and configurations.
Universal
Specialized
By number of spindles and traverse
According to this criterion, machines can be classified into:
- semi-automatic;
- positional;
- with programmable settings;
- additive mechanisms for hinges.
The most common are positioning machines, as they are easy to operate and reliable.
Semi-automatic
PositionalWith automatic settingsFor loops
By number of drill heads
A homemade furniture additive machine can have a different number of heads installed. Depending on this, the operating principle of the device changes significantly. Designs with a single head differ in that the workpiece must be clamped by pistons on a special table, and also correspond to the direction of the ruler. This was done to ensure that the part was positioned as needed. When the motor is turned on, the head moves towards the workpiece. Then the person, using the controls, releases the clamps and, if necessary, replaces one part with another. Due to the fact that the spindles move at an angle of 90°, high functionality of the installation is achieved. This makes it possible to select grooves and process beveled sides, which is why these devices are used in small companies with a low flow of parts.
Machines with multiple heads have different attachments: one for edge processing and several for drilling. A support is installed on the frame, which serves to fasten the part. The workpiece is placed on special strips and then clamped with clamps. When the engine is running, all heads work. Additionally, speed and position regulators are installed, which makes the equipment very expensive.
Drilling head is a rotating mechanism for fixing a tool (drill, countersink, etc.).
Single headMulti-spindle
Features of furniture additive machines, their types and use
If you are already engaged in or just want to start producing furniture, then you will certainly need a drilling and attachment machine. It will help you accurately drill the required holes with which the elements will be connected. If an additive machine for furniture produces parts according to pre-drawn drawings, then you will get a better result, the work will require less time and effort, and the manufactured furniture will be reliable and beautiful. Such a machine, of course, is expensive. This is a high-tech unit; it is not needed for one stool or table, but for small production it is extremely necessary.
You need DIY additives to drill neat and precise holes at specific points. There will be no torn wood fibers or any chips. High-quality equipment samples allow this process to be carried out as quickly as possible and almost completely eliminate the possibility of obtaining low-quality workpieces. When designing furniture, any of its parts are calculated so that they are in a place previously intended for them; any deviations make it difficult to assemble the finished product, and sometimes make it impossible.
The operation of the additive machine occurs according to the aggregate principle. This means that several similar devices mounted on the head operate simultaneously.
The permissible error for this equipment is 0.4 mm at 64 cm.
Types of models
On an additive machine, several similar tools simultaneously perform their functions - drilling units, countersinks, which are mounted in a head with several spindles.
According to purpose, this equipment is divided into:
- Universal furniture machines;
- Specialized equipment;
- Special mechanisms.
Universal equipment - designed for complete hole preparation, from drilling to full processing with other devices. They are often used in the serial production of furniture; they are capable of performing many functions. Small models with low energy consumption are suitable for beginner amateurs. Specialized devices - designed for conveyor processing of necessary parts. They are capable of processing a certain number of holes at the same time. Can be customized for different operations. Most of the additive equipment falls into this category. Special mechanisms are intended only for processing workpieces of a certain configuration. It is impossible to reconfigure them for other operations on your own.
The mechanisms are distinguished by the number of spindles and traverses:
- Drilling-filler and semi-automatic;
- Positional additives;
- Drilling and filler machines with programmable control;
- Additive mechanisms for hinges.
The best end result of using these mechanisms can only be obtained by understanding the features of its design and operation.
Special mechanisms
Universal
Specialized
Single head mechanisms
In such a machine, the workpiece is clamped with clamps on the tabletop in accordance with the indications of the guide ruler. In this way, the workpiece is positioned correctly relative to the tools. When the motor is running, the head moves towards the workpiece. The mechanism does its job, and the operator, using the remote control, releases the clamps and changes the workpiece.
The versatility of the installation is achieved by moving the spindles by 90 degrees. This feature is used for cutting grooves and processing beveled sides. Voids are created in the tabletop for moving drills at the bottom of the workpiece. Such equipment is successfully used in small organizations with a small flow of processed parts.
Multi-head mechanisms
Among the working tools of this equipment, various devices are used - all kinds of heads for drilling material, and one for finishing the edge of the workpiece. The frame has a support necessary for securing the workpiece in the desired position. The workpiece is placed on special strips and clamped with clamps. During engine operation, several heads operate simultaneously. This is expensive equipment; it additionally contains control mechanisms, speed adjustment and part position controllers.
Differences between machines with multiple spindles and machines with a single spindle:
- The position of the heads is controlled by an electronic device, for this reason the parts are processed with high precision, additional adjustments are carried out quickly;
- You can process 2 planes at once, the work is done with great accuracy and faster. For another run of several similar workpieces, there is no need to readjust the unit;
- Vertical heads can make holes at the required angle;
- Additionally, the support table has devices for replacing parts, which free a person from manual work. This equipment belongs to position-through installations. They are often used in conveyor furniture production. In this case, the machines process the part as it moves along the conveyor; this application significantly saves time and completely eliminates the need to do the work manually.
The bulk of industrial equipment belongs to this type.
Drill head
Every filler machine has an element called a drill head. It contains spindles located at equal distances. This is standard equipment for furniture making and is required by all filler machine manufacturers. Differences can only be found in units for special purposes, for example, in those that prepare holes for attaching façade hinges. Drilling characteristics may vary depending on the properties of the hinges.
The movement from the electric motor to the head is transmitted through gears that are located in the head. Depending on the number of spindles used, the head can be powered by 2 electric motors. This device is used to rotate spindles in opposite directions. In this case, you can use drills with both left and right cutting.
How to make it yourself
The disadvantages of small drilling mechanisms are practically invisible, because in this case there is no need to make many parts. And the simplest equipment can prepare precise and even holes, which allow you to make durable and high-quality furniture. Do-it-yourself furniture making machines have their advantages and disadvantages.
They are good because:
- The devices are easy to use;
- They have a simple design; you do not need special knowledge to operate and maintain them;
- You can make holes without obvious defects;
- If necessary, you can increase their productivity;
- Low cost;
- To install and operate the unit, you do not need a lot of space; a small part of the desktop is enough.
However, homemade machines also have disadvantages:
- During operation, only one cutting tool is used;
- Low performance;
- You cannot perform many operations; additional mechanisms are required to process different parts;
- No automation;
- It is not possible to enable different modes.
A reasonable question arises - what versions of a homemade additive mechanism can be, and how to make it. It is undoubtedly impossible to make this device at home using CNC, but it is possible to make a high-quality, albeit simple, furniture machine.
Photo enlarger as a machine
You can make a convenient homemade additive machine from an old household photo enlarger. Now this device is almost never used, for this reason its parts are often used for various homemade products.
The photo enlarger is used as the functional basis of the design. The most important thing is that it has a comfortable desktop, with a securely fastened vertical stand, which is equipped with a special mechanism. The casing is removed from the enlarger. Instead, an electric motor and a chuck for attaching the drill are attached. Most often, the motor is mounted on the enlarger carriage plate using clamps. You can use the motor from the mixer as an electric drive. For our purpose, its power is quite sufficient, it is small in size and is often equipped with a device for changing speeds. A chuck is attached to the motor axis, which can clamp drills up to 6 mm in diameter.
Such a machine for making furniture allows you to partially adjust it, changing the position of the vertical axis along which the chuck and the drill clamped in it move. And although it does not have the same characteristics as the factory models, it will cost almost nothing and will be able to perform simple tasks.
Making a machine from an electric drill
A homemade drilling machine can be made very quickly from a drill; you just need to select the appropriate parts. It is suitable for carpentry work; some craftsmen even connect CNC to it.
A piece of organic glass is prepared according to the required size; it will be needed for the manufacture of the base of the machine. Then stands and holes are made for the clamps that secure the engine. To make a productive machine, you will need a powerful electric drill. Using a drill makes it possible to abandon the search for a suitable cartridge.
But the most difficult thing in this design is to make a strong and reliable movable base. You can find a ready-made lifting table, or use a mobile support on which an electric drill is securely mounted. But a small problem appears - vibration, which will need to be eliminated.
The drill must be secured to the stand with mounting brackets. After this, you need to test the resulting design. We start the drill, switch it to the highest speed and make sure that there is no vibration; if there is any, you will need to strengthen the stand. After this, you can attach the lifting table.
Scheme
Preparing the table
Making a wooden support
Making a plastic stand
Fix the drill with clamps
We fasten the stand with self-tapping screws
Washing machine parts for additive machine
An asynchronous motor, removed from an old drum washing machine, allows you to make a more efficient machine than a device from an electric drill. Do not forget that the mass of a productive electric motor is higher than that of a drill. For this reason, you will have to think about making a solid base and a reliable stand.
The electric motor must be placed as close to the vertical stand as possible. And here a difficulty arises - the stand and engine, located nearby, reduces the size of the part that can be processed, for this reason you will have to move the cartridge further, and this will require a belt drive.
To make such a machine yourself you will need the following spare parts:
- Gear;
- Find 2 bearings of the same size;
- Specially machined shaft;
- Select 2 tubes into which the bearings fit tightly;
- Clamp ring.
A shaft is turned on a lathe, onto which the bearings and pulley are tightly fitted. The bearings are driven into a metal tube. Everything should be as tight as possible to prevent vibration. In the future, the manufacturing of the additive machine is carried out in the same way as the device from an electric drill.
Video
mblx.ru
How to make a machine with your own hands
A portable do-it-yourself furniture filler machine can be made at home from plywood, fasteners and a drill stand. Any metal structure is suitable as a rack; for the base you need a sheet of plywood or chipboard, self-tapping screws, bolts, wing nuts.
The initial stage of work is to prepare the wooden base. A hole is drilled in its left corner for the fixing bolt, and a groove is cut out in the right corner for the bolt that regulates the lifting height of the working elements of the machine. In the central part of the base you need to make a hole for the drill. Self-tapping screws are used as fasteners for drills.
Disadvantages of a homemade device
The main disadvantage of a homemade drilling and filler machine , which can be made from scrap materials, is the ability to use only one cutting tool and the need to mark holes manually. However, with low financial and material costs, a homemade furniture additive machine can serve for a long time, consumes little electrical energy, and does not pose a danger if the user follows personal safety rules.
Creating a Simple Aggregate
The compact unit, assembled with your own hands from an inexpensive drill, has little power and cannot be used as production equipment. The most productive devices include mechanisms with one or more multi-spindle heads. When working on the machine, the workpiece is fixed on the tabletop with pneumatic clamps.
After starting the unit, the working unit moves to the starting point of the workpiece, makes a hole 40−90 mm deep at a speed of 50−100 cm/min. After completion of the drilling process, the head automatically returns to its original position. The functionality that Vitap filler machine is achieved by turning the head 90
0
for creating grooves and finishing the edge of the hole. To improve the quality of work, the tabletop has slots for cutting tools.
Device Features
Two types of machines are most popular in production and furniture workshops:
- Filler machine with one multi-spindle head;
- Filler machine with several multi-spindle heads.
They should be considered separately
One head
This line features the following:
- The workpiece is placed on the tabletop, where stops and a ruler are provided. Commitment in progress. The work of fixation is usually assigned to pneumatic clamps.
- Having installed the product relative to the cutting devices, the engine starts.
- After starting the motor, the spindle with drills gradually moves towards the workpiece.
- The spindle moves at a speed of 5-10 m/min and makes holes up to 40 mm deep, after which it returns to its original position.
- The operator loosens the clamps and removes the workpiece.
- Multifunctionality is ensured by the fact that the head and spindle rotate 90 degrees for working with beveled edges and making grooves.
- The tabletop has special holes through which drills pass from below the workpiece.
- These units are compact and are used in small furniture production. They are able to make the required number of holes for hinges, handles, and fittings. But the line of machines with one multi-spindle head is not intended for mass production of furniture parts.
Multiple heads
- Such machines are distinguished by the presence of a large number of tools for work;
- One horizontal head, which houses more than one spindle, is used for finishing the edges of workpieces;
- Several more heads on which the spindle is mounted are vertical and make holes;
- All tools and positioning mechanism are located in the machine bed;
- The bed is equipped with supports, allowing the workpiece to be positioned relative to the working tools;
- The product is installed on strips with stops and fixed with pneumatic devices;
- When the engine starts, the unit begins to operate. In this case, each spindle in all multi-spindle heads functions.
There are several key points that distinguish a multi-spindle type additive machine from a single-spindle type.
- The spindle occupies a certain position due to the operation of the electronics. This allows for precise, quick adjustments for subsequent hinge hole production.
- A spindle with different heads processes two planes at once, increasing equipment productivity. To re-process a complex workpiece, there is no need to reconfigure the device.
- The spindle on the vertical head rotates relative to the center of the drive, making holes for the hinges at an angle.
- The supports are equipped with devices for installing and unloading workpieces, which allows minimizing the operator’s manual work.
These devices are used on production lines. Therefore, they are relevant for companies engaged in mass production of furniture.
Do-it-yourself work is practically not done here, which makes the multi-spindle type additive machine the most relevant for enterprises.
You can assemble a homemade unit. Based on drawings, video and photo instructions, a homemade machine can easily achieve a good level of performance. But you should not expect that a homemade additive unit will demonstrate similar results with such devices as Blum, Griggio GF 21, Vitap Alfa 21, Filato, BHX.