Many novice craftsmen want to have a small but functional circular saw in their workshop. You can buy a factory-made machine, but it will be quite expensive. This is the path taken by professional carpenters, who have a direct material dependence of their financial condition on labor productivity. The invested funds quickly pay for themselves and bring direct profits.
DIY stationary circular saw
Amateurs have a good way out of this situation - to make a circular saw themselves using the tools that most craftsmen have. But before starting work, it is recommended to familiarize yourself with existing engineering solutions and operating features of the equipment.
Types of circulars
According to the method of performing the work, circular saws are divided into two types:
- Stationary;
- Hand tools.
Each type has its own characteristics, advantages, and disadvantages. The main difference between a stationary machine and a hand tool is the object of movement. On a stationary machine, the sawn material is moved along the saw blade; the hand tool is moved along the stationary workpieces.
A circular saw is chosen depending on the type and amount of work performed. To make a shelf for books, a stool, or a flower stand, all you need is a hand saw.
For mass production and sawing of long, dimensional workpieces, a stationary installation is used. Many experienced craftsmen have both types of circular saws at their disposal.
Operating principle and tasks of the machine
The main cutting part is a steel disk, which cuts pre-designed and prepared wood or chipboard sheets. To increase the quality of cutting and operation of the machine, two electric motors are used: one main one for rotating the cutting disk, and a second less powerful one for cutting wood. This design allows you to avoid scuffing and performs better cuts.
Features of a manual circular saw
The tool is based on an electric motor with a saw blade mounted on a shaft. Models from different manufacturers have approximately the same design.
The products are equipped with many additional accessories:
- Start button with rotation speed controller;
- Protective casing;
- Retractable parallel stop;
- Regulators for cutting depth and tilt angle;
- Sawdust ejection pipe.
The saw blade rotates towards the base plate, towards itself. The main rule when working with a manual circular saw: first start the engine so that the disk begins to rotate, then carefully bring it closer to the surface to be treated.
The tool is convenient when performing the following work:
- Sawing boards, plywood, particle boards;
- Cutting timber, cutting slats;
- Recesses for groove tenons;
- Edge processing, chamfering;
- Cutting waste lumber for fuel.
The power of the device is selected based on needs. For short-term work in domestic conditions, processing workpieces up to 4.5 cm thick, a power of up to 1.2 kW is sufficient. Semi-professional tools have a power of 1.8 kW and cut workpieces up to 6.5 cm thick.
Professional equipment with a power of 2.2 kW can withstand long-term loads and leaves a cut of up to 8.5 cm. Woodworking enterprises use saws with a power of up to 5.5 kW; their weight reaches 100 kg.
Review and comparison of factory models
| Model | Enkor Corvette-10M | Elitech CP 1221 | Hitachi C10RD | Belmash PC 2000 |
| power, kWt | 1,2 | 1,2 | 1,6 | 2000 |
| Rotation speed, rpm | 4800 | 4800 | 4800 | 3100 |
| Disc diameter, mm | 210 | 210 | 250 | 250 |
| Cutting depth, mm | 48 | 45 | 73 | 70 |
| Weight, kg | 16 | 17,5 | 27,7 | 39,5 |
| Dimensions, mm | 590*460*340 | 455*340*585 | 730*590*370 | 700*670*330 |
| Price, rub | 7188 | 8433 | 14302 | 18156 |
Enkor Corvette-10M
Elitech SR 1221 Hitachi C10RD Belmash PC 2000
Requirements for the circular table
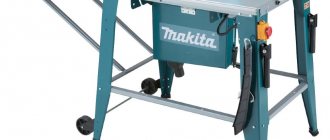
One of the advantages of a hand-held circular saw is that it can be mounted on a sturdy base, thus turning it into a stationary sawing machine. Such a device is especially convenient for sawing large lengths of source material into blanks of the same width.
Some brands initially offer a ready-made frame for the hand saw. It is convenient, but due to the small size of the work table, it is not suitable for working with large lumber.
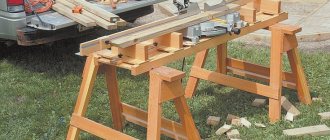
Therefore, craftsmen make a table for stationary placement of hand tools on their own. The design and dimensions are chosen in accordance with your needs, capabilities, and available materials.
A homemade design must satisfy several requirements:
- Be strong, stable, withstand vibration and significant mechanical loads;
- The height is determined taking into account the height of the master, on average it is 65-75 cm;
- The dimensions of the tabletop are chosen taking into account the possibility of processing as many workpieces as possible; The width is considered close to optimal: 35-40 cm, length - 1.0-1.2 m; provide for the installation of additional blocks to increase the width and length of the table if it is necessary to saw long, wide slabs;
- The surface of the table should be smooth, even, without defects; in appropriate places, make a groove for the saw blade, holes for attaching a hand saw, a protective screen, and guide templates.
Build process
The first thing you need to do is weld the frame. All angles must be 90 degrees for maximum structural strength. If you are thinking about creating a large sawing machine, you need to increase the strength by welding in additional reinforcement in the form of gussets and diagonal inserts.
The hardest part is installing the electric motor. In order for the machine to function correctly and make even cuts, it is necessary to install the electric motor horizontally using a building level. After marking the mounting location of the machine, two crossbars are welded to the frame, onto which the electric motor is installed using standard fasteners on the sides.
The next equally important step is to center the pulleys on the electric motor shaft. A pulley is required for machine variants with a double cutting element. For small machines, one is enough. If you decide to make a wood saw with a small working surface, you need to center the cutting blade on the shaft and tighten it with two nuts.
DIY materials
The circular table consists of two main parts: a support (bed, frame), and a tabletop. The tabletop is a more important detail; the choice of material for it is taken especially carefully. Sheet material with great strength is suitable: thick plywood, particle board, textolite, aluminum sheet, steel.
Craftsmen make a table platform of the required size by connecting narrow wooden blanks together.
Suitable for the frame are wooden blocks, preferably made of hardwood material, aluminum, rolled steel: angle, channel, square and rectangular pipes. Steel products are more common and cheaper than aluminum.
- Wooden blocks for the frame are thicker: from 8x8 cm; connected to each other in various ways.
- Connection using grooves and tenons is the most labor-intensive, but it looks great and indicates a highly qualified craftsman.
- A simpler way is to connect using bolts and nuts. Metal corners are used to increase strength.
- Connection with nails is the most primitive, but fragile and short-lived.
The steel parts of the base are connected in two ways: bolts and nuts, or welding. A welded connection is used more often: it is easier and faster to make. At the beginning of welding work, it is important to control the values of right angles and the distance between parts, since during the welding process the metal heats up and deforms.
Step-by-step instruction
A durable, comfortable table for a manual circular saw will work if you stick to the action plan.
Its points are as follows:
- Determine the dimensions of the tabletop and supporting frame;
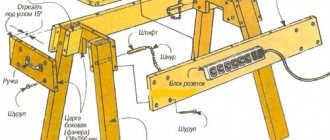
- Prepare drawings of parts indicating dimensions, material, quantity; you can use the examples, adjusting the shapes and sizes to suit your needs;
- Calculate the required amount of materials and fasteners; determine where scrap materials can be used and what needs to be purchased;
- The frame parts are connected sequentially, the top plate is prepared, and it is attached to the frame;
- At the bottom, through the prepared holes, a circular saw is attached, protection and guide stops are installed;
- The assembled apparatus is tested and modified if necessary.
