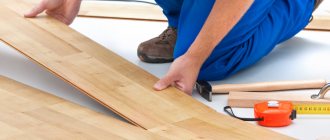
According to the technology, any wood surface must be mechanically cleaned and smoothed before further treatment with paints and varnishes. Let's look at how to sand wood manually or using various power tools. Let's get acquainted with the features of the work, the criteria for choosing certain devices. Read to the end and you will learn how you can achieve this or that result.
The difference between the sanded and untreated area on a wall made of timber Source pokraskadomov-vergiz.ru
How to choose a wood sanding tool?
The right tools ensure that the job gets done efficiently and effectively. Hand sanding requires the use of sandpaper. Mechanical grinding requires more professional equipment. So how do you know which tools to choose for this task? We have prepared a guide for you that will answer the most important questions and help you make a choice.
When purchasing, you should consider the choice of product. The decision most often depends on the size and type of surface that needs to be sanded. Small areas and complexly shaped objects with numerous corners and folds, carvings and designs are easier to sand by hand. Thanks to this you will reach all the hidden places. If you are new to sanding at home , choose sandpaper. Using it, you will have a greater impact on the speed and depth of surface abrasion.
Grinders are more efficient when processing large, uniform surfaces. Your work will speed up several times, and abrasion will become even. There is a large selection of sanders on the market, each of which works well in different conditions.
Orbital and random orbital sanders are ideal for small areas. The belt sander is considered one of the most effective. The delta sander is ideal for finishing surfaces that most models cannot reach. The parts sander features a pointed tip. Recommended for small wooden surfaces.
What is polishing
As a result of polishing, the wooden surface retains its natural color and acquires a mirror shine. To polish, you need to apply a special compound called polish to the wood several times. Unlike alcohol-based varnish, the polish contains three times less resins, which makes it possible to obtain a thinner and more transparent decorative coating.
The technology for creating beautiful textures requires high-quality surface preparation, in particular grinding and removal of lint and dust particles. Then the wood is treated with a primer emulsion, polished, and polished as a final step.
How to sand wood with an angle grinder?
An angle grinder is not ideal for working with wood. Although it is a tool for cutting and cleaning various surfaces, it can also be used for sanding the material in question. Many craftsmen have it in their home workshop.
The advantage of an angle grinder is its relatively low price and versatility.
The flake disc has a relatively coarse grain, so it can be used for pre-treatment of hard or rough wood that requires a more thorough finish. You should not use discs with a grit higher than P80 on wood. Experienced carpenters advise amateurs not to use lamellar discs - due to the high rotation speed, they can easily damage or burn the wood. A safer solution is a sanding disc, to which sanding discs of different granulations are attached. This guarantees a softer and smoother surface.
When sanding, remember to gradually increase the grit size. Use finer sandpaper followed by sanding until the surface is smooth. Sand along the grain. Do not press the sander too hard against the wood. Don't work on just one part of an object. Then you may damage the material. Be sure to clean the wood regularly—after removing dust, wipe the area with a soft, dry cloth. If residue remains on its surface, the particles may become lodged in the wood and leave scratches.
Application of polishing for finishing
Polishing is often done as a finishing touch. This technology is characterized by the following features:
- There is no need to apply a finishing material as polishing makes the product smooth.
- It is used when it is necessary to preserve the texture, since polishing does not deform the texture.
Polished wood
Today, polished products are found on sale extremely often. They look quite attractive and are comfortable to use.
Sanding wood with an orbital sander
An orbital sander allows you to sand large flat surfaces and hard-to-reach areas. Ideal for soft wood, no dents or protrusions. For example, it works well on countertops and door surfaces. You can sand corners with the machine because it has a sanding foot.
Ideal for amateurs - it's easy to check. It uses an oscillating motion, works calmly and gently, so that the novice user will not damage the sanded surface.
When choosing an orbital sander, remember that the larger the sanding pad, the faster and more efficient the work. Don't go overboard with the size, as a larger tool reduces the room you have to maneuver when working on a smaller, more difficult-to-reach surface. The small triangular shaped foot makes it easier to work in areas that larger sanders cannot reach. Due to their ease of use, such models are recommended for buyers with less experience.
You can choose abrasive discs with different grinding power for your orbital sander. When working with hard and durable wood, choose blades with a coarser grain. Finer granulation will be beneficial for delicate materials and finishes.
What types of rocks can be polished?
It’s worth noting right away that not all breeds are suitable for polishing. For example, loose wood is difficult to polish.
It is more effective to polish dense rocks:
- Red tree;
- birch;
- boxwood;
- nut;
- pear;
- hornbeam;
- apple tree;
- maple.
Beech wood gets a beautiful texture after polishing, although it is difficult to polish. Oak is characterized by its hardiness, so it is also difficult to polish. Pine is rarely polished due to the friability of the wood; it is mainly sanded and varnished.
How to sand wood with sandpaper?
Hand sanding takes time, but is highly precise and accurate. This method is suitable mainly for small surfaces with complex shapes, many folds and hard-to-reach places, grooves and decorations. For a beginner, the work will not be difficult, but more intuitive. Sandpaper is also the cheapest way to sand wood.
In addition to classic sandpaper, available in rolls and sheets, you can also buy sandpaper and abrasive cloth. The type of hand grinder should be selected according to the method you want to use. If you need dry lumber, you should choose paper. If you prefer wet work, choose a more flexible foil or soak the sandpaper for at least half an hour before sanding.
The wet technique is generally considered less aggressive to the wood. This prevents dust from forming and makes it easier to reach all the nooks and crannies. For wet sanding, use a higher grit than for the dry method.
The grinding process is classified as machining. Wooden furniture is sanded to smooth out uneven surfaces and remove old varnish and dirt. Remember that sandpaper comes in different grits. The smaller the grain size, the stronger the abrasive effect.
Larger grains mean stronger potency. Before purchasing tools, evaluate and decide what kind of results you want. Your actions will vary depending on what you want to do: matt the varnish layer, remove it completely, or change the color of the furniture by getting rid of the paint layer.
No matter what effect you want to achieve, remember to sand in the direction of the grain of the wood. Otherwise, the surface of the furniture may be scratched, which will not look neat. The entire object should be sanded evenly. Otherwise, you may have problems painting your furniture because the varnish will be lighter on areas that haven't been thoroughly sanded than on rougher areas. For the final sanding, you can prime the surface with diluted primer varnish. This will remove any hairs causing unwanted roughness.
Dry and wet sanding
How to properly sand wood with a sander or other tool? First, it is important to choose the type of procedure. It can be dry or wet. The first type increases the effectiveness of the abrasive and ensures its accurate removal. The downside of this technology is that the skin easily becomes clogged with dirt.
When carrying out wet sanding, you need to apply the liquid to the grainy surface of the sandpaper. Mineral oil or soap solution can be used for this. White spirit will also work.
Note! During the wet procedure, the abrasive becomes much less clogged, which helps to increase its service life. This creates an unpleasant mass of foam and shavings.
How to prepare wood for sanding?
Wood is the material from which most furniture and interior elements are made. Its versatility makes it a raw material often processed by enthusiasts. To restore furniture, you need to properly prepare it. First of all, do not forget about safety. Buy a dust mask, as sanding produces dust that is harmful to the respiratory tract. Make sure the area you are going to work in is well ventilated. If you are going to use an electric sander, you will also need gloves and goggles.
Before you start sanding, clean the surface first. Make sure that the wood is not saturated with moisture. If you are not using a sander with a dust collection system, then prepare a vacuum cleaner or brush to remove dust. If using hand sanding, you will need a sandpaper block or holder. Prepare sheets of sandpaper of different grits and a wallpaper knife, with which you can cut the paper to the desired size. If you are using a grinder, prepare a set of discs.
If you want your wood to look its best after sanding and to last as long as possible in perfect condition, the first step is to get rid of any dust that may have occurred during sanding. You can use a soft cloth lightly dampened with water. This will help collect as much sticky and dry waste as possible. If you do not use a sander with a vacuum cleaner, it is worth repeating this action from time to time while sanding. The finished wood needs to be thoroughly impregnated so that it is not damaged in the future.
Which sander is best for sanding wood?
The choice depends on your skills. Experienced woodworking enthusiasts and professionals will likely use an eccentric or belt sander. An angle grinder is less recommended since it is most often used for cutting or fabricating metal. You can work with it on furniture, but then you need to be very careful because it can easily burn the sanded surface (especially when it does not have a speed control). The undoubted advantage of this power tool is its low price.
Selection of oil-wax
The key criterion is the composition of the product, what components are included in it. The final result and tone of the wood directly depend on this.
The product consists of:
- oil (linseed, olive or jojoba),
- beeswax,
- tints for color saturation,
- a solvent that makes the product not so thick (the lower its mass fraction, the faster the hardening occurs).
If you buy a ready-made product, make sure that the composition does not contain aggressive solvents or benzene. It is also necessary to take into account the type of wood, since both the absorption rate and the consumption of the product directly depend on this. Compositions for hardwood, softwood and exotic woods are available.
Oil-wax often contains additives that make the surface glossy and shiny. It looks impressive, and this product is suitable for interior work. But be careful, as the coating becomes slippery when treated with the composition.
What can I use to polish it?
To sand the walls for further processing, including painting or wallpapering, you can use not only improvised means, but also specialized tools. However, the walls should be sanded before they are primed. To achieve the desired sanding result you will need:
sandpaper with a relatively small grit;
sanding block, equipped with a mesh or sandpaper;
mesh for grouting putty;
sander with built-in pump for dust removal;
special grinding attachments for a vacuum cleaner, screwdriver, drill, grinder.
The most effective and high-quality, of course, is mechanized grinding. In this case, it is not necessary to buy a grinding machine, which requires significant financial investments. Automatic grinding takes minimal time and effort.
Wood floor scraping
To protect against damage, floors are often coated with varnish, wax or other protective agent that reveals the natural grain of the wood. Before this, the floor must be thoroughly removed from uneven areas - sanded well (this process is also called sanding). They do the same thing when restoring old wooden flooring.
In addition, minor differences in height inevitably appear when laying even new boards or parquet elements, and boards in a floor that has been in use for more than one year sag or move relative to each other.
The floor should not be sanded if:
- the gaps between its elements are larger than 0.7 cm. If the gap is too large to fill with sealant or putty, the floor must be rebuilt, replacing damaged elements or sealing it with bars;
- Defects more than 4 mm deep appeared in those areas of the coating that were walked on most often. To scrape the rest of the floor at this level, you will have to destroy most of the useful thickness of the boards (from the surface to the ridge of the lock, it has an average thickness of only 3 to 7 mm). In this case, it would be better to simply replace these areas;
- if fragments of the floor are swollen from water, moldy or rotten. The structure of such wood is damaged, it cannot be sanded, and damaged areas also need to be replaced.
Manufacturing of the nozzle body for an angle grinder
You need to start with the fact that grinders can be structurally different and differ primarily in size. So there are no universal sizes for this nozzle; you need to measure everything as you go.
PHOTO: YouTube.com In the author's version, the grinder looks like this: it is an ordinary hand tool with a small disk and standard protection PHOTO: YouTube.com First, you need to determine the distance from the head of the grinding tool to the base of the attachment. This distance will be taken as the basis for cutting the bottle
PHOTO: YouTube.com Measure the required length from the bottom of the bottle and cut in a circle. It’s easier to navigate by circular marks; you don’t even need to draw a line. Cut with a small margin just in case PHOTO: YouTube.com The next size you will need to install is the diameter of the tool protection mounting clamp. You need to cut exactly the same hole in the center of the bottom of the bottle. Take a measurement with a caliper and use it to scratch a circle on the plastic, and then cut it out with scissors. You can trim the edge with a lighter
PHOTO: YouTube.com Insert the standard protection inside the plastic blank so that the clamp ring fits into the hole PHOTO: YouTube.com Now you need to align the edge of the plastic so that it is approximately 3-5 mm lower than the edge of the sole. The plastic is easy to cut with scissors, so you won’t have any problems with fitting
PHOTO: YouTube.com It’s easy to check the correctness of the edge: place the sander on a flat surface. All trimming flaws will be clearly visible through the transparent plastic.
Parquet laying process
The process of laying parquet flooring is not as complicated as it seems - it just needs to be done carefully and carefully, and then everything will work out. You should not choose a complex pattern if the master is not confident in his abilities - it is better to lay the parquet using the most common methods - for example, linear. But you can try to implement other variants of patterns or buy panel parquet.
Step 1. The surface of the rough base, which in this case is a concrete screed, is carefully ground - it needs to be leveled to perfect condition. The easiest and fastest way to do this is with a grinding machine.
Grinding the concrete base
Step 2. The resulting dust and other debris are collected using a vacuum cleaner. Corners and areas near walls are treated especially carefully.
The base is vacuumed
Step 3. A layer of epoxy primer is applied to the screed. The easiest way to do the work is with a roller with a long handle. The primer is applied so that there are no uncoated areas left on the floor.
Applying epoxy primer
Step 4. An insulating backing is placed on the base. It is glued to glue, which is applied to the prepared base using a notched trowel.
The glue is applied with a notched trowel
Step 5. The backing sheets are laid end to end and smoothed by hand.
Laying insulating underlayment
Step 6. Then the substrate is rolled with a heavy roller. This procedure will ensure the most reliable connection with the concrete screed.
The substrate is rolled with a heavy roller
Step 7. After this, laying the mosaic parquet begins. The first rows of elements are placed at a short distance from the walls - a few millimeters are enough. These will be compensation gaps, which will subsequently be closed with a plinth. Parquet adhesive is applied to the substrate using a notched trowel. It is applied in small areas, sufficient for gluing several elements.
Laying mosaic parquet
Step 8. The parquet elements are laid on the adhesive layer in joint with the previously laid ones.
Parquet elements are laid closely
Step 9. Each parquet element is carefully pressed to the base.
When laying the elements, you need to press them firmly to the floor.
Step 10. When the parquet is laid and the adhesive layer has dried well, the surface of the coating is sanded with a special grinding machine. Along the walls, the material is processed with an angle grinder.
Sanding laid parquet
Sanding parquet along walls
Step 11. The mosaic parquet blocks are puttied. Using a wide spatula, a special composition is applied to the surface of the material and distributed evenly over the base.
Applying putty
Step 12. After this layer has dried, the surface is sanded with a surface grinder for parquet.
After the putty has dried, the parquet is sanded
Step 13. Next, the parquet is coated with special parquet oil. It is applied in a thin layer using a wide spatula.
Application of parquet oil
Step 14. The final stage is polishing the parquet.
Parquet polishing
Simple screw device
To make this attachment you will need a long screw, 2 washers, a nut, and several pieces of sandpaper.
A washer is placed on the screw. After cutting the sandpaper into squares, a hole is made in the middle, and all the pieces are put on the screw. Then comes the turn of the second washer, and this entire set is clamped with a nut.
By inserting the device into a drill, you can grind the cavities of wooden parts with it.
The disadvantage of such a device is that the threads are jammed by the drill chuck, which creates a problem with re-applying sandpaper. The unnecessary part of the thread can be removed or 3 slots can be made on the screw - our homemade device will be clamped with a drill chuck.
Industrial vacuum cleaner for collecting dust
We are talking about using a professional vacuum cleaner; do not try to use a household vacuum cleaner for these purposes, you risk being left without it.
Significant differences between a professional vacuum cleaner and a household one
a professional vacuum cleaner with a large capacity for collecting dust must have a unit that automatically turns the vacuum cleaner on and off when you start the tool, so as not to run to the vacuum cleaner and turn it on and off during breaks in work; the presence of such an interesting mode as self-cleaning of the filter or “auto-shake” , that is, a function when the vacuum cleaner can work without a dust bag, which is important when working with fine dust, the presence of an antistatic hose; there is nothing like this in a household vacuum cleaner. Thanks to this, the static discharge will not accumulate and you will not get an electric shock, and dust will not quickly stick to the walls of the hose, again due to static electricity, and of course, this is the presence of an adapter in order to connect the tool to the vacuum cleaner hose.
What requirements must an industrial vacuum cleaner for furniture production meet?
Dust class
When working with wood, it is better to use “M” class vacuum cleaners, but “L” class vacuum cleaners can be used for soft and well-dried wood materials, such as pine or spruce.
Useful capacity of the vacuum cleaner
The volume is selected based on the volume of dust that appears during operation. For example, when sanding wood or MDF, the volume of the vacuum cleaner’s capacity must be no less than the volume of dust that is sucked up by the vacuum cleaner per shift, or at least half the shift.
Maximum permitted power of the connected tool
When purchasing a vacuum cleaner, pay attention to how powerful it is to the connected tool. If you have a vacuum cleaner with a connected tool power of 2.0 kW, then connecting a 2.2 kW tool to it is no longer recommended.
It is necessary to have an automation unit that is connected to an outlet, thanks to which the vacuum cleaner automatically turns on when the tool is started
But that’s not all, the automation unit must have a soft start and a shutdown delay, which is important for preserving the tool. Due to the shutdown delay, the vacuum cleaner turns off a little later than the tool, thanks to which the remaining dust is sucked out.
Vacuum cleaners with and without dust bags
An important point when choosing a vacuum cleaner is whether it has a dust bag or not.
If there is one, then from the point of view of future spending, pay attention to what material the dust collection bags are made of, and whether they are disposable or reusable
Yes, there are industrial vacuum cleaners that can work without a bag, thanks to the automatic shaking or self-cleaning mode.
Dimensions of pipes on the tool and vacuum cleaner
The dust removal pipe for a grinder and jigsaw has an outer diameter of 25 or 27 mm, and for a saw or router 35, 36 mm.
Therefore, when buying a vacuum cleaner, also pay attention to the inner diameter of the connecting coupling of the vacuum cleaner hose - it must correspond to the outer diameter of your tool.
Rice. 4
The grinder is connected to the vacuum cleaner via a hose
What kind of vacuum cleaner is needed for furniture production?
|
Such requirements, for example, are met by the Festool CTL 26 E vacuum cleaner with a price of about 45,000 rubles or a budget solution - the Mirka 1025 L PC vacuum cleaner with a price of about 20,000 rubles.
| Rice. 5. The Festool CTL 26 E industrial vacuum cleaner is used to collect dust even on small grinding machines |
| Rice. 6. Industrial vacuum cleaner Mirka 1025 L PC |
Kinds
Based on the release form and characteristics, there are several types of wood wax. The consistency of the products can be soft, pasty or hard. The effectiveness and approach to application depend on this.
There are varieties on sale with linseed oil and water-based wood products. Popular products are oil-wax impregnation, tinted decorative wax, white, matte transparent.
For each type of damage and scope of work, a different type of wax is used. Liquid varieties are applied with a brush, as in classic coloring. Solid agents are rubbed into the surface to be restored.
Solid
Varieties of this group are more popular than others, despite the fact that they are more difficult to apply. Visually similar to multi-colored plasticine, they are made on the basis of vegetable oils and natural wax. They are supplemented with chemical components, so they are heated before processing. Used to seal large cracks and chips. Wax of this group is suitable for external and internal work at air temperatures from +10 to +25 degrees.
The products perfectly restore the integrity of the surface and enhance its shine. Particularly plastic, characterized by high adhesion. They are considered universal products for waxing. Copes with processing of any type of base. Form a high-quality protective layer.
Requires maximum care in application. If the surface is uneven, they are practically impossible to level. In this case, there is a possible risk of processing with obvious differences in shades.
Soft
Soft wax products include products on a natural basis. Their protective effect will be the weakest. But they have deeper penetration. If we compare them with other analogues, soft products remain sticky longer and melt better. However, they do not increase the antistatic properties of the treated products. Therefore, waxed wood attracts dust very well. It also requires periodic renewal of the coating. If the temperature exceeds 20 degrees, the density of the wax decreases.
Soft oily impregnations renew the wood and visually mask chips and dents. They do not contain aggressive solvents or benzene. The lower the percentage of the solvent component, the faster the solution dries.
Liquid
Wax with a liquid consistency is good for its penetrating ability. Penetrates into hard-to-reach places and can create a uniform protective layer even on complex threads. It has a pleasant smell and makes the wood invulnerable to moisture. It contains artificial suspensions that maintain the desired consistency. Liquid wax fills scratches and crevices and has synthetic inclusions. It is used when processing large areas (panels, floors).
It is easy to use and has a matte and glossy finish. Due to this, the level of surface slipperiness also varies. Apply to the surface with a brush or a regular paint roller with a soft coat. A lint-free cloth is used to remove excess. However, there are practically no smudges during application, since the product dries quickly.
The first method is wetting
The easiest way to cut concrete or brick without dust is to moisten them with water.
You can use a regular spray bottle for this.
or a sprinkler (made from a plastic bottle with holes made in the lid), or a children's water pistol/machine gun.
Spraying the object must be done directly while sawing so that the dust immediately gets wet without having time to fly away.
Due to the fact that the sawyer's hands are occupied with an angle grinder, it is quite difficult and inconvenient for him to cut and spray at the same time, and besides, it is unsafe.
Therefore, a second person should do the spraying.
In tandem, all work can be done quickly and without difficulty.
This method does not require any significant effort, but it creates a lot of dirt, because... the dust turns into slurry, spills across the floor, and also flies in different directions.
The second method is more effective and practical.

