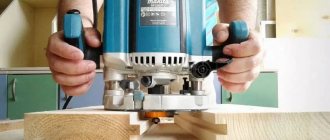
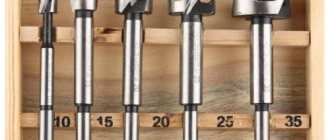
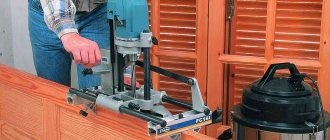
By purchasing a hand router for your home workshop, the happy owner of such a new thing gets at his disposal a very functional tool that can take the processing of wooden parts to a completely different level of quality. No other “representative” of household-grade woodworking equipment has such wide capabilities. In skillful hands, a hand router fully lives up to its name as a universal, multifunctional tool that opens up the broadest horizons of creativity.
Wood cutters
But this tool will only become truly multifunctional if the necessary equipment is purchased for it. And first of all, these are, of course, wood cutters. They are available for sale in a very wide variety, and a novice craftsman needs to learn how to navigate it and choose the right cutter for a particular type of work.
Let’s make a reservation right away: it is simply impossible to talk about all types of cutters in one publication. Yes, it’s probably not necessary, since with the arrival of work experience, a constantly improving master will have a complete understanding of this issue. So this publication is just a “start” in this field.
Scope of application and features
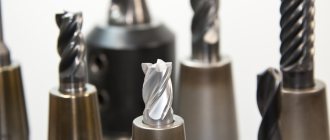
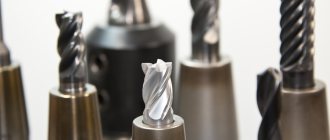
Face mills are used on vertical milling machines for finishing of planes, grooves, ledges, as well as various shaped surfaces of complex configuration. The main area of application is mechanical engineering - boring of shafts, gears and other parts. The tool allows you to simultaneously process two surfaces located at right angles to each other thanks to the cutting edges on the end and cylindrical surfaces. To increase processing efficiency, proper selection of the body, cutting speed, replaceable inserts, lubricants and coolants is necessary.
During processing, only the tops of the edges are profiled. The shapes of the cutting elements can be varied, most often they are made in the form of a circle or a broken line. The shape and location of the cutting parts allows for smooth processing with minimal allowance, the value of which does not affect the angle of contact with the workpiece. The main parameters are the diameter of the cutter and the width of the cut. A necessary condition for face machining is high rigidity and dimensions of the tool, so the fastening of the tooth and replaceable inserts is especially strong.
Adviсe
Let's talk a little about tips that should be taken into account when creating homemade cutter models.
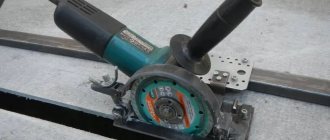
- To give the cutting area the correct configuration, you will need to use diamond-coated needle files or angle grinders with discs that are used specifically for working with metal.
- The edge for cutting should be sharpened at a 7-10 degree angle. If you make it sharper, then it will hold an edge poorly, which is why its cutting properties will significantly decrease.
- If a wood cutter made by yourself must have some kind of complex device, you can flatten it or bend it.
- When using an edge router, take into account that the guide ring or bearing is already installed.
- The cutter must be secured in the collet before starting work.
- The presence of additional accessories will help increase the power of the electric tool.
- The part to be processed must have some kind of support.
- When carrying out work, the correct insertion depth level should be set.
- To prevent too much dust from being generated when working, you can use a vacuum cleaner.
In general, it should be said that creating a wood cutter yourself is not difficult. True, it should be understood that in this way you can quickly solve some simple problem, because for hardware such as bolts, ordinary steel is used, not tool steel. This means that such a homemade cutter will quickly wear out. But its life can be significantly extended in a number of ways.
Therefore, this solution has a place and should be used in cases where you really need to quickly acquire a pretty good wood cutter in order to get the desired result.
Types of tools
End mills require a large volume of work, which requires a variety of design options to solve the task. First of all, cutters are divided according to the material of the cutting part of the cutter, which is used as:
- High-speed and carbon steels.
- Hard alloys.
- Mineral ceramics.
- Industrial diamonds (for non-metallic hard materials).
Depending on the design, cutters can be prefabricated or solid. The former have removable carbide teeth or plates, which allows sharpening or replacement as they wear out. According to the shape of the tooth tips, the tool can be rounded or straight. Rounded ones have higher performance characteristics due to minimal runout of edges during cutting and high wear resistance. Rounded teeth are used for roughing or semi-finishing.
Depending on the method of fastening, end mills are divided into end mills and shell mills. With end fastening, installation is carried out on the shank; the attachment ones are mounted on a frame with a key. The latter are usually used for working with steel and cast iron parts, for preparing ledges and planes. The material of shell cutters is usually high-speed steel.
General information about cutters
The cutter is the main replaceable element of the equipment of any router. In fact, it is the cutting tool that is used to process a wooden part. The quality of the resulting product largely depends on the quality of the cutter.
The principle of the structure of cutters
The variety of cutters according to their “geometry”, and therefore according to their purpose, is extremely wide. But in any case, if we consider these components specifically for a manual router, the general principle of their design remains the same.
General structure of wood cutters for a manual router
In fact, there are only two mandatory basic design elements.
First of all, this is the shank (item 1), which is clamped in the milling cutter chuck and through which, accordingly, torque is transmitted.
The working area or head (position 2) is the one in which the blades (knives, cutters - they are called differently in different sources) are located. The cutting edge can be straight or have a very intricate configuration, which determines the capabilities of a particular cutter.
The variety of configurations of cutter heads will mainly be discussed below - this is the main selection criterion.
Finally, the cutter may have additional elements (in this illustration it is a support bearing - item 3), either simplifying the milling work or expanding the capabilities of the cutter. For example, bearings are very helpful in the manufacture or processing of wooden parts according to existing templates - the result is literally copying the contours. In addition to bearings, these can be locking couplings, calibration bushings or washers, screws that allow you to sort out the collapsible cutter and place its cutting parts in the desired sequence.
Prices for a set of Bosch cutters
set of cutters "Bosch"
Cutter Shank Dimensions
Milling cutter shanks are characterized by two sizes - diameter and length.
The length largely depends on the purpose of the cutter. But sometimes situations arise when, when choosing, for example, deep grooves, the length is not enough. A similar problem can be encountered if a manual router is installed under a special milling table, and the thickness of the tabletop also “eats up” some of the length of the shank.
Manual milling cutters are often built into special milling tables (ready-made or homemade). In any case, this may slightly reduce the free vertical passage of the cutter, and for cutting deep grooves, equipment with an extended shank is often required.
This is one of the points to keep in mind when choosing
The second parameter of the shank is its diameter. Naturally, it is selected according to the chuck of an existing or purchased router.
There is an important nuance here. The fact is that both the tool itself and milling cutters of inch and metric standards can be found on sale. For example, in metric notation it might be 6; 8; or 12 mm. In inch, there are two sizes: ¼ and ½ inch. If we convert this into millimeters, we get 6.35 and 12.7. It seems to be very close...
But exactly what “seems to be.” Milling cutters are equipped with a collet chuck, which, unlike, for example, a drill chuck, does not tolerate “liberties” with diameters. And a cutter with a half-inch shank can become tightly jammed in a 12-mm chuck, so much so that you have to resort to some extreme measures. And vice versa - a 12 mm cutter can be fixed in a ½ inch chuck unreliably, which is extremely dangerous, as there is a possibility of very serious injury.
The shank diameter can be metric or inch. Despite the seemingly insignificant difference in millimeters, they are not interchangeable!
The difference between a diameter of 6 mm and ¼ inch is not so significant. But even in this case, it’s better not to take risks, but to purchase what is written in the router’s passport.
You shouldn’t give in to the persuasion of sellers - they say, everyone does it, and it’s okay, it will “settle down”, etc. With such connivance, there is a possibility of simply ruining your instrument, if the worst does not happen.
What if you need either a longer shank or a milling cutter of a certain configuration, but for a collet of a different diameter, and the store doesn’t have those in its assortment? Sometimes extension adapters help in this regard. They themselves have a shank of a certain size, and at the end there is a collet chuck. So you can purchase similar equipment for different diameter transitions, which, if necessary, will help out in both cases.
Using an extension or adapter, you can solve the problem of both the insufficient length of the shank and the discrepancy between its diameter and the collet chuck of the router.
But, of course, even when choosing a manual router, it is recommended to have an idea in advance about what work it is supposed to perform, and what equipment should be primarily used in this regard. You should not overuse additional adapters - this is always an extra “weak link”, undesirable at high speeds and high loads.
Choosing a hand router is a responsible task!
If you decide to acquire this very useful power tool in order to independently or under someone’s guidance master the technology of milling processing of wooden parts, you should at least have a general idea of the structure of a manual router and the criteria for evaluating it when purchasing. Read more about these issues in the special publication of our portal “Which manual wood router to choose” .
Differences in the structure of the cutting part
Even if we put aside the configuration of the cutting head for now, we can notice possible differences in the design principle itself.
Prices for a set of cutters “FIT”
set of cutters "FIT"
- The most common are prefabricated cutters. The essence of their design is that during the production process, a cutter blank with a shank is first made. And then metal cutting edges are attached to it in the right places. The connection is made using soldering technology using special refractory solders.
It is clearly noticeable that the cutting edges are soldered onto the cutter heads.
This technology has been well mastered, and therefore such cutters are most common. True, sometimes it is the solder joint that becomes the “weak link” - this happens on inexpensive models or on cutters of unknown origin. You usually don’t have to worry about the quality of edge soldering on models from leading brands.
- Recently, cutters with replaceable blades have become increasingly popular. Their cutting edge is attached to the blank with one or more screws.
Examples of wood cutters with replaceable knives
Such blades, if necessary, can be easily dismantled in order to sharpen them or replace them with new ones. The cost of new ones, of course, in any case will be lower than the cost of a whole cutter of similar quality. But, as they say, we still “have to live to see a complete replacement.” The fact is that such blades, as a rule, have a double-sided sharpening, and some (as, for example, shown in the illustration above in its left fragment) even have a four-sided sharpening. That is, if the cutting edges are dull, you can not waste time on sharpening them yet, but simply remove the mounting screws, turn the blades the other side out and continue working.
Of course, the cost of such cutters is quite high, but this is fully justified by the convenience and long service life of them. Therefore, an increasing number of professional craftsmen are switching to this type of equipment.
- The third type is monolithic cutters. Their cutting edge is formed by sharpened protrusions on the blank itself, approximately in the same way as is done on conventional drills.
Monolithic type cutters
With such cutters, the possibility of the cutting edge being torn off from the “body” is almost completely eliminated, which, of course, is an undeniable advantage. However, such blades are more difficult to sharpen, and in addition, as they are sharpened, their geometry gradually changes, which shortens their service life. And you have to throw away the entire cutter completely.
- Separately, you can select attachment (or typesetting) cutters. Their cutting parts are not tightly connected to the shank - they can be removed and installed in the required sequence, alternating spacers, couplings or bearings. This changes the “geometry” of processing the wooden part or the number and relative position of simultaneously selected grooves.
An example of an attachment cutter - you can choose one cutting head or install several, varying the distance between them using the included couplings.
However, this is more equipment for professional craftsmen. For a beginner, it would be more prudent to start mastering milling technology with the usual most common prefabricated cutters with a soldered cutting edge.
Differences in material and method of sharpening the cutting edge
When choosing cutters, pay attention to the material of the cutting edge itself . There are two main options here.
- High-speed steel blades are usually designated by the abbreviation HSS (from English “High Speed Steel”). This is an excellent solution for processing soft wood. As is clear even from the name, such cutters are usually used at high milling speeds - it is under such conditions that they show their advantages, giving very clean processing.
True, it doesn’t take much effort to blunt such edges. When encountering a solid medium, they quickly overheat, lose their qualities and require correction.
- If you have to process hardwood or dense composite materials based on it, then preference should be given to cutters with carbide tips. The accepted designation for such equipment is NM. The most commonly used edge material is tungsten carbide, known for its strength. But this does not mean that such cutters are eternal. No, and they become dull and also require periodic editing. It’s just that with their help it is quite possible to process very dense wood, but at lower milling speeds.
But for soft rocks, this is perhaps not the best option, since, in theory, it can be quite difficult to achieve ideal cleanliness of processing with them. However, this largely depends on the quality of the cutting edges - there is also considerable variation in this matter. Hard alloys can seriously differ in grain size: the smaller it is, the better and more durable the cutting tool is. So the quality of the surface after passing through NM edges of products from leading manufacturers is no worse than after passing through high-speed cutting edges. And in fact, such carbide cutters are universal equipment for any type of wood.
On the packaging of the cutter it is indicated that the cutting edges are carbide. In addition, the maximum permissible rotation speed of the spindle of a hand router when working with such a cutter is indicated.
There may also be differences in the configuration of the cutting edge relative to the axis of rotation of the cutter.
- For the most part, there are cutters in which the cutting edge of the blades is located vertically or, if it is a figured cutter, in the same plane with the axis of rotation. That is, in the lateral projection it still becomes vertical.
Typical examples of cutters with vertical cutting edges.
It should be noted that such edges are the most unproductive and wear out quickly. In fact, they work by chipping a thin layer of wood, so soon nicks appear on them, which worsen the quality of the parts.
But such cutters have a relatively low cost, and are easier than others to edit and sharpen (up to certain limits, of course).
Prices for a set of cutters “Bison”
set of cutters "Bison"
- More advanced are cutters whose cutting edges are located at an angle to the axis of rotation. For the most part, they already work exactly like knives; they provide not chipping, but a neat cut of wood fibers and, accordingly, increased quality of processing of workpieces.
Mills with inclined cutting edges
Such cutters, of course, are more expensive, but the “motor life” of high-quality products of this type is already much longer. That is, the blade will require sharpening or even complete replacement less often.
- The cutting edge can also have a spiral configuration, as is usually done on conventional drills. But, unlike them, the working part of the cutter is not only the end sharpening, but also the entire edge along its length from bottom to top.
Spiral cutters.
There may also be a difference in the type of sharpening of the cutting edge - straight angular, trapezoidal or radial sharpening is used. But it is still too early for a beginner to delve into these “wilds,” and understanding of this issue comes only with sufficient experience in milling, when reaching a qualitatively different level of skill.
Elliptical and round grooves
To cut grooves in the shape of an ellipse or circle with a hand router, circular devices are used. A simple compass for a router can be made from a rod, the end of which is connected to the base of the tool, and the second is equipped with a pin or screw. To obtain a circle, the rod is inserted into the hole, which serves as the center, and then a groove is formed along the contour.
To change the diameter of the circle, you need to move the tool closer to the other end. A more convenient version of this compass uses two rods instead of one.
Such equipment is quite common and often comes complete with a router. With its help it is convenient to cut shaped grooves with different radii. And when it is necessary to obtain holes of small diameter, other equipment is used. Its peculiarity is that the pin, which is installed in the center of the workpiece, is located under the tool.
- The design of such a compass includes:
- A base that is fixed to the material being processed using screws or vacuum suction cups.
- Two rods.
- Two shoes that fit onto the guides.
- Bracket connecting the router and fixture.
Using the holes in the bracket, the support plate of the equipment is easily aligned with the tool. If a circle is being milled, then only one shoe is used, but for an oval, both are used. Cuts made with this addition are of a higher quality than those made with a band saw or jigsaw.
This occurs due to the characteristics of the tool, which rotates at a very high speed.
Expanding the functionality of the router
Additions for a router should solve one problem - to hold the tool in the desired position when processing material. When purchasing an expensive machine, frequently used milling accessories are included in the kit. But for cheaper or highly specialized options, you have to buy them separately.
The design of such additions is quite simple and does not require a drawing for self-production.
Rip fence
This addition allows for straight cuts and is often used when working with wood. It allows you to work on any surface, not just your desktop. The grooves are cut with its help.
The design of the add-on consists of:
- Rods that are attached to the body of the instrument.
- A fine adjustment screw is used to adjust the gap between the cutter and the surface.
- A locking screw, with its help, the rods are secured in the desired position.
- Overlays, on which the tool is placed.
The design of the base is quite simple and you can make it yourself.
To prepare an addition to the work you need:
- Install the rods into the holes of the tool body and secure them with a screw.
- Set the required distance between the surface and the cutter.
Additionally, by placing a specially treated block (with one rounded edge), you can significantly increase functionality and make cuts along a curve. This part is installed between the tool and the surface. Due to its unstable position, it must be handled very carefully.
Guide rail
The addition is used to move the tool over the working surface at any angle, which is different from the rip fence. The design makes it easier to mill holes located at a distance from each other. Special clamps hold the device on the surface being treated.
If they were not included in the delivery set, then clamps are used. Some options are equipped with an adapter to adjust the direction of movement of the tool.
The design is best used together with a power tool whose support platform is adjustable. This will help eliminate the problem when the tire and the cutter are located in different planes, which happens when the tool and the workpiece are close.
The design is quite simple, but very effective. If you have minimal skills in working with the tool, it can be easily done at home. To do this, just take a block, which is attached to the surface to be treated using a clamp. If you fix the structure on two or more bars at the same time, you can make a groove in one go.
The main disadvantage is the difficulty of accurately fixing the structure in relation to the future cut. But the following additions lack this.
The first fixture consists of a sheet of plywood and a guide connected together. It is used to work with blades of the same size.
When you need to use cutters of different diameters, a different device is suitable. Its main advantage is that the tool is in contact with the entire lower part of the material. The guide has a board (folding) that holds the power tool in the desired position to the material.
Very often, when working with wood, the material is milled against the grain, resulting in chips.
To reduce this phenomenon, an addition is used that presses the wood at the entry point of the cutter, which prevents it from splitting off. The device consists of two guides connected at an angle of 90°. And another type is assembled from two parts in the shape of the letter L, which are attached to the material using clamps. It is often used for cutting grooves.
Varieties by processing method
In order to choose the right wood cutter for a hand router, you need to have an idea of what types are used for specific types of work with workpieces. According to this characteristic, cutting tools are divided into 5 main types:
- End.
- Grooved.
- Edges.
- Combined.
- Curvy.
Let us analyze in detail the main features and nuances of using each of them.
End
Having a structure similar to a drill, an end mill, however, differs from it in that its working part extends over the entire area of the cutting edge. That is, wood is sampled with the entire head part. There are the following varieties:
- Profile.
- Spherical.
- Conical.
- Spiral.
- End
- Burr cutters (cutters).
Most end mills have a universal purpose. Thus, spiral varieties allow you to drill and select grooves, quarters, and process ends; profile varieties allow you to make grooves of complex geometry, create ornaments, trim, cutters allow you to finish surfaces, engrave, select special shapes of holes and grooves.
Wood end mill set Source fainaidea.com
Grooved
The very name of the groove cutter reveals the nature of its application - the choice of grooves. However, they differ in the following modifications:
- Fillet. A semicircular sample is formed.
- Conical. Creates a V-shaped groove and is also used for carving surfaces.
- Spiral. They have a structure similar to a drill, but with a larger working part.
- T-shaped. They are used to create grooves of the type where one part slides into another.
- Dovetail. Similar to the above modification - with the difference that the cross-section of the base has the shape of a trapezoid.
- Shaped. It has a wide variety of species. It is used both for making grooves and for processing ends.
- Straight or cylindrical. Create a rectangular groove.
- Combined. They are used to form interlocking joints - when assembling linings, panels, and panels.
Slot milling cutter with performance characteristics displayed Source static-sl.insales.ru
Recommendation! When choosing a specific type of wood cutter for a hand router, you need to have an idea of what they are like in terms of workmanship, thermal strength, connection of the cutting area with the tail part and solder material. When processing hardwood, a tool with weak soldering will soon lose its longitudinal stability and quickly fail.
Edge
An edge cutter is used to create an edge that is smooth and perpendicular to the plane of the workpiece. The following types are distinguished:
- Direct. Designed to create an end perpendicular to the upper plane.
- Moulded. Straight, arched, wavy edges are formed. Used for applying complex patterns. There are also double cutters with the ability to adjust the distance between the blades.
Copy templates and rings
The copying sleeve runs along the edge of the template and thereby sets the blade in the desired direction. The addition is attached to the bottom of the instrument using screws or special antennae. Using a copy sleeve for a router is quite simple, but you need to ensure that the size of the cutting blade and the ring are the same, and they should not touch during operation.
The template is fixed to the material using tape or clamps. The rings should lie tightly on the workpiece.
Using this device, the corners of the parts are rounded and the edges are cut out. To improve convenience, bearings or rings are installed on the templates. But there are several conditions: their diameter must match or an additional limiter must be installed that will keep the template at a distance from the workpiece. And for figure milling, flexible templates are used.
Before you make a template for the router, you need to decide on the grooves that it will cut. For its manufacture, it is best to use hardboard with a thickness of at least 6 mm. And to increase durability, they use birch: it has the best characteristics.
Jig routing is often used by furniture installers when large numbers of holes and grooves need to be cut. This allows you to significantly reduce installation time and also increase the quality of work.
To get a good result from using the template, you need to consider several points:
- Before work, the router is set to full depth.
- The most precise displacement of parts can be achieved using two additional rods.
- Tenon parts made using a template do not require additional fixation with glue.

