Forging chisel PICARD. Photo ForgingPRO
A chisel (a cleaver with a handle) is one of the oldest tools for processing cold or hot metal . Scientific and technological progress has made very minor improvements to this tool, offering high-strength materials for use and formalizing the sharpening angles of the blade. However, the appearance and methods of working with a chisel have not changed for many centuries. This article provides complete information about blacksmith tools for chopping metal, types, the possibility of making it yourself or purchasing a factory-made cleaver.
Bench chisels
The blade and head of a bench chisel are hardened and tempered . The length is usually 10-20 cm, and the width of the blade is 5-5.2 mm. The sharpening angle of the blade depends on the metal for which this chisel will be used - the harder or more brittle the metal, the more obtuse the sharpening angle should be. Standard sharpening angles for cutting various metals are as follows:
- hard steel, bronze, cast iron – 70 degrees;
- medium hard steel – 60 degrees;
- copper, brass – 45 degrees;
- zinc, aluminum alloys – 35 degrees.
The tool is also widely used for more specialized tasks, such as cutting grooves and narrow grooves. This instrument is called a crossmeisel .
How to harden a chisel - let's put everything on the shelves
A bench chisel is made of carbon steel, so this tool must be hardened at a temperature of 750-800 degrees (cherry-colored). Chisels for concrete are made of alloy steel, and their hardening temperature is higher. If you have a homemade tool, then it must be heated in a certain temperature range, depending on the grade of steel. Eg:
- mild steel: 730-950 degrees;
- high carbon: 680-850 degrees;
- alloy steels: 850-1150 degrees Celsius.
The tool is heated evenly to avoid a sharp temperature difference between the cutting edge and the core of the chisel. When the required temperature is reached, the product must be kept in the oven for some time. It is better to heat the instrument evenly for 1 hour and keep it in the oven for 30 minutes than to heat it to the highest possible temperature in 10 minutes and immediately cool it. You can cool the chisel in water or oil. Don't skimp on the amount of coolant. Half a cut plastic bottle will not work for us, but 2-3 liters of oil in a galvanized bucket is what we need.
To form a ferrite-cementite mixture (the strongest mixture of iron and carbon, with high resistance to shear along the sliding plane when exposed to external loads), the metal must be slowly cooled to a temperature of 650 degrees, and from 650 to 400 degrees rapid cooling is required. When a liquid medium comes into contact with hot metal, the liquid begins to steam and envelops the tool; as a result, the metal does not come into direct contact with the coolant. A film of steam forms around it, called a steam jacket. This external environment slowly cools the steel. When the temperature of the material decreases, the oil or water stops evaporating, the jacket disappears, and we get faster cooling. Thus, oil and water have the same effect on the metal.
The only difference is that the oil cools the material more slowly. This reduces the likelihood of internal stress occurring in the metal. It is more suitable for high-carbon and alloy steels, and water is more suitable for low-carbon steels.
The tool must be lowered perpendicular to the surface of the oil, in no case sideways, not at an angle, and not thrown into a bucket. We immerse the tool with the cutting part down, smoothly moving it up and down and left and right. This will prevent a sharp temperature difference between the hardened part and the non-hardened part, and will also allow you to quickly get rid of the steam jacket. In addition to the edge, the shank also needs to be hardened. It also experiences shock loads and, without hardening, after a short period of work it will begin to acquire “curls.” We harden it in the same way as a cutting edge. As a result, we get a rod with hardened edges and a non-hardened, elastic middle - a balanced tool.
Blacksmith chisels
The main design difference between a blacksmith's chisel and a mechanic's chisel is the hole in its middle part for mounting on a wooden handle. The cutting part of a forging chisel is called a knife, its length is from 30 to 50 mm. The length of the entire tool for cutting cold metal is 16-19 cm, for cutting hot metal – 18-24 cm.
Cold cutting forge chisel
LIST OF REFERENCES USED
- B.A. Baum, G.A. Khasin, G.V. Tyagunov et al. Liquid steel. - M.: Metallurgy, 1984. - 208 p.
- Voskoboynikov V.G. General metallurgy [Text]: textbook for universities / V.G. Voskoboynikov, V.A. Kudrin, A.M. Yakushev. – 6th ed., add. and processed – M.: ICC “Akademkniga”, 2002. – 768 p.
- Davydov S.V., Panov A.G. Trends in the development of modifiers for cast iron and steel // Procurement production in mechanical engineering. -2007.- No. 1. — P. 3-11.
- Kudrin V.A. Theory and technology of steel production [Text]: textbook for universities / V.A. Kudrin. – M.: Mir, 2003. – 528 p.
- Panov A.G., Davydov S.V. Study of the influence of the microstructure of cast Ni-Mg-Fe master alloys on their impact strength // Procurement production in mechanical engineering. 2010. - No. 2. — P. 3-8.
- Panov A.G., Konashkov V.V., Tsepelev V.S., Gurtovoy D.A., Kornienko A.E. Study of the structure formation of cast iron melts // M: Liteyshchik of Russia, 2010, No. 3. - P. 32-38.
- Panov A.G., Kornienko A.E., Kornienko A.E., Improving the technology of modifying cast irons with spherical graphite Mg-Ni-Fe alloy // M: Liteyshchik of Russia, 2009, No. 3. - p. 27-30.
- Cast iron: Handbook / Ed. A.D. Sherman and A.A. Zhukov. - M.: Metallurgy, 1991. - 576 p.
What types are there: intrinsically safe with a wooden handle and others, photo
There are several types of blacksmith chisels:
- Non-sparking tools are designed for use in potentially explosive areas. The head of such chisels is made of bronze alloys, which ensures antimagnetic properties and a high level of corrosion resistance, and the handle is made of wood.
Blacksmith chisel. Photo ForgingPRO
- Chisels with a thin blade are designed for chopping hot metal, while those with a thicker blade are designed for separating cold workpieces.
- The shape of the working part can be straight or round.
Chisel. Types and work. Application and sharpening. Peculiarities
A chisel is a percussion-cutting tool designed for chopping or chipping metal and stone. It is a steel rod with double-sided sharpening and a flat butt designed for striking with a hammer. The design of the chisel can position it as a hand tool or as an attachment for mounting in a hammer drill. The cross-section of the rod can be in the shape of a circle, rectangle, oval or polyhedron. To reduce the risk of injury, an expanding mushroom made of rubber or other metal can be installed on the striking part of the tool, providing a more comfortable hammer hit and dampening recoil.
Sharpening chisels, angle
Sharpening is performed on a special sharpening machine. The chisel is placed on the tool rest and, pressing slightly, slowly moved along the entire width of the rotating abrasive wheel, alternately sharpening one or the other edge. In this case, the blade should be often immersed in cold water to prevent overheating of the metal, during which it loses the necessary hardness.
After sharpening is completed on the grinding wheel, the burrs are removed from the chisel, and then the cutting edge is threaded on the abrasive wheel.
Hot forging chisel with a sharpening angle of 70-80 degrees
The sharpening angle of the chisel knife for hot cutting is no more than 50 degrees, and for cold cutting - at least 60 degrees.
Important! The wooden handle on which the forging chisels are mounted is not wedged (to avoid kickback and breakage).
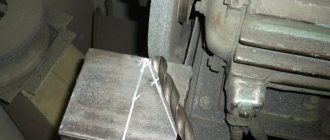
Finally, the correct sharpening angles of the blade are checked with a special template . As such a template, a metal block is used, in which grooves are cut. The angles in these grooves have the required values, therefore, by inserting a sharpened chisel blade into this groove, you can visually determine the correct sharpening.
Material
When choosing such a product, attention is paid to a fairly large number of different criteria; the main one can be called the type of material used in the manufacture of the main part. A bench chisel consists of a cutting edge, a main part and a striking surface. In most cases, it is manufactured in cast form, due to which the performance characteristics are significantly increased.
Chisels are made from carbon tool steels (for example, U7, U7A, U8, U8A, 9HS, etc.), and when equipped with carbide plates (VK20, VK25, etc.), the main part is made from structural steels (40X, 45, etc.).
A variety of materials can be used in the manufacture of a chisel, including carbon steel. It is considered the most common alloy and is suitable for processing various workpieces.
If chipping or chiseling of stone is carried out, then attention should be paid to products made of structural steel, as they are characterized by greater resistance to mechanical stress.
The manufacturing material is selected taking into account the type of work that will be done when using the tool. To significantly increase the strength indicator, the surface layer is hardened, which is carried out taking into account established standards. Recently, the production of metalworking chisels from aluminum has not been carried out, since such an alloy is characterized by a high price and softness, the cutting edge quickly becomes dull and sharpening has to be carried out at high intervals.
Requirements
The main requirement for a blacksmith chisel is its serviceability . Safety of using the tool includes several characteristics that the chisel and its individual parts must have:
- The strikers must have a smooth surface , without chips, cracks, burrs, or deformation.
- The handle, necessarily made of hardwood or synthetic materials, must have an oval shape with a thickening towards the free end and a smooth surface, without cracks. Metal handles are also used, which also do not fit tightly, and rope handles.
- The length of the chisel should not be less than 150 mm.
- When working with a chisel, individual parts of the metal may fly off to the sides, so it is necessary to wear safety glasses.
CHAPTER III
WORKSHOP
Metal chopping has the goal of separating pieces of the required size from large sheets or strips or removing some of the excess part from the surface of the metal. When chopping, clamp the workpiece tightly in a vice and, holding the chisel with your left hand, strike its head with a hammer with your right hand so that the chisel blade cuts into the metal (Fig. 7).
The following tools are used for chopping: 1) chisel, 2) crossmeisel, 3) hammer.
CHISEL AND KREUTZMEISSEL
A mechanic's chisel is made from a special type of carbon steel called “chisel”, which is distinguished by its toughness and stability with sufficient strength. The length of the chisel is determined by the width of the worker’s palm; it is mostly about 200 mm. For greater stability in the operator's hand, the steel has an oval cross-section. The chisel has one flat end, up to 25 mm wide, called the “blade,” and the other in the form of a truncated cone with a flat head, called the “pube.” The reduced area of the pubis gives it greater stability and directs the hammer blows more centrally.
The cutting part of the chisel is sharpened depending on the hardness of the metal: the harder the metal, the greater the sharpening angle. The accepted sharpening angles are: for cutting cast iron - 75°, iron - 60°, copper - 45°. The edges of the chisel have an inclination of about 10° and the distance between them in the lower part is about 2-3 mm. A correctly chosen sharpening angle affects the speed and quality of work: a dull one makes it difficult to move the chisel, and a too sharp one speeds up chipping of the blade; The correct sharpening is checked with a template (Fig. 8). The Kreutzmeisel is similar to a chisel; It differs from it in that the blade is made narrower (approximately 6 - 10 mm); sharpening angles are the same. The chisel is used for cutting off planes, the crossmeisel is used for cutting grooves and for cutting sheet iron. The process of making a chisel and a crosspiece consists of cutting or sawing off a piece of about 200 mm long from a strip of steel, heating it to red heat and drawing the blade on an anvil, and then proceeding to harden the blade to increase its hardness. Hardening consists of heating the blade a second time to a light cherry or red color (the steel should never be overheated), then quickly cooling it by immersing the chisel vertically in water at room temperature. The chisel is given a slow rotational movement around the axis at different depths to come into contact with different layers of water, which prevents the chisel from overheating and the appearance of cracks on its surface. If you take the chisel to work immediately after hardening, it will break or quickly crumble. To avoid this, after hardening they resort to tempering, which slightly reduces the hardness, but significantly increases durability and elasticity. Tempering consists of not allowing the blade to complete cooling, and quickly removing it from the water, clean the hardened part until it shines on dry ground or brick, observing the discolored colors on the blade. At the moment a purple or dark blue discoloration appears, the chisel is quickly lowered into water for final cooling.
The chisel's pubis and shaft are not hardened. To heat steel, ordinary charcoal is used; They do not use stone, because due to the sulfur it contains, it has a very harmful effect on steel: the chisel becomes brittle and brittle. In cases of repairing a damaged cutting part of a chisel or crosspiece, they must first be released, i.e., annealed. To do this, the cutting part is placed in a furnace and, having been heated to a dark red color, is left to cool slowly in the ash, turning off the fan blowing. After annealing, the blade is again forged and hardened. Sharpening of the chisel is carried out using an emery or sand sharpener while constantly wetting the latter with water to eliminate the harmful effects of sand and metal dust on the respiratory organs of the worker. When sharpening, you should hold the chisel slightly inclined, gradually moving it from one edge of the sharpener to another and back; After sharpening the chamfer, the chisels must be the same width and have the required sharpening angle. Grinding wheels are equipped with safety casings made of iron in case of stone rupture, as well as a glass shield against flying sparks and dust (Fig. 9).
HAMMERS
The hammer is made of carbon steel. Both ends are hardened and polished. The middle part is not hardened and remains frozen. The front part is called the “strike”, the narrower rear part is called the “tail”, and the middle part is called the “eye”. Hammers come in shape with square or round heads. The latter, thanks to the widened middle part, have a stronger attachment to the handle. For metalworking work, hammers weighing from 0.25 to 0.8 kg are usually used, the most common ones weighing 0.5 kg. When making products from thin iron, a light hammer, called a “roofing hammer,” or a wooden one, called a “mall”, is used (Fig. 10).
The mallet is made of strong wood (birch, beech) of a quadrangular shape measuring 130 X 130 X 45 mm. It does not break the iron and does not leave impact marks on it, and the large striker area speeds up the work process. The handle of a plumber's hammer is made of hardwood (rowan, oak, maple) without knots or cracks, and has a smooth surface. The shape of the handle is oval (for greater stability in the operator’s hand). The length of the handle is taken depending on the weight of the hammer: the heavier the hammer, the longer the handle should be. The hammer is placed on the handle at a right angle (Fig. 11) and secured to it by wedging using steel wedges 2 - 3 mm thick (Fig. 12). If over time the nozzle becomes weaker, then add additional wedges or change the handle. Please remember that a hammer with a loose handle is dangerous.
The head of the hammer and the head of the chisel must be flat, clean and free of burrs, so that the hammer does not slip upon impact, and the burrs do not cause injury to the hand. To eliminate a blow to the hand, instead of a chisel (especially during the apprenticeship period), a rubber guard in the form of a ring with a diameter of 76 - 80 mm and a thickness of 6 - 8 mm is put on the left hand.
CUTTING TECHNIQUES
Chiseling takes place in a durable chair vice. While chopping, hold the chisel with your left hand by the middle in the girth, and with your right hand hold the hammer closer to the end of the handle. The legs should be apart, and the stronger the blow, the more stable the position of the body should be and the wider the legs should be. The hammer movement should be made exclusively with the hand, with the elbow and shoulder bending slightly. In addition to the correct positioning of the body, legs and grip of the instrument, accuracy and impact force are of great importance. The accuracy of the blow is that the center of the striker always accurately hits the chisel's pubis, and you need to look not at the hammer, but at the blade of the chisel. Having acquired such a skill, the worker develops confidence in his movements and operates the hammer automatically. The force of the blow depends on the swing, the speed of movement of the hammer when lowering it, the weight of the hammer and the physical strength of the worker. To increase the impact force, it is recommended to hold the hammer by the end of the handle (Fig. 13).
At first you need to work slowly, trying to acquire sufficient accuracy, and then speed up the pace of work, reaching the normal 60 beats per minute. Chopping should not be done with a continuous feed, but by taking breaks after 2-3 blows: in this case, the hand gets less tired and the work turns out cleaner. When chopping, give the chisel an inclination of 25-30°; otherwise - if the position is steep - the chisel will crash into the product, and if it is too inclined, it will jump off the intended line (Fig. 14). Incorrect position of the chisel results in an uneven surface. You need to chop towards the stationary jaw of the vice, somewhat obliquely. When chopping heavy products in a vice, a wooden lining is placed under them, resting on the vice nut.
Chopping cast iron products must be done from the edges to the middle, since otherwise, with a strong blow, the edges of the products can be broken off. When cutting off wide planes, initially a series of grooves are cut with a cross-section, and then the spaces between them are cut off using a chisel (Fig. 15).
Narrow surfaces such as keyways are cut out with a crossmeisel, the width of which is taken to be less than the groove. Thick layers of metal are cut down several times. A margin of about 1 mm is left for finishing chips. When chopping cleanly, you need to apply less strong blows than with rough chopping. Felling is assessed by the cleanliness of the resulting surface and the volume of chips removed per unit of time. Iron is cut approximately twice as hard as cast iron, so the depth of the chips for iron is taken to be half as deep. The thickness of the chips is taken from 1 to 2 mm and no more than 3 mm, and cutting off a 2 mm layer of metal at once takes more time than removing two layers of 1 mm each. To protect against rebounding metal chips (especially when cutting cast iron), safety glasses with white lenses should be used. Sheet iron is cut depending on its size in a vice, on a workbench or on the floor. In a vice, small pieces or strips are cut off in the form of a strip, while the iron is clamped in a vice along the cutting line (Fig. 16 a).
When cutting sheet iron, a forge chisel and a heavier hammer are used. The iron is placed along the cutting line on a rail or I-beam, and the chisel is placed vertically along the cutting line and the chisel is struck with a hammer. Thick sheets are scored on both sides, and then the spaces between them are separated (Fig. 16). To maintain the edge of the chisel when cutting iron, it is occasionally lubricated with machine oil during operation. To do this, place a rag soaked in oil in a metal box and touch it with the tip of a chisel. Cast iron is cut dry.
QUESTIONS FOR SELF-CONTROL
1. How should you hold the hammer and chisel while working? 2. Flat chisel and crosspiece. Their shape and size. 3. Chisel sharpening angles for copper, cast iron and iron. 4. Advantages of a correctly chosen sharpening angle. 5. What is hardening and tempering and how are they done? 6. Techniques for sharpening chisels. 7. Which parts of the chisel are hardened and why? 8. Bench hammers, their shape and attachment to the handle? 9. Why is a “mallet” used instead of a plumber’s hammer when doing roofing and tin work? 10. Which hammers and chisels are dangerous to work with? 11. How should the chisel be installed and how should the blows be struck when chopping? 12. When cutting which metals and why is chisel lubricant used? 13. How should you hold the hammer handle when chopping and why? 14. Why and what kind of gaskets are used when clamping products in a vice? 15. What determines the force of impact? 16. At what angle should the chisel be held to the surface being processed? 17. What techniques are used for cutting wide and thick planes? 18. How is sheet iron cut? 19. What safety measures are taken when cutting?
Previous page
| table of contents | Next page |
Malfunctions
Among the most common breakdowns of a forging chisel are:
- break;
- dullness;
- the appearance of notches;
- deformation, curvature of the striker;
- cold hardening on the striker, which is fraught with chips and flying fragments.
Chisel striker broken
Malfunctions arise in the event of incorrect cutting, during prolonged use of the tool, or in the presence of manufacturing defects. Periodically (at least once a quarter) it is necessary to inspect the chisel for any damage to the striker or handle. Faulty tools that have defects must be removed from service.
Tools for hot metal forging
Blacksmith hammer-smoother. Photo ForgingPRO
Each master creates a set of necessary equipment independently, depending on the level of skills and assigned tasks. The blacksmith's kit includes a different list of tools: basic and auxiliary:
- hammer, sledgehammer and anvil;
- pliers (tongs);
- nail shop;
- manual and lining forks;
- vice.
Using the listed tools, various operations for processing metal workpieces are performed: chopping, bending, giving the desired shape through deformation.
Hand tools for artistic forging have a simple design, so they are easy to make with your own hands.
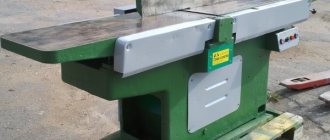
Cutting metal with a guillotine
At metalworking, machine-building enterprises, and large workshops, mechanized metal cutting is used. The most common is cutting using various guillotines. Mechanization of cutting makes it possible to improve the quality of the chopped edge, cut thicker metal, and increase the speed of obtaining the finished workpiece.
Guillotines are used for cutting sheet metal of various thicknesses. The cutting technique is quite simple. The guillotine has a special knife, which, under pressure, is lowered onto a sheet of metal, cutting it according to the applied markings. To create the required force, mechanical, hydraulic or electromechanical systems are used. In this case, the metal steel strip is exposed to the action of a knife, which implements a vertical cutting method. In this case, a special device - a roller table - feeds the metal workpiece to a given length. The fixing device captures and holds the workpiece in the required position. A knife is lowered to the cutting site under pressure, which carries out this operation exactly along the marking line.