17.03.2020
- When should you sharpen drills?
- Drill geometry and parts
- Parameters to be restored
- Dependence of sharpening angle on material
- What to use for sharpening
- Tools to check for proper sharpening
- How to sharpen a drill for metal
- Methods for sharpening a drill for metal to obtain the correct back plane
- Processing options based on the number of bevels on the edge
- Instructions for operating the machine
- Processing on special equipment
- How to sharpen metal drills correctly: video instructions
- Important points
- How to extend the life of a cutter
A dull instrument can and should be restored to sharpness. Therefore, we will tell you how to properly sharpen a drill for metal: processing methods, what geometry to achieve, and so on. As a result, you will know what to do to restore its full characteristics and use it again. Agree, this is much more practical than buying a new one right away.
Attention, as soon as you notice that the cutting edge has lost its original profile, you must immediately stop performing the technological operation. Because its edge, under the influence of friction forces, has heated up and become soft, and continued work will cause even greater deformation, already critical, after which recovery will become impossible.
When should you sharpen drills?
You can understand that it is necessary based on the following fairly obvious signs:
- when the tool is immersed into the thickness of the workpiece, a sharp creaking sound is heard;
- the chips come out in the form of small crumbs, and not a long spiral;
- the edge quickly overheats - if you try it with your finger, you might get burned.
So, if you notice any of these warning signs, stop immediately, otherwise you will not avoid damage. If a usual operation begins to take longer - for example, before you made a hole in 3 seconds, but now in 5 - this also indicates wear.
If in doubt, you should simply check the edge by touch: if it is round or smooth and, conversely, with unevenness, chips, or burrs, this indicates that the tool is unsuitable for further use and it is time to worry about restoration.
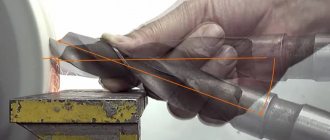
Special opinion on sharpening edges on an angle grinder
On the YouTube channel, many video bloggers show this method as the most accessible. I won’t give examples, you can find them yourself using search queries.
Special sharpening devices are even being developed for this technique.
It is possible that in some critical situation this technology can help out, but I do not recommend using it as a basis, especially when training, for the following reasons:
- cutting wheels are created for metal cuts directed perpendicular to their axis of rotation. They are not designed for lateral loads and may fly apart;
- The speed of the grinder's disc is high;
- machining of the cutting tip is carried out on a flat surface and only allows you to straighten the rear cutting angle without fine-tuning the other two necessary conditions.
A drill treated in this way will work more or less normally in wood and plastics, but problems will quickly arise with hard metal.
My conclusion: the technology for straightening cutting edges on an angle grinder is dangerous and unreliable.
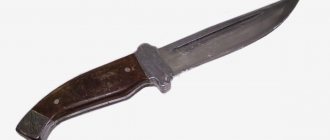
Drill geometry and parts
The design of the instrument in question is quite simple and consists of the following elements:
- cutting edge, directly removes chips;
- neck, which acts as a kind of jumper;
- working part with cut grooves that remove waste;
- shank fixed in the machine (hand drill);
- a pair of rear (back of the head) and front surfaces forming a profile;
- two backs with ribbons creating the outside.
When technological operations are performed repeatedly, it becomes dull, which means that it is the sharpness that needs to be restored.
Determining the sharpening angle
Different drills also have different sharpening angles. In this case, it matters both what material the tool is designed to process and the features of the working part. You can clarify the data in GOST 19543-74.
Most often, the “sharpening angle” is the angle at the tip of the drill, in fact, the angle at the tip of the cone into which the working part fits. But this is not the only determining factor.
The helix angle or, in other words, the inclination angle of the helical groove (usually 30 degrees), the clearance angle and the inclination angle of the transverse cutting edge are also taken into account. The diameter of the working part of the tool must be taken into account - the length of the cutting edges depends on this.
In addition, there are single and double sharpening, sharpening of the transverse blade and ribbons.
At first glance, all this seems quite complicated. In fact, with a little skill, sharpening a drill is not so difficult.
Parameters to be restored
Proper sharpening of a drill for metal allows you to normalize the following characteristics:
The apex angle that the edges make with the bridge. Initially, it depends on the quality characteristics of the processing material (hardness is as important as viscosity) and can be 60-150 degrees, and sometimes reach 180. In our case, it is necessary for it to become 116-118 0, accordingly, it needs lead to this indicator.
The angle of the axis and the cutting part - it must be half as narrow as the previous one, that is, 58-59 0, and symmetrical with respect to each side of the tool. Otherwise, uneven wear will be observed, which results in faster tool failure, as well as uneven edges of the finished holes.
Relief angle - should be fixed in the range 7-17 0 (depending on what the workpiece is made of); any deviation of the actual value from the nominal value must be corrected, otherwise the performance will decrease significantly, and a breakdown will not be long in coming.
The shape and length of the edges - it is important that they are equal, otherwise runout will inevitably occur, as a result of which it will not be possible to make holes of a strictly specified diameter. Dimensions (to determine symmetry) should be determined from the edge (top) to the central point of the jumper.
Dependence of sharpening angle on material
We already mentioned above that the number of degrees changes in one direction or another, based on what kind of part is being processed. The smaller it is, the longer the edge, better heat dissipation, and longer service life. The more, the more difficult it is to center the tool at the initial stage of the technological operation.
There is a universal value - 118 0 (with a tolerance of 2 0) and 7-12 0, respectively. It is chosen when no details are specified. If you know what the workpiece is made of, you should give preference to the recommended values, which we have summarized in a table for clarity.
| Material | Angle, 0 | |
| rear | at the top | |
| soft wood, plastic, fiber structures | 12-15 | 60 |
| hardwood, elastic rubber, bakelite, malleable rubber | 90 | |
| stainless steel, alloys of corrosion and heat-resistant steels | 12-14 | 127 |
| tool steel | 7-15 | 118-150 |
| copper | 12-15 | 100-118 |
| hard bronze, structural steel, cast iron (when working with casting, it should be double sharpened, making the transition edge angle 70-75 0) | 7-12 | 118 +/- 2 |
| alloys | ||
| titanium | 12 | 70-118 |
| magnesium | 135-140 | |
| aluminum | 12-17 | 90-140 |
| copper | 12-15 | 118-150 |
What to use for sharpening
Sufficient accuracy in aligning the angle can only be achieved if the tool is securely fixed, and the feed of the device processing it can be adjusted during the process. This approach will make it possible to restore the geometry of spiral rods ranging in size from 3 to 19 mm.
All work can be performed with minimal errors and maximum productivity on machines. And you will find several versions of suitable equipment, reliable, easy to use, economical and at the same time mobile, in the Izhevsk catalog - choose in favor of quality.
Now we will tell you how to properly sharpen drills for metal not in production, but in the garage or even at home, when there is simply no specialized equipment (the purchase of which for one-time needs is impractical). To do this, you can use the following machines, tools, and devices:
- grinder - will allow you to remove signs of wear and bring the desired edge to 120 0, but for this you will have to remove chips repeatedly for 1-2 seconds, holding the drill vertically in a vice;
- sharpener - you should first remove all the notches from the rod (if any), and then secure it in the clamp and carefully straighten it, lightly pressing (at the required angle) to the rotating circle;
- a special attachment for the drill - just install it, secure the drill in it and turn it on, and then rotate the tool 1800 to debug the second face; but this option is effective for small bluntness, medium diameter (3.5-10 mm);
- needle file or file - here editing is done manually; this is a choice only for cutters made of relatively soft materials; It is not advisable to use an abrasive or diamond stone, since it will be problematic to maintain the desired geometry.
The devices and technologies for their use may be different, but after using each of them, in any case, you should make sure that the desired result is achieved.
Sharpening using reverse mode
You can make a very simple homemade device for sharpening drills with your own hands from sandpaper. This is a convenient option if you don’t have a grinding wheel at hand.
In this case, you should wrap an even round piece of wood or a pipe (even a plumbing plastic pipe will do) with several layers of sandpaper.
It is advisable to make quite a lot of layers (about 2 cm) so that the drill can be sharpened faster and with high quality. You can fix the paper with glue.
To sharpen the drill, place it in a drill or screwdriver. It is extremely important to enable reverse rotation mode. In standard mode, tool sharpening cannot be done in this way.
Next, simply drill through the sandpaper several times along the entire length of the drill. In general, you can even do without a pipe by simply rolling up a long enough piece of sandpaper.
During the drilling process, the edges of the equipment are sharpened with sandpaper. The method allows you to restore even heavily worn drills. But the quality of sharpening will not be as good as when using emery.
Tools to check for proper sharpening
It can be:
- calipers;
- protractor;
- ruler;
- goniometer.
and others - all together or separately. But for maximum accuracy and convenience, it is better to use a universal template - with length scales and angles already applied. The easiest way is to buy a ready-made one, but since it is not always found on sale, it makes sense to make it yourself, it’s not difficult.
You can implement one of two configurations:
- a thin plate made of sheet stainless steel, steel or even tin with markings applied with a diamond pencil;
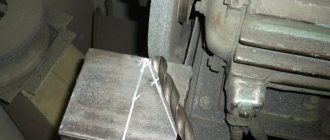
- 2-3 nuts, welded together or fastened with hot glue - the angle at the junction of their faces will definitely be equal to 120 0, so the tip of the cutter can easily be checked by it.
How to sharpen a drill for metal
With the correct choice of angle, fine-tuning, checking and adjustment (if necessary). But before considering each stage, we note that when working on a modern high-performance machine, using a familiar grinder or a classic abrasive wheel, for your own safety it is better to use an additional locking device.
This could be a simple clamping base or a bushing of suitable diameter. Another option is a template with a whole set of tubes with sections of different widths, suitable for rods of all common sizes. The main thing is that two conditions are met:
- this auxiliary element successfully plays the role of a stop and makes the back movement of the cutter impossible;
- it also ensures accurate centering throughout the entire work period.
Now let's look at each step in order.
Maintain angle
Answering questions from beginners about how to learn how to sharpen drills for metal, the craftsmen note that first of all, you need to get the hang of understanding how sharp the edge should be. This directly depends on the steel, plastic, solid oak or other material for which the tool is intended: the softer the workpiece, the blunter (wider) the angle must be, and vice versa. We provided a correspondence table above, use it as a guide, but here are a few more interesting relationships for:
- silumin – 90-100 0;
- wood – 135 0;
- magnesium and its alloys – 85 0;
- textolite and plastic – 90-100 0;
- granite and ceramics – 135 0;
- aluminum – 135 0.
By analogy, you can select the degree for other cases.
Perform debugging
If you watch any truly complete and well-thought-out video on the topic “how to properly sharpen a drill for metal,” the video will probably contain a stage in which the master arms himself with an angle grinder or a hammer drill with an attachment in the form of an abrasive wheel and begins grinding the edge.
Why is he doing this? To remove minor defects such as burrs or scratches. The geometry of the cutting part does not change, which means the angle remains the same as it was already maintained. But for the most accurate result at this stage, you need to clamp the rod in a vice (or in another such reliable clamp) so that it does not move around.
Finishing is a unique operation in its own way, since it combines two types of surface treatment at once - both rough and finishing - so it is simply necessary to carry out it.
Run check
Those who know from their own experience how to properly thread a metal drill and sharpen it understand perfectly how important it is to ensure the quality of the result. Therefore, after editing the tool, they take a template (we described above how to make it) and make sure that the following indicators meet all standards:
- edge lengths;
- angles - at the vertices, longitudinal edges, inclination of helical grooves.
If any parameter does not meet the norm, this must be corrected. Otherwise, runout will occur and the size of the hole made will be larger than necessary.
Make a point
It is relevant for rods whose diameter exceeds 10 mm. Its implementation makes it possible to reduce the inclination of the leading edge and at the same time increase the angle of the cutting edge.
This will increase the service life of the tool and ensure its resistance to crumbling, as well as narrow it, and therefore make it easier to enter the workpiece (a scraping effect will appear) and reduce the negative impact of friction.
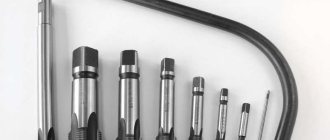
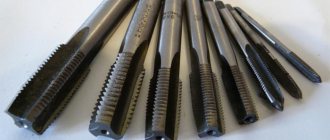
Sharpening products of other designs
In addition to twist drills, tools of other designs are used for metal processing. You can debug the following tools at home.
Cone gimlets
You can sharpen a step drill using a regular file. The cutting edge of the product is sharpened at a right angle.
If a cone drill becomes dull in a limited area, then sharpening should be done without going beyond the damaged area.
Video:
Crowned
When debugging hole saws, a special device is used and you need to know at what angle the metal should be removed from the cutting surface. Considering all the difficulties and time spent on performing the procedure, it is better to turn to experienced craftsmen for sharpening.
Video:
Conclusion
It’s not difficult to learn how to sharpen metal drills yourself.
- For small volumes, it is enough to purchase a high-quality file and carry out the process manually.
- For large volumes, to reduce time costs, it is better to purchase special equipment that will speed up the work and reduce the likelihood of incorrect dressing of the tool.
Methods for sharpening a drill for metal to obtain the correct back plane
Methods are classified according to how the back of the head is treated. Today the following variations are distinguished:
- Single-plane – relevant for small rods (up to 3 mm in diameter); you need to make 1 surface, at an angle similar to the back one and selected within 15-25 0.
- Dihedral - in the back of the head, 2 planes are sharpened with varying degrees of intensity; the first, generally adjacent, is at 7-17 0, the second is at 25-40 0. Then the intersection edge as a result of this execution passes at 0-40 0; Ideally, it should be 25-30 0 for materials of high hardness and 35-40 0 for medium and soft ones. Remember, if you increase it, you will reduce the axial force, weaken the wedge on sharp slopes, and worsen heat dissipation and strength.
- Conical - as it is performed, the back of the head becomes curved, since the rear angle gradually increases, and immediately from the blade. It is narrowest on the cutting part, where it ranges from 7-17 0 (the specific value depends on the workpiece itself). To achieve success in the process, it is worth twisting the shank of the rod from top to bottom.
There are other methods, for example, screw factory sharpening of a drill for metal, and this is carried out mainly on machine tools; There is also a cylindrical one, although it is much less common. There is also a manual method - elliptical: for it, just like for the shaped one, you will need abrasive wheels of a specific (indirect) profile.
Processing options based on the number of bevels on the edge
There are two of them, and with each the angle does not remain constant, but changes, gradually narrowing from the central peak to the side ones. This allows for uniform heat dissipation and, in principle, reduces the heating of the tool.
So, 2 technologies:
Normal - the edge geometry is smooth, along its entire length. Very popular, including due to its ease of implementation.
Double-headed - carried out at a couple of angles near the top; Please note, at the first stage and on 4/5 of the cutting part it is necessary to adhere to the indicator of 116-140 0, while on the remaining, final 1/5 of the diameter (if we take the outer edge as the starting point) - already 66-100 0. This approach will allow create a main zone with a transition zone, thereby extending the useful area, which will help improve chip ejection, and therefore increase the service life of the rod.
Instructions for operating the machine
Naturally, sharpening twist drills for metal should be carried out in compliance with safety precautions, according to which:
- a mask or goggles for eye protection and gloves with hand guards are required;
- while the equipment is turned on, you must not touch its working parts;
- Even after switching off, it is forbidden to touch the abrasive wheel until it stops rotating and stops.
Now let's move on to the nuances of the procedure:
- Level the back surfaces - this will make it easier for you to maintain the desired degree; You can adjust the corners using a drawn line.
- Place the tool on the index finger of your right hand, fixing it with your thumb and holding it by the shank with your left hand, and then controlling it - this is most convenient.
- Keep the rod strictly horizontal during the process, otherwise you risk removing the jumper and edges; lower only the back part and then smoothly, without rushing.
- Control the pressure and remember that all movements should be short and quick to avoid overheating; Cool the cutter regularly in salted water.
- Continue until you have removed even the smallest defects - it is important to achieve a perfectly smooth surface.
Sharpening methods
Carpentry shops use sharpening machines for drills. Professional equipment is precise and allows you to quickly restore cutting ability. However, the cost of good machines is quite high - 90–200 thousand rubles.
At home, instead of sharpening machines, use a grinder, emery cloth, or a special attachment for a drill. All three methods are relatively easy and allow you to sharpen twist drills in a few minutes.
Experienced craftsmen are able to maintain the desired sharpening angle “by eye”. It is difficult for beginners to do this - they are recommended to make a special device from scrap items. For example, from a suitable size bolt, nut and powerful magnet, metal corners, wooden block:
At a minimum, you should mark a line on the sanding tool (or, in extreme cases, the table) at the desired angle. Use a protractor.
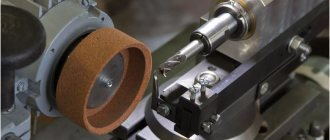
Sharpening on a grinding wheel
An emery machine equipped with a grinding wheel is a universal device. If available, sharpening the drill bits will take a few minutes.
What do we have to do:
- Position the drill at an angle of 60 degrees relative to the plane of the grinding wheel. The cutting edge should take a horizontal position and be parallel to the circle.
- If the drill is large, severely damaged, or worn out, you should first use a rough metal sharpener, and then a soft one. In other cases, you can use only one wheel - for fine sharpening.
- Place your left hand with the tool on the rest. Secure the drill with your thumb. With your right hand, grab the shank.
- Turn on the sander. Carefully move the drill. Press the cutting edge against the surface of the wheel and smoothly move the tip up, lowering the shank. When performing sliding movements, maintain a 60-degree angle and do not release pressure.
- Rotate the drill 180 degrees. Position it in the same way (see step 1) and sharpen it (step 4). The main task is to make the back surfaces smooth and with the same slope.
- Continue sharpening the tool evenly on both sides until the cutting edges are sharp.
- Check if the edges are symmetrical. If necessary, adjust their length.
- Reduce the jumper if it is too wide. This will help reduce resistance when cutting metal.
Sharpening on an angle grinder
A grinder should be used only in extreme cases. Being mobile, it can cause injuries. To avoid unpleasant situations, it is recommended to securely fasten the tool to a sheet of plywood or insert it into a vice. Hobbyists also make special devices for guiding and holding drills at a certain angle. They are attached to the grinder. The result is a convenient and efficient sharpening machine.
For sharpening, an abrasive wheel is installed on the grinder. The further course of work is exactly the same as when using a sharpening machine:
- The drill is installed at the desired angle to the abrasive disc.
- The back surface of one tooth is ground down, then the second.
- The length of the cutting edges is adjusted.
- The jumper is sharpened.
Using a drill attachment
Craftsmen who want to make their job of sharpening drills easier use a special drill attachment. The device looks like a cartridge. Inside there is a specially shaped sanding stone with a preset angle of 118 degrees. Also on the nozzle there are 15 holes for twist drills of different diameters (3.5–10 mm). When turned on, the stone rotates and sharpens the tool. The average cost of a nozzle is 800 rubles. (SPARTA 912305).
We recommend: How to replace the battery in a clock – wall, table, wrist?
For sharpening you need:
- Install the attachment on the drill.
- Insert the drill into the hole of the nozzle of the appropriate diameter until it stops.
- Turn on the electric drill for 20–30 seconds.
Despite the obvious advantages of the nozzle - simplicity and ease of use - the method has disadvantages:
- With the help of the device, you can sharpen only slightly dull instruments without serious damage.
- The attachment can be attached to a drill with a neck diameter of 43 mm, and sharpening can be done at only one angle - 118 degrees. The attachment is not suitable for drills for wood and non-ferrous metals.
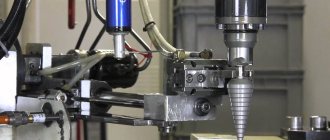
Processing on special equipment
We described in detail how to sharpen a broken drill on a machine, but there are other options. For example, the use of devices specially created for sharpening, which are fundamentally divided into 2 types.
Grinding attachments - each of them is a cylindrical device. On the one hand, it has clamps, thanks to which it is fixed to the drill, on the other, there is a cover with holes of different sizes. Insert the rod into a suitable rod, make sure that it is positioned strictly horizontally, and turn on the power tool for 10 seconds, and then turn the shank 180 0 and repeat the procedure. The downside here is the diameter limitation (3-10 mm) and the need to control the feeding direction. Plus – the affordable price of such an assistant.
Stationary devices - with a fixed platform and a rotating part, on which the cutter is fixed. Bring the latter to the abrasive and remove all defects. The advantage is convenience and safety of use: you can easily and accurately set the angle and do not bring your hand closer to the disc. The disadvantage is the lack of mobility: to prevent vibrations, the base must be rigidly fixed.
Features and types of wood drills
So, first you need to figure out what this item is. Many people know that high-quality work with any material requires a special type of construction tools, this also applies to drills.
This item is divided into several types, each of which is used for different categories of work. The following modifications are distinguished:
- feather ( feather). This type of drill is used for drilling holes of medium diameter - up to twenty-five millimeters. Typically, this element is used when the accuracy of the geometric parameters and the quality of the hole made are not important. It is not very expensive and, on top of everything else, is very easy to use,
- spiral ( screw ) - the working part of such a drill is somewhat reminiscent of an auger; it is used for drilling holes of small diameter. The design is practical in that the process removes wood chips very well. And, in addition to the above, the screw drill accurately and efficiently fulfills its role,
- screw - a variation of the previous option. Designed for working with wood, but the peculiarity is that it drills against the grain,
- Lewis drill is a subtype of auger drill. It has a serpentine shape. The diameter of the drilled holes is from ten to sixty millimeters,
- crown - designed for making holes of larger diameter,
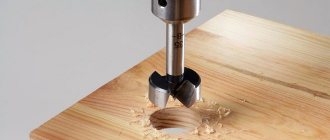
- Forstner drill - this item helps to make a hole with a bottom. This is its difference from previous types - it is not intended for through drilling. When working with such an element, the bottom turns out to be perfectly flat.
Important points
When resolving the issue, strictly adhere to the following requirements:
- Keep the rod motionless, under no circumstances allowing it to rotate around its axis; a change in position even by a degree will entail a re-alignment.
- Use only those disks and circles whose surface is perfectly flat; restore it regularly using CBN nozzles.
- Allow the tool to cool after completing the sharpening operations, and only when it has cooled naturally, place it in the template and check.
These rules for sharpening metal drills help to achieve maximum quality of processing and are dictated by practice, so apply them.
How to extend the life of a cutter
To avoid having to edit it for as long as possible, you should:
- avoid overheating, which leads to rapid softening of the metal, and therefore dulling of the edge;
- lubricate with machine oil - this will help reduce such a dangerous friction force and prevent a sharp increase in temperature in the contact zone;
- control the rotation speed - limit it, focusing on the hardness of the material and the desired hole diameter, but do not chase speed, remember that operating conditions should be gentle;
- remove chips in a timely manner so that they do not clog the recess, otherwise the tool may get stuck and even break;
- also process the jumper with a ribbon - this way you will improve the durability and quality of the plunge, which will allow you to weaken the feed while maintaining proper performance;
- make several passes, giving pauses between each of them - so that the device has time to cool down.
We told you how to properly sharpen a drill for metal, we also provided a video of this process, now you can safely start processing damaged rods. And if you need to purchase a machine for this, you will find it in the plant’s catalogue, contact us and order high-quality and modern equipment.
Practical training
If you feel that you are unable to sharpen the tool correctly, then you should practice more. This can be done through a lot of practice - take a few drills that you no longer use and try to sharpen them correctly. Through trial and error, you can learn to perform the procedure perfectly.
Sharpening a tool is not a difficult process, although some people think otherwise. Many online resources describe in detail and even show the steps of this process. Here you can watch a video that very accurately shows exactly how to sharpen a drill.
The video shows how to sharpen correctly. By following the man's instructions, you can get the job done efficiently. The tool should turn out the same as it was purchased. Only if the procedure is correctly performed will you be able to use it in the same way as before.
If you make a mistake, you will have to throw away the drill. But everyone makes mistakes, so don’t be upset if you weren’t able to sharpen your tool the first time. Every person learns from their mistakes. The main thing is not to abandon unfinished work because something doesn’t work out for you.
In order to learn how to perform an action with the highest quality, try to get involved in the process as much as possible, to understand how it works. Only competent consideration of every detail can lead you to success.